14+ Creative Cinder Block Wall Cap Ideas
Cinder Block Wall Cap Ideas are practical, durable, and cost-effective structures commonly found in residential and commercial properties. Whether you have built a retaining wall, garden border, or privacy barrier, the finishing touch that truly elevates your structure is the cap. A proper wall cap not only protects your investment from weather damage but also transforms a utilitarian concrete structure into an attractive architectural feature.
The exposed hollow cores of cinder blocks make them vulnerable to water infiltration, freeze-thaw damage, and deterioration over time. Without adequate protection, moisture can seep into the blocks, causing cracking, spalling, and structural weakness. Beyond functionality, the right capping choice dramatically impacts your landscape’s visual appeal, creating clean lines and a polished appearance that complements your outdoor design.
This comprehensive guide explores over fourteen creative capping solutions ranging from traditional concrete caps to innovative modern alternatives. Whether you prioritize budget considerations, aesthetic appeal, or long-term durability, you will discover options that align with your specific needs and design vision.
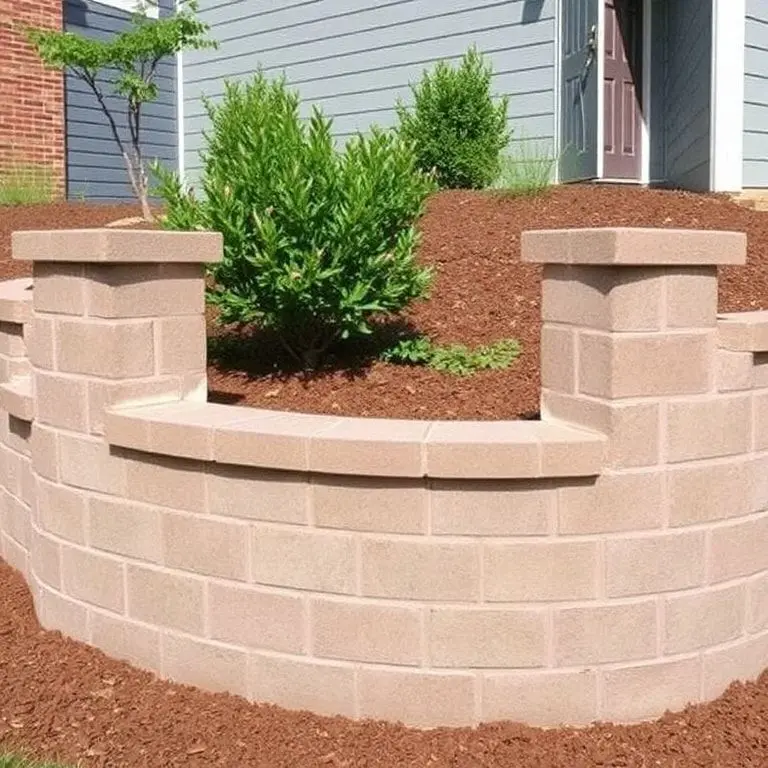
Solid Concrete Cap Blocks
The most straightforward approach involves using purpose-made concrete cap blocks designed specifically for cinder block walls. These precast units typically measure 4 inches in height and come in various widths to match standard block dimensions. Solid cap blocks create a seamless appearance when matched to your wall color and provide excellent protection against water penetration.
Installation requires spreading a mortar bed along the top course of blocks, setting the caps level, and striking the joints for a professional finish. The primary advantage lies in their structural integrity and weather resistance. Modern manufacturers offer textured surfaces, rounded edges, and color options that extend beyond basic gray, allowing customization without sacrificing durability.
Natural Stone Capping
For those seeking elegance and timeless beauty, natural stone caps deliver unmatched aesthetic appeal. Bluestone, limestone, granite, and sandstone are popular choices that introduce organic texture and rich coloration to cinder block structures. Each stone type brings distinct characteristics in terms of color range, durability, and price point.
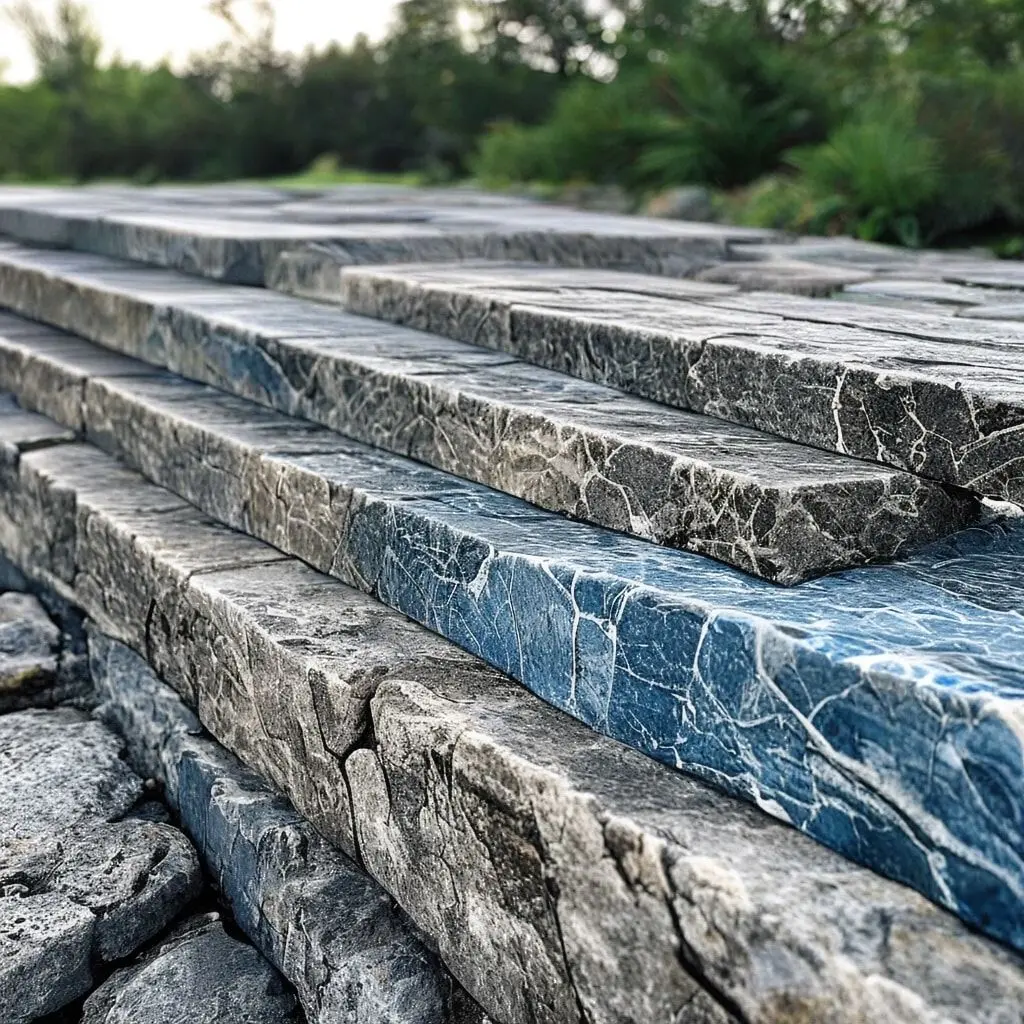
Bluestone offers blue-gray tones with excellent weather resistance, making it ideal for regions with harsh winters. Limestone provides warm earth tones and a smooth finish but requires sealing in areas with acid rain. Granite delivers exceptional durability and comes in numerous colors, though it commands a premium price. The installation process involves cutting stones to size, applying construction adhesive or mortar, and ensuring proper overhang for water runoff.
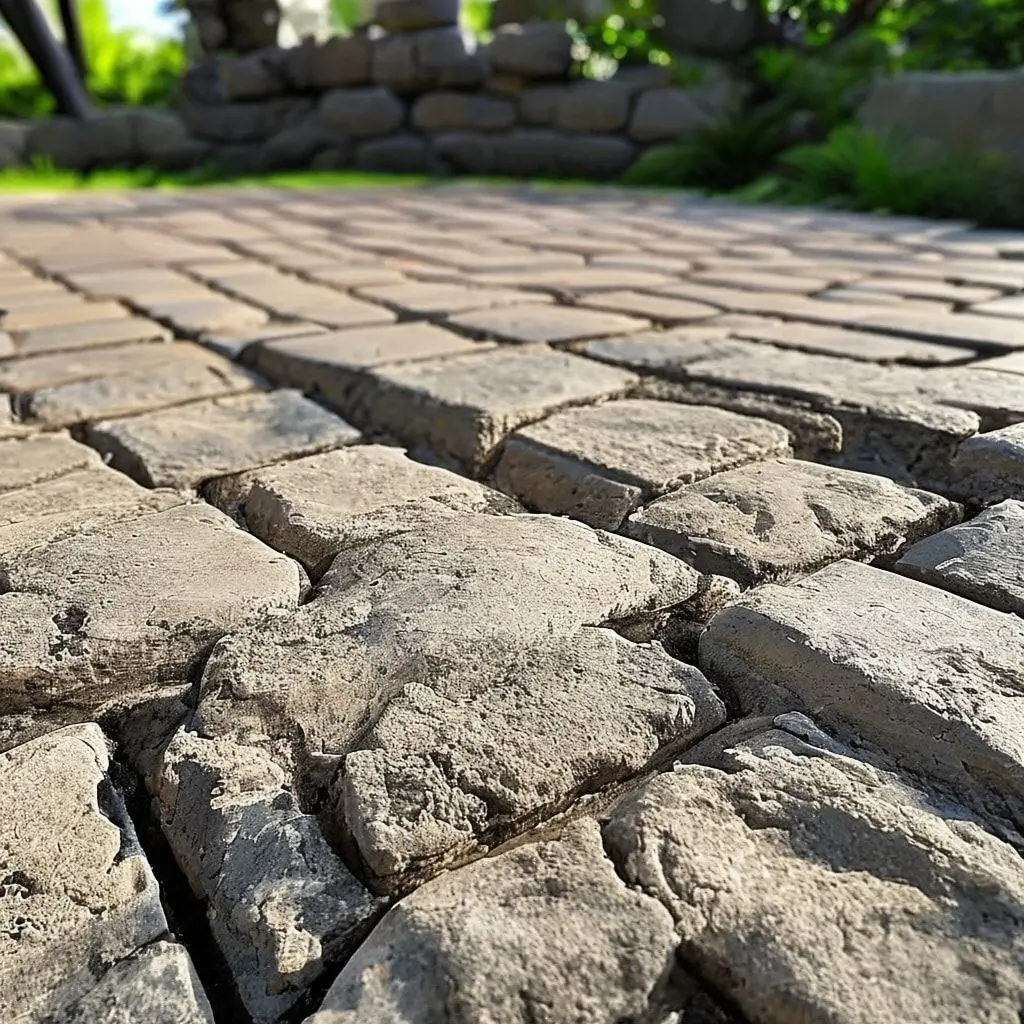
Flagstone Capping
Flagstone presents a rustic alternative that works beautifully with natural landscape designs. These irregular flat stones create an organic, cottage-style appearance when fitted together atop cinder block walls. The varied thickness and natural edges provide character and visual interest.
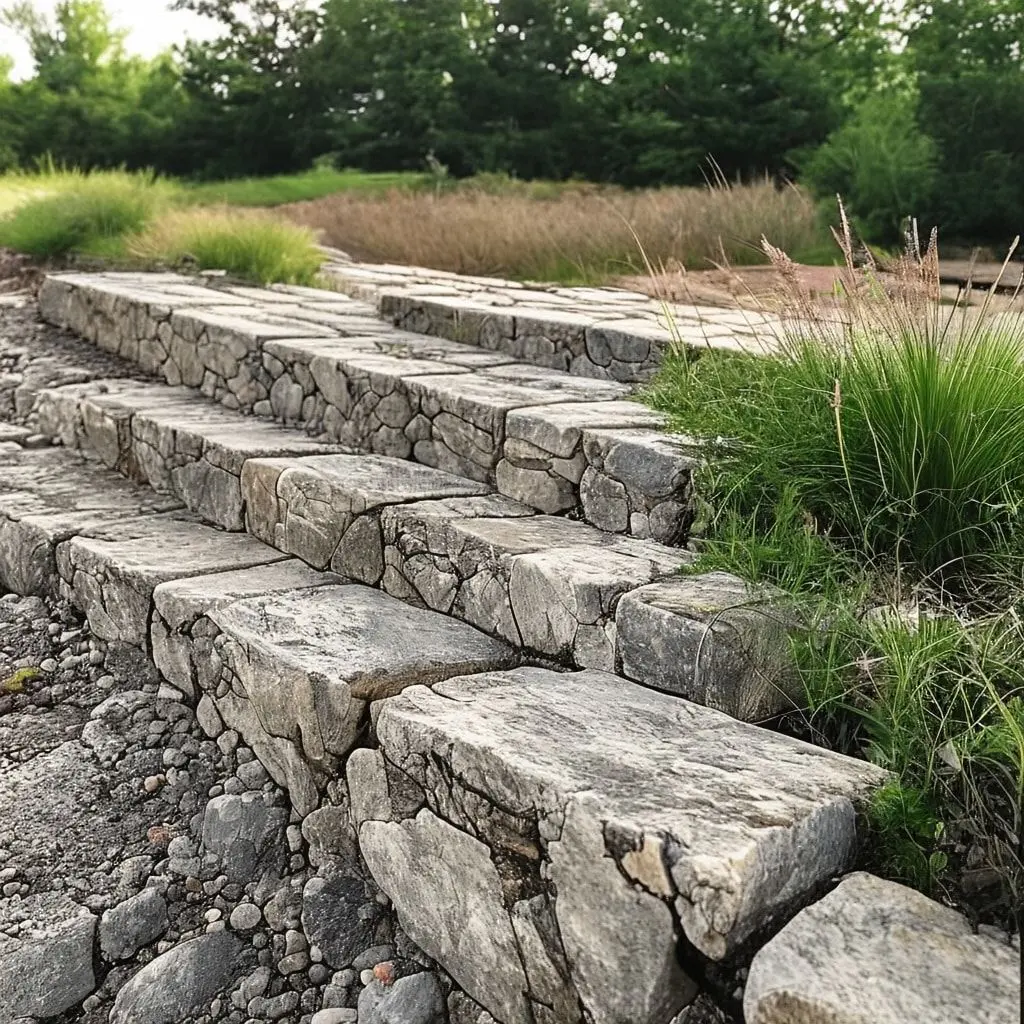
The installation involves selecting stones that fit together with minimal gaps, adhering them with mortar or construction adhesive, and filling joints with either mortar or polymeric sand. This option works particularly well for garden walls and landscape borders where a softer, less formal appearance is desire.
Aluminum Flat Stock Caps
Aluminum capping introduces sleek contemporary styling to cinder block walls. This lightweight material resists corrosion, requires minimal maintenance, and comes in various finishes including brushed, powder-coated, and anodized options. The metal can be fabricated with drip edges that channel water away from the wall face.
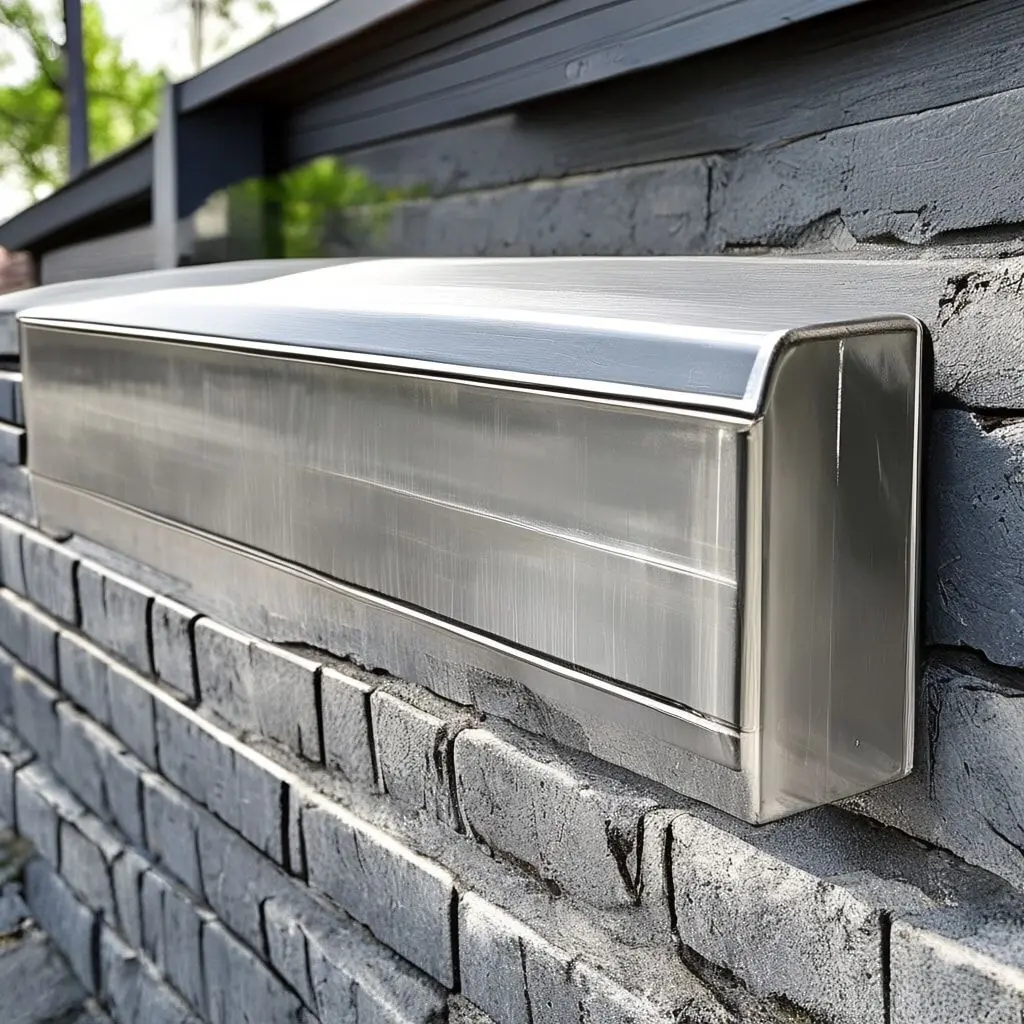
For installation, aluminum stock is cut to width, bent to create overhangs if desired, and attached using construction adhesive designed for metal-to-masonry bonding. The material adapts well to walls with slight irregularities and provides clean, straight lines that complement modern architectural styles.
Steel Cap Rails
For industrial or contemporary designs, steel cap rails offer strength and distinctive visual character. Corten steel, which develops a protective rust patina, has gained popularity for its warm orange-brown color and modern aesthetic. Standard steel can be painted or powder-coated to match design preferences.
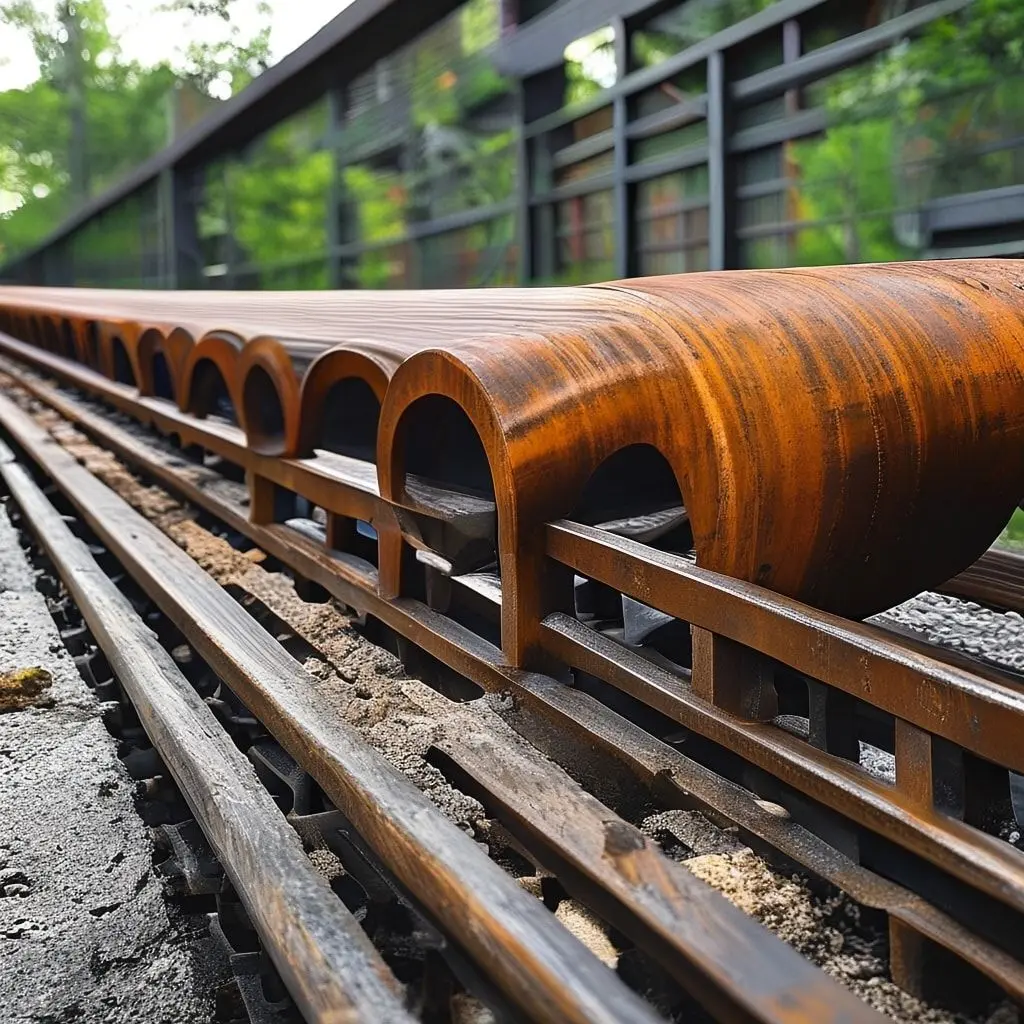
The installation process requires drilling into the top course of blocks, inserting anchors, and securing the steel rails with appropriate fasteners. This method works exceptionally well for longer wall runs where continuous lines enhance the design impact.
Copper Capping
Copper capping represents the premium end of metal options, delivering both beauty and longevity. The material develops a distinctive green patina over time, creating a living finish that evolves with age. Copper resists corrosion, handles temperature extremes, and can last for decades with minimal maintenance.
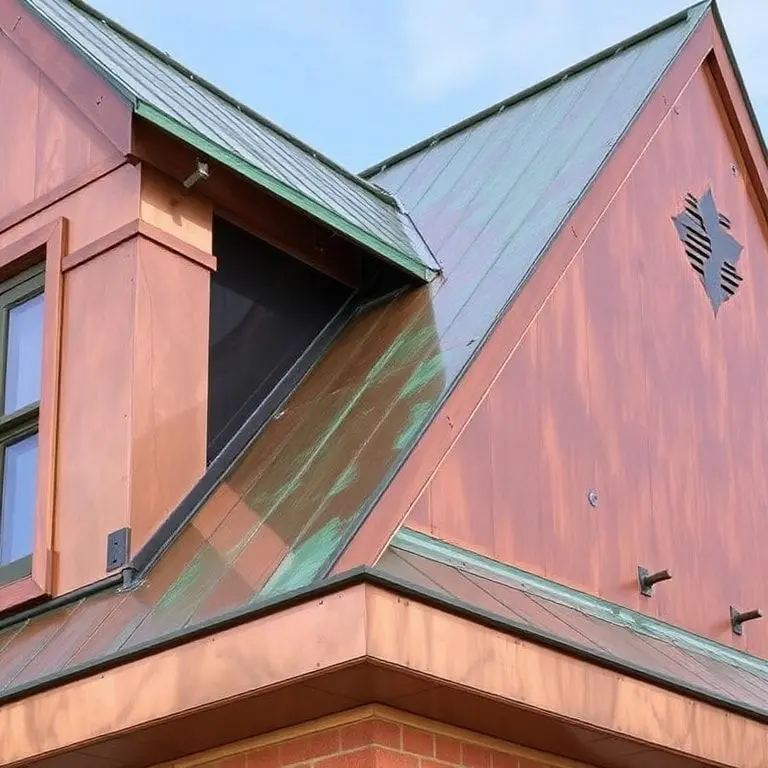
Due to the material cost, copper is often reserved for featured wall sections or shorter runs where it serves as a design focal point. The installation mirrors aluminum methods but requires specialized tools for cutting and bending the softer metal. https://casolia.com/cinder-block-wall-cap-ideas/
Pressure-Treated Lumber Caps
Wood capping brings warmth and natural beauty to cinder block structures, creating a bridge between hardscape and softscape elements. Pressure-treated lumber rated for ground contact offers affordability and reasonable durability when properly maintained. Common dimensions include 2×8, 2×10, or 2×12 boards that provide substantial overhang.
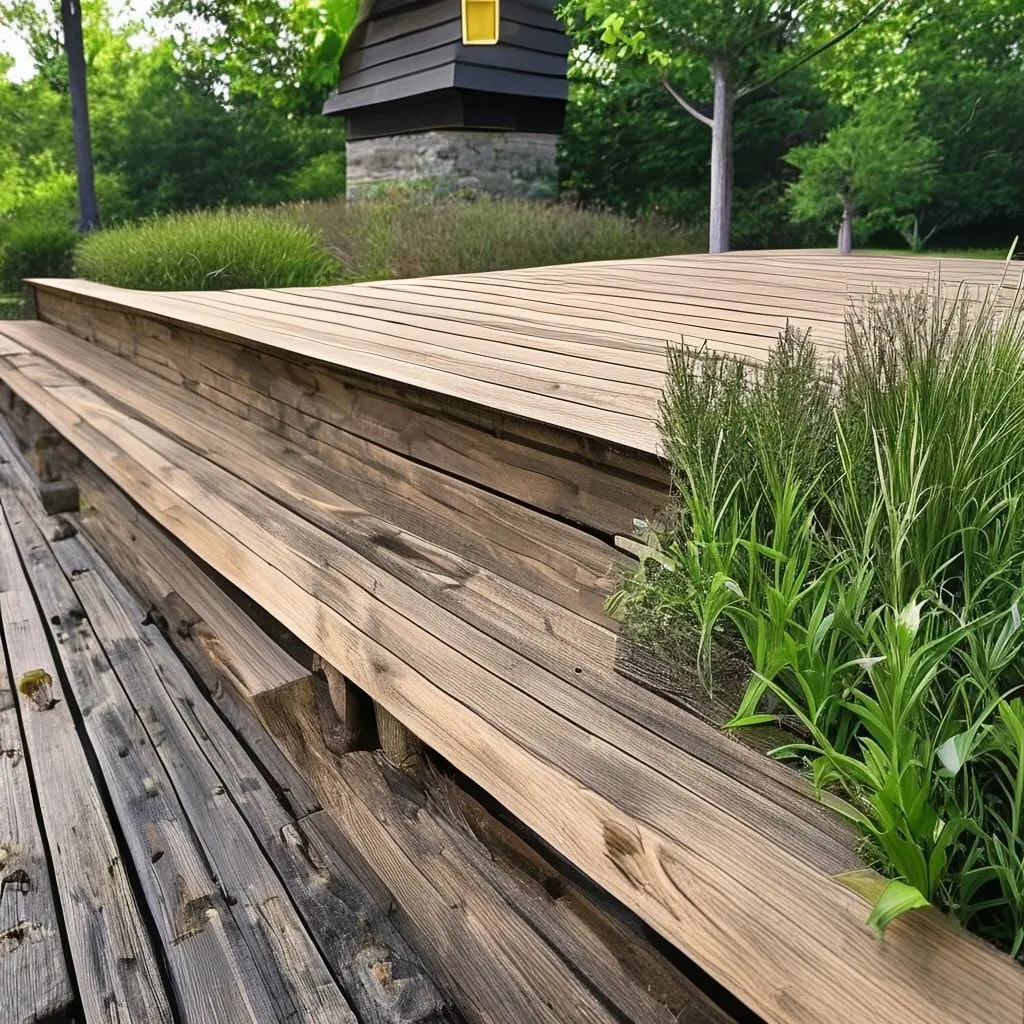
Installation involves attaching treated lumber to the block wall using construction adhesive and masonry anchors. Sealing the wood with quality exterior stain or paint extends its lifespan and enhances appearance. This option works particularly well for garden walls, raised beds, and residential property boundaries.
Composite Decking Material
Composite materials combine wood fibers with plastic polymers, creating cap boards that resist rot, insects, and moisture damage without requiring regular maintenance. Available in wood-grain textures and various colors, composites provide the aesthetic of wood with superior longevity.
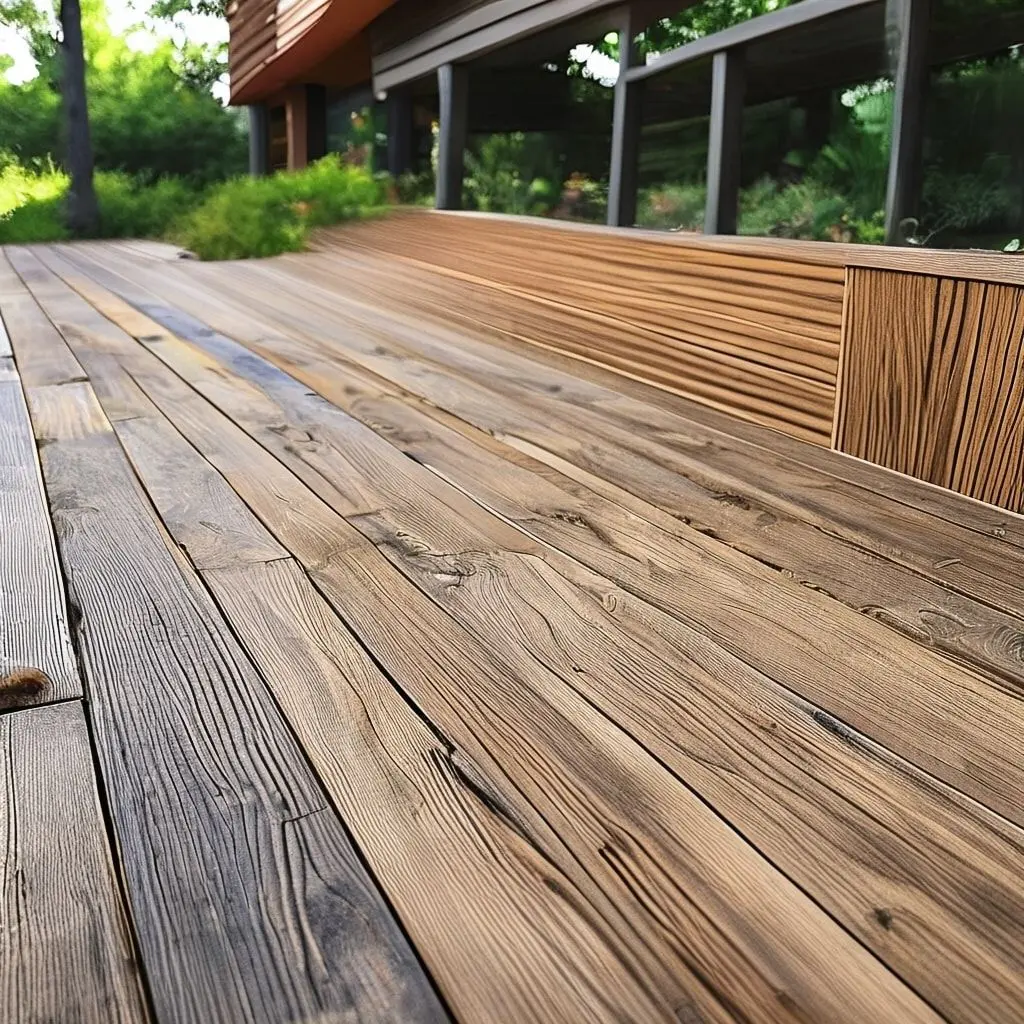
The material can be cut with standard woodworking tools and attached using the same methods as natural wood. While initial costs exceed pressure-treated lumber, the reduced maintenance requirements and extended lifespan often justify the investment.
Cedar or Redwood Caps
For those willing to invest in premium natural materials, cedar and redwood offer exceptional beauty and natural rot resistance. These woods contain oils that repel insects and resist decay, though they still benefit from periodic sealing to maintain color and extend lifespan.
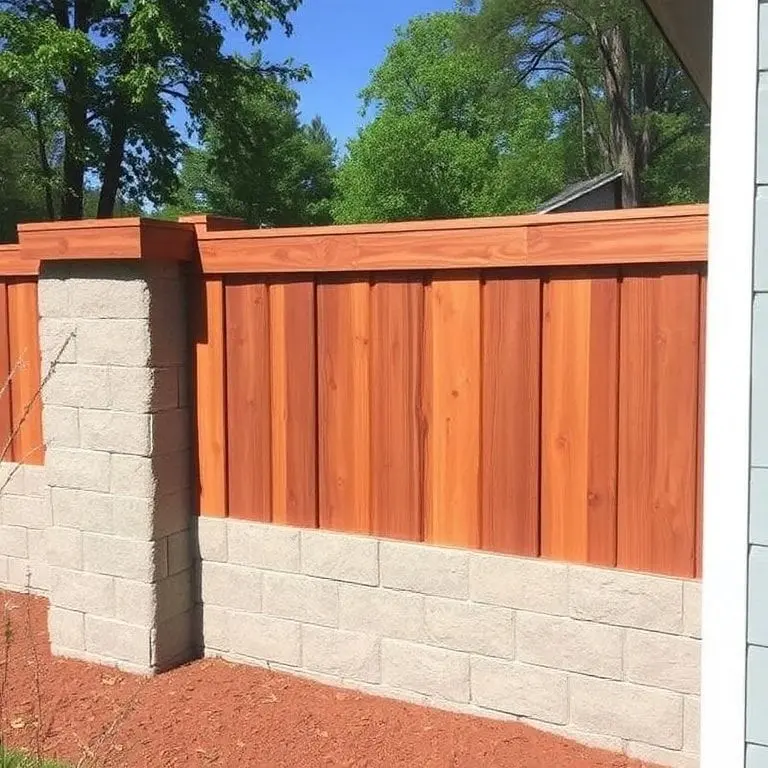
The rich tones and attractive grain patterns create stunning visual contrast against gray concrete blocks. Installation follows the same principles as pressure-treated lumber but warrants extra care in fastener selection to avoid staining from metal corrosion.
Creative Tile and Masonry Options
Porcelain and Ceramic Tile Caps
Tile capping opens endless design possibilities through color, pattern, texture, and style variations. Exterior-rated porcelain tiles offer superior durability and freeze-thaw resistance, making them suitable for all climate zones. Options range from solid colors to elaborate patterns, natural stone looks, and contemporary designs.
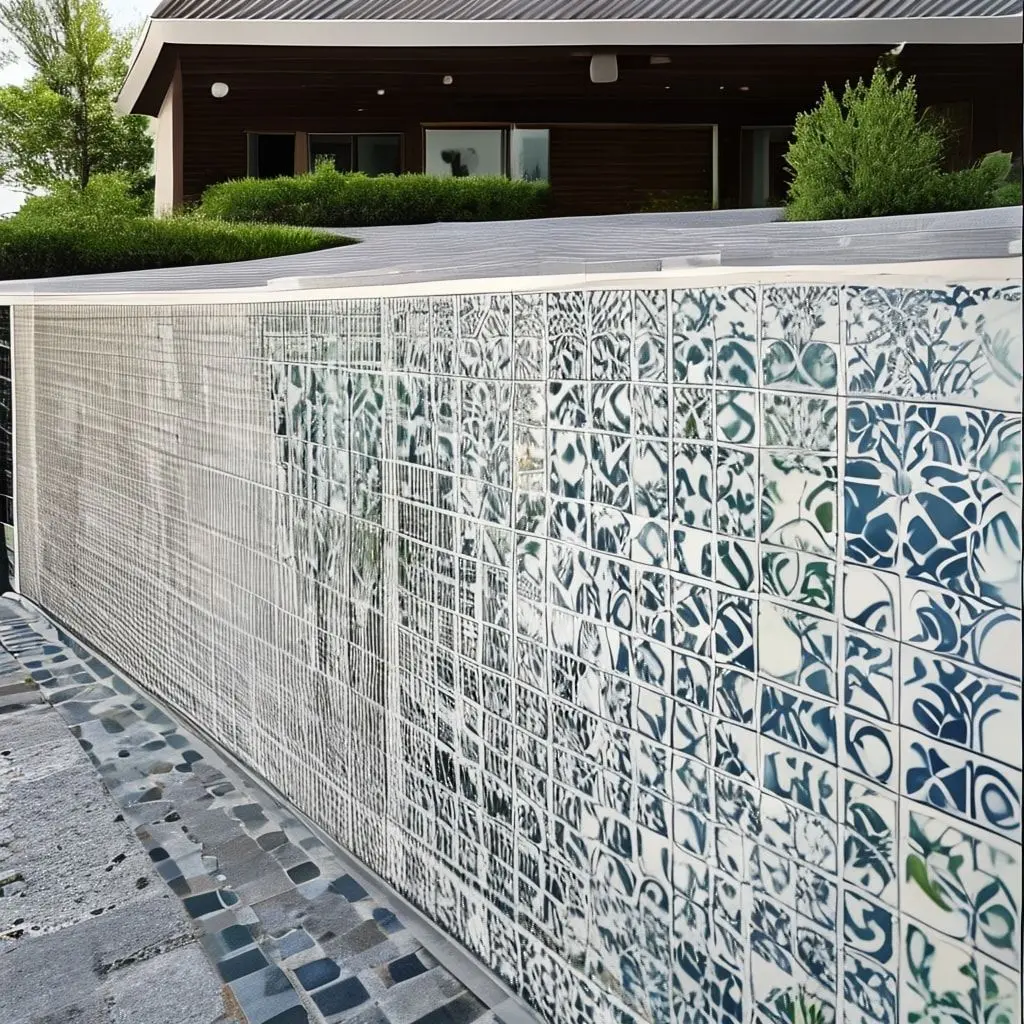
Installation requires a level mortar bed, proper tile spacing, waterproof grout, and sealer application. The finished product provides a highly customized appearance that can coordinate with home exteriors, pool decking, or patio materials.
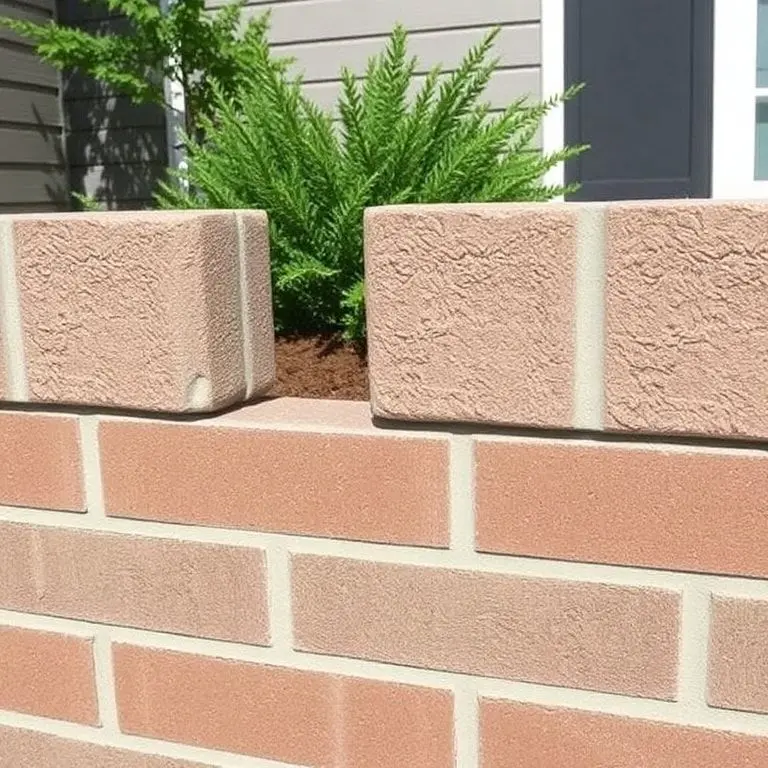
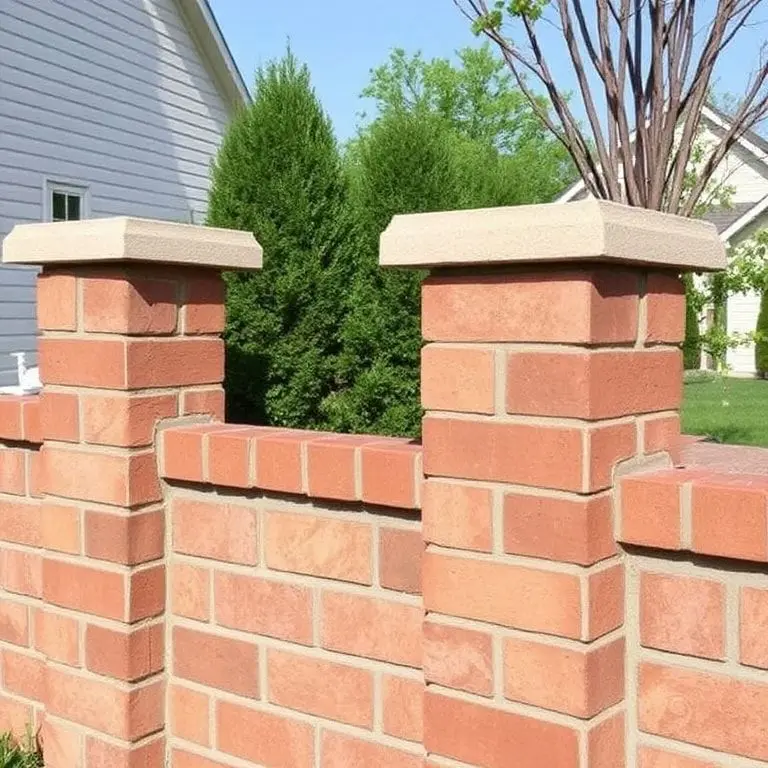
Brick Capping
Using brick as a capping material creates visual cohesion when walls are near brick homes or structures. Rowlock or soldier course configurations position bricks on edge, creating a finished top course that complements traditional architecture. The installation uses standard masonry techniques with mortar joints that match existing brickwork.
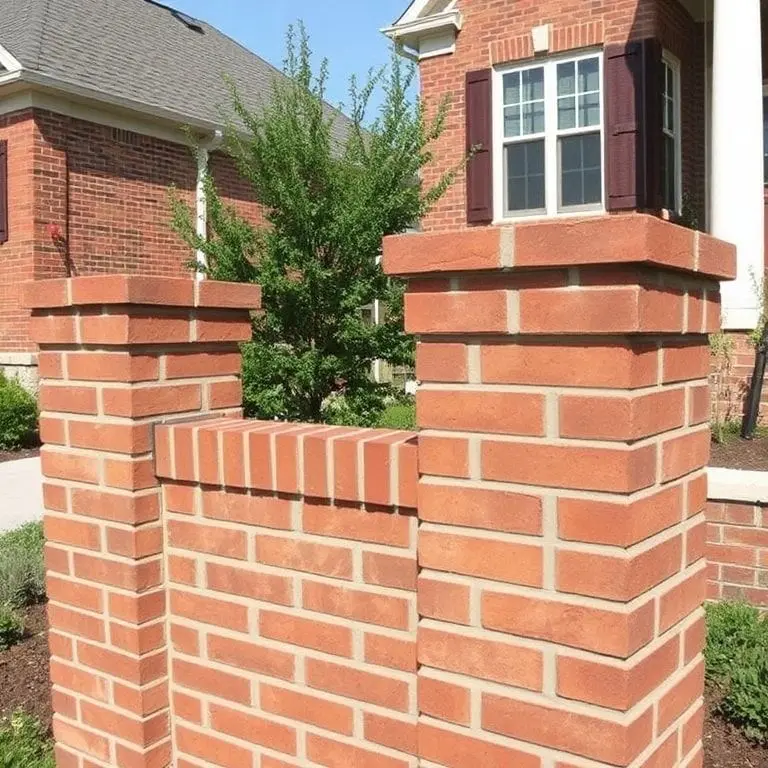
This approach works especially well for garden walls, entrance pillars, and property boundaries where architectural consistency matters. Color matching ensures the caps integrate seamlessly with surrounding elements.
Split-Face Block Caps
For textured visual interest, split-face concrete blocks provide dimensional relief and shadow lines. These specialty blocks feature a rough, stone-like surface on the exposed face while maintaining the structural benefits of concrete. They work well in contemporary and transitional designs.
The installation mirrors standard concrete cap block methods but requires attention to pattern alignment and joint consistency to maximize the textured effect.
Poured Concrete Caps
For the most economical approach, pouring concrete directly atop the block wall creates a solid, permanent cap. This method requires building forms along the wall edges, adding reinforcement if desired, and finishing the surface to the preferred texture.
Concrete can be colored with integral pigments, stamped to mimic stone or brick, or left with a smooth troweled finish. While labor-intensive, this option provides excellent water protection and durability at minimal material cost.
Concrete Pavers
Standard concrete pavers designed for walkways and patios adapt well as wall caps. These precast units come in numerous sizes, colors, and textures at affordable prices. The installation involves bedding pavers in mortar or construction adhesive, ensuring level placement, and filling joints appropriately.
This versatile option allows mixing colors or patterns to create custom designs. The uniformity of manufactured pavers produces clean lines and professional results without specialized masonry skills.
Stucco or Render Finish
Rather than adding physical caps, applying stucco or render creates a finished top edge through built-up layers of cement-based coating. This approach works best for walls in Mediterranean or Southwestern architectural contexts. Multiple coats create a rounded, organic edge that can be painted or textured.
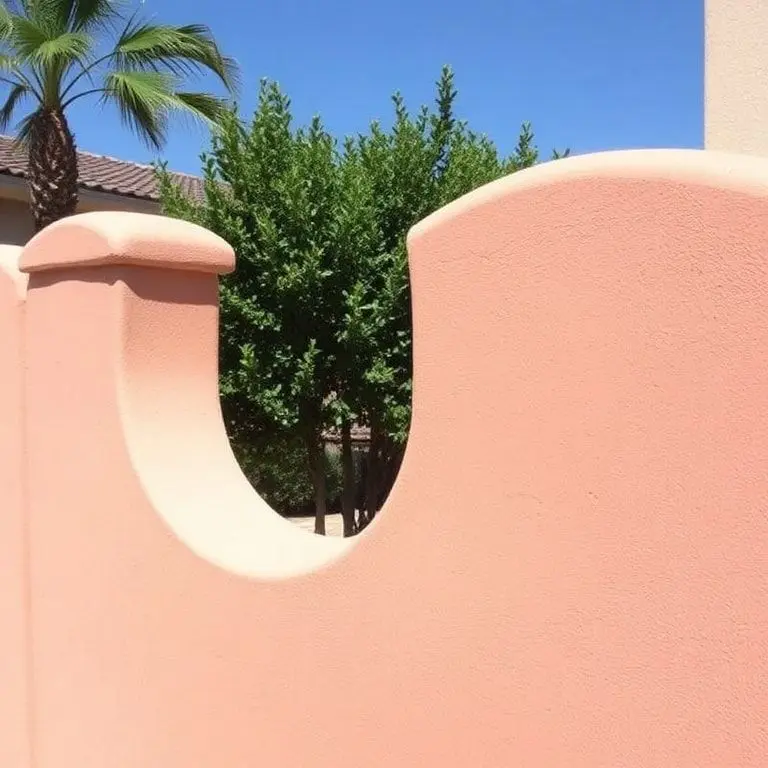
The method requires proper surface preparation, application of base and finish coats, and careful curing. While less protective than solid caps, the technique suits decorative garden walls in mild climates.
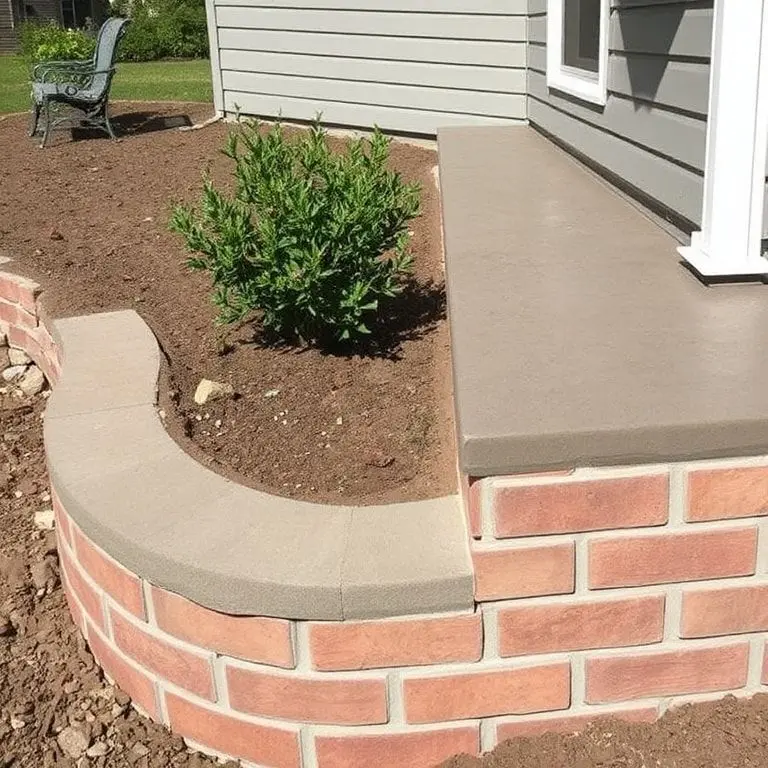
Proportion and Overhang
Proper proportion ensures wall caps enhance rather than overwhelm the structure. A general guideline suggests cap width should provide 1 to 2 inches of overhang on each side to facilitate water drainage away from the block face. Excessive overhang creates a top-heavy appearance, while insufficient overhang fails to protect the wall adequately.
Height also matters, with caps typically ranging from 2 to 6 inches depending on wall scale and purpose. Taller caps suit higher walls and create stronger visual termination, while lower profiles work for shorter garden borders.
Slope and Drainage
Incorporating subtle slope into cap design prevents water pooling and directs runoff away from the wall structure. Even flat-appearing caps should include minimal pitch, typically around one-quarter inch per foot, to encourage drainage. Sloped caps work especially well in regions with significant rainfall or snow.
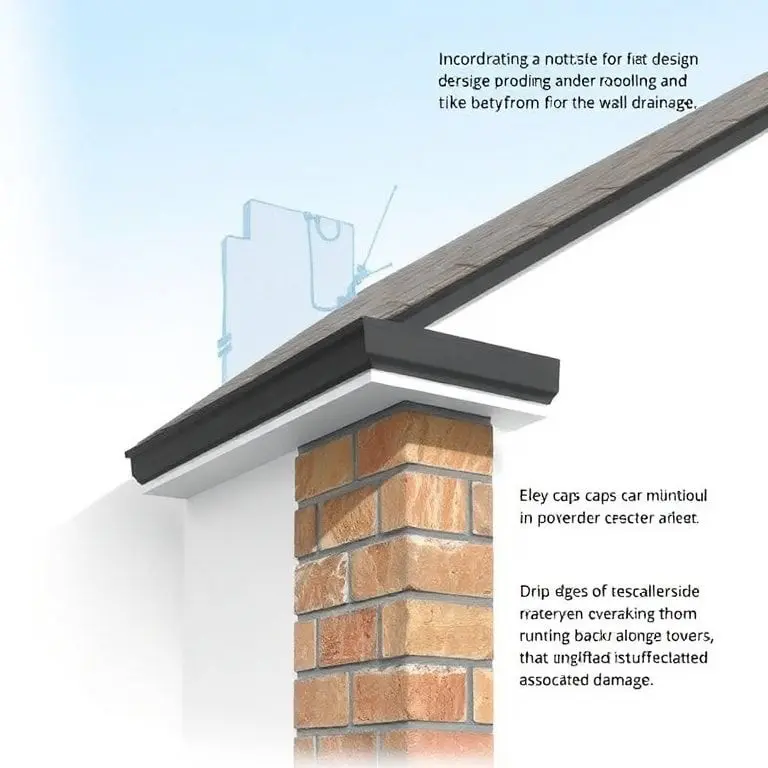
Drip edges on the underside of overhanging caps prevent water from running back along the bottom surface toward the wall face. This detail significantly reduces moisture infiltration and associated damage.
Color Coordination
Thoughtful color selection integrates wall caps with surrounding landscape elements and architectural features. Matching or complementing home exterior colors, patio materials, or garden hardscaping creates visual harmony. Contrasting colors can define borders or create focal points depending on design intent.
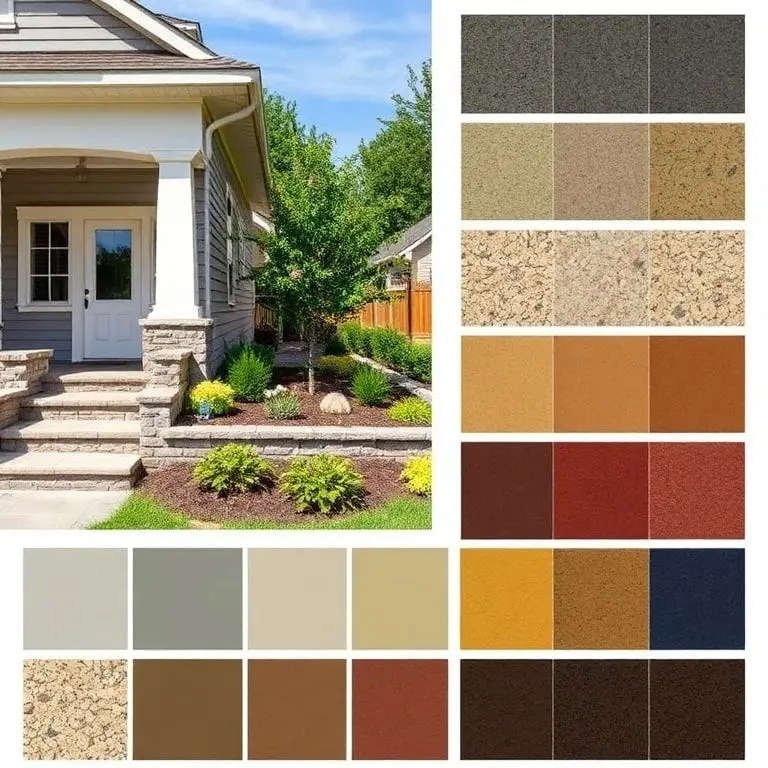
Neutral tones like gray, tan, and earth browns offer versatility and longevity, while bolder colors make stronger statements but may limit future design flexibility.
Surface Preparation
Successful cap installation begins with proper surface preparation. Remove debris, dust, and loose material from the top course of blocks. Ensure the surface is level, making corrections with mortar if necessary. Dampening the blocks slightly before applying mortar or adhesive improves bonding.
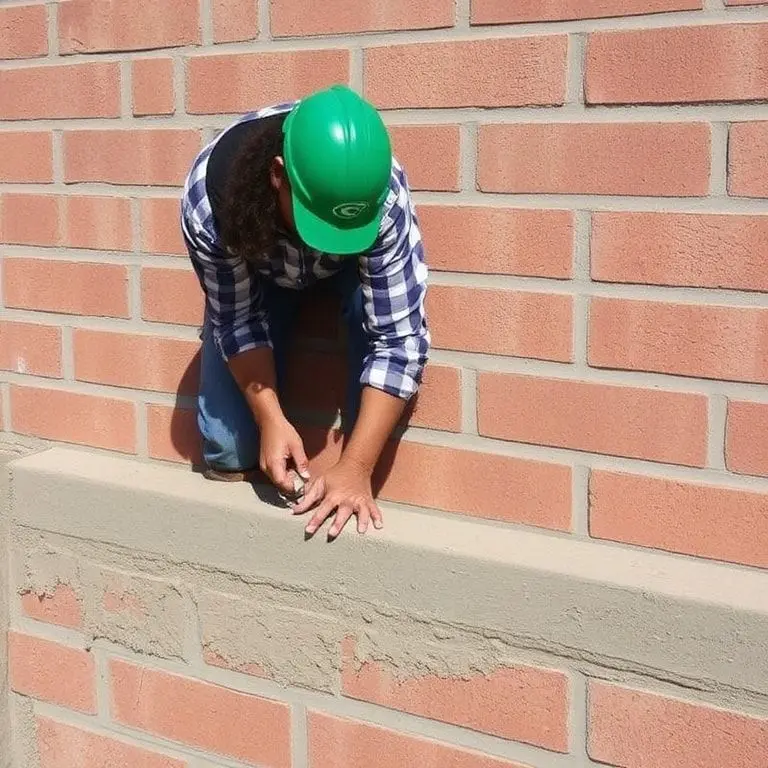
For walls with significant irregularities, a leveling bed of mortar creates the flat surface needed for cap placement. This step prevents rocking caps and ensures uniform joint widths.
Adhesive Selection
Construction adhesive formulated for masonry applications provides reliable bonding for most capping materials. Polyurethane-based products offer excellent adhesion, flexibility to accommodate minor movement, and weather resistance. For heavy materials like thick stone, combining adhesive with mechanical anchors ensures secure attachment.
Mortar remains the traditional choice for concrete and stone caps, providing proven performance when properly mixed and applied. Type S mortar offers good strength and durability for most applications.
Joint Treatment
Properly finished joints complete the professional appearance and enhance weather protection. Tooled mortar joints create tight seals and attractive shadow lines. For materials where mortar joints are inappropriate, such as metal or wood, caulk fills gaps and prevents water infiltration.
Polymeric sand works well for stone caps with wider joints, locking together when activated with water and resisting washout better than standard sand.
Maintenance and Longevity
Regular Inspection
Annual inspection identifies emerging issues before they become serious problems. Check for cracked caps, loose units, failed joints, and signs of water damage. Early intervention through repointing mortar, resealing joints, or replacing damaged caps prevents escalating repair costs.
Pay particular attention after severe weather events, as freeze-thaw cycles, heavy rains, and high winds stress cap installations.
Sealing Requirements
Many capping materials benefit from periodic sealing to repel water, resist staining, and maintain appearance. Natural stone, concrete, and wood caps particularly require sealing based on manufacturer recommendations and local climate conditions. Quality sealers extend material lifespan and reduce maintenance demands.
Reapplication schedules vary by product and exposure, typically ranging from annually for wood to every few years for stone and concrete.
Cleaning Methods
Appropriate cleaning maintains appearance without damaging cap materials. Pressure washing works well for concrete and stone but requires care with softer materials. Mild detergent solutions remove most dirt and organic growth. Avoid harsh chemicals that may discolor or degrade materials.
Different materials demand specific approaches, with wood requiring gentle methods to preserve finishes and metal needing products that won’t promote corrosion.
Cost Analysis and Value
Material Cost Comparison
Budget planning benefits from understanding relative material costs. Basic concrete caps represent the most economical choice, followed by concrete pavers and pressure-treated wood. Mid-range options include composite materials, ceramic tiles, and common natural stones like flagstone. Premium materials encompass exotic stones, copper, and specialty manufactured products.
Labor costs vary based on installation complexity, with simple concrete caps requiring less skilled work than intricate tile patterns or fitted natural stone.
Long-Term Value Considerations
Initial cost represents only part of the value equation. Maintenance requirements, replacement frequency, and durability impact long-term expense. Materials like composite decking or porcelain tile may cost more initially but require minimal maintenance and last decades. Wood caps need regular treatment and eventual replacement.
Aesthetic value also factors into analysis, as appealing caps enhance property appearance and potentially increase resale value. Well-capped walls signal quality construction and proper maintenance to prospective buyers.
DIY Versus Professional Installation
Many capping projects suit DIY installation, particularly concrete caps, pavers, and basic wood applications. Homeowners with basic tools and moderate skills can achieve professional-looking results while saving labor costs. Complex installations involving custom stone cutting, metal fabrication, or intricate tile work may warrant professional expertise.
Consider time investment, tool requirements, and comfort level with masonry work when deciding between DIY and contractor installation.
Conclusion
Selecting the right cap for your cinder block wall balances functional requirements with aesthetic preferences and budget realities. Whether you choose the timeless elegance of natural stone, the modern appeal of metal, the warmth of wood, or the practicality of concrete, proper capping protects your investment while enhancing your landscape.
The fourteen-plus options explored here demonstrate that capping solutions exist for every design vision and budget level. From economical poured concrete to premium copper installations, each approach offers distinct advantages in durability, appearance, and maintenance requirements.
Success lies in matching material properties to your specific situation, considering climate conditions, design context, and maintenance commitment. Proper installation techniques and regular maintenance ensure your chosen caps perform their protective function while maintaining visual appeal for years to come. The transformation from bare cinder block to beautifully finished wall demonstrates how thoughtful details elevate ordinary structures into landscape features that add value and beauty to your property.
Frequently Asked Questions:
What is the primary purpose of capping a cinder block wall?
Capping serves two essential functions: protecting the wall from water infiltration through the hollow cores and providing a finished appearance. Water entering exposed blocks causes freeze-thaw damage, deterioration, and structural weakening over time. Caps channel water away while transforming utilitarian concrete into attractive landscape features.
Can I install wall caps myself or should I hire a professional?
Many capping projects suit DIY installation, especially concrete caps, pavers, and basic wood applications. If you have moderate construction skills and basic tools, you can achieve professional results. Complex installations involving custom stonework, metal fabrication, or intricate patterns may benefit from professional expertise to ensure proper installation and longevity.
How much overhang should wall caps have?
Standard practice recommends 1 to 2 inches of overhang on each side of the wall. This projection creates a drip edge that directs water away from the block face, preventing moisture infiltration. Insufficient overhang fails to protect adequately, while excessive projection creates visual imbalance and may be structurally unsound.
What is the most budget-friendly capping option?
Poured concrete represents the most economical approach, requiring only concrete mix, forming materials, and basic tools. Concrete cap blocks and pavers offer the next budget tier, providing precast convenience at reasonable cost. These options deliver excellent protection and durability despite their affordability.
How often do wall caps need maintenance or replacement?
Maintenance frequency depends on material choice and climate exposure. Concrete and stone caps may require resealing every 2 to 5 years and repointing as needed. Wood caps need annual staining or sealing. Metal and composite materials require minimal maintenance beyond occasional cleaning. With proper installation and care, quality caps last 20 to 50 years before replacement becomes necessary.