17+ Festive Christmas Candy Jar Ideas
The holiday season brings with it the joy of gift-giving, and few presents are as delightful and personal as a beautifully crafted Christmas candy jar. These charming creations combine visual appeal with sweet treats, making them perfect for friends, family, teachers, coworkers, and neighbors. Whether you are seeking an affordable gift option or a festive decorating element for your home, candy jars offer endless possibilities for creativity and customization.
Christmas candy jars have become increasingly popular because they solve multiple gifting challenges at once. They are budget-friendly, allowing you to create numerous gifts without breaking the bank. They offer a personal touch that store-bought items cannot match. They serve dual purposes as both decoration and treat. Most importantly, they are adaptable to any skill level, from crafting beginners to experienced DIY enthusiasts.
The beauty of candy jar creations lies in their versatility. You can transform simple mason jars into whimsical characters, elegant apothecary displays, or layered masterpieces that showcase colorful confections. The process itself can become a cherished holiday tradition, with families gathering to design and assemble these sweet gifts together. Children especially enjoy participating in jar decoration, making this an excellent activity for creating lasting memories while preparing thoughtful presents.
Before diving into specific ideas, it is worth noting that the foundation of any great candy jar project starts with selecting the right container. Mason jars remain the most popular choice due to their affordability, availability, and classic appeal. However, apothecary jars, recycled glass containers, and specialty jars from craft stores all work wonderfully. The key is choosing a jar with a wide opening for easy candy placement and a secure lid to keep contents fresh.
Classic Character Candy Jars
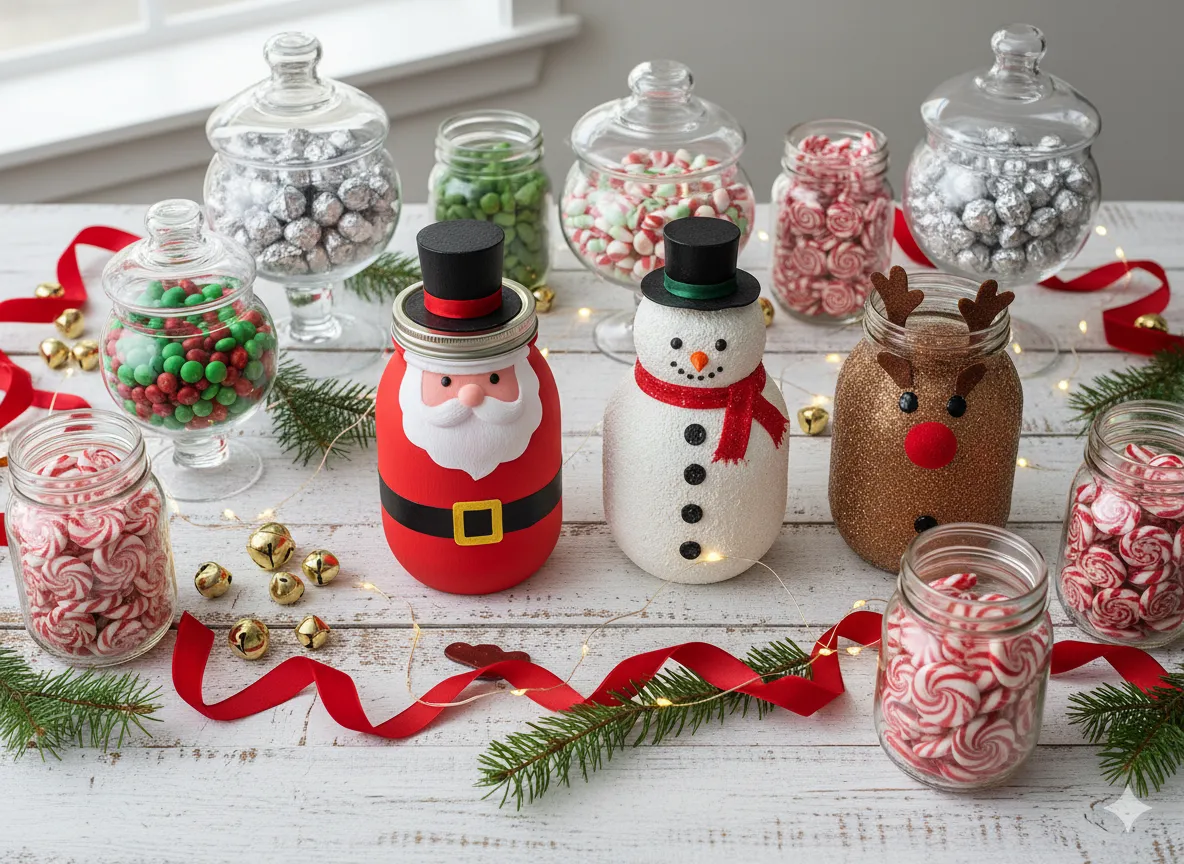
Character-themed candy jars represent some of the most beloved and recognizable designs in Christmas crafting. These charming creations transform ordinary jars into festive personalities that bring smiles to recipients of all ages.
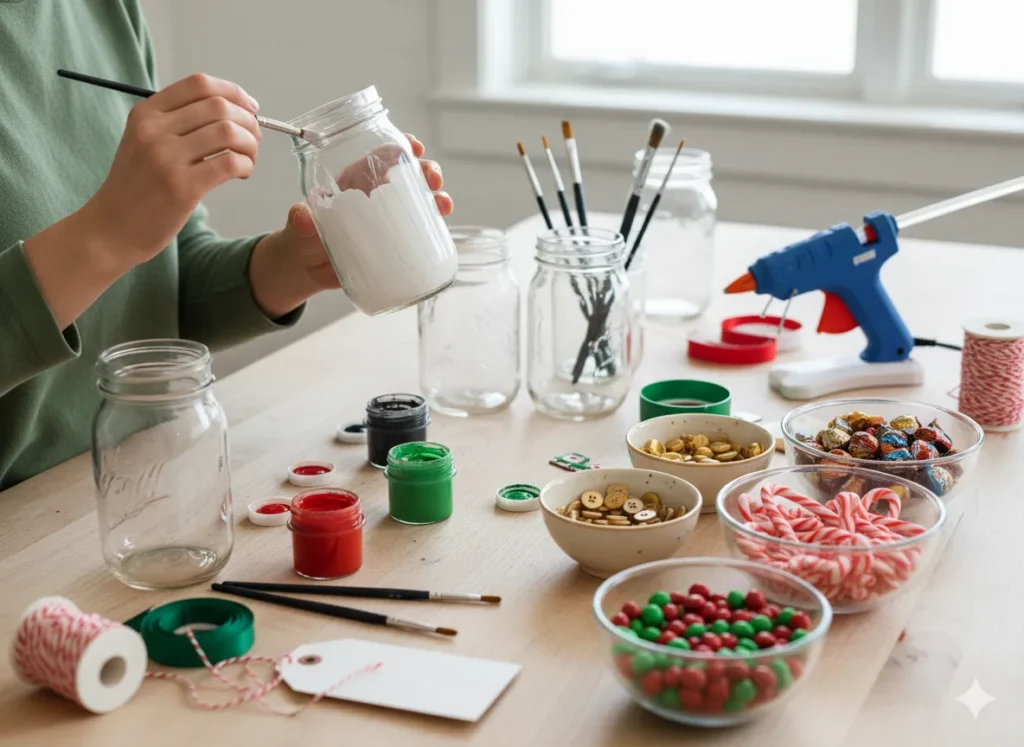
The Santa candy jar stands as a timeless favorite. Creating this jolly character requires painting the jar red, either with glass paint or spray paint designed for multi-surface use. The iconic black belt is fashioned from ribbon or black glitter material wrapped around the jar’s middle, secured with craft glue. A gold buckle cut from foam or felt completes the belt. Small black buttons glued vertically above and below the belt add authentic detailing. For the best results, apply paint in thin layers, allowing each coat to dry completely before adding the next. This prevents streaking and ensures rich, even color coverage.
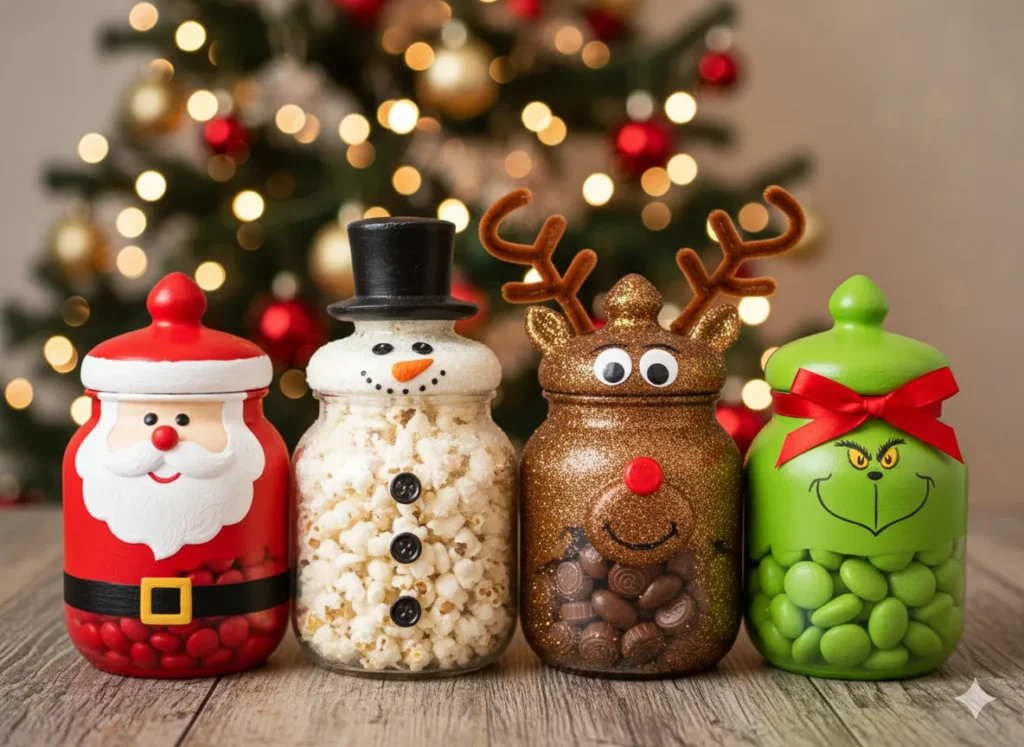
Snowman jars offer another delightful option, particularly appealing when filled with white candies or popcorn. White craft paint covers the jar’s exterior, while the lid receives a coat of black spray paint to serve as the snowman’s hat. Button eyes and an orange felt or button nose create the friendly face. Some crafters add a fabric scarf around the jar’s neck for extra charm. The beauty of snowman jars lies in their simplicity, making them ideal projects for children to help create.
Reindeer jars bring playful energy to your candy jar collection. Brown craft paint or glitter forms the base, with googly eyes providing an animated expression. A red pom-pom serves as Rudolph’s famous nose, while pipe cleaners twisted into antler shapes and attached to the lid complete the transformation. These jars work particularly well when filled with chocolate candies, creating a cohesive brown and red color scheme.
The Grinch jar has gained tremendous popularity in recent years, appealing to fans of the classic Christmas tale. Green candies, particularly mint-flavored options, fill the jar to capacity. A red ribbon tied around the lid represents the Grinch’s eventual change of heart, while a small red heart button can be glued to the ribbon as a sweet reference to the story’s heartwarming conclusion. These jars are remarkably easy to assemble yet make a strong visual impact.
Elegant Apothecary Jar Displays
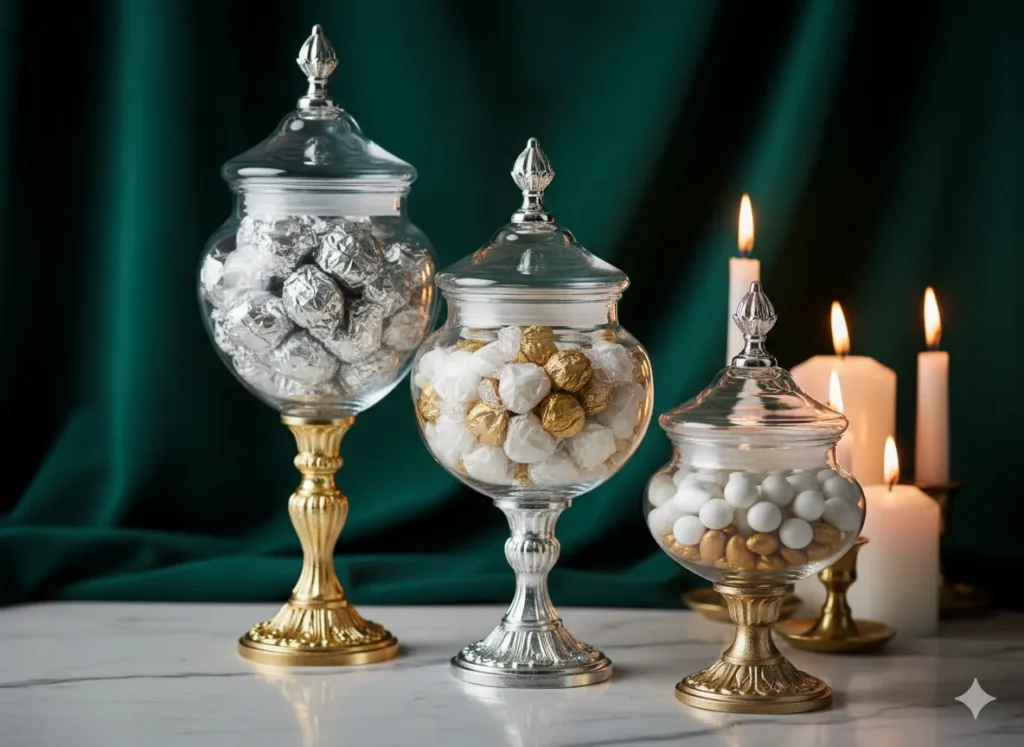
Apothecary-style candy jars elevate the presentation to a more sophisticated level, perfect for adult recipients or formal holiday displays. While authentic apothecary jars can be expensive, crafty individuals can create convincing replicas using budget-friendly materials.
The secret to DIY apothecary jars involves combining glass candlesticks with mason jars. Paint the candlestick base in festive colors using enamel paint, then securely attach it to the bottom of the jar using strong adhesive suitable for glass. Wooden craft pieces stacked and glued together create finials for the jar lids, which are then painted to coordinate with the base. The result is an impressive candy display that looks professionally made at a fraction of the cost.
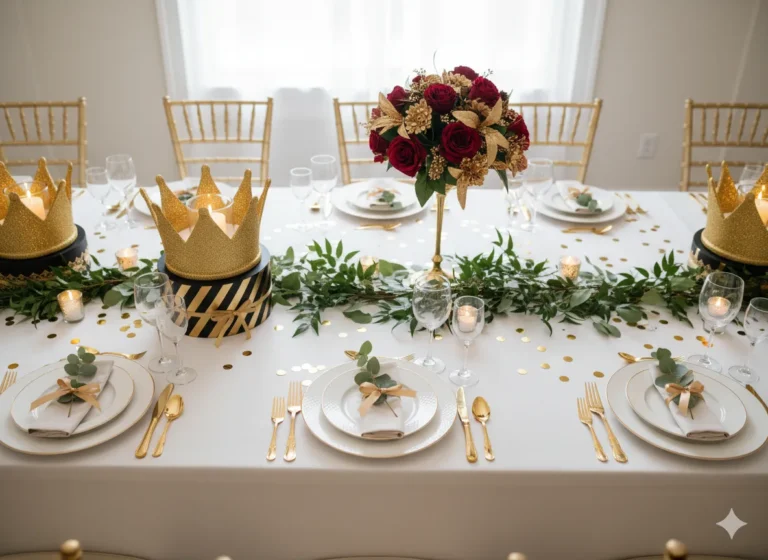
These elevated jars work beautifully for Christmas table centerpieces or mantel decorations. Fill them with color-coordinated candies that match your holiday decor scheme. Traditional red and green candies create classic Christmas appeal, while silver and gold wrapped chocolates offer elegant sophistication. White and blue candies evoke a winter wonderland atmosphere. The transparent nature of the jars allows the candy colors to become part of the decorative element.
For added visual interest, consider creating sets of three apothecary jars in varying heights. This creates dimension and draws the eye across the entire display. Each jar can hold different candy types while maintaining color coordination. For instance, one jar might contain peppermint candies, another chocolate truffles, and the third candy canes, all wrapped in complementary colors.
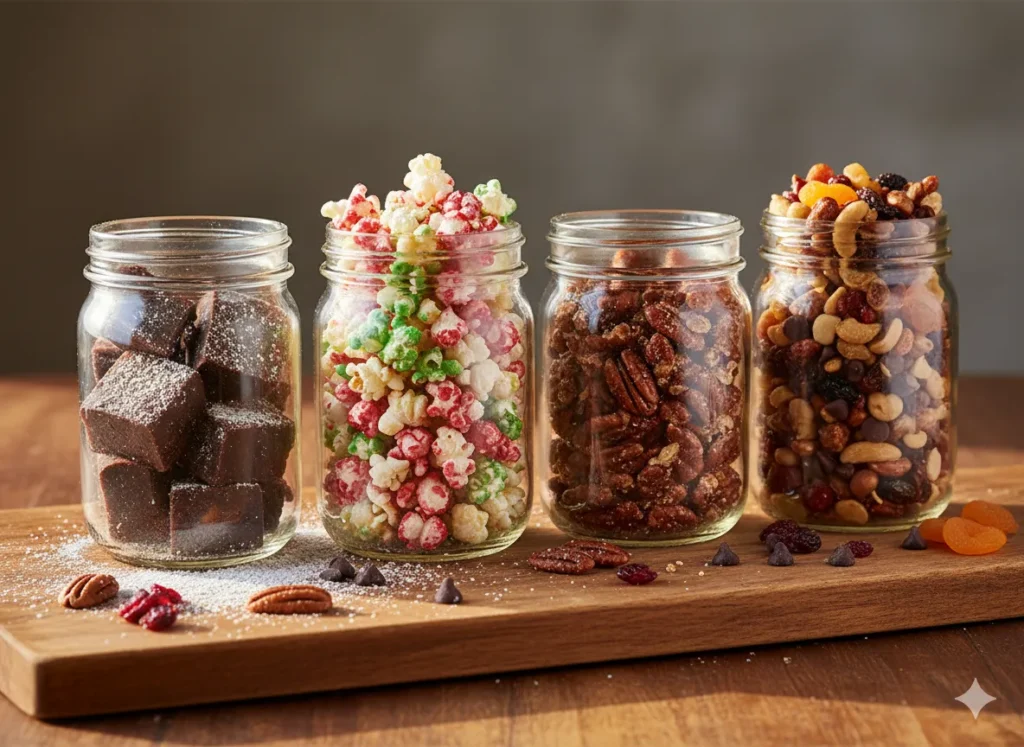
Layered Candy Jar Creations
Layered candy jars transform simple treats into stunning visual presentations through strategic color placement and thoughtful arrangement. The technique requires patience but produces impressive results that recipients will admire before enjoying.
The fundamental principle of candy layering involves creating contrast through color and texture. Begin with heavier candies at the bottom of the jar to provide stability, then work upward with progressively lighter items. Alternate between contrasting colors to create distinct, visible layers. For example, layer red and white peppermints, green and red candies, or chocolate and vanilla colored treats.
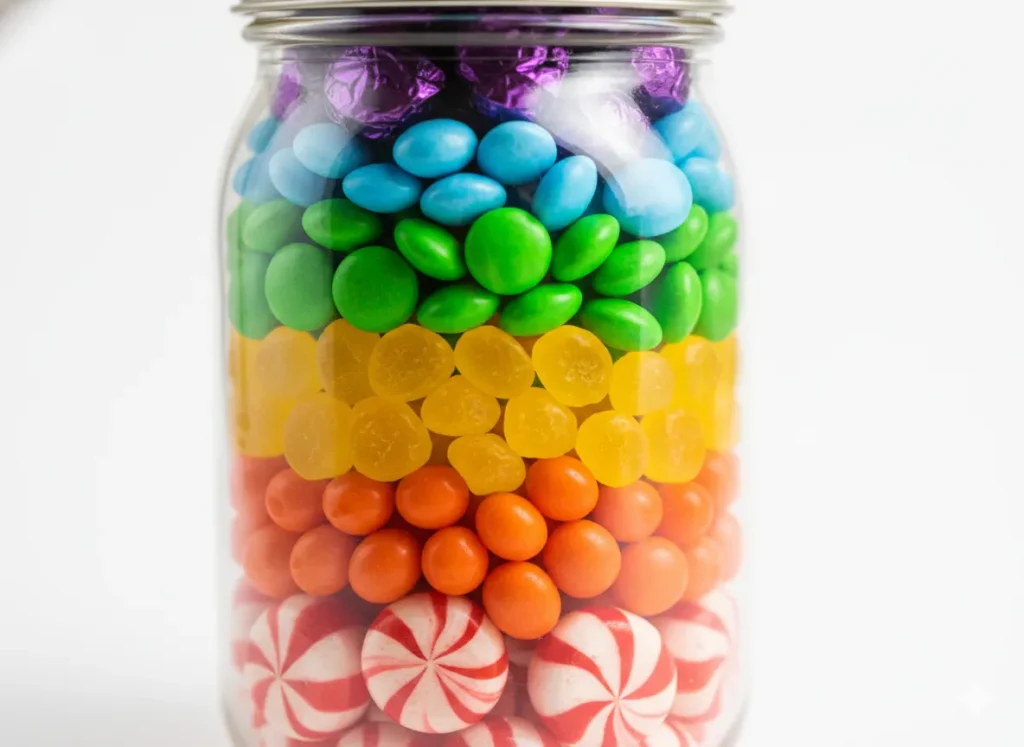
One popular approach creates rainbow effects using candies sorted by color. Start with red candies at the bottom, followed by orange, yellow, green, blue, and purple layers moving toward the top. This requires purchasing candy assortments or sorting mixed bags, but the vibrant result justifies the effort. Each layer should be approximately the same height for the most polished appearance.
Another effective layering technique incorporates different candy types for varied texture and visual interest. Combine smooth chocolate candies with bumpy gumballs, flat peppermints with round truffles, or wrapped caramels with unwrapped mints. The textural variety creates depth and makes the jar more interesting to examine.
For jars intended as centerpieces or long-term displays rather than immediate consumption, consider the strategic placement of specialty candies. Position candies with specific shapes, such as Christmas trees, stars, or bells, against the jar’s glass so they face outward and remain visible. Fill the interior space with less expensive candy to reduce costs while maintaining the impressive exterior appearance.
Hot Chocolate and Baking Mix Jars
Moving beyond simple candy filling, gift jars can contain ingredients for delicious homemade treats. These creations combine the visual appeal of layered ingredients with the practical gift of a special recipe.
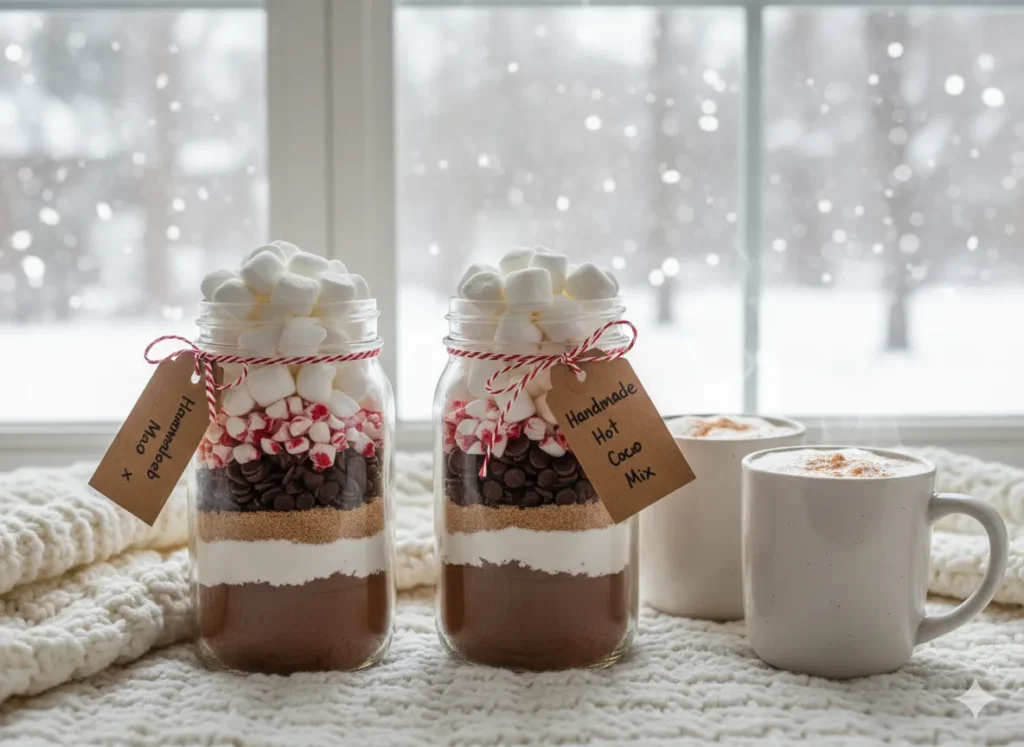
Hot chocolate mix jars have become a holiday staple, offering warmth and comfort during cold winter months. Layer cocoa powder, powdered sugar, powdered milk, chocolate chips, crushed peppermint candies, and mini marshmallows in a quart-sized jar. The contrasting brown, white, and colorful layers create an attractive presentation. Attach a decorative tag with preparation instructions explaining how to mix the contents with hot water or milk for a delicious beverage.
Cookie mix jars follow a similar concept, layering dry ingredients needed to bake homemade cookies. Sugar cookie mixes, brownie mixes, and gingerbread cookie ingredients all work well in jar form. The key is carefully measuring and layering ingredients in the correct order, typically with sugar and flour mixtures at the bottom, followed by add-ins like chocolate chips or dried fruit at the top. Recipients simply need to add wet ingredients like eggs and butter before baking.
When creating baking mix jars, precision matters. Test your recipe beforehand to ensure all ingredients fit properly in your chosen jar size. Quart-sized mason jars accommodate most standard recipes, but some may require larger containers. If ingredients don’t quite reach the jar’s top, fill the remaining space with crumpled tissue paper wrapped in a piece of fabric or decorative material to prevent settling during transport.
Gift Card Surprise Jars
Combining candy with gift cards creates a multilayered surprise that delights recipients twice. This clever presentation disguises the monetary gift within layers of sweet treats.
The simplest method involves wrapping the gift card in decorative paper to protect it from candy contact, then placing it in the jar’s center and surrounding it with candy. However, this approach requires substantial candy quantities for larger jars and can make card retrieval challenging.
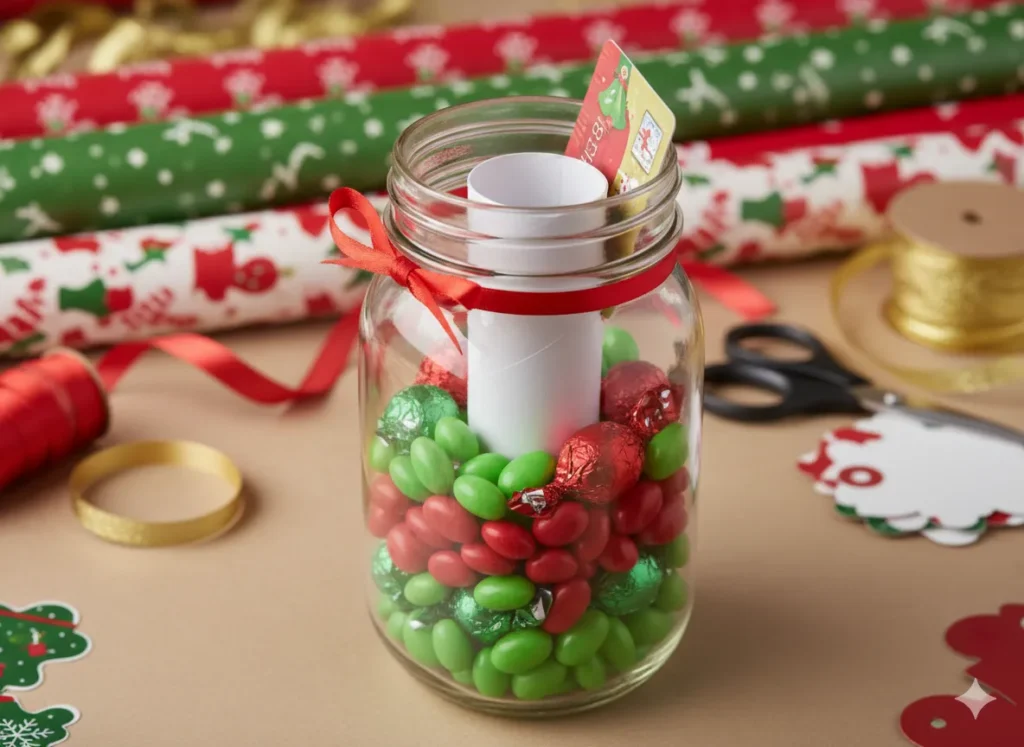
A more efficient technique uses a cardstock tube placed in the jar’s center. Cut thick cardstock slightly shorter than the jar’s height and form it into a cylinder large enough to hold the gift card. Secure with tape and position it in the empty jar’s center. Fill the space around the tube with candy, working evenly around all sides to keep the tube centered. Once filled to the top, slide the gift card into the tube and secure the lid.
This method offers multiple advantages. It requires less candy since the tube occupies central space. The gift card remains clean and easily accessible. The visual presentation shows candy throughout the jar while concealing the special surprise inside. Recipients experience genuine delight when they discover the hidden gift card after enjoying the candy display.
Choose candies proportionate to your jar size and tube diameter. Smaller candies like Christmas themed chocolate pieces work better than large items that leave gaps. Fill any visible spaces by gently sliding a butter knife down the jar’s side and shifting candies to eliminate air pockets.
Budget-Friendly Dollar Store Jars
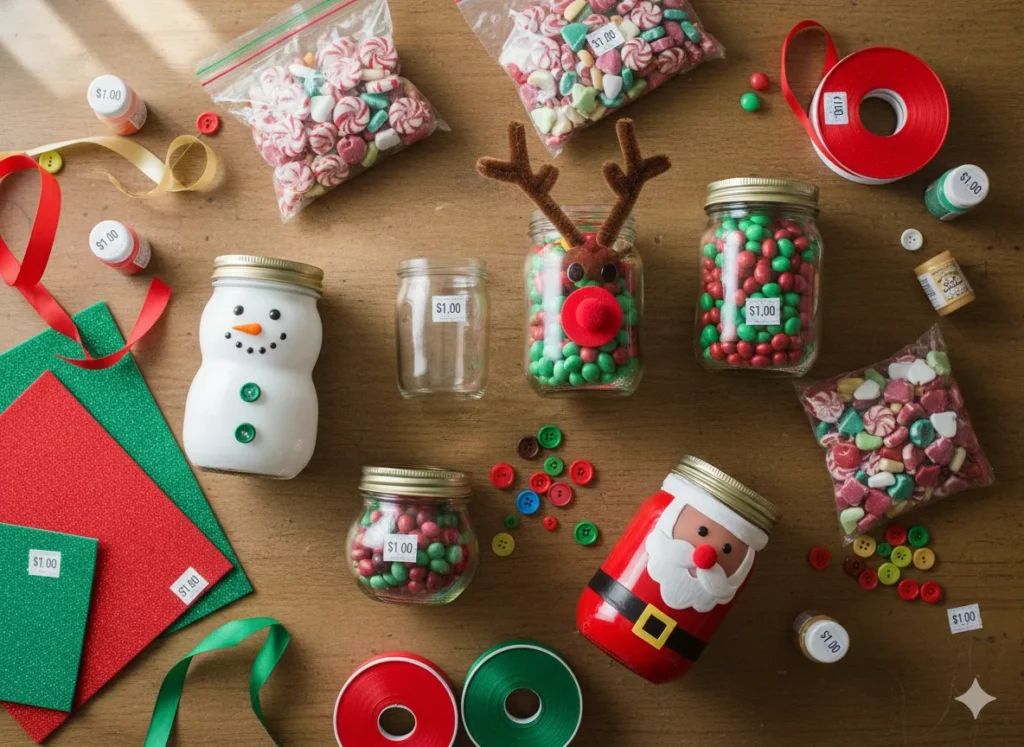
Creating impressive candy jars does not require expensive supplies. Dollar stores and discount retailers offer everything needed for beautiful presentations at minimal cost.
Begin by browsing dollar store aisles for basic glass jars, which often come in various sizes and styles. While they may lack the branding of premium mason jars, they function identically and cost significantly less. Look for jars with secure lids and pleasant shapes.
Craft supplies from dollar stores include paint, ribbon, buttons, felt, foam sheets, pipe cleaners, and adhesive. These basic materials enable creation of any character jar or decorated design at a fraction of craft store prices. A single shopping trip can yield supplies for multiple jar projects.
Candy selection at dollar stores deserves special attention. Holiday seasons bring themed candy options in festive colors and shapes. Purchase candy bags during after-holiday sales for even greater savings, storing them for the following year. Generic or store-brand candies often taste identical to name brands while costing considerably less.
When working within tight budgets, focus on maximizing visual impact through creative design rather than expensive materials. A well-executed character jar made from dollar store supplies often looks more impressive than a hastily assembled jar using premium materials. The time and care invested in crafting shows through regardless of supply costs.
Themed Candy Jar Collections

Creating candy jar sets around specific themes provides cohesive gifts or displays that tell a visual story. Themed collections work particularly well for families, offices, or party favors.
Winter wonderland themes incorporate white, silver, and blue color schemes. Fill jars with white chocolate candies, silver wrapped kisses, blue mints, and snowflake-shaped treats. Decorate jar exteriors with snowflake stickers, white glitter, or painted snow scenes. These jars evoke the magic of freshly fallen snow and cold winter nights.
Traditional Christmas themes embrace red and green combinations. Candy canes, peppermint patties, red and green chocolate candies, and holiday-themed gummies fill these classic jars. Decorations might include plaid ribbons, holly accents, or painted Christmas trees. This timeless approach appeals to recipients who appreciate conventional holiday aesthetics.
Retro Christmas themes have experienced renewed popularity, featuring vintage-inspired decorations and old-fashioned candy selections. Ribbon candy, hard candies in traditional flavors, and nostalgic treats fill jars decorated with vintage Christmas imagery. Gold and red color schemes, along with classic ornament shapes, complete the throwback appearance.
For offices or large groups, consider creating matching sets where each jar maintains the same basic design but includes personalized elements. This provides visual cohesion while acknowledging individual recipients.
Candy Jar Assembly Techniques
Proper assembly techniques ensure your candy jars look polished and professional rather than hastily thrown together. Several key principles guide successful construction.
Always start with thoroughly cleaned and dried jars. Any moisture risks candy deterioration and can interfere with paint or adhesive application. Wash jars in hot soapy water, rinse completely, and allow ample drying time, preferably overnight.
When painting jars, patience yields superior results. Thin paint coats dry faster and more evenly than thick applications. Allow each layer to dry completely before adding the next. While this extends project time, the smooth, professional finish justifies the wait. Glass paint or multi-surface acrylic paint works better than standard craft paint, which may scratch or peel.
For gluing embellishments, hot glue provides strong, fast bonding ideal for most jar decorations. However, it creates visible glue strings that must be carefully removed. Craft glue or super glue suitable for glass and fabric offers cleaner results but requires longer drying times. Choose adhesive based on your project timeline and desired finish quality.
When filling jars with candy, work slowly and deliberately. Rushing creates messy layers and uneven distribution. For layered designs, use a funnel or rolled paper cone to direct candy into specific areas without disturbing lower layers. Gently shake or tap the jar periodically to settle contents and eliminate gaps.
Specialty Candy Selections
Candy choice significantly impacts your jar’s overall appearance and appeal. Strategic selection considers color, size, shape, and flavor while staying within budget constraints.
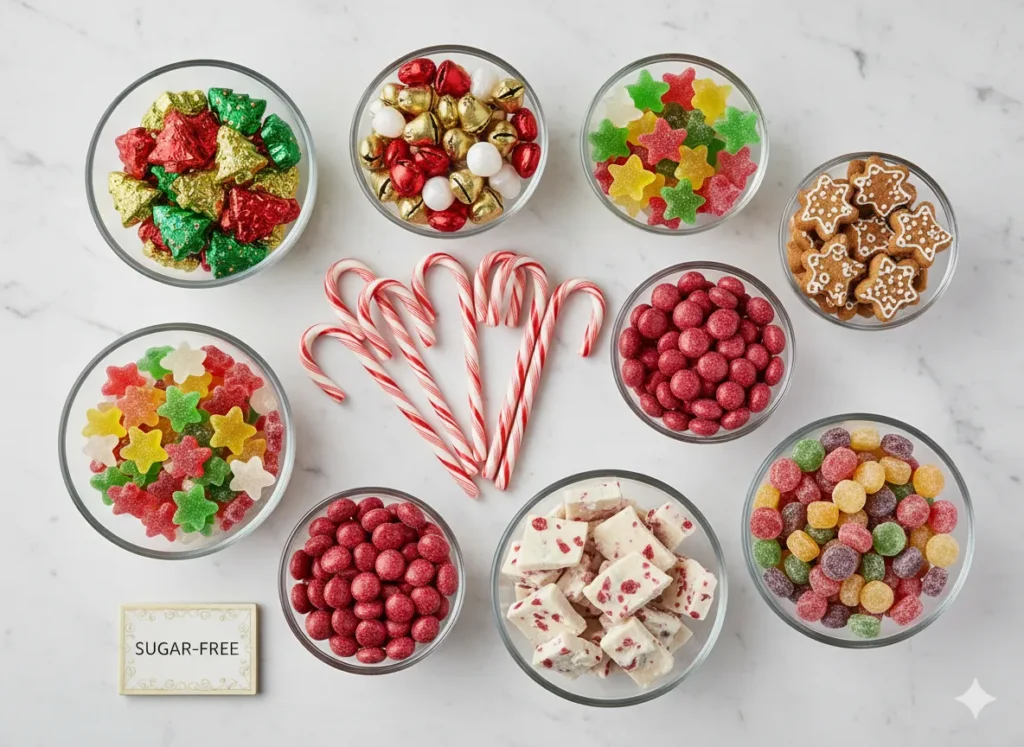
Seasonal candies designed specifically for Christmas offer festive shapes and colors unavailable year-round. Christmas tree-shaped chocolates, bell-shaped candies, star-shaped treats, and holiday-colored varieties enhance the seasonal theme. These specialty items typically cost more than standard candy but can be used selectively for maximum impact, such as positioning them against the jar’s exterior while filling the interior with less expensive options.
Traditional holiday flavors like peppermint, cinnamon, gingerbread, and eggnog appeal to nostalgic preferences. Candy canes, peppermint bark pieces, cinnamon hard candies, and gingerbread-flavored treats all evoke classic Christmas memories. Consider recipient preferences when selecting flavors, as some people strongly prefer certain tastes.
For recipients with dietary restrictions, specialty candy options accommodate various needs. Sugar-free candies work for diabetic individuals or those reducing sugar intake. Chocolate alternatives suit people with cocoa allergies. Vegan candies contain no animal products. While these options may require additional shopping effort, they demonstrate thoughtfulness and ensure everyone can enjoy your gift.
Texture variety within a single jar creates interest and prevents monotony. Combine chewy candies with hard candies, smooth chocolates with crunchy treats, or soft marshmallows with firm peppermints. This variety appeals to different taste preferences and makes the jar more enjoyable to sample.
Personalization and Custom Touches
Personalizing candy jars transforms them from generic gifts into treasured keepsakes that reflect the recipient’s personality and interests.
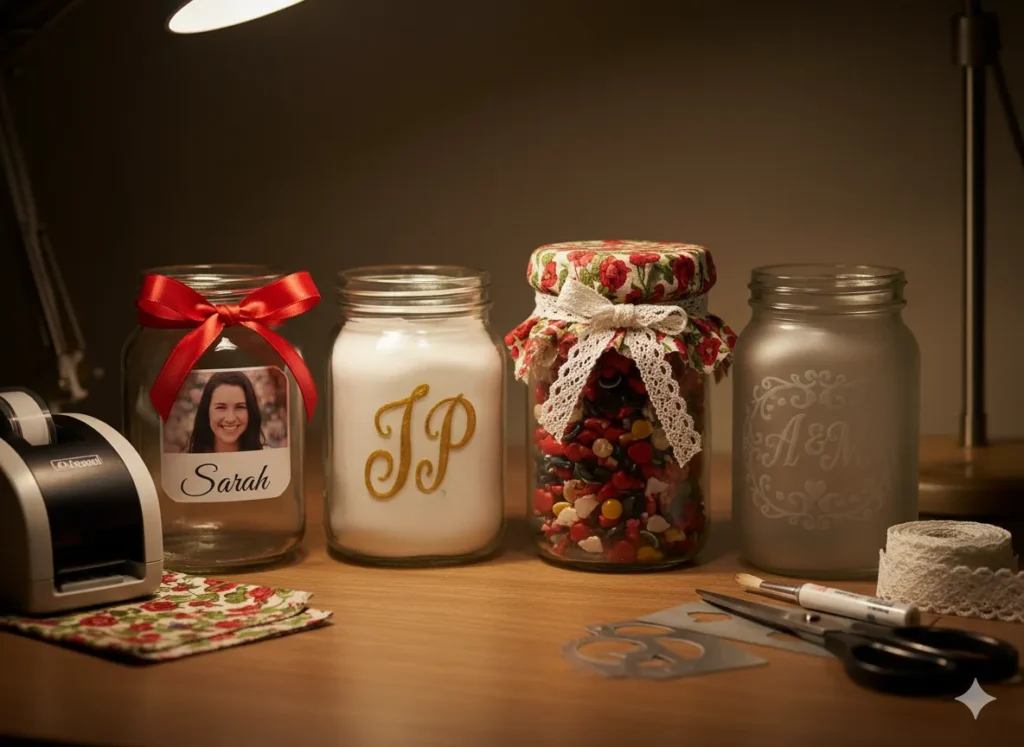
Custom labels and tags provide easy personalization opportunities. Print recipient names on decorative labels, include personal messages, or reference inside jokes and shared memories. Computer-designed tags can be printed on cardstock and attached with ribbon or twine. Handwritten tags offer a personal touch that shows extra care and effort.
Fabric jar toppers create charming lid decorations while allowing for customization through fabric selection. Cut fabric circles approximately two inches larger than the lid’s diameter. Place fabric over the lid, secure with the screw ring, and add ribbon around the ring to hide raw edges. Choose fabrics matching recipient favorite colors, hobbies, or interests. Quilting cotton works well and comes in countless patterns.To see some more quilting ruler storage ideas do visit Homeliaa.
Painted or etched designs on jar exteriors provide permanent personalization. Glass etching cream creates frosted designs that won’t wash away. Stencils guide painting or etching for those less confident in freehand artistic abilities. Personalized elements might include initials, significant dates, or symbols representing shared interests.
Color customization extends beyond candy selection to jar decoration. If you know someone’s favorite color scheme, incorporate those shades throughout the design. Purple and silver for a particular sports team, blue and gold for school colors, or any combination that resonates with the recipient shows attention to their preferences.
Preservation and Presentation Tips
Proper presentation enhances candy jar appeal while ensuring contents remain fresh and attractive until opened.
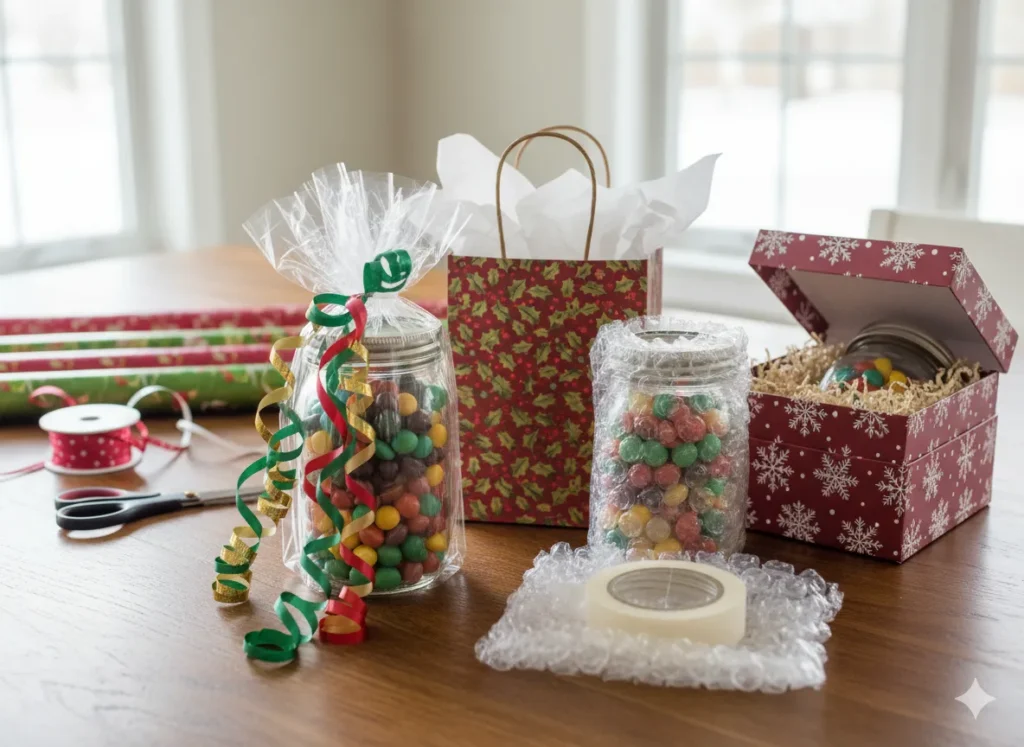
Wrapping finished jars requires careful consideration to showcase your work while protecting it during transport. Clear cellophane bags allow the jar design to remain visible while gathering at the top with ribbon creates a festive presentation. Gift bags sized appropriately for your jar offer another option, with tissue paper cushioning contents during movement.
For jars filled with homemade candies or baking mixes, include preparation dates on labels. This information helps recipients gauge freshness and prioritize consumption. Most commercial candies remain fresh for several months when properly stored, but homemade items may have shorter shelf lives.
Storage instructions matter for certain candy types. Chocolate-filled jars should be kept in cool, dry locations away from heat sources to prevent melting. Hard candies tolerate wider temperature ranges but can become sticky in humid environments. If your jar contains temperature-sensitive items, include a small note with storage recommendations.
Transport considerations prevent disasters when delivering candy jars. Place jars in boxes or carriers that prevent tipping and rolling. Wrap individual jars in bubble wrap or newspaper if transporting multiple items. Avoid leaving jars in hot vehicles for extended periods, especially those containing chocolate.
Creative Filling Alternatives
While traditional candy works wonderfully, alternative fillings create unique jars suited for various preferences and occasions.
Homemade candy options allow complete control over ingredients and flavors. Fudge cut into small squares, chocolate bark broken into pieces, peppermint bark, toffee, caramels, and truffles all jar well. Homemade candies require more time investment but often impress recipients more than store-bought options. Include ingredient lists for those with allergies or dietary concerns.
Popcorn creations offer less expensive alternatives to candy while providing festive color through flavored coating. Caramel corn, cheese popcorn, or colorful candy-coated popcorn fills jars beautifully. Popcorn’s light texture means jars appear full without requiring large candy quantities. However, popcorn has shorter freshness periods than hard candy, so note this on labels.
Mixed nut assortments provide sophisticated gifts for adults who prefer less sugary treats. Candied pecans, sugared almonds, chocolate-covered nuts, or seasoned mixed nuts offer gourmet appeal. These items cost more than basic candy but create upscale presentations appropriate for professional settings or discerning recipients.To see more Jar decorating ideas do visit Living Spaces.
Trail mix combinations balance sweet and salty while offering perceived health benefits compared to pure candy. Combine nuts, dried fruit, chocolate chips, and perhaps some candy pieces for colorful variety. Recipients appreciate versatile snacks suitable for various occasions rather than strictly dessert items.
Group Project Ideas
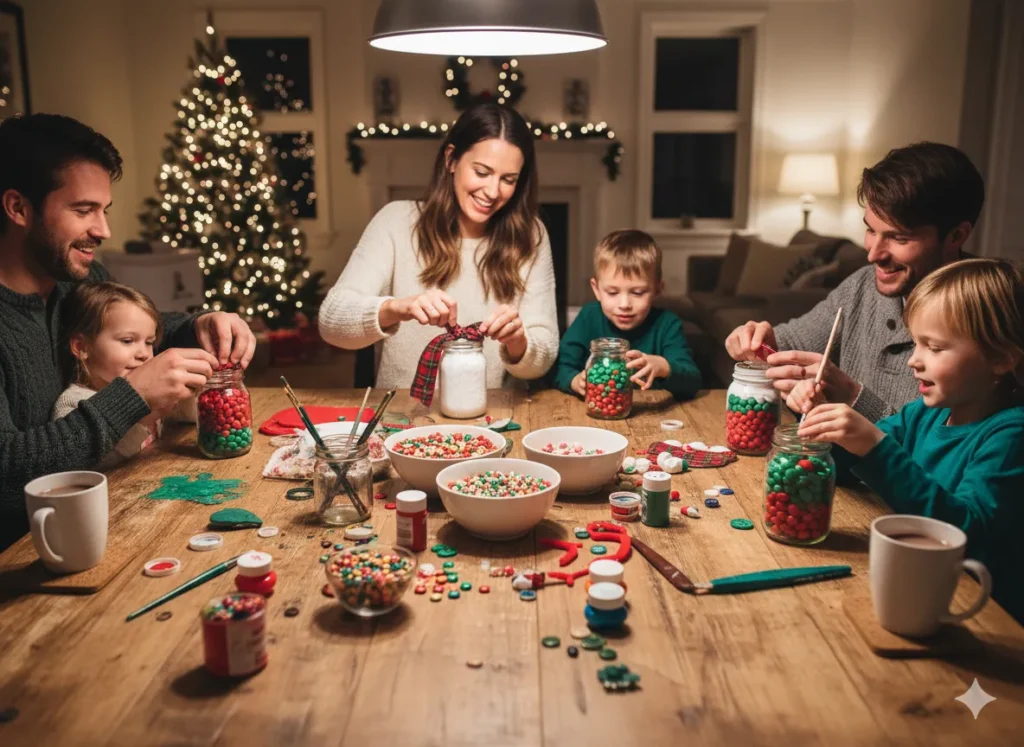
Candy jar creation lends itself beautifully to group activities, whether with family members, friend groups, or community organizations.
Family craft nights centered on jar assembly create cherished memories while accomplishing holiday gift preparation. Assign age-appropriate tasks to each family member. Young children can sort candies by color, older children can paint or glue decorations, and adults can handle more complex assembly steps. Working together teaches cooperation while producing gifts for teachers, neighbors, or extended family.
Church or community groups often organize charitable gift-making events where candy jars serve as donations for seniors, hospital patients, or families in need. Bulk purchasing supplies reduces per-jar costs, making it feasible to create large quantities. Assembly-line production, where different people handle different steps, increases efficiency and allows for social interaction during the process.
School classroom projects for older students teach budgeting, planning, and creative expression through candy jar creation. Students research costs, design jars, and execute their visions within budget constraints. Completed jars might be sold at school fundraisers, donated to charitable causes, or given as teacher appreciation gifts.
Office team-building activities can incorporate candy jar creation as a lighthearted way to foster cooperation while producing gifts for clients or partner organizations. The low-pressure, creative nature of the activity encourages conversation and relationship building among coworkers who may not typically interact.
Sustainable and Eco-Friendly Approaches
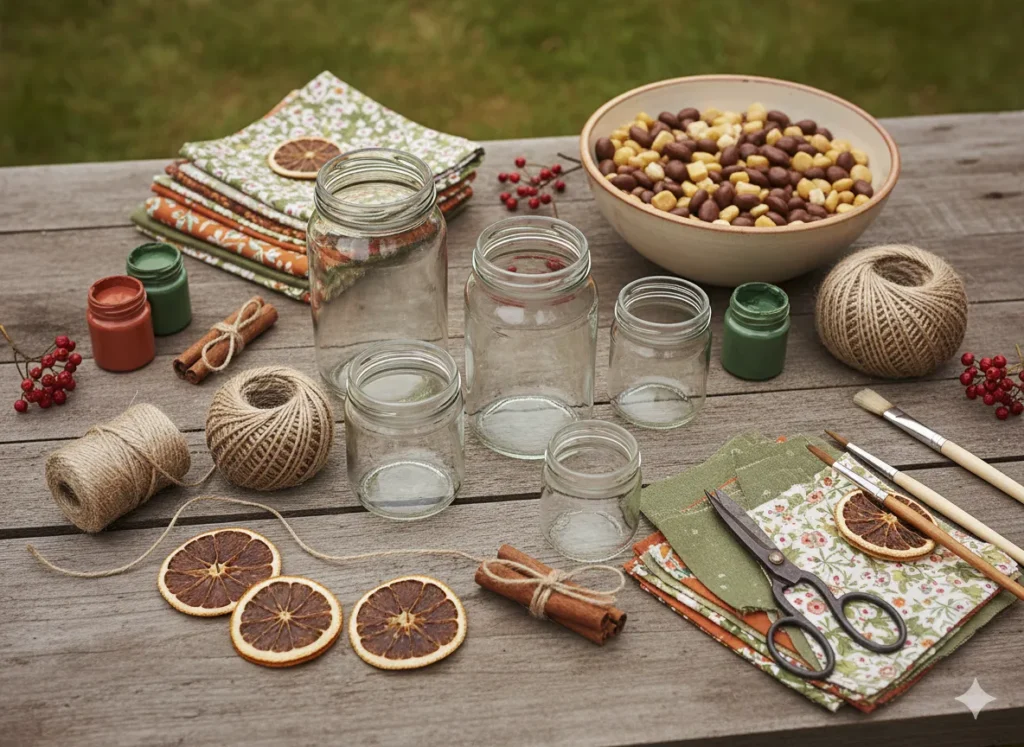
Creating candy jars with environmental consciousness appeals to increasingly eco-aware gift recipients.
Repurposing jars from your own kitchen reduces waste while eliminating jar purchase costs. Pasta sauce jars, pickle jars, jam jars, and other food containers work perfectly after thorough cleaning and label removal. Soaking jars in hot soapy water loosens most labels, while stubborn adhesive residue responds to oil-based solutions or commercial adhesive removers.
Natural decoration materials reduce environmental impact while creating rustic, appealing aesthetics. Twine instead of synthetic ribbon, fabric scraps instead of new materials, dried orange slices or cinnamon sticks as embellishments, and natural dyes for coloring all support sustainability goals. These materials often cost less than conventional craft supplies while offering unique visual appeal.
Bulk candy purchasing from stores offering bins where customers select desired quantities reduces packaging waste compared to individually wrapped bags. Bring reusable containers to fill, further minimizing environmental impact. Many stores discount bulk purchases, providing both ecological and financial benefits.
Encouraging jar reuse by choosing attractive, versatile containers increases their value beyond single-use status. Recipients can refill jars with their own candy, use them for storage, display them as decorative items, or repurpose them for entirely different functions. Quality jars with timeless designs have longer useful lives than trendy items.
Troubleshooting Common Issues
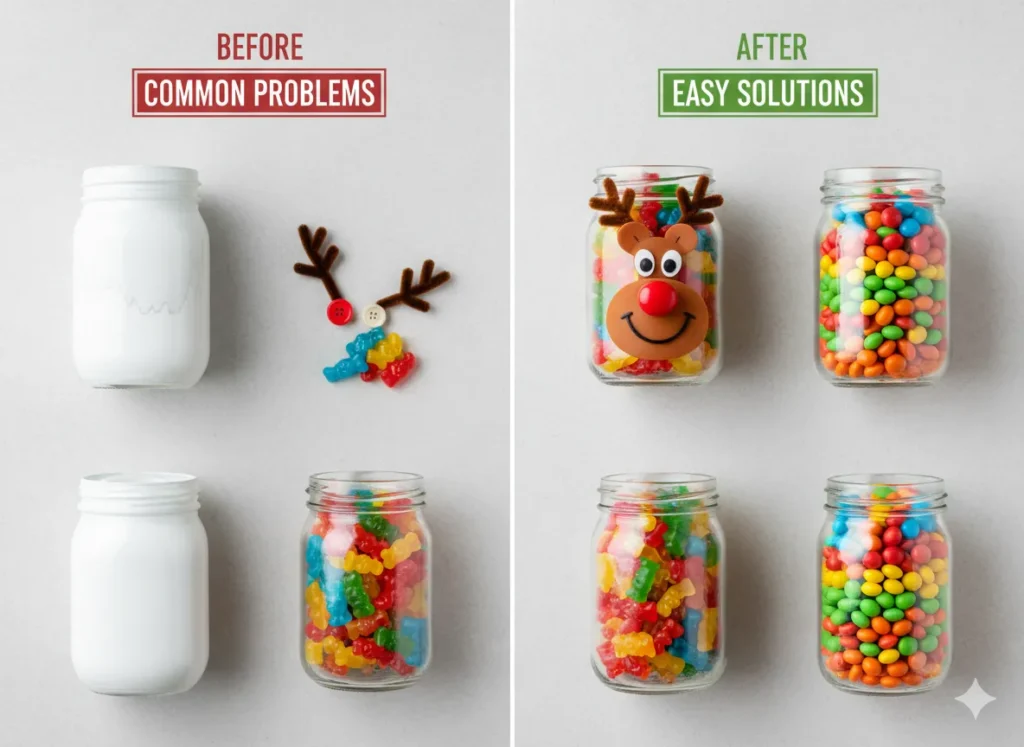
Even experienced crafters encounter challenges when creating candy jars. Understanding solutions to common problems prevents frustration and ensures successful results.
Paint that appears streaky or uneven usually results from applying coats too thickly or failing to allow adequate drying time between layers. Fix this by sanding lightly with fine-grit sandpaper, wiping away dust, and applying thinner coats with complete drying between each. Patience truly makes the difference between mediocre and excellent painted finishes.
Decorations that fall off indicate inadequate adhesive or insufficient drying time. Hot glue generally bonds strongly but can fail on very smooth glass surfaces. Roughening the glass slightly with sandpaper where decorations will attach improves adhesion. Allowing glued items to cure overnight before handling ensures maximum bond strength.
Candy that sticks together or becomes sticky typically reflects storage in warm or humid conditions. This affects chocolate and sugar-based candies differently but creates problems with both types. Prevent this by filling jars shortly before gifting rather than weeks in advance, storing completed jars in cool, dry locations, and choosing candy types appropriate for your climate.
Layered candy that mixes together during transport frustrates crafters who carefully arranged distinct color bands. Prevent this by filling jars completely to the top, leaving minimal space for shifting. Alternatively, create temporary dividers using wax paper circles between layers, though this adds complexity to the process.
Making Candy Jars for Different Recipients
Tailoring candy jars to specific recipient types ensures your gifts resonate with their preferences and circumstances.
Teacher gifts should be modest in size to avoid appearing as attempts to curry favor while still showing appreciation. Small jelly jars or half-pint mason jars work perfectly, filled with quality candies or homemade treats. Attach tags with student names and simple thank-you messages. Avoid excessive decoration that might seem overly elaborate for the professional setting.
Neighbor gifts should be friendly without presuming close relationships. Medium-sized jars with classic designs suit most situations. Stick with traditional holiday themes and popular candy selections rather than highly personalized choices for neighbors you know casually. These gifts acknowledge community connections while respecting appropriate boundaries.
Coworker gifts work well when created in matching sets that treat everyone equally while allowing small personalization through name tags or color variations. This avoids perceptions of favoritism while demonstrating thoughtfulness toward the entire team. Budget-friendly approaches make sense here since multiple gifts require more total investment.
Conclusion
Family member gifts allow for maximum personalization and can justify greater time and financial investment. Larger jars, premium candies, extensive decoration, and deeply personal touches all suit close family relationships. These jars might incorporate family jokes, references to shared experiences, or designs reflecting individual personalities and interests.
Creating festive Christmas candy jars combines artistic expression with practical gift-giving in ways few other crafts achieve. Whether you prefer character designs, elegant apothecary displays, layered masterpieces, or creative filling alternatives, candy jars offer something for every skill level and budget. The joy recipients experience when receiving these handmade treasures makes every moment of planning, shopping, and assembly worthwhile. This holiday season, embrace the sweet tradition of candy jar crafting and spread cheer to everyone on your gift list.
Frequently Asked Questions
How far in advance can I make Christmas candy jars?
You can create candy jars up to two weeks before gifting if stored properly in cool, dry conditions away from direct sunlight. Paint and decorations should be completed even earlier to ensure everything fully cures before adding candy. Commercial wrapped candies stay fresh longer than homemade treats or unwrapped items. For best results, decorate jars well ahead of time but add candy within a few days of gifting.
What size jar works best for candy jar gifts?
Half-pint to pint-sized jars work well for individual gifts and require less candy to fill. Quart-sized jars make impressive presentations for close friends and family but need more candy and cost more to fill. For large groups like classrooms or offices, smaller jelly jars keep costs manageable while still looking festive. Consider your budget and candy quantities when selecting jar sizes.
Can I use regular craft paint on glass jars?
Regular craft paint can be used but may chip or scratch off glass surfaces easily. Glass paint or multi-surface acrylic paint designed for glass provides better adhesion and durability. If using standard craft paint, apply a clear sealant after painting dries to protect the finish. Spray paint formulated for glass also works well and applies more evenly than brush-on options.
What are the best candies for layering in jars?
Smaller candies like chocolate pieces, mints, jelly beans, and gumballs create distinct layers and fill spaces efficiently. Choose candies with contrasting colors to make layers visible through the glass. Avoid very large candies that leave gaps or extremely small items like sprinkles that blend together. Wrapped candies maintain freshness longer but create less dramatic visual layers than unwrapped varieties.
How do I remove sticky labels from recycled jars?
Soak jars in hot soapy water for 30 minutes to loosen most labels. Scrape remaining adhesive with a plastic scraper or old credit card. Stubborn residue responds to cooking oil, peanut butter, or commercial products like Goo Gone applied with a cloth. Acetone or rubbing alcohol also removes adhesive effectively. Always wash jars thoroughly after using oil-based removers before adding candy.