
20+ Inspiring Easy Stone Carving Ideas
Easy Stone Carving Ideas, Stone carving represents one of humanity’s oldest artistic pursuits, dating back thousands of years to ancient civilizations that created everything from functional tools to breathtaking sculptures. Despite its historical significance and seemingly complex nature, stone carving remains accessible to modern beginners willing to learn basic techniques and start with appropriate materials. The therapeutic rhythm of removing material to reveal hidden forms offers a deeply satisfying creative outlet that connects us to both artistic tradition and the natural world.
Many aspiring artists hesitate to explore stone carving, assuming it requires expensive equipment, advanced skills, or years of training. The reality is far more approachable. With the right stone selection, a few basic tools, and proper guidance, beginners can create beautiful carved pieces within their first attempts. Soft stones like soapstone and alabaster yield easily to simple hand tools, making them perfect starting points for learning fundamental techniques without frustration or excessive physical strain.
This comprehensive guide presents over twenty easy stone carving ideas designed specifically for those beginning their journey into this rewarding craft. Each project builds foundational skills while producing finished pieces you’ll be proud to display or give as gifts. Whether you’re drawn to functional objects, decorative art, or sculptural forms, these ideas provide clear starting points that balance creative expression with achievable goals for newcomers to stone carving.
Smooth River Stones with Carved Initials
One of the simplest entry points into stone carving involves personalizing smooth river stones with initials or simple symbols. These naturally rounded stones require minimal shaping, allowing you to focus entirely on learning carving techniques. The finished pieces make thoughtful gifts, garden markers, or decorative paperweights that carry personal meaning.
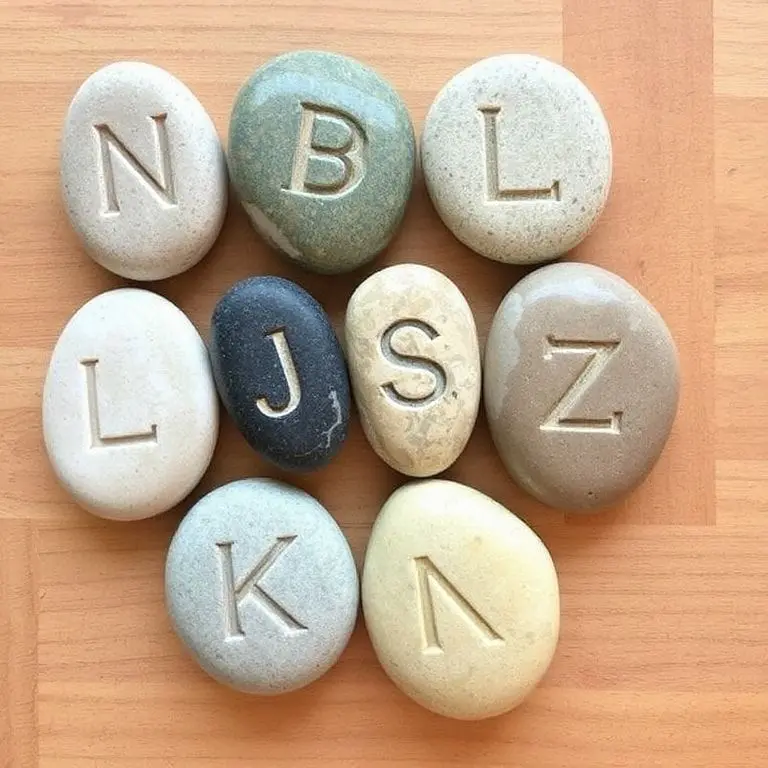
Select river stones with relatively flat surfaces that provide stable working areas. Softer sedimentary river stones work better than hard granite for beginners. Sketch your initials lightly with pencil on the stone surface before beginning. Use a small chisel or diamond-tipped engraving tool to carefully follow your lines, working slowly to develop control and precision.
The beauty of this project lies in its scalability. Start with simple block letters before progressing to more ornate scripts. You might carve single initials, complete names, or meaningful dates. Some carvers add simple decorative elements like borders or small symbols surrounding the letters. The natural beauty of the river stone provides an attractive backdrop that requires no additional finishing beyond light sanding and optional sealing.
Basic Soapstone Hearts
Heart shapes offer ideal first projects for learning three-dimensional carving. The symmetrical form provides clear visual feedback when something is uneven, helping develop your eye for proportion and balance. Soapstone’s soft, forgiving nature allows beginners to work confidently without fear of irreversible mistakes or tool damage.
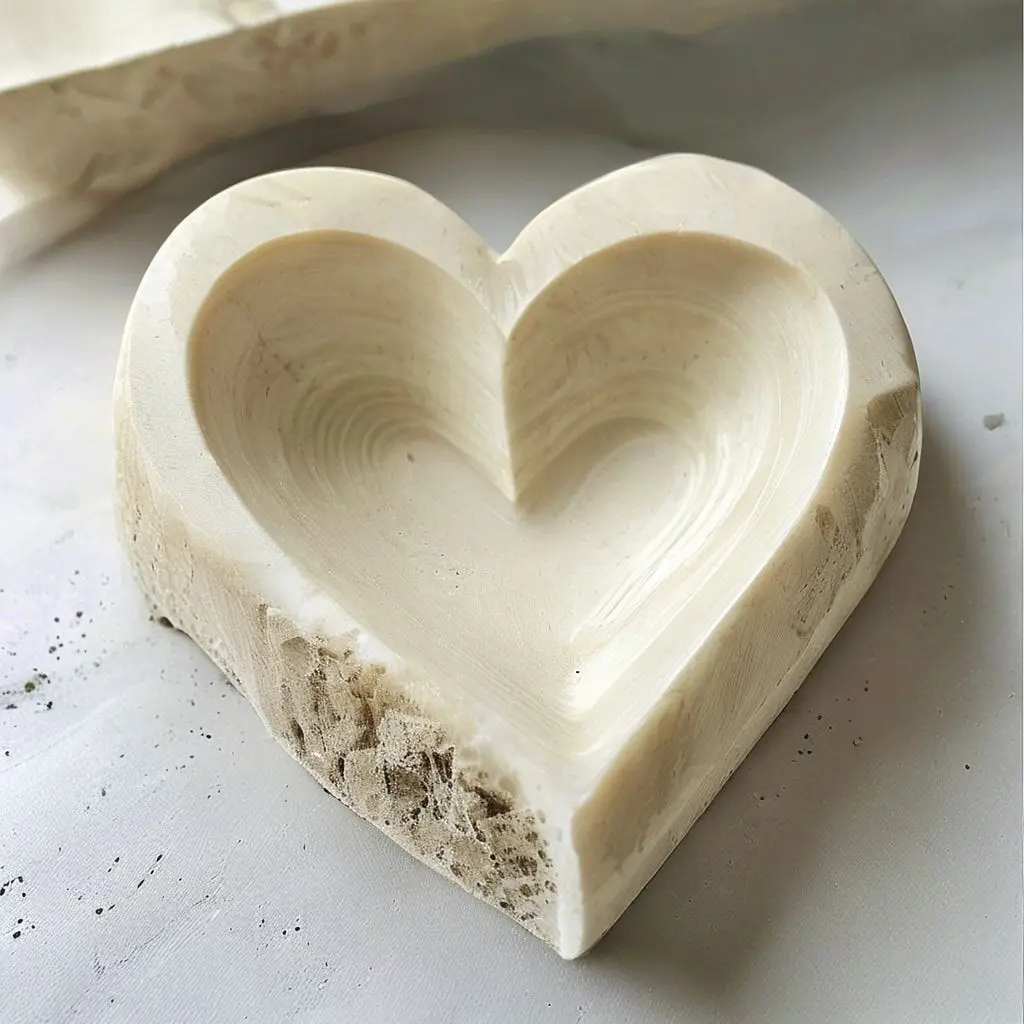
Begin with a rectangular piece of soapstone approximately three inches by three inches. Draw a heart outline on the widest face, then sketch side views showing the heart’s thickness. Use a small saw to remove excess material from the corners, creating a rough heart outline. Files and rasps refine the shape, smoothing curves and establishing symmetry between the two lobes.
As you work, frequently rotate the piece to evaluate proportions from all angles. The heart should appear balanced from front, back, and side views. Sanding progresses through increasingly fine grits, transforming the rough surface into smooth, touchable sculpture. Many carvers leave soapstone hearts in their natural gray or white tones, while others apply oil finishes that deepen colors and add subtle sheen.
Simple Geometric Shapes
Geometric forms like cubes, spheres, and pyramids teach fundamental carving principles while producing clean, modern sculptures. These projects develop essential skills in measurement, symmetry, and surface finishing. The abstract nature removes pressure to achieve realistic representation, allowing you to focus on technique and craftsmanship.
Cube carving teaches flat surface creation and right-angle precision. Start with a roughly cubic piece of soft stone, then carefully work each face until all six sides are flat, smooth, and perpendicular to their neighbors. This seemingly simple project reveals much about tool control and patience. Spheres present different challenges, requiring constant rotation and evaluation to achieve uniform roundness in all directions.
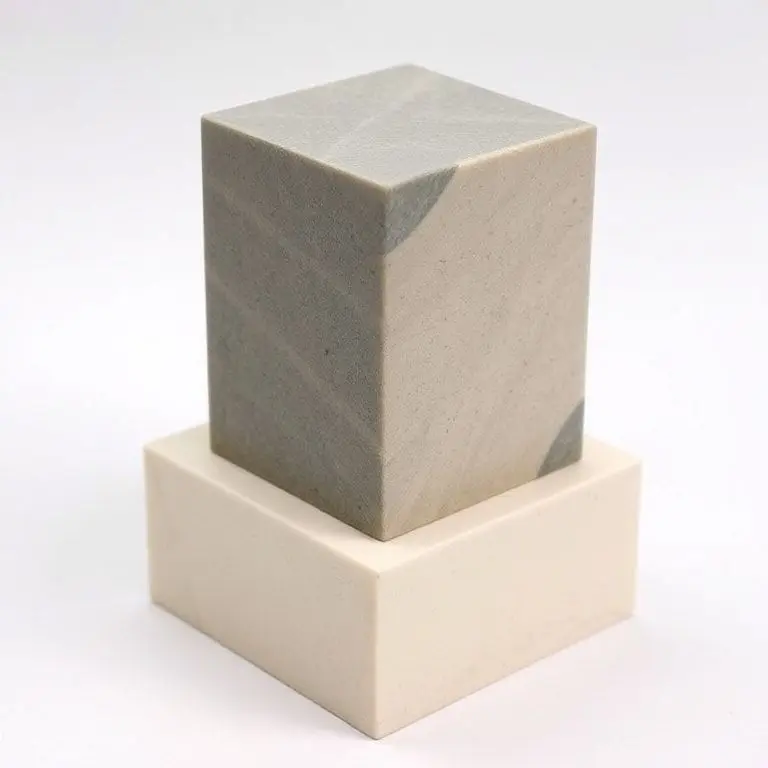
Pyramids combine flat surfaces with angled planes, introducing concepts you’ll use in more complex projects. The four triangular faces must meet precisely at the apex while maintaining equal angles and smooth transitions. These geometric exercises might seem basic, but they build muscle memory and visual judgment that benefit all future carving work. Display them as minimalist art or use them as learning references when teaching others.
Decorative Leaf Patterns in Relief
Relief carving involves removing material from a flat surface to create designs that project outward at varying depths. Leaf patterns work wonderfully for first relief projects because their organic shapes forgive small irregularities while still producing recognizable, attractive results. The flowing lines and natural asymmetry of leaves feel intuitive to carve.
Select a flat piece of limestone or sandstone approximately six inches square. Sketch your leaf design on the surface, including the central vein and smaller branching veins. Begin by outlining the leaf shape with a small chisel, creating a shallow trench around the perimeter. This establishes the leaf boundaries and prevents accidental damage to surrounding areas.
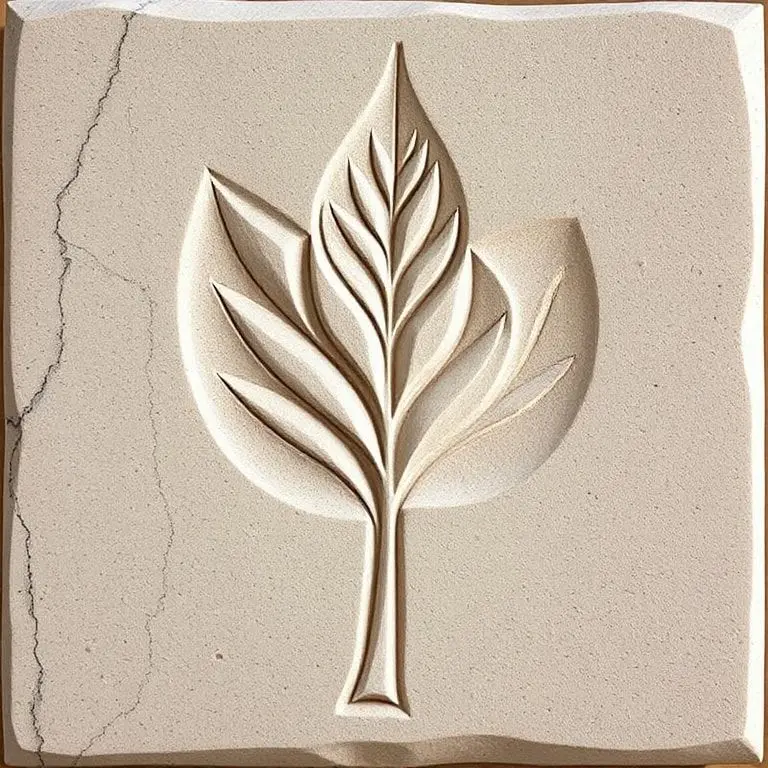
Gradually remove material from the background, working carefully to maintain even depth. The leaf itself remains at the original surface level while everything around it recedes. Add detail by carving the vein patterns, creating subtle grooves that follow the leaf’s natural structure. Some carvers leave backgrounds rough-textured for contrast, while others smooth them completely. This technique translates to countless subjects beyond leaves, opening possibilities for monograms, animals, or abstract patterns.
Small Animal Figurines
Simplified animal forms introduce figurative carving without overwhelming detail. Birds, fish, turtles, and similar creatures can be reduced to essential shapes that remain recognizable while staying within beginner skill levels. These projects teach proportion, form, and the art of suggesting details rather than rendering them precisely.
A sitting cat makes an excellent first animal project. The basic form consists of a rounded body, small head, and triangular ears. Sketch the profile on your stone, then remove material from areas that recede, like the space between the head and body or beneath the tail. Work gradually, stepping back frequently to assess the emerging form from multiple angles.
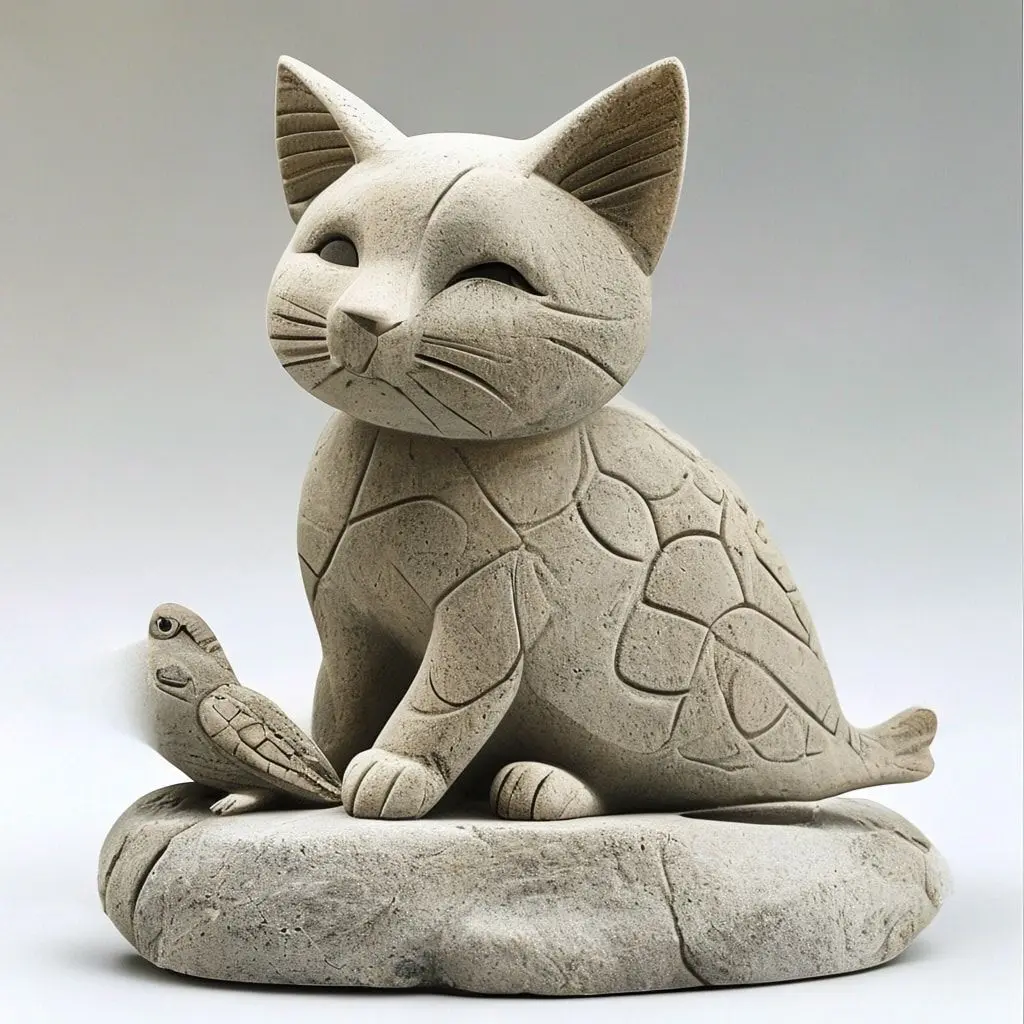
The key to successful simplified animal carving lies in capturing characteristic postures and proportions rather than anatomical accuracy. A bird needs recognizable body, head, and beak relationships even if individual feathers aren’t carved. A fish requires appropriate body taper and fin placement without scale detail. These abstracted forms often possess more charm and artistic merit than overly detailed attempts that exceed beginner capabilities.
Polished Worry Stones
Worry stones are smooth, oval stones with a thumb-sized indentation on one side, traditionally used for stress relief through rhythmic rubbing. Creating these functional items combines basic shaping with extensive finishing work, teaching patience and the satisfaction of achieving glass-smooth surfaces. The finished stones make practical gifts that recipients actually use.
Start with an oval piece of soapstone or alabaster approximately two inches long. The stone should fit comfortably in your palm. Mark the center of one flat side, then use files or rasps to create a shallow depression roughly the size of your thumb. Work carefully to maintain smooth, even curves without creating flat spots or irregular depths.
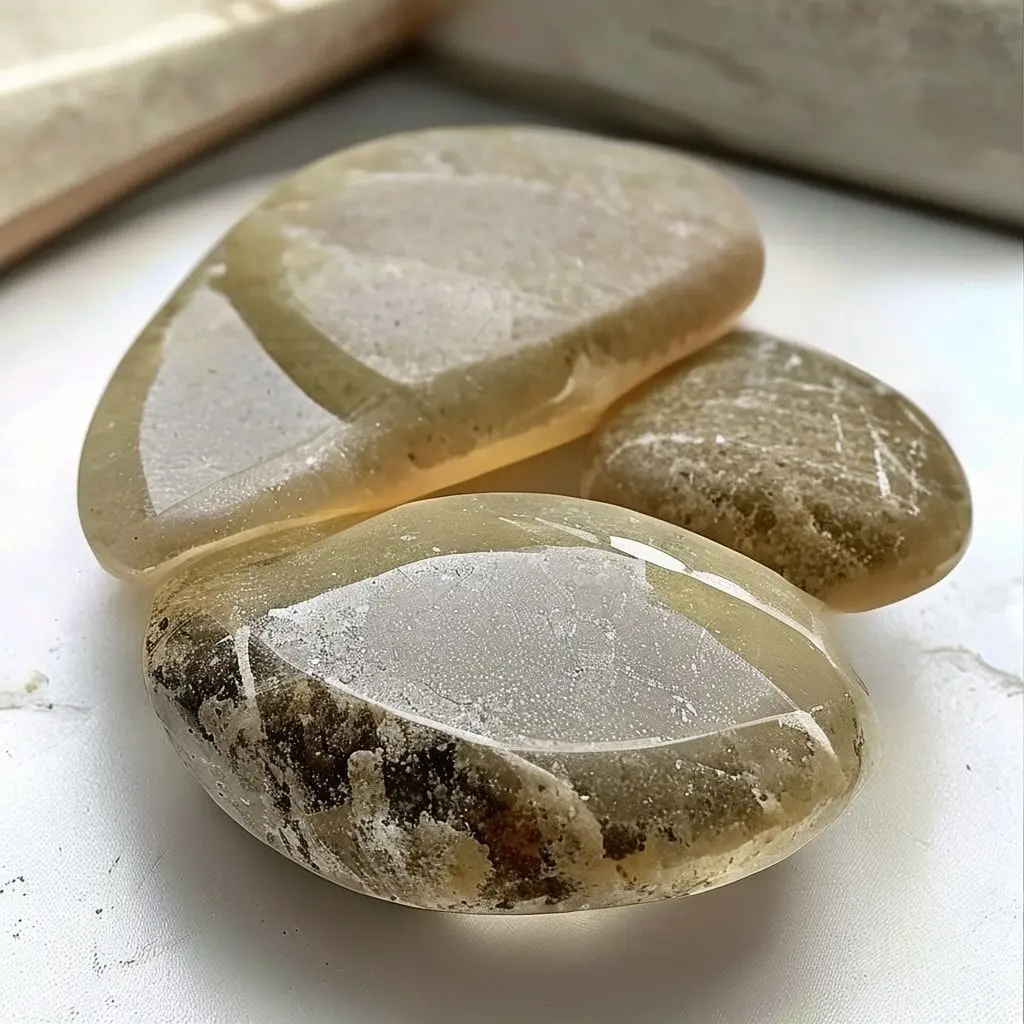
The real work in worry stone creation comes during finishing. Progress through sandpaper grits from coarse to very fine, spending time at each level to remove scratches from the previous grit. The goal is a completely smooth surface that feels pleasant to touch. Some carvers finish with wet sanding at ultrafine grits, then apply oil or wax for a subtle sheen. The repetitive sanding work itself becomes meditative, preparing you for the stone’s intended purpose.
Garden Name Markers
Carved stone garden markers combine functionality with artistic expression, creating permanent labels for herb gardens, vegetable plots, or memorial plantings. These vertical or horizontal markers weather outdoor conditions beautifully while adding rustic charm to planted areas. The project practices letter carving in a forgiving context where perfect precision matters less than character and durability.
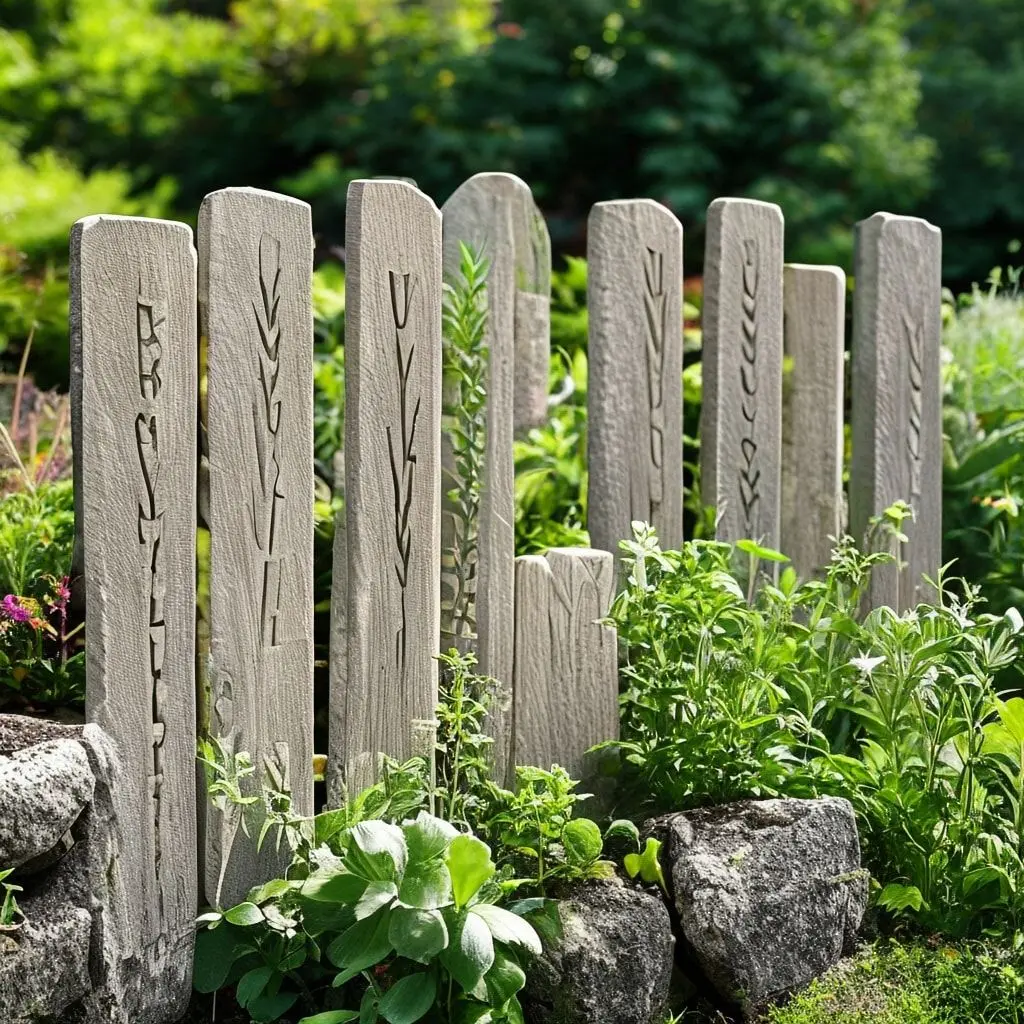
Choose limestone or sandstone pieces approximately four to eight inches tall and one to two inches thick. Plan your layout carefully, considering letter size and spacing before making the first cut. Block letters work better than cursive for outdoor visibility and carving ease. Use a chisel to carve letters in shallow relief, making them deep enough to remain visible after years of weathering.
Consider carving decorative elements alongside the plant names. Small leaf motifs, simple borders, or corner flourishes personalize each marker. If creating multiple markers for one garden, maintain consistent letter sizes and styles for visual cohesion. Some carvers paint carved letters with outdoor paint for high contrast, while others prefer the subtle shadow-based visibility of unpainted carved letters against natural stone.
Abstract Flowing Forms
Abstract sculpture frees you from representational accuracy, allowing pure exploration of form, balance, and movement. Flowing, organic shapes suggest natural elements like wind, water, or growth without depicting specific subjects. These projects develop your ability to see and create pleasing curves, transitions, and spatial relationships.
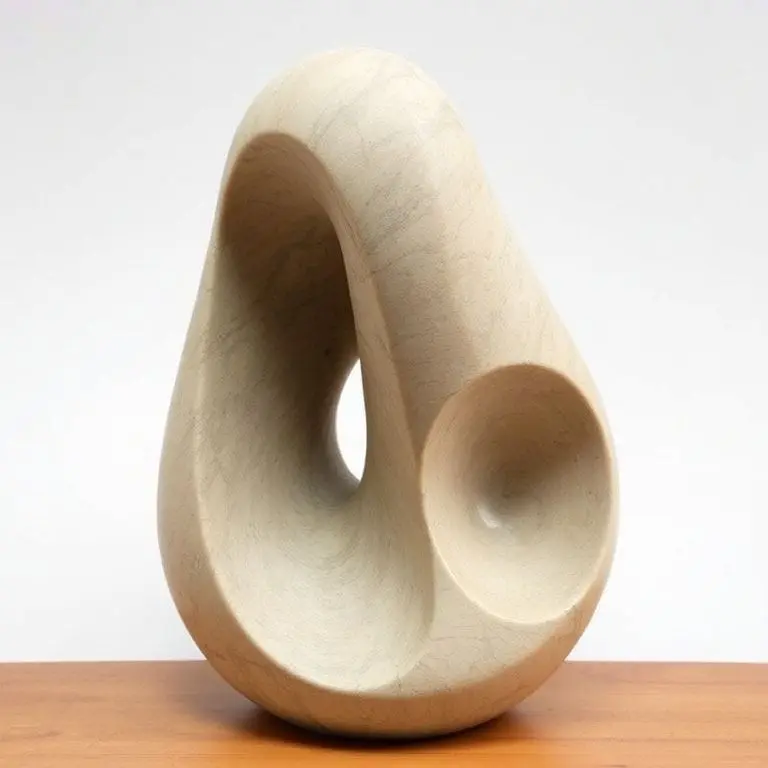
Begin with a piece of soft stone without preconceived plans for the final form. Let the stone’s natural shape suggest possibilities. Perhaps one end tapers naturally, suggesting upward movement. Maybe an interesting grain pattern deserves emphasis through thoughtful shaping. Remove material gradually, following intuitive responses to emerging forms rather than predetermined designs. https://casolia.com/easy-stone-carving-ideas/
The freedom of abstract work can feel uncomfortable at first. Without clear goals, how do you know when the piece is finished? Trust your developing aesthetic sense. Rotate the sculpture frequently, evaluating it from all angles. Does it feel balanced? Do curves flow smoothly or create awkward transitions? Does the piece communicate the feeling you intended? Abstract carving teaches you to trust artistic instincts that benefit all creative work.
Simple Bowl or Dish Forms
Carved stone bowls range from rustic primitive styles to refined contemporary forms. Beginner versions focus on basic hollow shapes rather than perfect symmetry or paper-thin walls. These functional objects teach interior carving techniques while producing useful items for holding jewelry, keys, or decorative objects.
Start with a piece of soapstone at least three inches thick and four to six inches in diameter. Mark the desired bowl outline on the top surface, leaving at least half an inch of material around all edges for walls. Use chisels and gouges to remove material from the center, working gradually deeper while maintaining relatively even depth across the interior.
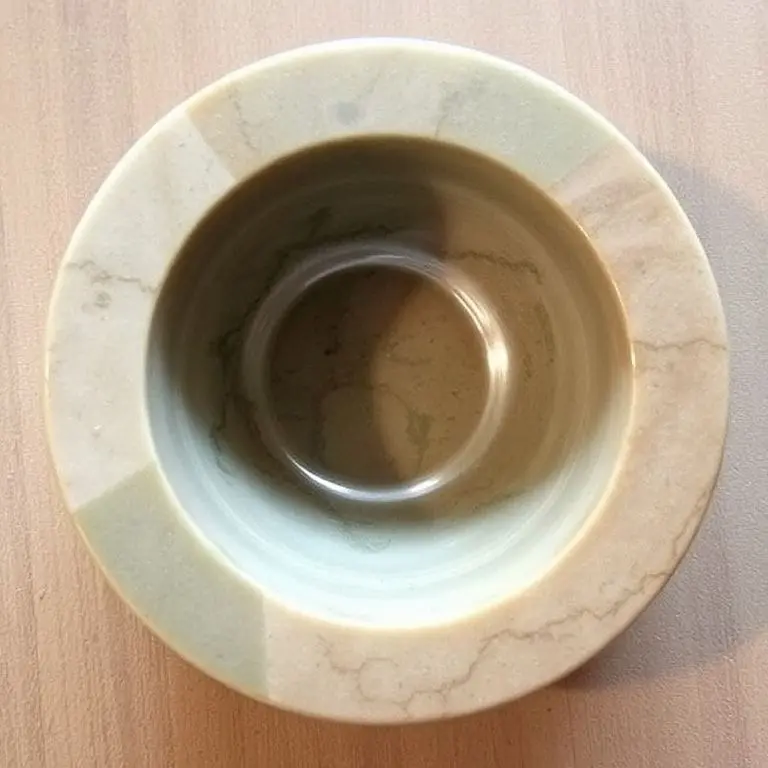
Bowl carving requires frequent measurement to ensure you don’t break through the bottom. Many beginners use calipers to check wall thickness as they work. The interior doesn’t need perfect smoothness initially; focus first on establishing shape and uniform walls. Refining and smoothing come later with smaller tools, files, and sandpaper. The finished bowl might hold potpourri, serve as a soap dish, or simply display the stone’s natural beauty.
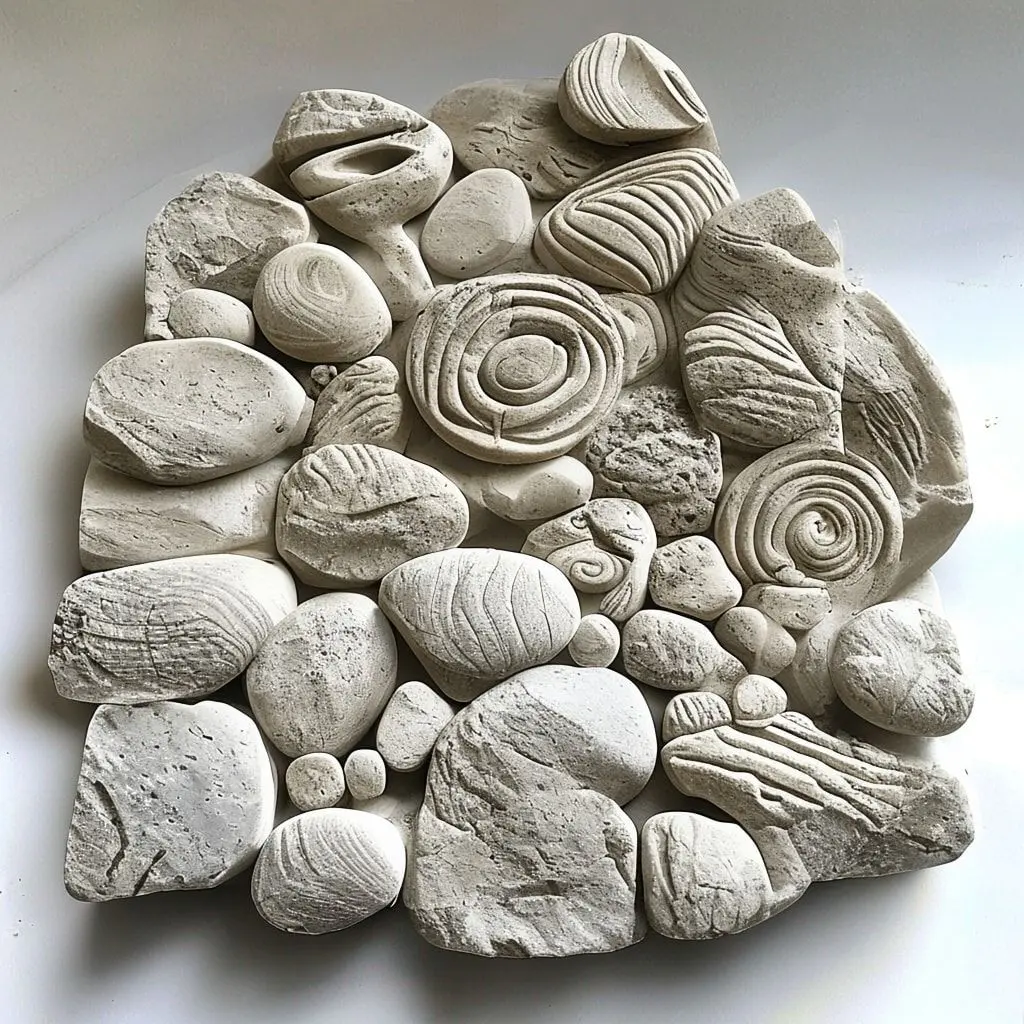
Textured Surface Experiments
Not all carving involves creating specific forms. Exploring various textures and surface treatments builds skills while producing interesting abstract pieces or backgrounds for future relief carvings. Different tool techniques create distinct visual and tactile effects that add dimension and interest to carved work
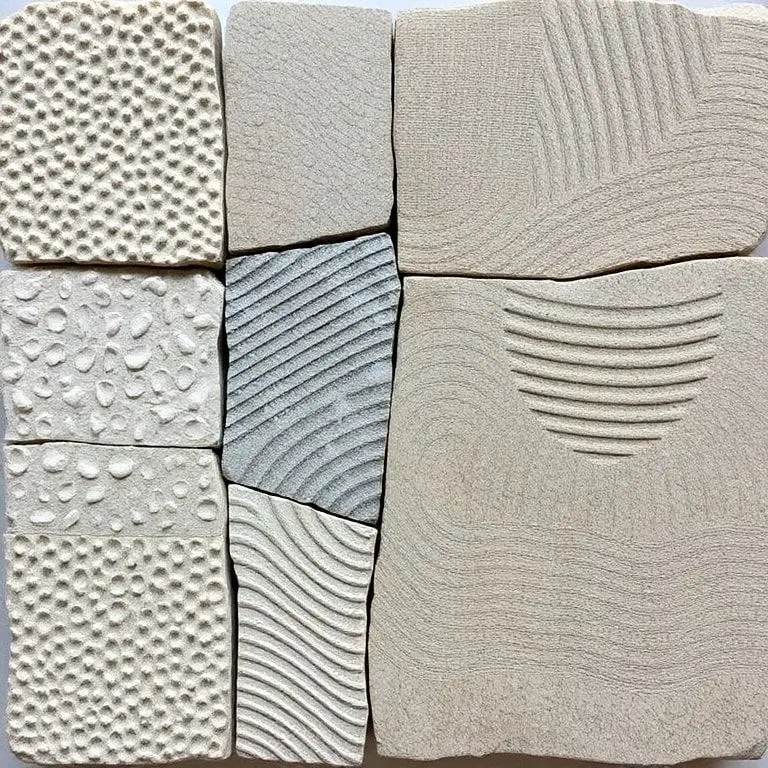
Dedicate a flat stone piece to texture sampling. Divide the surface into sections, creating different textures in each area. Try stippling with a pointed tool for a rough, organic texture. Use a flat chisel to create parallel grooves of varying spacing. Experiment with crosshatching, random chipping, or deliberate fracturing for different effects. Some textures catch light dramatically, while others absorb it for matte appearances.
These experiments teach you how various tools interact with stone and how different surface treatments affect the finished piece’s character. You’ll discover which textures appeal to you aesthetically and which suit different subjects. The sample piece becomes a reference for future projects when you need specific textural effects. Many carvers frame these experimental pieces as abstract art showcasing stone’s versatility.
Miniature Mushroom Clusters
Mushroom forms offer organic shapes that remain recognizable even when simplified dramatically. The rounded caps and straight stems reduce to basic cylinder and dome combinations, making them accessible first projects in creating multiple related elements within one piece. Clustering several mushrooms together creates visual interest and compositional challenge.
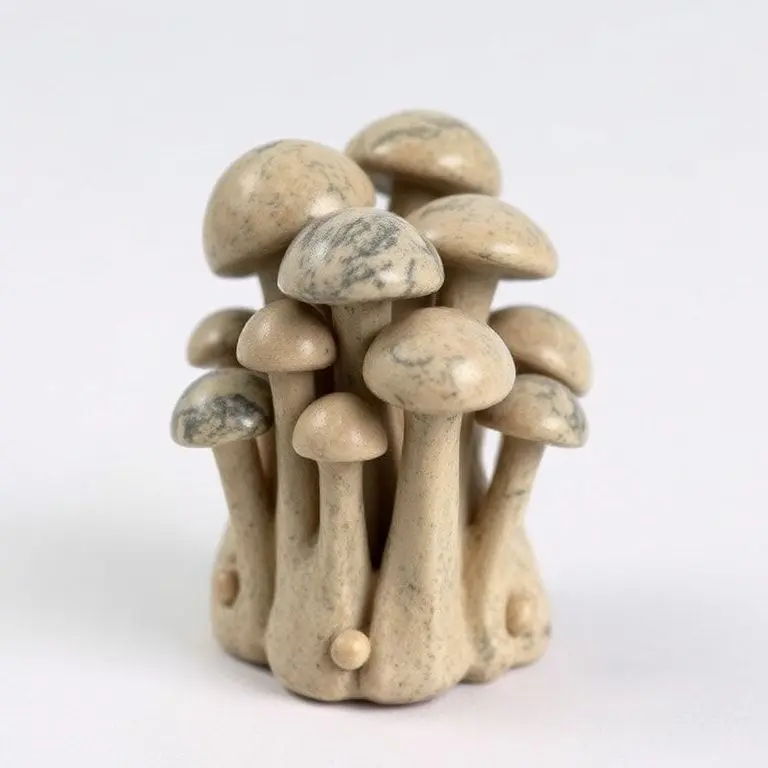
Use a piece of soft stone approximately four inches square and three inches tall. Sketch mushroom outlines showing varying heights and cap sizes. Begin by establishing the tallest mushroom, carving away material from around the cap and defining the stem. Add additional mushrooms at different heights, leaving some caps touching or overlapping for natural appearance.
The beauty of mushroom clusters lies in their variety. Different cap sizes, stem heights, and slight angle variations create organic randomness. Some carvers add simple gills underneath caps by making shallow radial grooves. Others texture stems to suggest natural surface details. The cluster can stand freely as sculpture or be carved in relief on a larger stone surface. This project teaches planning multiple elements within confined space while maintaining overall composition.
Stackable Meditation Stones
Inspired by naturally balanced rock cairns, carved meditation stones are shaped to stack stably despite irregular forms. These pieces combine aesthetic shaping with the functional challenge of creating surfaces that balance properly. The finished stacks become contemplative desk objects or garden features.
Create a set of three to five stones in graduated sizes, each shaped from soft stone. Unlike perfectly flat stacking surfaces, these stones feature gentle curves or slight irregularities that require careful placement to balance. The challenge lies in carving complementary curves on adjacent stones that nestle together while remaining stackable in multiple configurations.
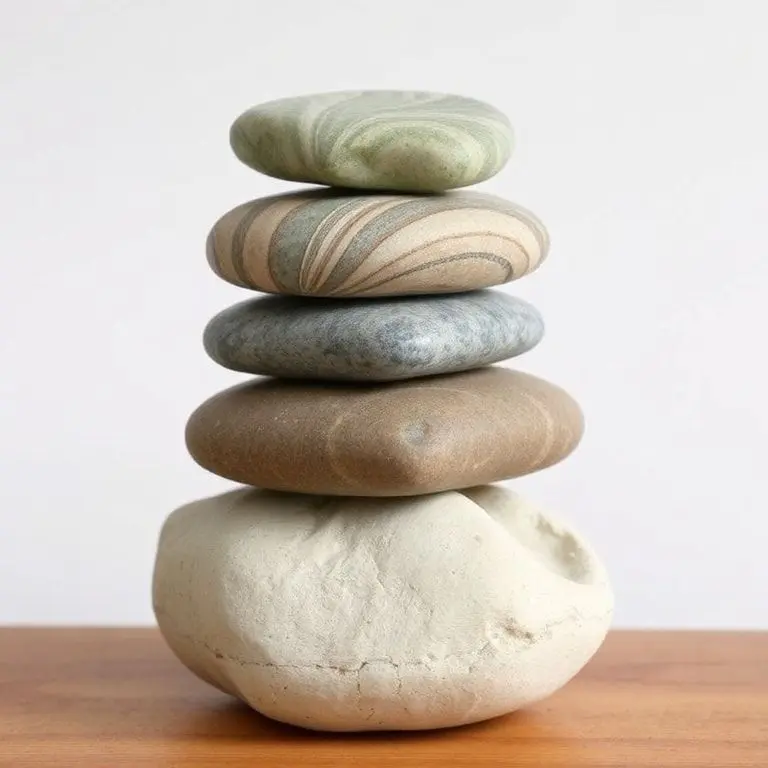
Shape each stone individually, smoothing all surfaces and removing sharp edges. Test stacking combinations as you work, adjusting contact points where stones wobble or slide. The process becomes a conversation between carving and balancing, form and function. Some carvers add subtle carved patterns or textures to each stone’s surface. The meditative quality emerges both in creating the stones and in the mindful stacking practice they enable.
Simple Face Profiles
Human face profiles present carving challenges while remaining achievable for beginners when simplified appropriately. Rather than attempting photorealistic portraits, focus on essential elements like forehead, nose, lips, and chin in basic proportions. These projects introduce facial anatomy and the challenge of creating recognizable human features.

Work on a flat piece of stone approximately six inches tall. Draw a simple profile showing the face from the side. The forehead, nose, and chin should project forward from the general face plane. Begin by outlining the profile, then carefully remove background material. Work gradually on facial features, establishing the nose bridge, tip, and nostril area before refining.
Keep details minimal at first. A simplified eye, basic nose shape, and suggestion of lips communicate “face” without requiring advanced skill. The profile format eliminates the challenge of achieving bilateral symmetry present in front-facing portraits. As confidence grows, add subtle details like eyebrow definition or lip curves. Many beginners find success by working from reference photos, measuring proportions carefully before translating them to stone.
Carved Stone Pendants
Small-scale carving for wearable pendants teaches precision and finishing while producing jewelry-sized art. These projects require extra care since flaws become obvious at close viewing distances. The small size means less material removal, allowing beginners to complete pieces quickly while practicing detailed work.
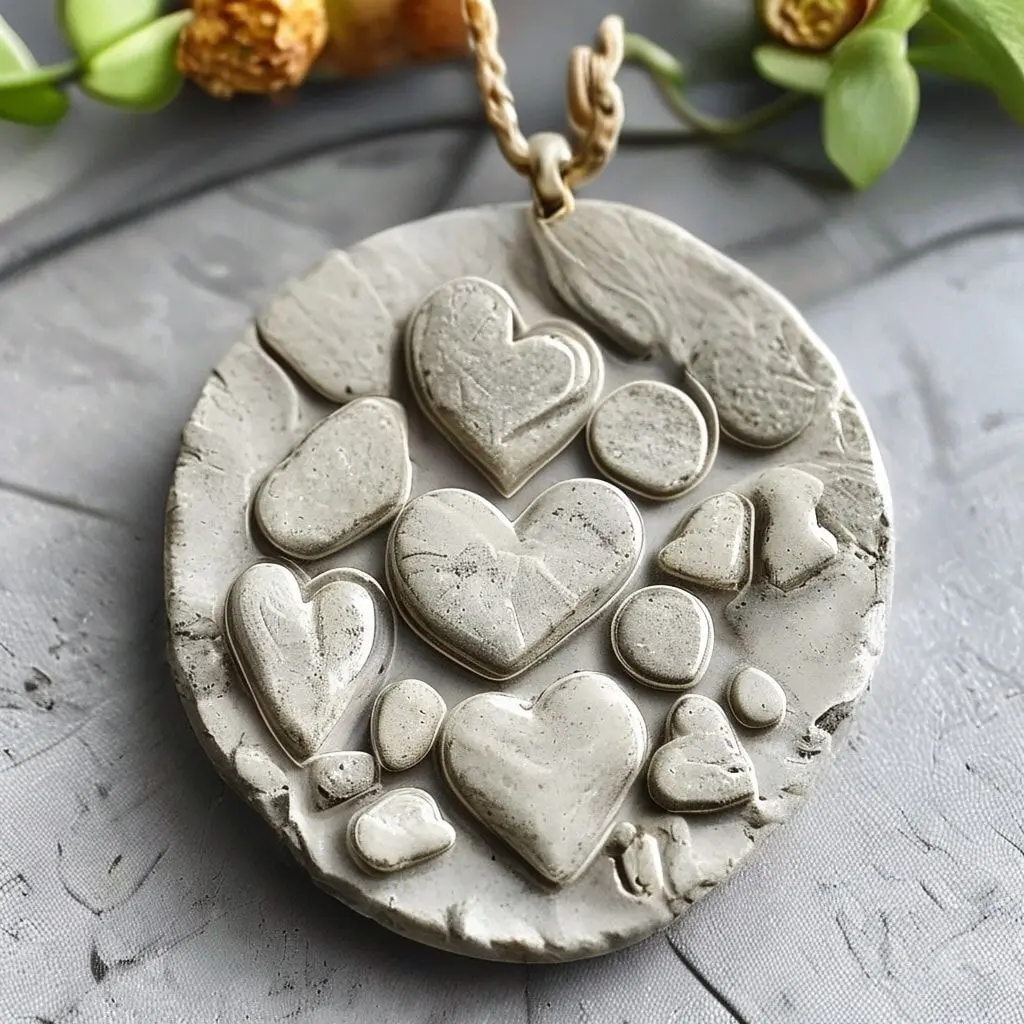
Select thin pieces of attractive stone like soapstone, alabaster, or serpentine approximately one to two inches in diameter. Design shapes that work for pendants: hearts, teardrops, simple animals, or abstract forms. Carve carefully, knowing the final piece will hang at eye level where details matter. Drill a hole for cord or chain using a small bit, working from both sides to prevent chipping.
Pendant carving demands excellent finishing. Progress through fine sandpaper grits until surfaces feel completely smooth. Consider the stone’s natural colors and patterns, positioning designs to showcase attractive features. Some carvers apply oil finishes to enhance colors and protect surfaces. The small scale makes these ideal gifts that recipients treasure for their handmade quality and personal significance.
Decorative Bookends
Functional carved bookends combine practical utility with artistic expression. These paired pieces can match exactly or relate thematically while maintaining individual character. The project teaches creating multiple related pieces and solving the engineering challenge of adequate weight and stability for actual bookend function.
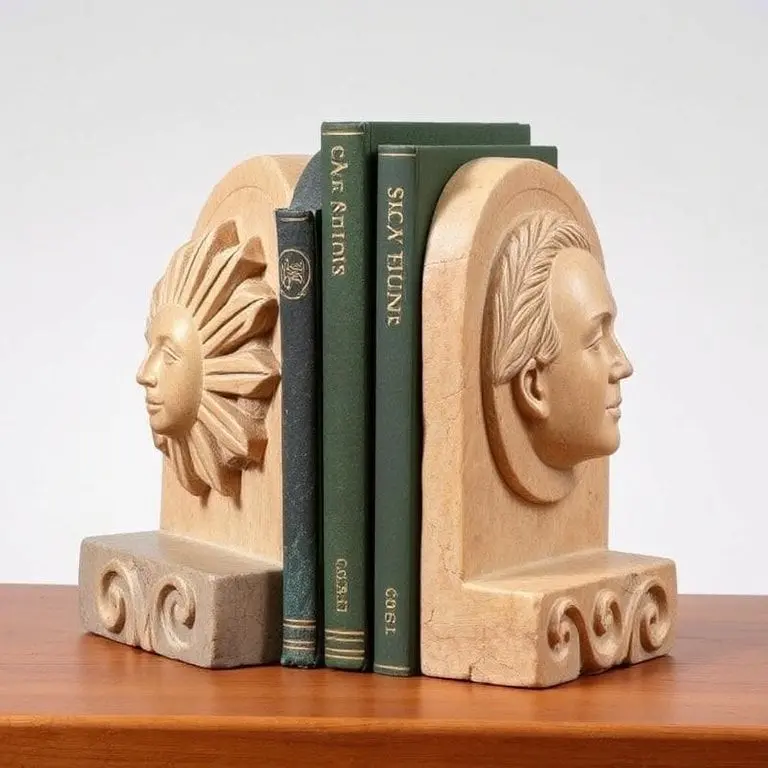
Each bookend requires a substantial stone base, typically four to six inches tall and deep enough to support books without tipping. The front face provides the artistic surface for carving. You might create matching designs on both bookends or develop complementary themes, like sun and moon, or beginning and end of a story told across two stones.
Consider weight distribution carefully. The bookend must be heavy enough and positioned so it doesn’t tip forward under book pressure. Some carvers add felt or cork to the bottom surfaces to protect furniture. The carved face might feature relief designs, three-dimensional elements, or simple textures. Because bookends function as pairs, they teach you to work consistently across multiple pieces, maintaining similar styles, depths, and finishing quality.
Stylized Tree or Plant Forms
Simplified tree shapes capture essential characteristics of wood and foliage without botanical precision. These vertical sculptures teach balanced composition, tapering forms, and the art of suggesting texture and detail through simplified carving. The organic subject matter feels natural in stone, bridging the transition from abstract to representational work.
A basic tree form consists of a tapered trunk with a rounded or irregular crown suggesting foliage. Begin with a vertical stone piece approximately six to eight inches tall. Mark the trunk area, planning trunk width, taper rate, and crown size. Remove material from around the trunk, creating roundness and natural taper from base to crown. The crown can remain a simple rounded mass or receive texture suggesting leaves or branches.
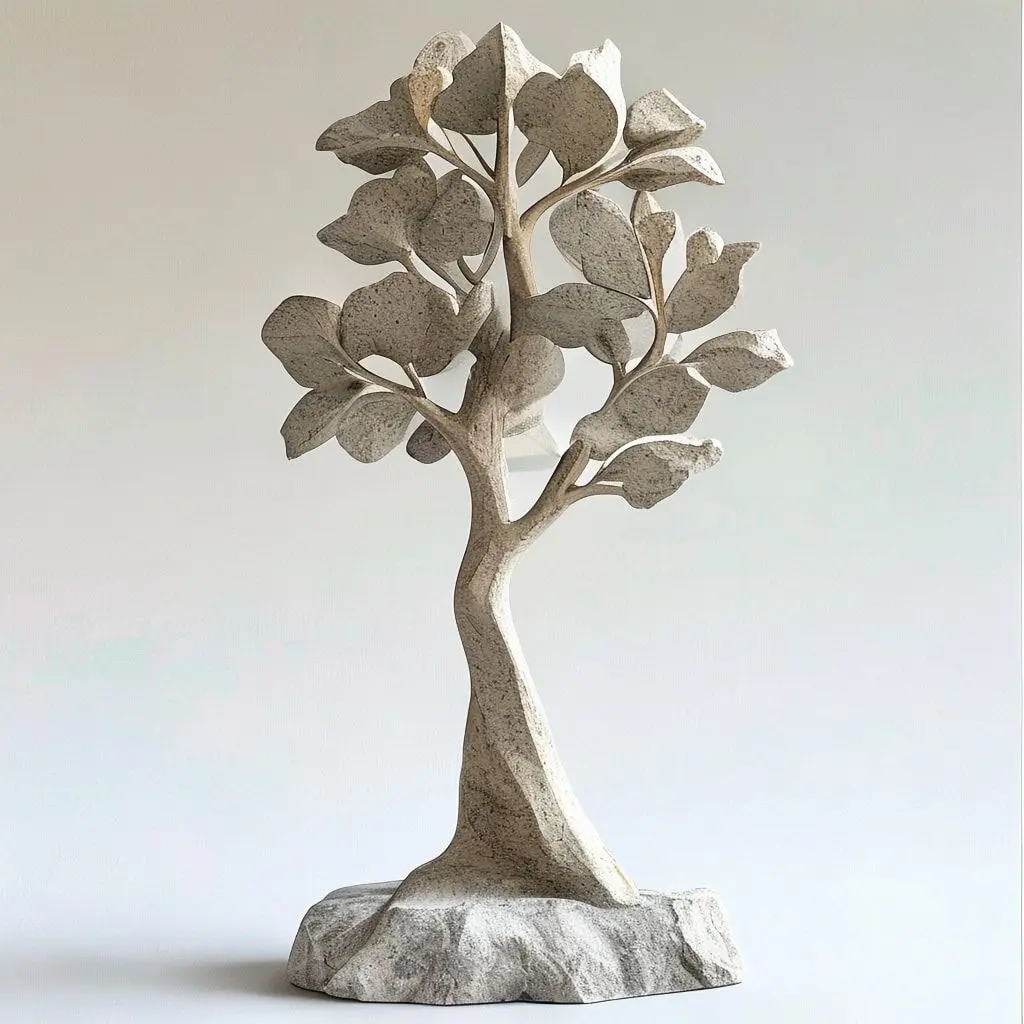
Some carvers add minimal branch suggestions extending from the trunk into the crown area. Others keep forms completely simplified, relying on proportions and silhouette to communicate “tree.” Root suggestions at the base add visual interest and improve stability if the piece stands freely. The project scales well, from small desk sculptures to larger garden pieces, with techniques remaining consistent across sizes.
Smooth Touchstones with Carved Spirals
Spiral patterns carry universal symbolic meanings while offering satisfying carving practice. Combined with smooth, palm-sized stones, carved spirals create touchstones that invite handling and contemplation. The flowing curves teach controlled tool work and planning carved lines that follow pleasing paths across three-dimensional surfaces.
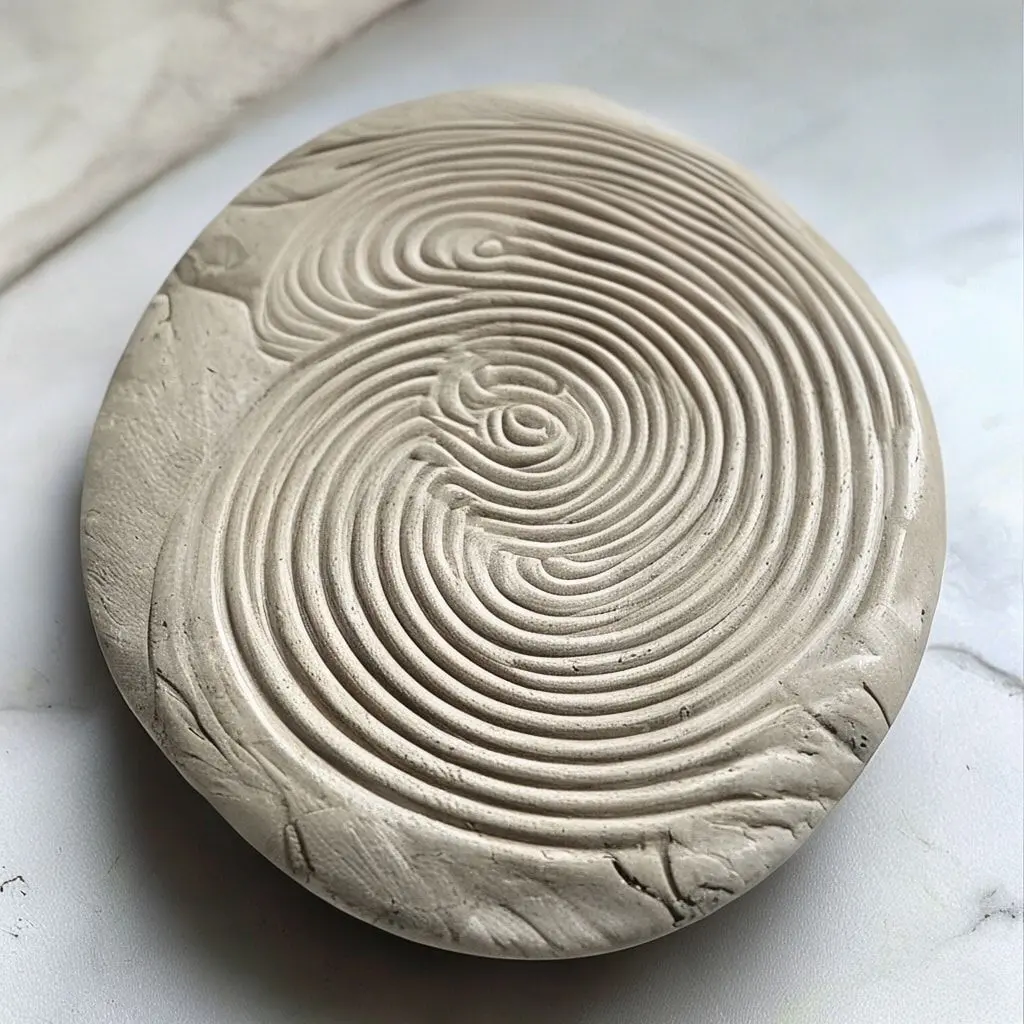
Select an oval or rounded stone that fits comfortably in your hand. Mark a spiral pattern on the smoothest surface, planning the spiral’s center point and path carefully. Use a small chisel or rotary tool to carve the spiral groove, maintaining consistent depth and width as the spiral expands. The carved line creates visual interest and provides tactile feedback when fingers trace the pattern.
Spirals can be simple or complex. A basic Archimedean spiral maintains even spacing between rotations, while more elaborate designs might vary groove width or depth for visual interest. Some carvers add multiple spirals on one stone or create spiral patterns that wrap around curved surfaces. Extensive sanding ensures all surfaces feel pleasant to touch, fulfilling the touchstone’s purpose as a calming, handheld object.
Basic Letter Monograms
Letter carving develops precision and attention to detail while creating personalized decorative pieces. Monograms make excellent gifts and teach fundamental techniques applicable to more complex text carving. The limited character count keeps projects manageable while still requiring careful planning and execution.
Choose a square or rectangular stone approximately four inches across. Plan your monogram layout, considering single initials, three-letter combinations, or intertwined letters. Draw the letters on the stone surface, paying attention to proportions, spacing, and visual balance. Decide whether to carve letters in relief, where letters project from recessed backgrounds, or incised, where letters are carved into the surface.
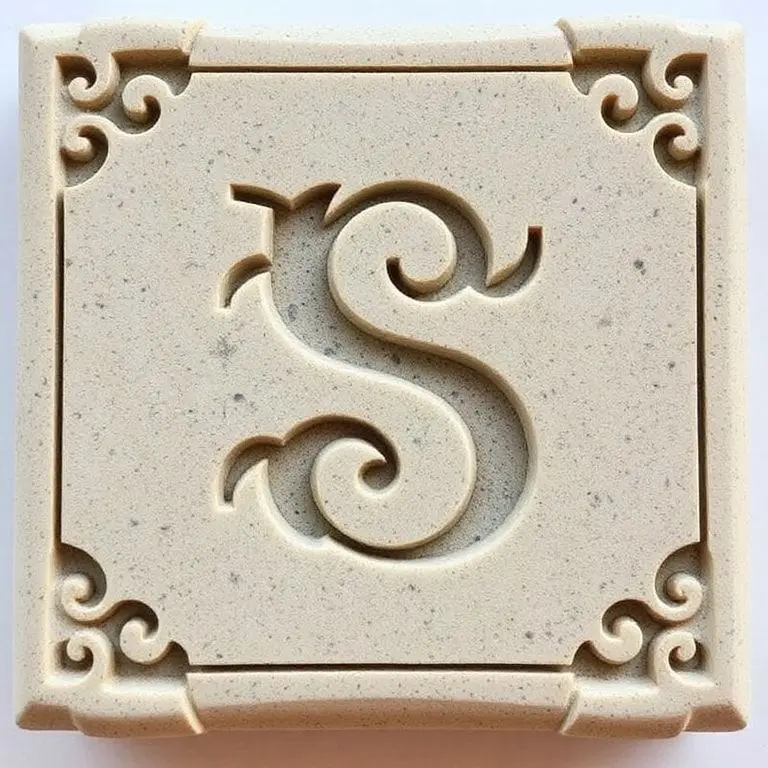
For relief letters, outline each letter with a chisel, then carefully remove background material to a consistent depth. The letters remain at the original surface level, standing out against the lowered background. Incised letters require carving the letter forms themselves into the stone. Both approaches create effective monograms, with relief offering higher contrast and incised providing subtle elegance. Consider adding simple border designs or corner flourishes to frame the monogram.
Fish and Dolphin Sculptures
Streamlined aquatic creatures translate beautifully to stone, their flowing forms echoing the smooth, polished surfaces achievable in soft stone. Fish and dolphins can be simplified to essential torpedo shapes with fins and tails, remaining recognizable while staying within beginner skill ranges. These projects practice creating elongated forms and adding appendages that integrate smoothly with main bodies.
A basic fish form begins with an oval body that tapers toward the tail. Sketch the profile showing body depth, head position, and tail placement. Remove material from the underside to create a rounded belly, then shape the back into a gentle curve. The head narrows slightly from the body, with a simple pointed or rounded snout. Add basic fins as raised areas rather than separate elements to avoid fragile projections.

The tail presents the main challenge, requiring careful thinning without breaking. Work gradually, supporting the tail area as it becomes more delicate. Many beginners create thicker tails than realistic proportions would suggest, prioritizing durability over accuracy. Extensive sanding creates the smooth, flowing surfaces that enhance the aquatic feel. Some carvers leave fish unpainted to showcase stone’s natural beauty, while others add simple color accents.
Textured Coasters
Functional coasters carved from stone combine utility with artistic surface treatment. These small, flat projects teach controlled shallow carving while producing items used daily. The coaster format allows exploration of various patterns, textures, and designs within manageable three to four inch squares.
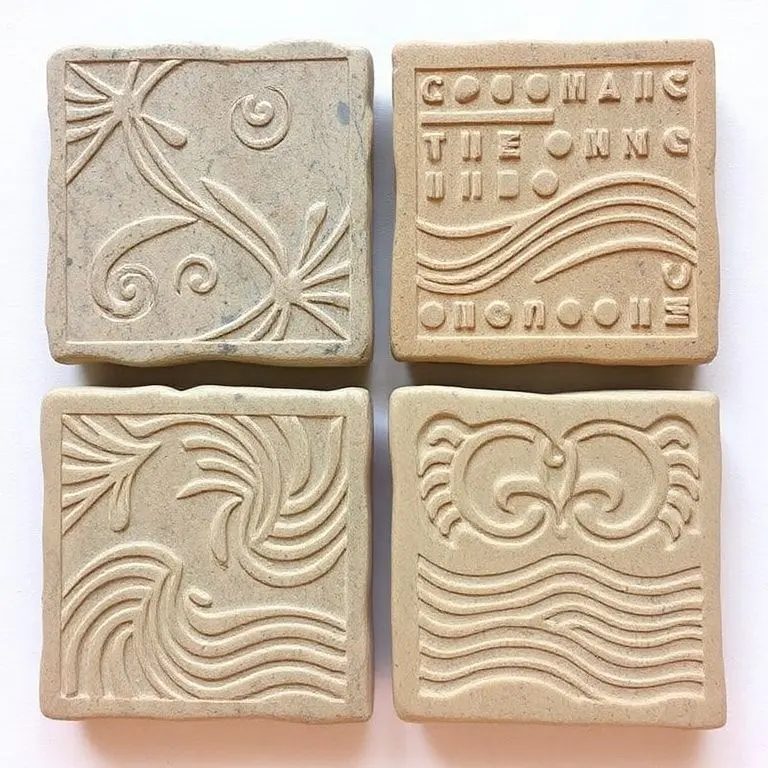
Select thin, flat pieces of limestone or sandstone approximately half an inch thick. Plan designs that work well repeated across a coaster set. You might carve simple geometric patterns, natural motifs like leaves or waves, or abstract textures. Relief carving works well, with designs standing slightly proud of the background or vice versa.
Consider drainage when designing. Slight texture or pattern helps water evaporate rather than pooling. Some carvers create subtle channels that guide condensation toward coaster edges. Seal finished coasters with appropriate products to protect against water damage and staining. Creating a matched set of four or six coasters teaches consistency across multiple pieces, an important skill for any carving work intended for sets or series.
Minimalist Bird Forms
Birds reduce to simple egg-shaped bodies with small heads and minimal detail, creating charming sculptures that suggest rather than describe their subjects. These projects teach proportion, balance, and achieving recognizable forms through silhouette and posture rather than surface detail. The results possess timeless appeal that suits various decor styles.
Begin with an oval stone approximately three to four inches long. Draw a simple bird outline showing a plump body, small head, and basic tail. The body comprises most of the mass, tapering slightly toward the tail. The head is small, emerging from the front of the body at a slight upward angle. Remove material from the neck area to differentiate head from body.
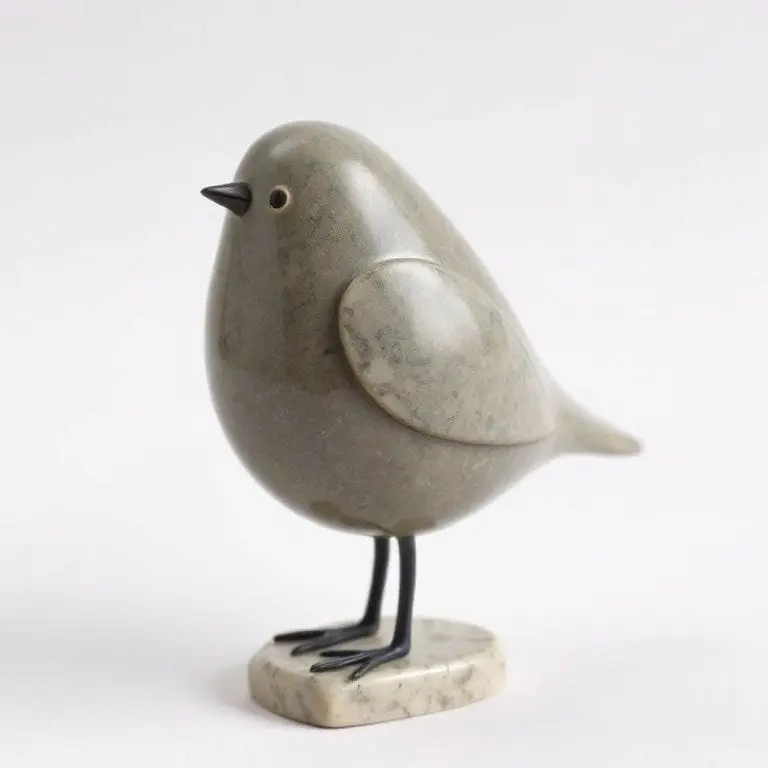
Wings can be suggested through shallow carved lines or left completely absent for maximum simplification. A small beak adds character with minimal carving. The bird can stand upright on a flat base or perch on a small carved branch element. Sanding and polishing transform the simple form into elegant sculpture. Many carvers create small flocks of minimalist birds in various poses, each sharing the same simplified aesthetic while maintaining individual character.
Conclusion
Stone carving opens doors to creative expression that connects modern makers to ancient artistic traditions spanning millennia. The projects presented throughout this guide demonstrate that beginning this rewarding craft requires neither expensive equipment nor years of training. With appropriate stone selection, basic tools, and patient practice, anyone can experience the satisfaction of revealing beautiful forms hidden within natural materials. Each project builds skills progressively, from simple letter carving to three-dimensional sculpture, establishing foundations for continued growth and exploration.
The therapeutic benefits of stone carving extend beyond the finished pieces themselves. The focused attention required creates meditative states that quiet busy minds and reduce stress. The physical engagement with natural materials grounds us in tactile reality, offering respite from screen-dominated modern life. The slow, deliberate pace of removing material teaches patience and presence, valuable qualities that enhance all areas of life. These intrinsic rewards often prove more valuable than the sculptures themselves.
As you begin exploring these easy stone carving ideas, remember that mistakes and imperfections contribute to learning. Stone forgives errors more readily than you might expect, especially when working with soft materials like soapstone and alabaster. Each flawed piece teaches lessons that inform better decisions on the next project. The carved stones that don’t meet your initial expectations often become favorites later, their quirks and irregularities revealing personality and charm that perfect pieces sometimes lack.
The journey from first tentative chisel strikes to confident carving unfolds uniquely for each artist. Some discover passion for functional items like bowls and coasters, while others gravitate toward pure sculpture. Some prefer the precision of geometric forms, while others embrace organic irregularity. All paths are valid and valuable. Allow your interests to guide project selection, and don’t hesitate to revisit ideas as your skills develop. The simple heart you carve today will look completely different when you attempt it again after six months of practice. This visible progress provides tremendous satisfaction and motivation to continue refining your craft.
Stone carving rewards those who approach it with curiosity, patience, and respect for both the material and the process. Start with projects that match your current skill level, celebrate small successes, and learn from challenges. The stones you carve will outlast most other handmade items, becoming lasting testaments to your creative journey and the timeless human urge to shape the world around us.
Frequently Asked Questions:
What is the easiest stone for beginners to carve?
Soapstone is universally recommended for beginners due to its exceptional softness and forgiving nature. It carves easily with simple hand tools, doesn’t require specialized equipment, and produces minimal dust. Alabaster offers similar workability with translucent beauty, though it’s slightly more brittle. Both stones allow beginners to focus on learning techniques rather than struggling with hard materials.
What basic tools do I need to start stone carving?
For soft stone carving, you need just a few essential tools: a set of basic chisels in various sizes, files or rasps for shaping, sandpaper in multiple grits for finishing, and safety equipment including dust masks and eye protection. Many beginners start with inexpensive starter sets before investing in higher-quality tools as their skills and commitment develop.
How long does it take to complete a simple carving project?
Simple projects like carved initials or small hearts can be completed in one to three hours, depending on your pace and detail level. More complex pieces like animal figurines or bowls might require several sessions totaling six to ten hours. The process shouldn’t be rushed, as stone carving rewards patience and careful work over speed.
Can stone carving be done indoors safely?
Yes, but proper ventilation and dust control are essential. Carving soft stones like soapstone produces fine dust that shouldn’t be inhaled. Work in well-ventilated areas, wear appropriate dust masks, and consider wet carving techniques that minimize airborne particles. Many beginners work outdoors when weather permits or dedicate garage or workshop spaces to carving activities.
How do I finish and seal carved stone pieces?
Finishing begins with progressive sanding through increasingly fine grits until achieving desired smoothness. For many soft stones, wet sanding at fine grits creates glass-like surfaces. Sealing options include natural oils like mineral oil for soapstone, or specialized stone sealers for porous materials. Outdoor pieces need weather-resistant sealers, while indoor sculptures might need no sealing at all, depending on the stone type and intended use.


One Comment