
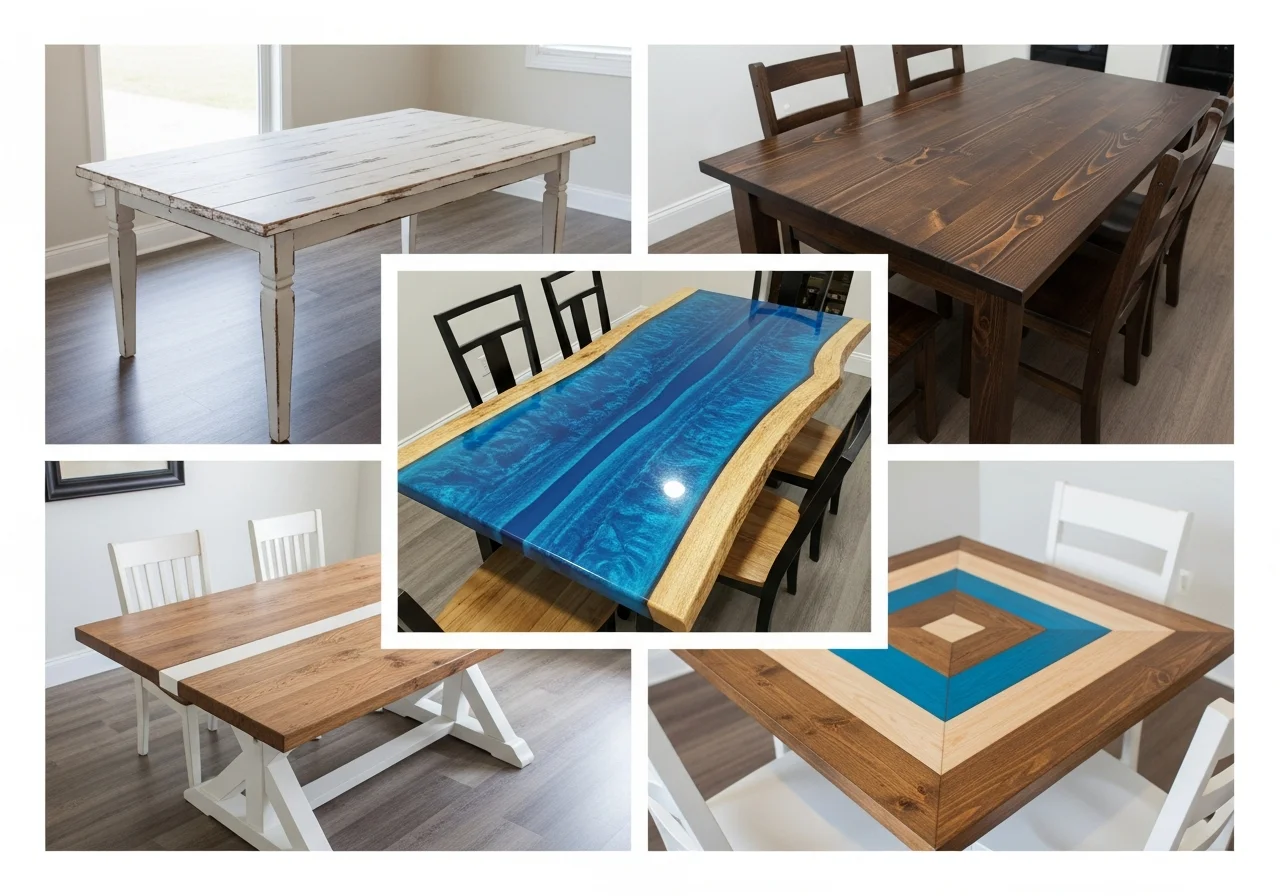
19+ Inspiring DIY Dining Table Makeover Ideas
Your dining table serves as the heart of your home, a gathering place for family meals, homework sessions, and endless conversations. Over time, even the sturdiest tables can look tired, outdated, or simply mismatched with your evolving decor. Rather than spending hundreds or thousands on a replacement, transforming your existing table through a inspiring DIY dining makeover ideas offers an affordable, rewarding alternative that lets you create something uniquely yours.
Whether you inherited a solid wood table that needs refreshing or purchased a secondhand piece with good bones but poor aesthetics, the possibilities for transformation are virtually limitless. From simple paint applications to complex refinishing techniques, each approach can dramatically alter your dining space while preserving the quality construction of older furniture that modern pieces often lack.
This comprehensive guide explores over nineteen creative approaches to revitalizing your dining table. These ideas range from beginner-friendly weekend projects to more involved transformations that showcase advanced woodworking skills. Regardless of your experience level or budget, you’ll discover methods to breathe new life into your dining area’s centerpiece.
Classic Chalk Paint Transformation
Chalk paint remains one of the most popular choices for furniture makeovers due to its forgiving nature and minimal preparation requirements. Unlike traditional paints, chalk paint adheres to most surfaces without extensive sanding or priming, making it ideal for beginners tackling their first refinishing project.
The matte, velvety finish creates an instant vintage appeal that works beautifully in farmhouse, shabby chic, or French country interiors. You can apply chalk paint in virtually any color, from soft neutrals like cream and gray to bold statement shades. After painting, many crafters distress edges with sandpaper to reveal underlying wood or previous paint layers, adding character and depth.
Sealing your chalk-painted table with wax or polyurethane protects the finish from daily wear. Clear wax enhances the matte appearance, while dark wax settles into crevices and grain patterns, emphasizing texture and creating an aged patina.
Rich Wood Stain Refresh
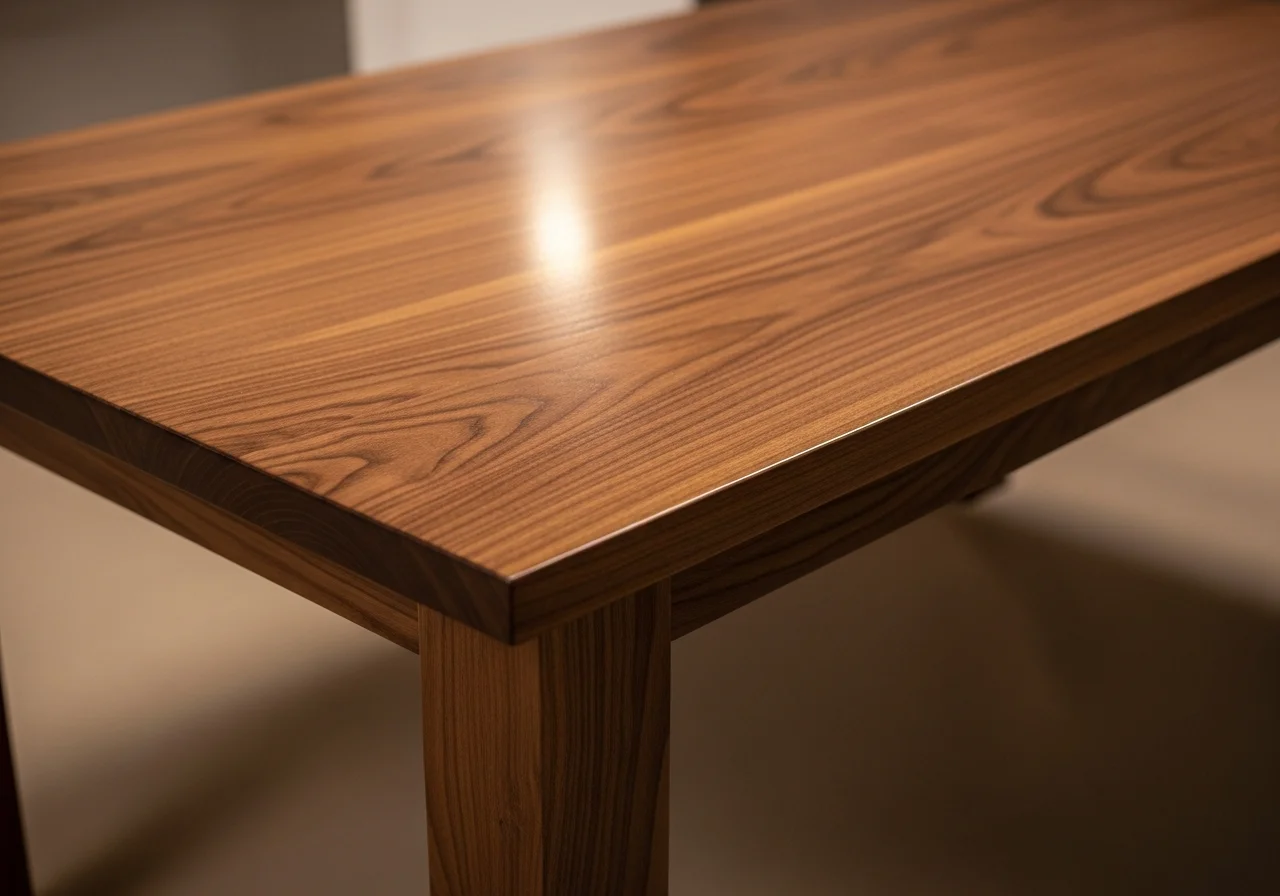
Sometimes the best transformation simply means returning wood to its natural beauty. Stripping away old finishes and applying fresh stain allows you to showcase gorgeous grain patterns while updating the color tone to match current preferences.
Modern stain options extend far beyond traditional browns. Gray-toned stains create contemporary sophistication, while weathered or driftwood finishes evoke coastal charm. Darker espresso or ebony stains deliver drama and elegance, particularly striking when paired with lighter chairs.
The staining process requires thorough preparation, including complete removal of existing finishes, careful sanding with progressively finer grits, and proper wood conditioning for even absorption. Though more labor-intensive than painting, staining preserves the tactile quality and visual depth that makes solid wood furniture so appealing.
Two-Tone Design Appeal
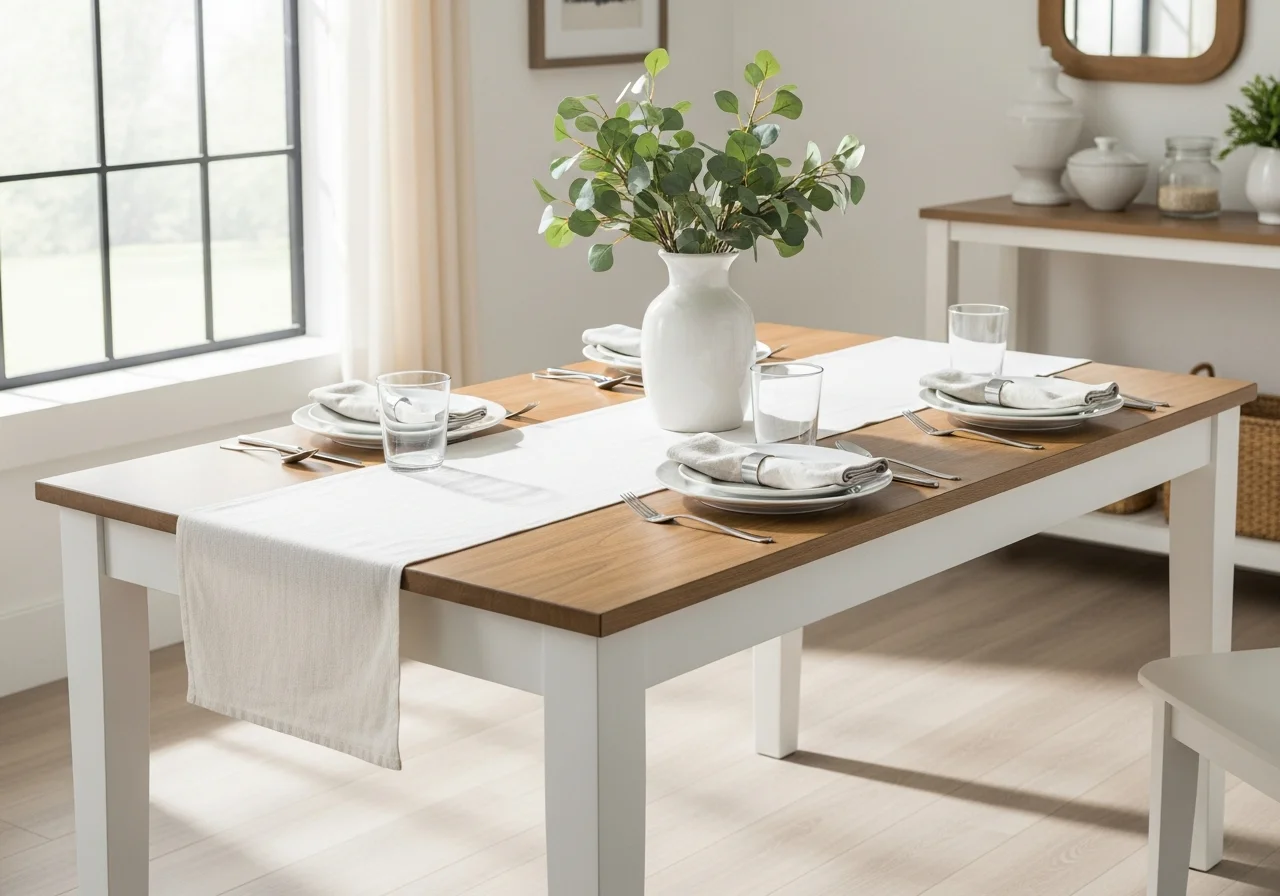
Creating contrast through two-tone finishes adds visual interest and can make design statements that single-color treatments cannot achieve. The most common approach involves painting the table base while staining or painting the top in a complementary shade.
Popular combinations include white or cream bases with natural wood or gray tops, navy bases with walnut-stained surfaces, or black legs supporting lighter painted tabletops. This technique allows you to incorporate trendy colors through the base while maintaining a practical, durable finish on the eating surface.
Two-tone designs also help define the table’s architectural elements. Painting turned legs, aprons, or decorative details in contrasting colors highlights craftsmanship that might otherwise go unnoticed in single-color applications.
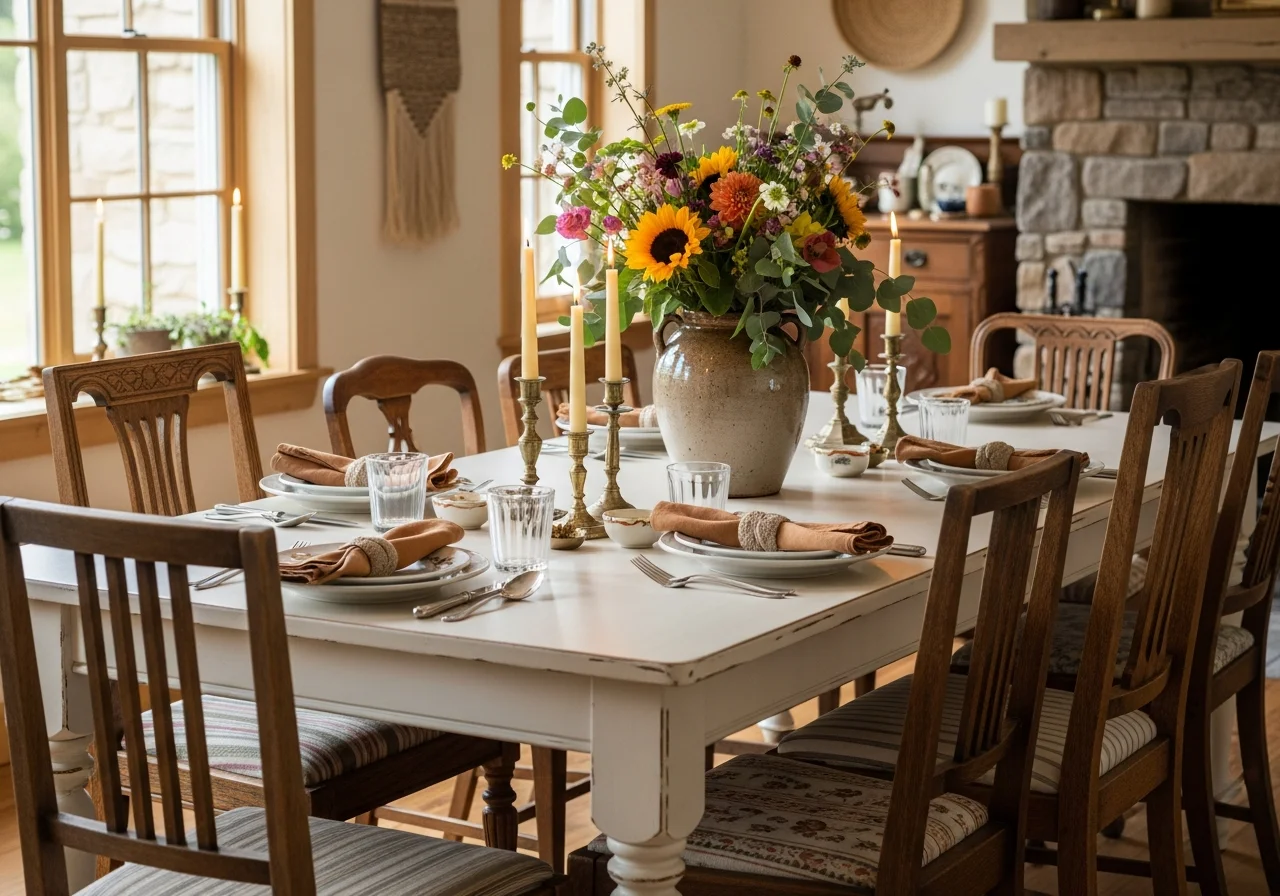
Whitewashed Farmhouse Style
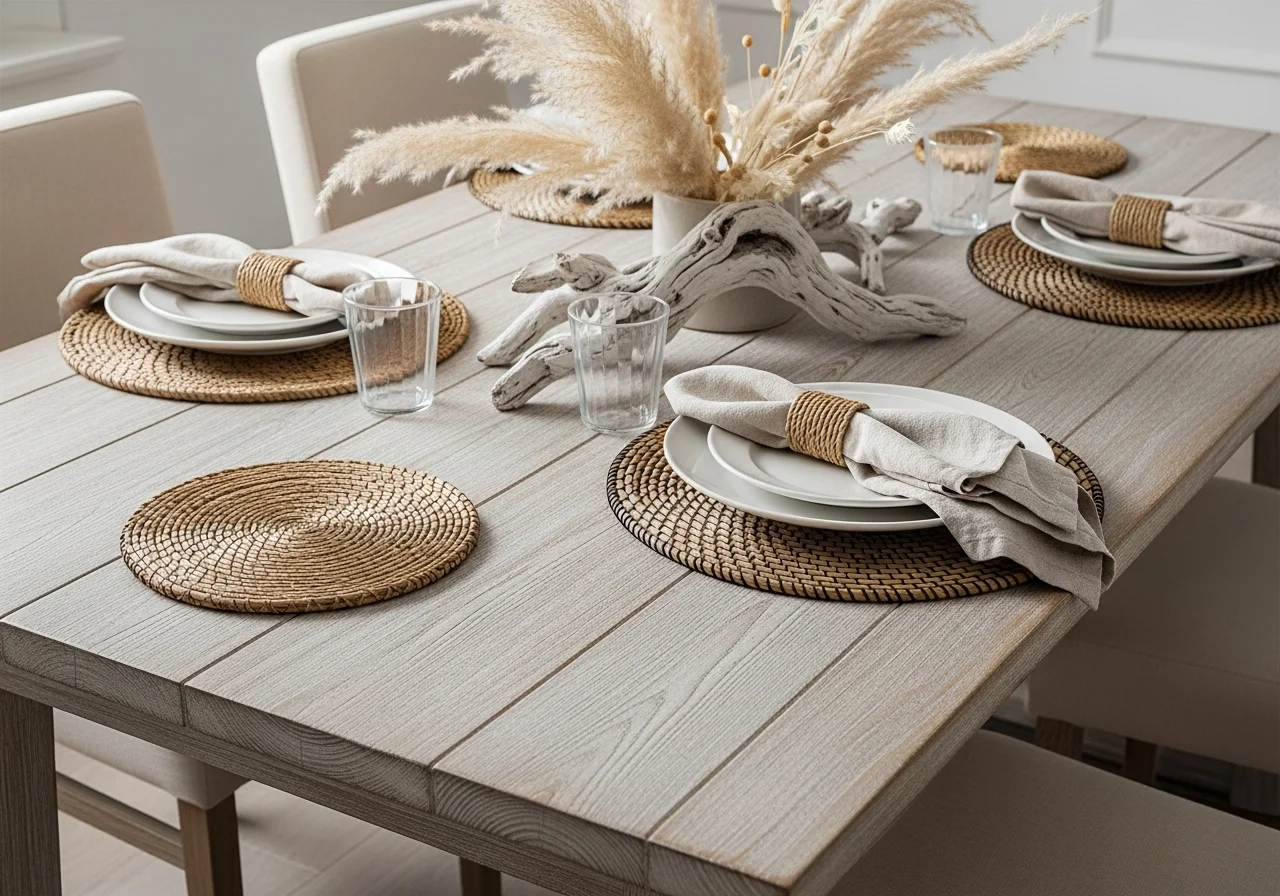
Whitewashing creates an airy, casual aesthetic perfect for farmhouse or coastal design schemes. This technique differs from solid paint coverage by allowing wood grain to show through a translucent white finish, resulting in texture and dimension.
You can achieve whitewashing through several methods. Thinning white paint with water creates a wash that penetrates wood pores while remaining somewhat transparent. Alternatively, applying white stain or mixing paint with glazing medium provides more control over opacity levels.
The beauty of whitewashing lies in its flexibility. Apply multiple thin coats for more coverage or keep applications minimal for subtle brightening. This approach works exceptionally well on pine, oak, or other woods with pronounced grain patterns that create visual interest beneath the white veil.
Dramatic Dark Transformation
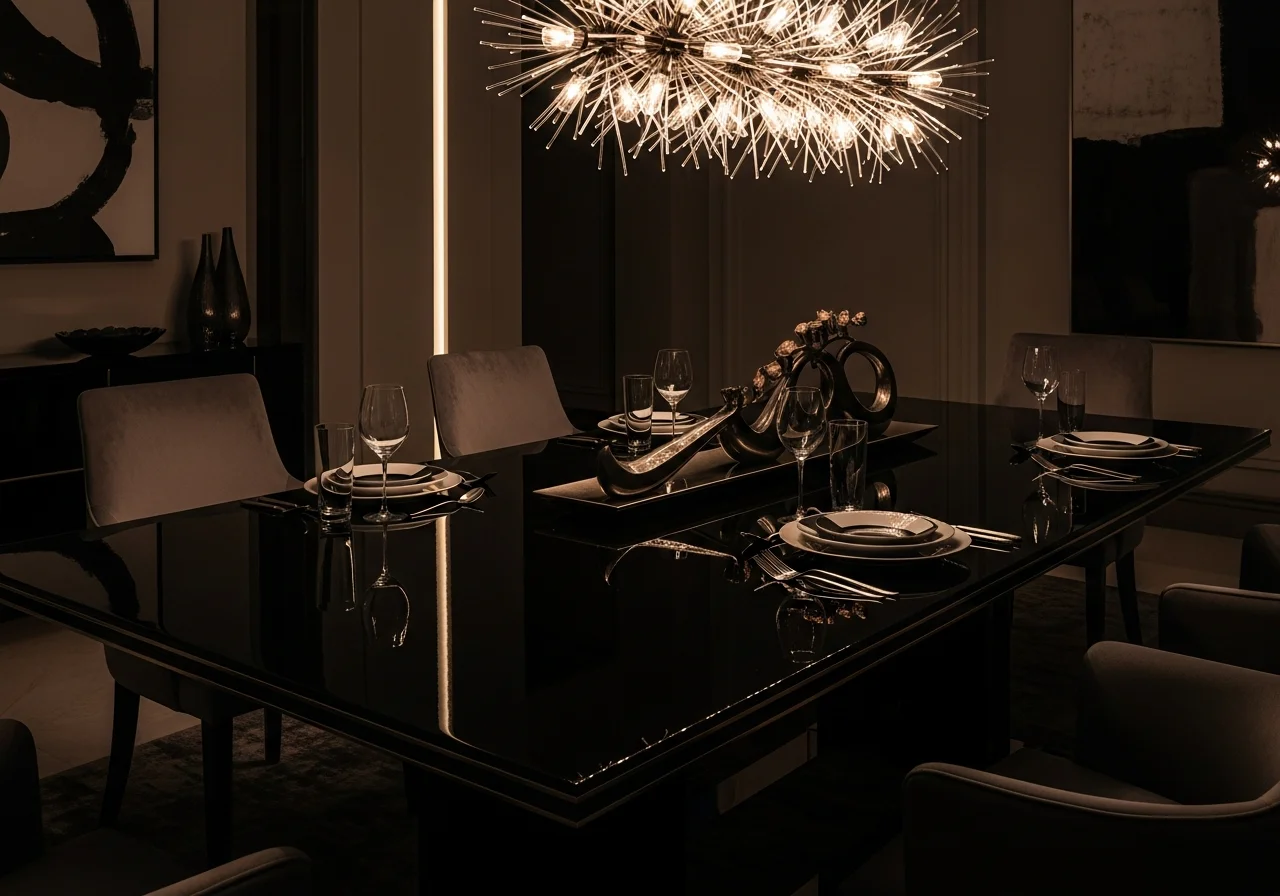
Taking a light or medium-toned table to a deep, dark finish creates instant sophistication and can anchor a dining space with commanding presence. Dark finishes range from rich espresso browns to true black, each offering distinct aesthetic qualities.
Black-painted tables deliver bold modernity, especially when finished with a satin or semi-gloss sheen that reflects light. Deep brown stains maintain warmth while providing the visual weight and elegance associated with darker palettes. For truly dramatic effect, consider black stain, which preserves wood grain visibility while achieving deep coloration.
Dark tables pair beautifully with both light and dark chairs, offering versatility in surrounding decor choices. They also tend to show fewer daily-use marks than lighter finishes, a practical consideration for busy households. May you get more ideas
Distressed and Weathered Finishes

Intentionally aged finishes bring character and history to newer or characterless tables. Distressing techniques simulate years of authentic wear, creating the impression of a cherished heirloom passed through generations.
After applying your base paint color, use sandpaper, chains, hammers, or other tools to create realistic wear patterns. Focus on edges, corners, and high-contact areas where natural distressing would occur. Some crafters add a contrasting color beneath the top coat, allowing it to peek through distressed areas for added depth.
Weathering can also involve application techniques beyond distressing. Dry brushing with lighter or darker shades creates subtle dimension. Layering multiple paint colors and selectively removing portions replicates the complex patinas found on genuinely old painted furniture.
Geometric Pattern Painting
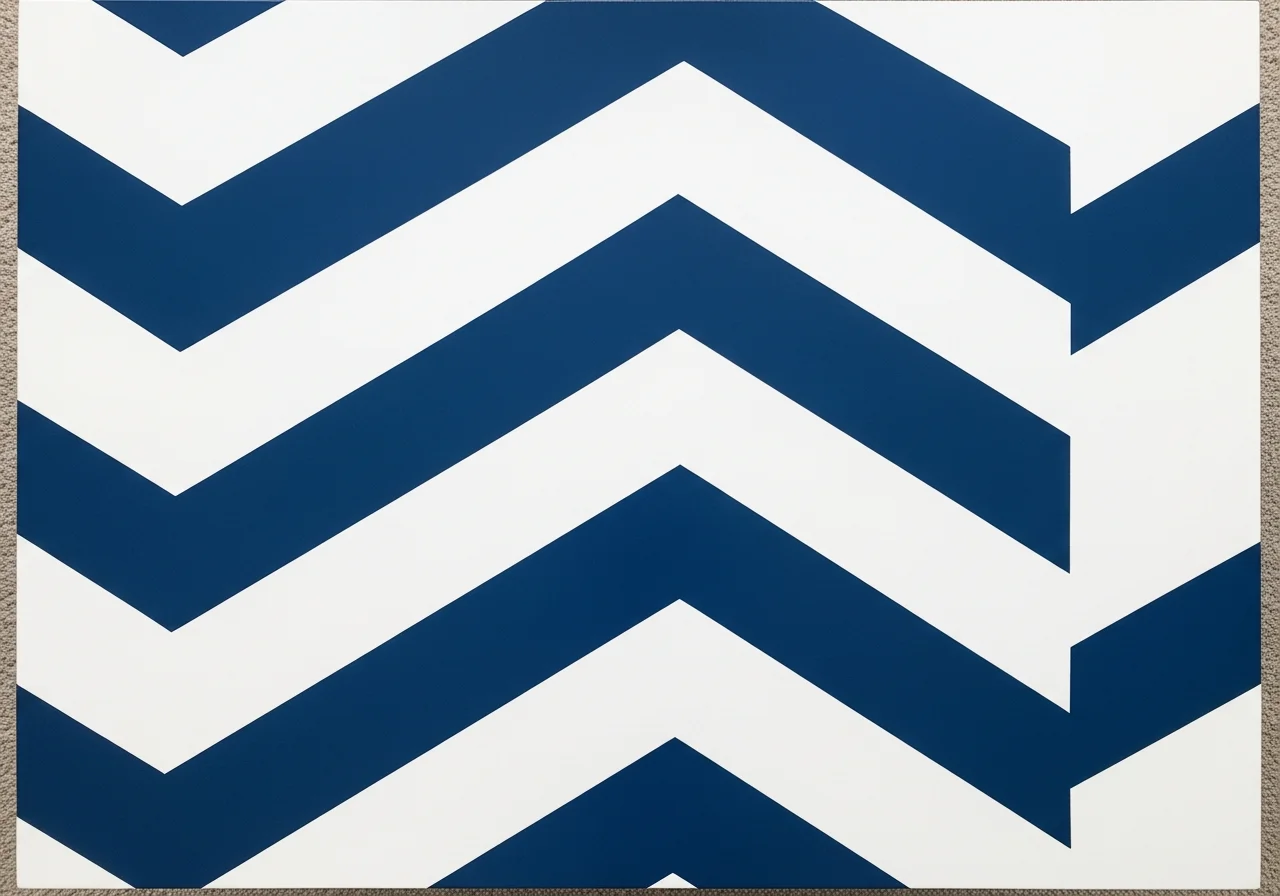
Transform your tabletop into a work of art through geometric designs that add personality without overwhelming your space. Herringbone, chevron, hexagon, or simple stripe patterns create focal points that spark conversation.
Creating clean geometric designs requires careful planning and precise taping. Graph paper sketches help visualize patterns before committing to your table surface. Quality painter’s tape ensures crisp lines, though removing tape while paint remains slightly wet prevents peeling.
You can execute geometric patterns through paint alone or combine painting with staining. For example, tape off a herringbone pattern, stain exposed sections, then paint the remaining areas in a complementary color. This mixed-media approach adds texture variation alongside visual pattern.
Concrete Overlay Surface
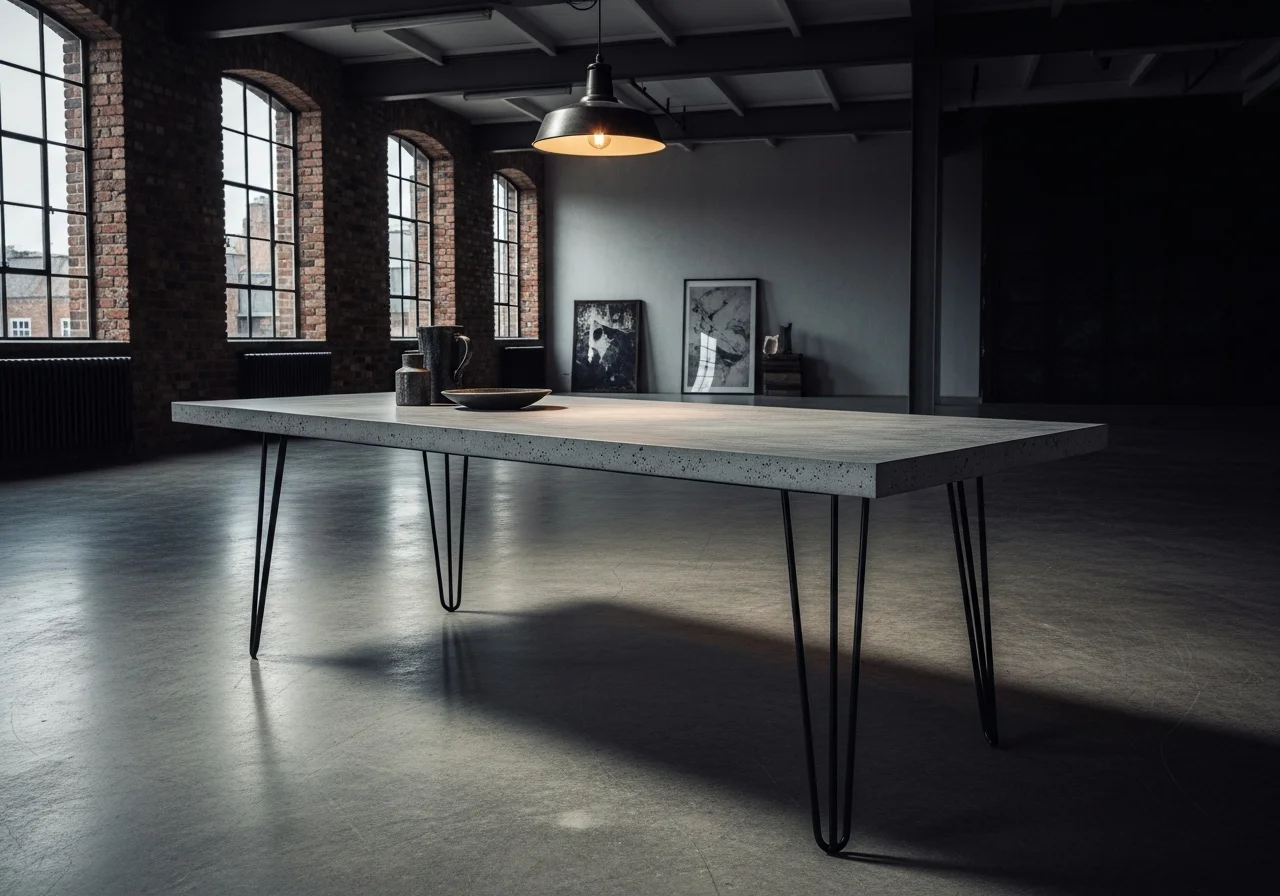
For an industrial or ultra-modern aesthetic, concrete overlays provide unexpected material contrast while creating extremely durable surfaces. Specialty concrete products designed for furniture application allow you to achieve this look without the weight of solid concrete.
The process involves building up edges with foam or wood strips to contain the concrete, then spreading and smoothing the overlay across your existing tabletop. Once cured, concrete can be sealed in matte or glossy finishes and even tinted with concrete stains for color variation.
Concrete surfaces pair strikingly with wooden bases, metal legs, or even painted pedestals. The raw, textural quality of concrete creates compelling juxtaposition with softer dining room elements like upholstered chairs or fabric window treatments.
Tile Mosaic Tabletop
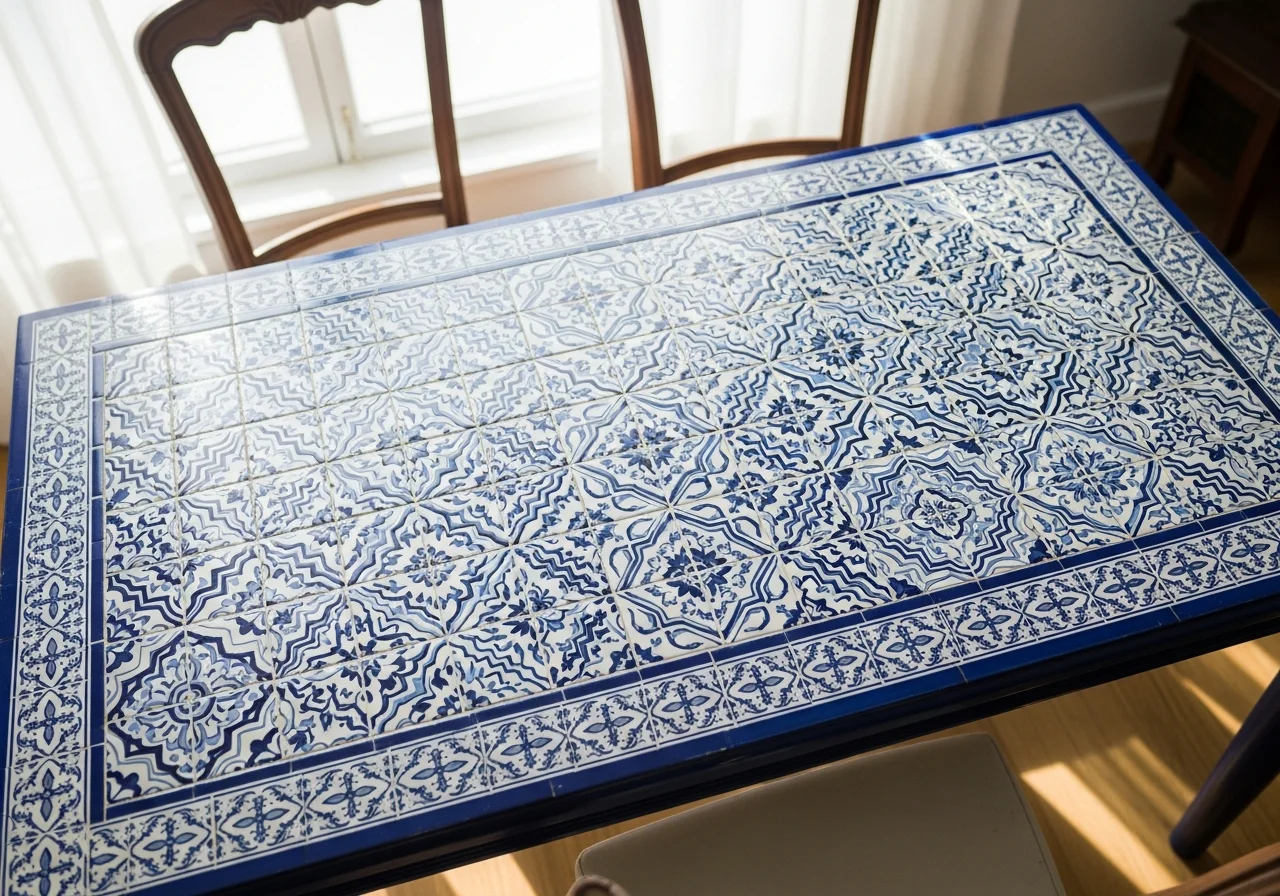
Installing tile transforms your dining table into a custom piece while introducing pattern, color, and easy-clean practicality. Ceramic, porcelain, or even natural stone tiles can be arranged in countless configurations, from uniform grids to artistic mosaics.
This project requires building up your tabletop edges to accommodate tile thickness and grout depth. After planning your layout, tiles are adhered with appropriate adhesive, grouted, and sealed. The resulting surface resists heat, moisture, and staining far better than most wood finishes.
Tile tops work particularly well in casual dining spaces, outdoor eating areas, or homes where spills and messes are frequent concerns. The design possibilities are endless, from Mediterranean-inspired blues and whites to modern subway tile patterns or rustic natural stone. click here if you want to know more
Epoxy Resin River Table

Epoxy resin projects have surged in popularity, with river tables representing one of the most striking applications. These designs feature colored resin poured between wood slabs or into routed channels, creating the appearance of flowing water through natural wood.
Creating a resin river table requires careful preparation, including building dams to contain liquid epoxy and achieving perfectly level surfaces for curing. Resin is mixed with pigments or dyes, then poured in layers to achieve desired depth and effects like embedded objects or metallic swirls.
Once fully cured and sanded smooth, epoxy resin creates glass-like surfaces of remarkable durability and visual depth. While more complex than paint or stain projects, the results deliver truly one-of-a-kind furniture that serves as functional art.
Butcher Block Surface Addition

Adding a butcher block top to an existing table base provides warmth, durability, and practical food-preparation surfaces. Pre-made butcher block slabs are available in various wood species and dimensions, ready to attach to your table frame.
This approach works beautifully when your current tabletop is damaged beyond simple refinishing but the base remains structurally sound and aesthetically pleasing. Maple, walnut, cherry, and oak butcher blocks each offer distinct grain patterns and color tones to complement your decor.
Proper sealing is essential for butcher block dining surfaces. Food-safe mineral oil maintains natural appearance while protecting against moisture and stains. For surfaces that won’t contact food directly, polyurethane or other film-forming finishes provide enhanced durability.
Stenciled Design Elements

Stenciling allows you to add intricate patterns or designs without advanced painting skills. From delicate floral to bold geometric repeats, stencils provide controlled ways to introduce visual interest to painted table surfaces.
Quality stencils and proper technique prevent paint bleeding that creates fuzzy edges. Using foam pouncer brushes or stencil-specific applicators with minimal paint produces the cleanest results. Multiple stencil layers in coordinating colors build complex, professional-looking designs.
Consider stenciling the entire tabletop, creating border designs around edges, or adding accent motifs to table legs or aprons. This technique pairs beautifully with chalk paint bases and can be protected with clear topcoats for longevity.
Industrial Pipe Leg Replacement

Swapping traditional wooden legs for industrial pipe supports completely transforms your table’s character. Black iron or galvanized steel pipes in various configurations create edgy, urban-industrial aesthetics increasingly popular in modern interiors.
Pipe legs can be assembled in straightforward H-frame designs or more complex structures incorporating multiple levels and cross-bracing. Flanges attach securely to table undersides, providing stability comparable to original wooden legs.
This modification works especially well when paired with reclaimed wood tops, concrete surfaces, or even heavily distressed painted finishes. The raw, utilitarian quality of pipe bases creates appealing contrast with refined or rustic tabletop treatments.
Ombre Paint Technique

Ombre finishes transition gradually from one color to another, creating soft, artistic effects that feel custom and sophisticated. This technique can flow from dark to light vertically down table legs, horizontally across the tabletop, or even in circular patterns radiating from center points.
Achieving smooth ombre transitions requires blending paint colors while still wet, working in sections to maintain workable edges. Starting with your darkest shade and progressively lightening with white paint creates controlled gradations.
Ombre works beautifully in monochromatic schemes or with complementary color combinations. Seal finished ombre surfaces with clear topcoats to preserve the subtle blending and protect against wear. May you read more
Metallic Accent Integration
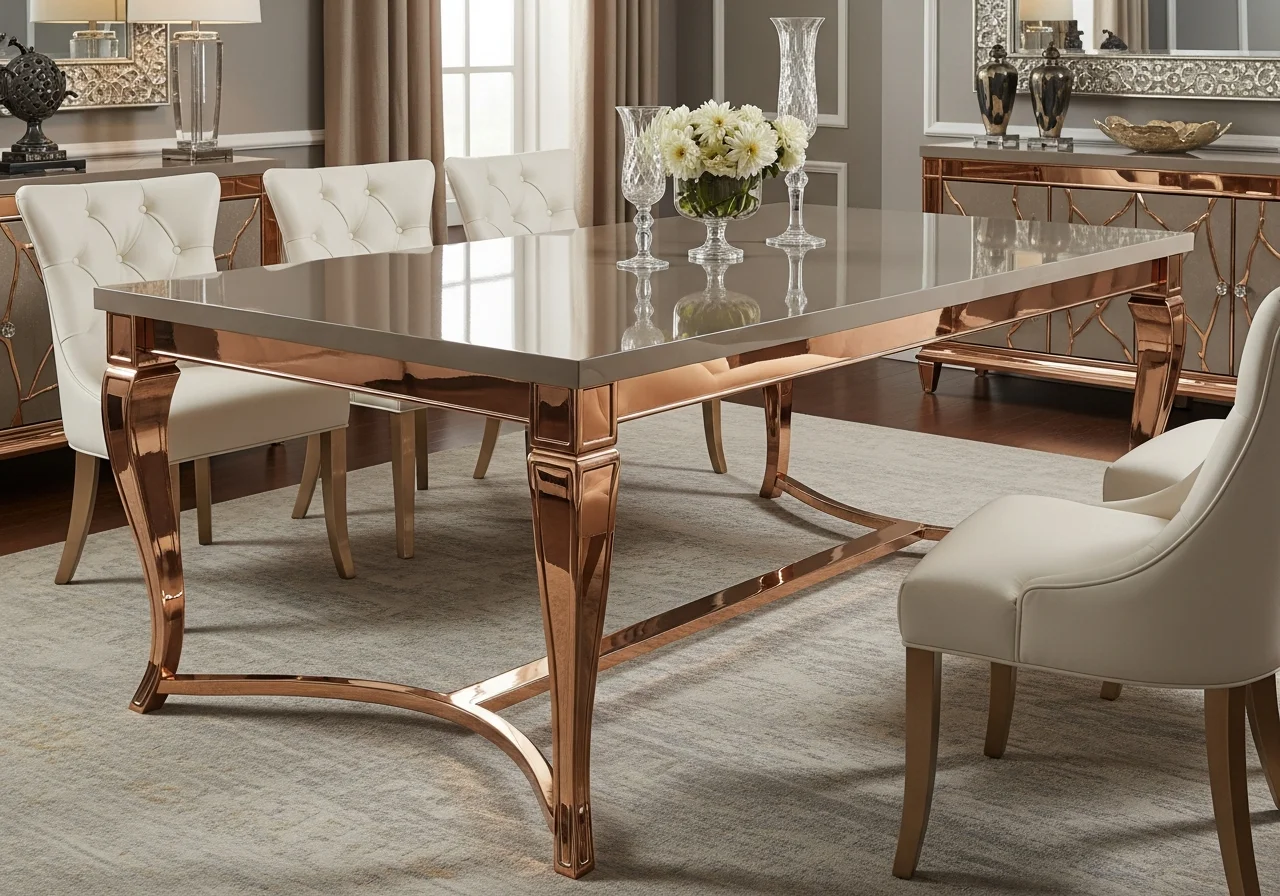
Incorporating metallic paints or leafing adds glamour and catches light in ways that flat finishes cannot achieve. Gold, silver, copper, or rose gold metallic can be applied as full coverage, accent details, or incorporated into distressing and layering techniques.
Painting table legs in metallic shades while keeping tops neutral creates elegant contrast. Alternatively, applying metallic glazes over painted bases adds subtle shimmer and depth. Gold or silver leafing on carved details or edges delivers luxurious traditional appeal.
Modern metallic paints have improved dramatically in quality and ease of application. Many require no special primers and provide excellent coverage in one or two coats, making glamorous transformations surprisingly accessible.
Decoupage Surface Treatment
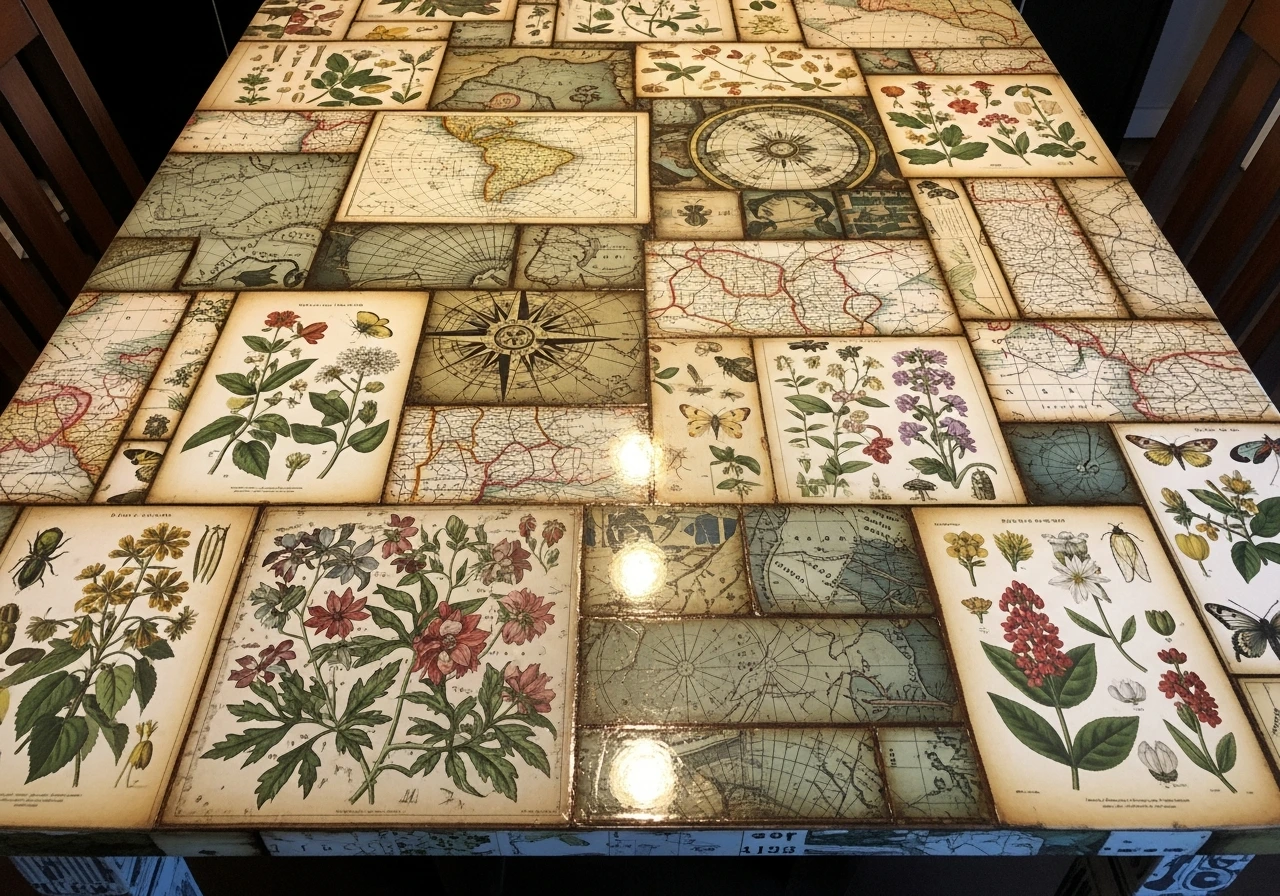
Decoupage allows you to permanently adhere paper, fabric, or other thin materials to your tabletop, creating completely personalized designs. Vintage maps, sheet music, botanical prints, or decorative napkins can transform plain surfaces into conversation pieces.
The process involves adhering materials with decoupage medium, then sealing with multiple protective topcoats. For dining tables that will see heavy use, epoxy resin or high-quality polyurethane provides necessary durability over more delicate decoupage layers.
This technique offers unlimited creative possibilities. Create themed designs, showcase family photos printed on special paper, or arrange abstract collages from various paper sources. The result is truly custom furniture impossible to replicate.
Chevron or Herringbone Wood Application
Installing new wood in chevron or herringbone patterns across your existing tabletop creates sophisticated geometric visual interest while showcasing woodworking skills. These angled patterns add movement and dimension that straight plank applications cannot achieve.
This project involves cutting wood pieces at precise angles and arranging them in repeating V-shaped or zigzag configurations. Thin plywood, reclaimed pallet wood, or specialty flooring materials can all work, depending on desired aesthetics and budget.
After installation, the new wood surface can be stained, painted, or finished naturally. The pattern itself provides such strong visual impact that simple clear finishes often work beautifully, allowing wood tones and grain patterns to take center stage.
Nautical Rope Edge Detail
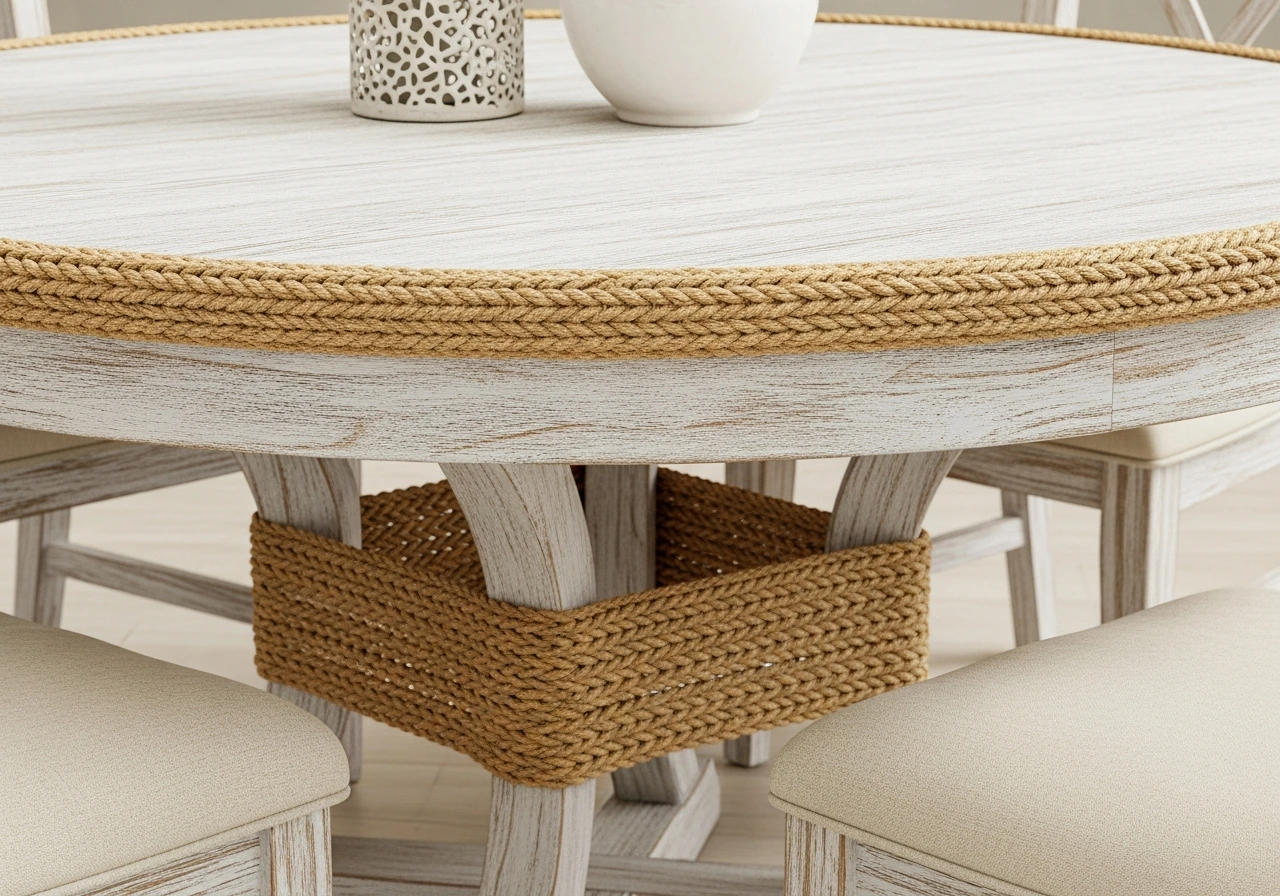
Adding nautical rope trim around table edges or leg bases introduces unexpected textural contrast and casual coastal charm. Natural jute, manila, or cotton rope in various thicknesses can be secured with strong adhesives or small tacks.
This detail works particularly well on round or oval tables where rope can follow curved edges smoothly. For rectangular tables, rope corners require careful miter-style joining or decorative knot treatments that become design features themselves.
Rope details pair beautifully with whitewashed, light stained, or soft blue-painted finishes. The organic texture adds warmth to otherwise simple treatments and creates cottage or beach house character effortlessly.
High-Gloss Lacquer Finish
Lacquer finishes deliver mirror-like shine and exceptional durability, creating sleek, modern aesthetics quite different from matte or satin alternatives. Professional-quality spray lacquers provide the smoothest results, though brush-on products have improved significantly.
Achieving flawless high-gloss finishes requires meticulous surface preparation, as any imperfection will be magnified by reflective sheens. Multiple thin coats with light sanding between applications build depth and clarity.
Glossy finishes work beautifully in contemporary, art deco, or Hollywood regency interiors. They reflect light to brighten spaces and create the polished, sophisticated atmosphere associated with high-end furniture.
Finding Your Perfect Approach
Choosing among these diverse techniques depends on several factors including your existing table’s condition, your skill level and available tools, your design aesthetic, and how much time and budget you can dedicate to the project.
Begin by honestly assessing your table’s current state. Structurally sound pieces with good proportions deserve investment in more involved techniques, while wobbly or poorly constructed tables might benefit from simpler paint treatments before determining whether they warrant additional effort.
Consider your comfort level with various techniques. Paint-based projects generally offer more forgiveness for beginners, while staining, epoxy work, or wood application require greater precision and sometimes specialized knowledge. Starting with simpler techniques builds confidence and skills for future, more complex projects.
Your home’s overall design direction should guide aesthetic choices. Farmhouse interiors welcome distressed paint and whitewashing, while modern spaces might call for concrete, high-gloss finishes, or bold geometric patterns. Ensuring your refinished table complements surrounding elements creates cohesive, intentional spaces.
Conclusion
Transforming your dining table through DIY makeover techniques offers satisfaction that extends far beyond the finished product itself. The process of envisioning possibilities, learning new skills, and physically creating something beautiful with your own hands delivers rewards that purchasing new furniture simply cannot match.
Each technique explored here provides pathways to completely different aesthetics, from rustic farmhouse charm to sleek contemporary sophistication. The beauty of DIY refinishing lies in its accessibility regardless of budget constraints or previous experience. Even the simplest paint application can dramatically transform a tired table into a refreshed centerpiece that serves your family for years to come.
As you embark on your dining table transformation, remember that imperfections often add character rather than detract from finished pieces. The slight variations in hand-applied finishes, the authentic distressing that differs from factory-produced uniformity, and the knowledge that you created something uniquely yours all contribute to furniture with genuine soul and story.
Whether you choose straightforward staining, adventurous epoxy resin work, or any approach in between, your refinished table will represent more than updated decor. It becomes a testament to creativity, resourcefulness, and the enduring appeal of putting personal effort into the spaces we inhabit daily. click here for more dining table ideas
Frequently Asked Questions
How long does a typical dining table makeover take to complete?
Most paint-based makeovers can be completed over a single weekend, including drying time between coats. Staining projects typically require three to five days when accounting for stripping, sanding, staining, and sealing steps. More complex techniques like epoxy resin or tile installation may take one to two weeks, primarily due to extended curing or drying periods rather than active working time.
Do I need to strip old finish before painting my dining table?
Not always. Chalk paint and some specialty furniture paints adhere to existing finishes with minimal preparation, requiring only cleaning and light scuffing. However, tables with thick, glossy finishes, or those you plan to stain rather than paint, benefit from complete stripping to ensure proper adhesion and even color absorption. The condition of the existing finish helps determine whether stripping is necessary.
What type of finish is most durable for a heavily used dining table?
Polyurethane topcoats provide excellent protection for dining surfaces that see daily use, with water-based versions offering easy cleanup and low odor. Epoxy resin creates extremely durable surfaces resistant to heat, moisture, and scratching. For painted tables, furniture wax offers some protection but requires periodic reapplication, while polyurethane over paint provides longer-lasting durability without maintenance.
Can I refinish a veneer dining table or only solid wood?
Veneer tables can be successfully refinished with careful technique. Paint-based makeovers work beautifully on veneer since they don’t require aggressive sanding that might damage thin veneer layers. Light sanding to roughen glossy surfaces helps paint adhesion without cutting through to substrate materials. Avoid heavy distressing techniques that could expose particle board or plywood beneath veneer surfaces.
How much should I budget for a DIY dining table makeover?
Simple paint makeovers can cost as little as thirty to fifty dollars for quality paint, brushes, and sealer. Staining projects typically run fifty to one hundred dollars depending on stripper needs, stain choice, and finishing products. More involved techniques like epoxy resin, tile, or butcher block additions may require one hundred fifty to three hundred dollars in materials. Regardless of approach, DIY refinishing costs substantially less than purchasing new furniture of comparable quality.


3 Comments