16+ Creative Waterfall Diorama Ideas to Inspire You
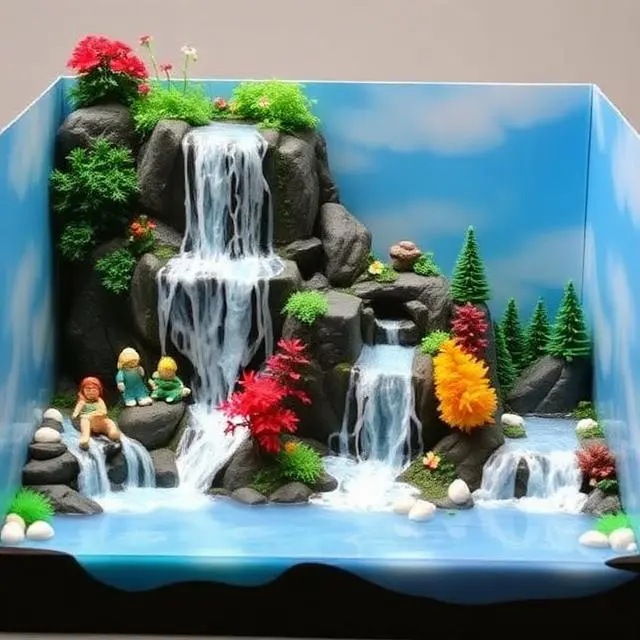
waterfall diorama ideas offer an exciting opportunity to build a miniature world that captures the beauty and movement of cascading water. Whether you are a hobbyist working on a school project, a model railroad enthusiast, or an experienced miniaturist, waterfall dioramas provide endless creative possibilities. This comprehensive guide explores various techniques, materials, and ideas to help you craft stunning waterfall scenes that bring your miniature landscapes to life.
Understanding Waterfall Dioramas
A waterfall diorama is a three-dimensional miniature scene that features cascading water as its central element. These projects combine artistic vision with practical crafting skills to create realistic representations of natural water features. The beauty of waterfall dioramas lies in their versatility. You can incorporate them into larger landscape scenes, use them as standalone display pieces, or integrate them into model railroad layouts and gaming terrains.
The appeal of waterfall dioramas extends beyond their visual impact. They teach valuable lessons about geography, geology, and natural water systems. For younger crafters, these projects provide hands-on learning experiences about erosion, water flow, and landscape formation. For advanced hobbyists, they present technical challenges that push creative boundaries and develop new skills in materials manipulation and realistic effects creation.
Essential Materials for Waterfall Dioramas
Building a convincing waterfall diorama requires gathering the right materials before you begin construction. The foundation typically consists of foam materials, which serve as the terrain base. Extruded polystyrene foam, commonly found at hardware stores in pink or blue sheets, provides an excellent sculpting medium. This dense foam cuts cleanly without crumbling into messy beads, making it ideal for carving cliff faces and rocky outcroppings.

For the water effects themselves, several options exist depending on your skill level and budget. Clear epoxy resin creates the most realistic water appearance, offering excellent clarity and the ability to be tinted with inks or dyes. Mod Podge combined with Liquitex gloss gel provides a more accessible alternative for beginners. Hot glue represents the simplest approach, offering quick results that can be remarkably convincing when properly applied and painted. https://casolia.com/waterfall-diorama-ideas/
Additional materials enhance realism and detail. Polyfiber or cotton batting creates mist effects at the base of waterfalls. Aluminum foil, when crumpled and carefully positioned, can form the structure for cascading water. Woodland Scenics products, including realistic water effects, water-effect paints, and vegetation materials, offer professional results for those willing to invest in specialized supplies. Acrylic paints in various shades of blue, white, green, and brown allow you to color your water and surrounding terrain convincingly.
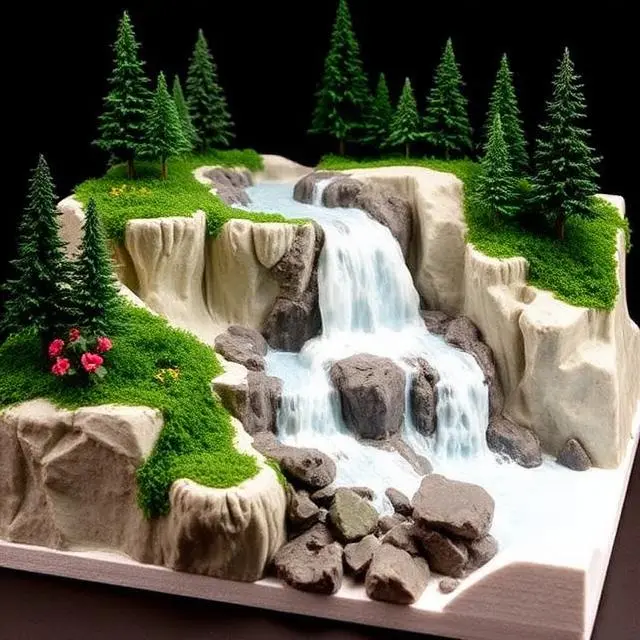
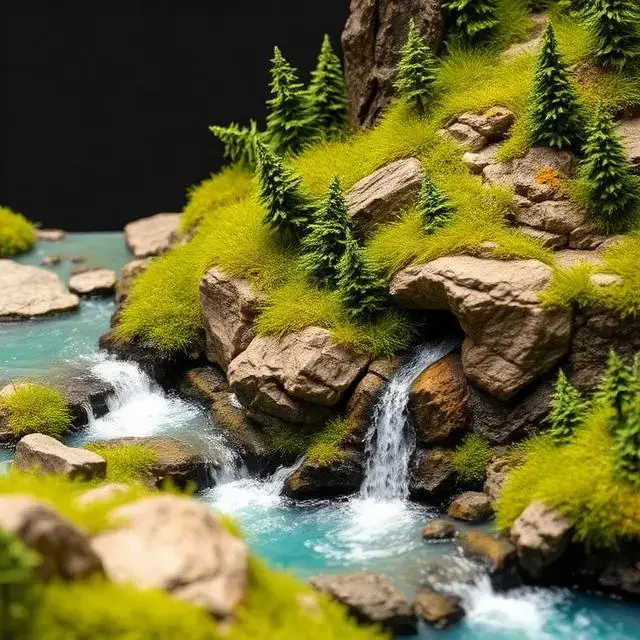
1 Mountain Stream Waterfall
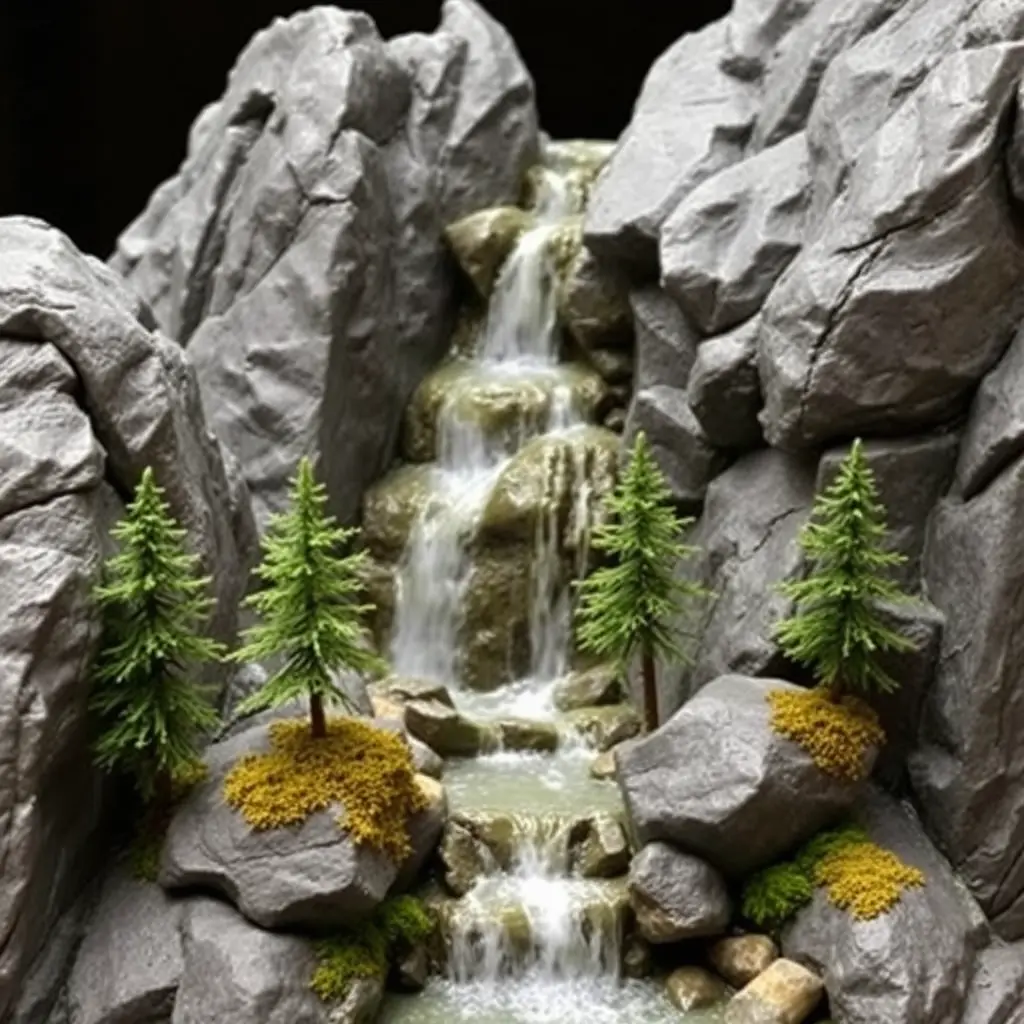
A mountain stream waterfall captures the rugged beauty of alpine landscapes. Begin by carving steep rock faces from foam, creating natural ledges where water would logically cascade down. Paint the rocks in layers, starting with dark grays and blacks, then dry-brushing lighter tones to highlight texture. Position the waterfall to flow between rocky outcroppings, using clear resin or gloss gel to simulate the water’s movement. Add small pine trees crafted from natural materials or model railroad supplies around the base, along with lichen to represent moss-covered stones.
2 Tropical Lagoon Waterfall
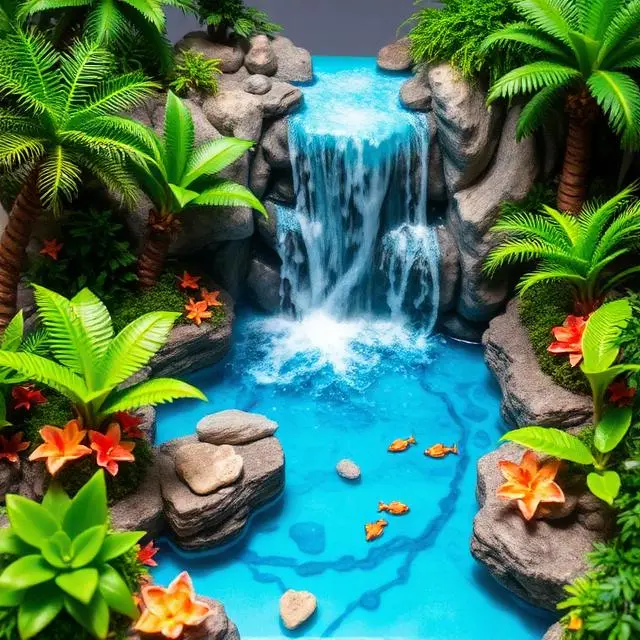
Transport viewers to a lush paradise with a tropical waterfall flowing into a crystal-clear lagoon. Create a shallow basin using sculpted foam, painting the depths in gradients from turquoise near the edges to deep blue in the center. The waterfall itself should have a gentler flow than mountain cascades. Surround the scene with tropical vegetation, including miniature palm trees, broad-leafed plants, and flowering bushes. Add small details like pebbles visible through the clear water or tiny fish shapes embedded in the resin for extra realism.
3 Fairy Garden Waterfall

Fairy garden waterfalls bring whimsy and magic to miniature landscapes. Keep the scale small and enchanting, perfect for indoor displays. Use hot glue for quick water effects, painting it with iridescent paints to give it a magical sparkle. Incorporate tiny fairy figurines, mushroom houses, and delicate flowering plants. Add small pebbles as stepping stones across the stream, and consider installing battery-operated LED lights to make the water shimmer at night.
4 Desert Oasis Waterfall
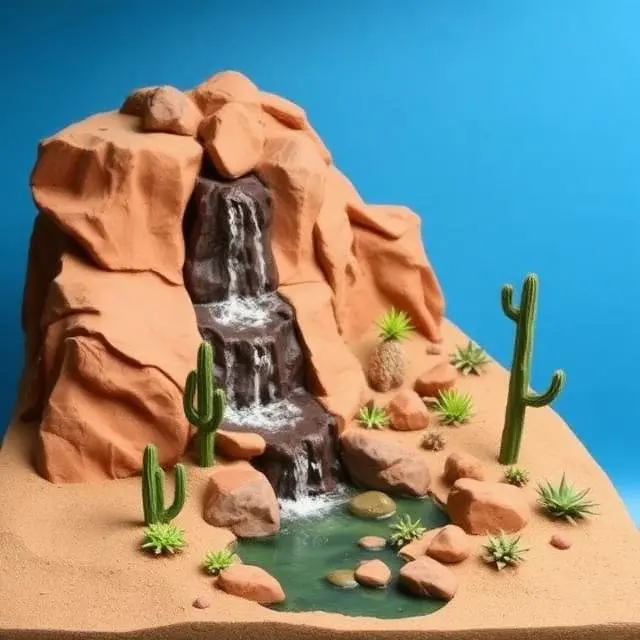
An unexpected waterfall in a desert setting creates dramatic contrast. Build surrounding terrain from sand-colored foam and actual sand mixed with glue for texture. The waterfall should be modest in size, representing a rare water source in an arid landscape. Paint rocks in warm terracotta and tan tones. Add desert plants like cacti and succulents around the oasis, with perhaps a small palm tree near the water source. This design works exceptionally well for educational dioramas about desert ecosystems.
5 Frozen Winter Waterfall

Capturing a partially frozen waterfall presents unique creative challenges. Use clear glue or resin for ice formations, allowing them to drip and freeze in mid-cascade. Paint the surrounding landscape in whites and pale blues, with snow created from baking soda mixed with white glue or commercial snow products. The waterfall itself should show areas of flowing water breaking through ice, demonstrating the constant movement even in freezing conditions. Add bare winter trees and perhaps animal tracks in the snow.
6 Japanese Garden Waterfall
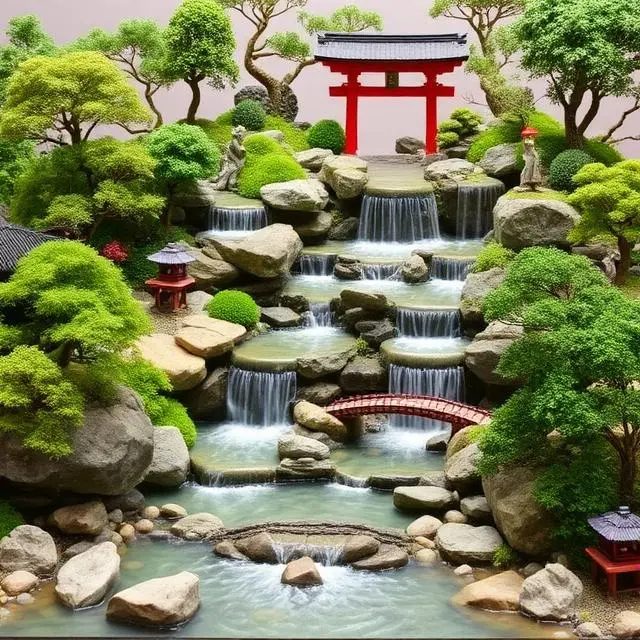
Japanese-inspired waterfall dioramas emphasize tranquility and careful placement. Design a multi-tiered waterfall with gentle cascades rather than dramatic drops. Incorporate traditional elements like a small red torii gate, stone lanterns, and carefully pruned miniature trees. Use smooth river rocks at the water’s base and consider adding a small bridge crossing the stream. The color palette should remain subdued with natural greens, grays, and the subtle blue of moving water.
7 Prehistoric Dinosaur Waterfall
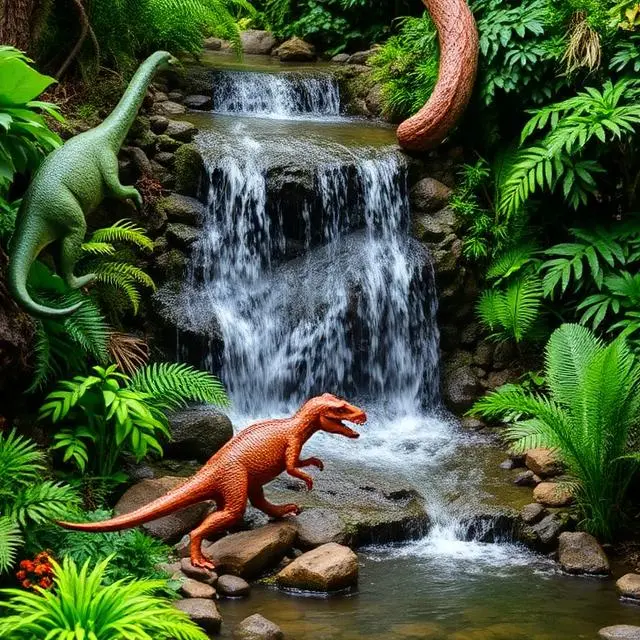
Combine natural history with landscape design by creating a waterfall scene from the age of dinosaurs. Build lush vegetation using various shades of green foliage materials, creating a dense jungle atmosphere. Position plastic dinosaur figures near the water, as if drinking or hunting. Add prehistoric plants like ferns and cycads. The waterfall can be more dramatic and powerful, suggesting the untamed nature of the ancient world.
8 Underground Cave Waterfall

Challenge yourself with an underground waterfall emerging from a cave system. Cut into your foam base to create cave openings, painting the interiors in deep blacks and dark grays. The waterfall should appear to flow from darkness into light. Consider using glow-in-the-dark paint on certain mineral formations inside the cave for a magical effect. Add stalactites hanging from the cave ceiling using sculpting materials or even candle wax carefully dripped and shaped.
9 Medieval Castle Waterfall
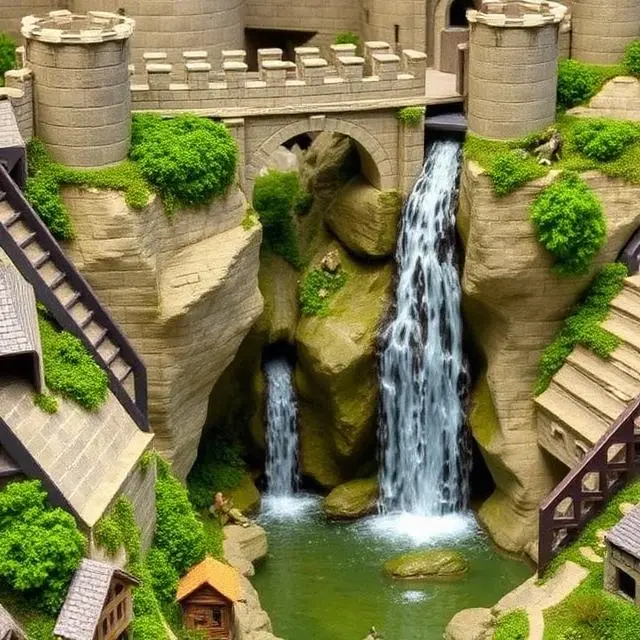
Integrate a waterfall into a fantasy castle scene, perhaps flowing beneath a stone bridge or cascading down the cliff face where the castle perches. Construct castle walls from foam carved with mortar lines, or use actual miniature castle pieces. The waterfall adds movement and life to what might otherwise be a static structure. Include period-appropriate vegetation and perhaps a path leading down to the water where villagers might draw water.
10 Miniature Mill Waterfall
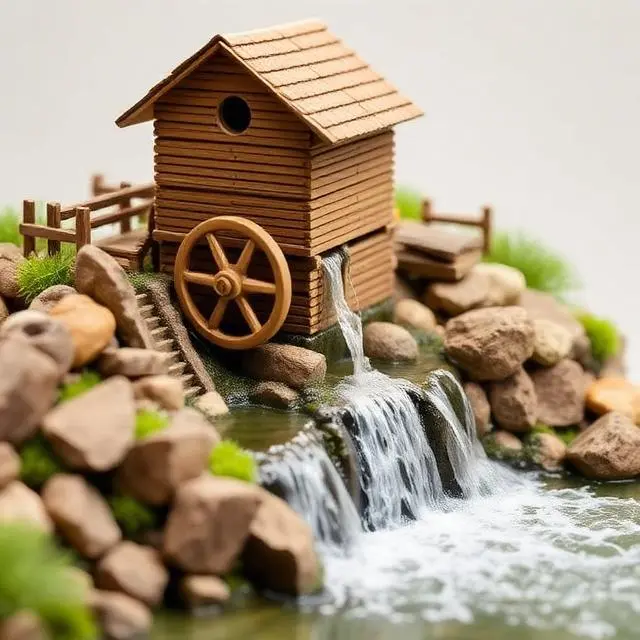
Create a functional-looking water mill beside your waterfall, complete with a wheel positioned as if turned by the flowing water. This design combines natural and man-made elements effectively. Build the mill structure from balsa wood or cardboard, weathering it to look aged and water-worn. The waterfall should appear to channel specifically to power the wheel, showing how humans have historically harnessed natural water power.
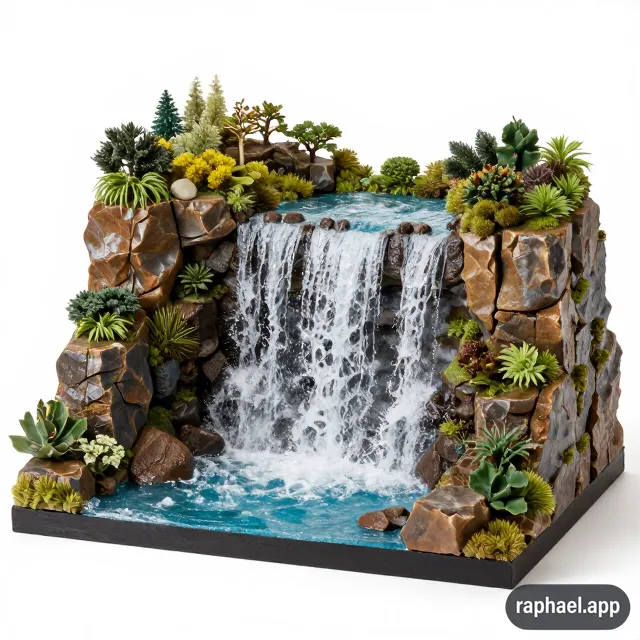
11 Terraced Rice Paddy Waterfall
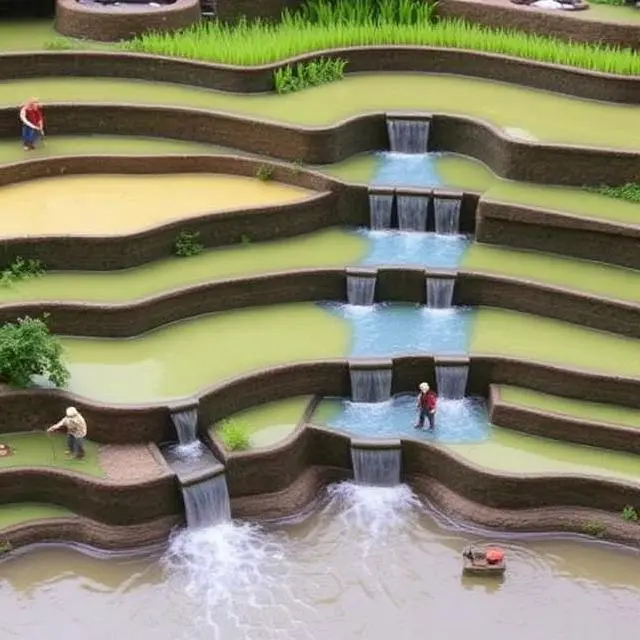
Inspired by agricultural landscapes, build a series of terraced levels with water flowing from one to the next. This design teaches about irrigation and farming while creating visual interest through repetition and variation. Paint the water areas in shallow pools a murky blue-green, suggesting the sediment in agricultural runoff. Add tiny rice plants or similar vegetation in neat rows, and perhaps miniature farmer figures tending the fields.
12 Rainforest Canopy Waterfall
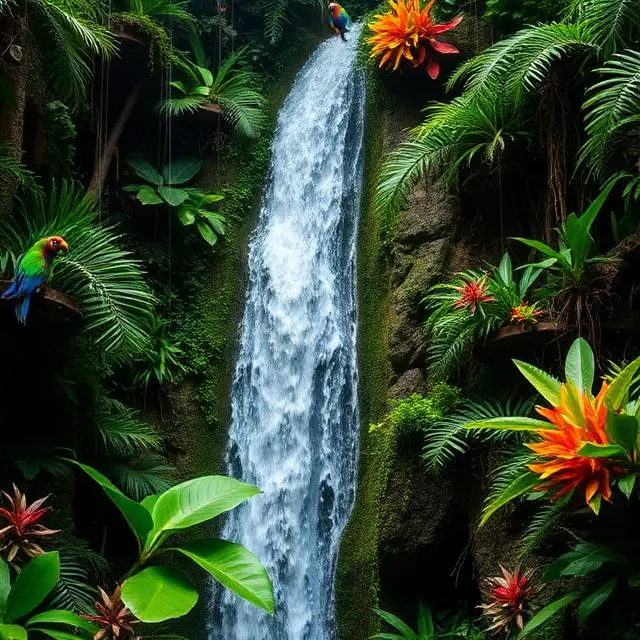
Create a dramatic vertical scene where water falls from high canopy levels down to the forest floor. Build multiple levels of vegetation, with larger trees at the base and smaller plants on elevated platforms representing different forest layers. The waterfall should be tall and narrow, emphasizing the vertical nature of rainforest environments. Include tropical birds, perhaps suspended on thin wire, and vibrant flowering plants.
13 Volcanic Landscape Waterfall

Combine the elements of fire and water by positioning a waterfall within a volcanic landscape. Use dark basalt-colored rocks and perhaps some orange or red accents suggesting lava flows or hot springs. The water might appear to steam as it contacts the heated rocks, which you can suggest with cotton batting. This dramatic scene works well for geology education or simply as a striking visual piece.
14 Seasonal Transformation Waterfall
Create a diorama that shows the same waterfall across different seasons by building four small connected scenes. Spring features budding plants and rushing water from snowmelt. Summer shows full vegetation and moderate flow. Autumn displays changing leaf colors with increased water volume from fall rains. Winter presents the frozen scene previously described. This educational approach demonstrates natural cycles throughout the year.
15 Coastal Cliff Waterfall
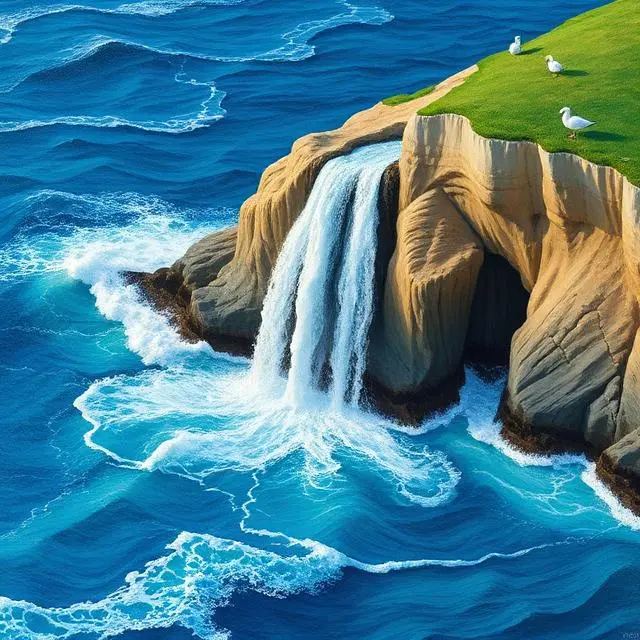
Design a waterfall that plunges directly into the ocean from coastal cliffs. Paint the ocean using deep blues with white caps, perhaps using textured painting techniques to suggest waves. The cliff face should show erosion patterns and sea birds nesting in rocky crevices. This design creates an opportunity to show both freshwater and saltwater environments in a single scene.
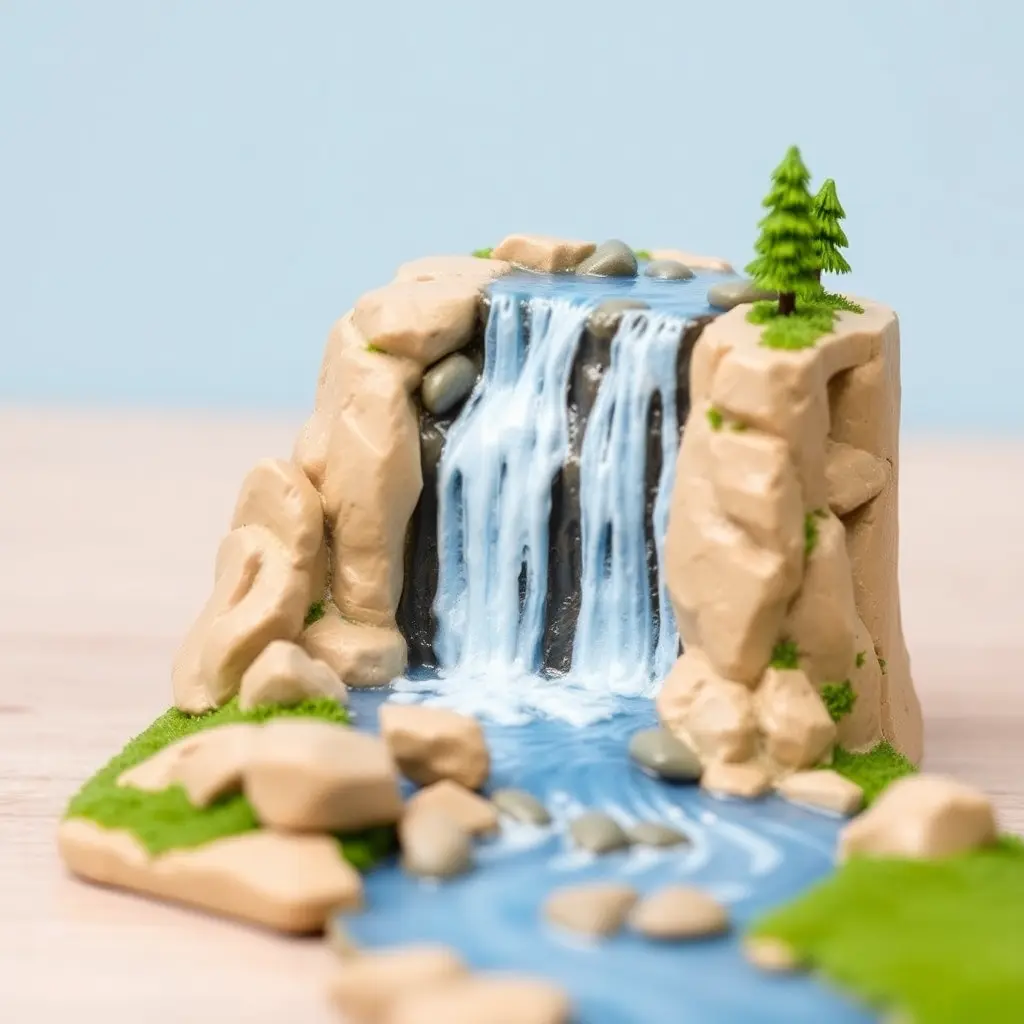
16 Garden Pond Waterfall
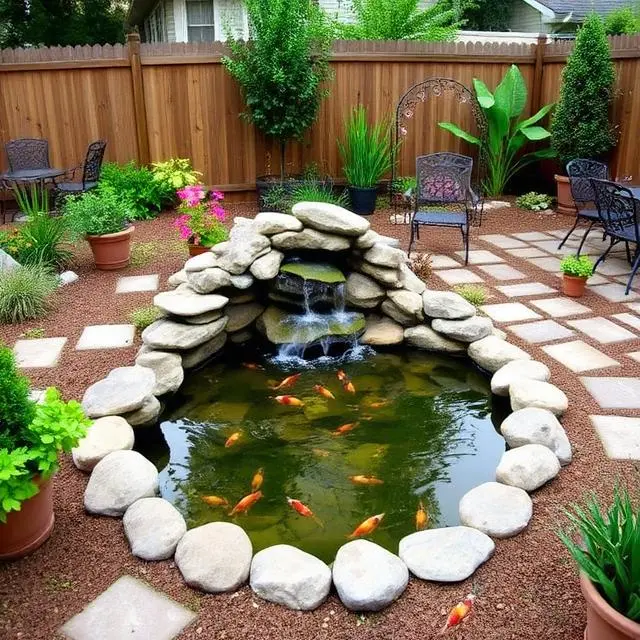
Scale down to a backyard setting with a decorative garden pond waterfall. This approachable design might include paving stones around the pond, garden furniture, and potted plants. The waterfall could be a small purchased fountain or a natural rock arrangement. This style works well for showcasing realistic suburban landscapes and could even include miniature koi fish in the pond.
Advanced Techniques for Realistic Water Effects
Creating convincing water requires understanding light, movement, and transparency. When working with clear resin, pour in thin layers rather than attempting to complete the project in a single pour. This approach prevents excessive heat buildup and allows you to add elements between layers for dimensional depth. Tint each layer slightly differently to suggest varying depths and water clarity.

For flowing water effects, consider the physics of how water actually moves. It accelerates as it falls, becoming thinner and more transparent. At impact points, water froths and splashes, which you can represent with white paint or textured materials. Between falls, water may pool briefly before continuing its descent, creating opportunities for interesting surface treatments.
The trick to convincing waterfalls lies in capturing both movement and stillness. Use glossy finishes where water flows quickly and more matte treatments where it sits in pools. Aluminum foil forms an excellent armature for cascading water when covered with resin or gel products, as its texture naturally suggests the turbulent surface of falling water.
Working with Foam Foundations
Foam serves as the structural backbone of most waterfall dioramas. When selecting foam, choose dense varieties that cut cleanly without producing the irritating static-charged beads associated with packaging materials. Extruded polystyrene, sold at building supply stores, offers the best balance of workability and strength.
Cutting foam requires the right tools. Sharp utility knives work well for straight cuts and general shaping. Hot wire cutters create smooth, melted edges ideal for organic shapes like eroded cliff faces. For fine detail work, consider using a soldering iron or Dremel tool with various bits, though always work in well-ventilated areas when melting foam, as the fumes can be harmful.
Sealing foam before painting prevents paint absorption and creates a more durable surface. Apply a coating of diluted white glue, Mod Podge, or specialty products like Durham’s Water Putty. This step also hardens the foam surface, making it more resistant to accidental damage. Once sealed and dry, foam accepts acrylic paints beautifully and can be textured to resemble virtually any natural material.
Painting and Finishing Techniques
Professional-looking dioramas result from careful attention to painting and finishing. Begin with base coats in appropriate colors for each element of your scene. For rocks and cliffs, start with dark values and build up to lighter highlights through dry brushing. This technique involves using a mostly dry brush with a small amount of paint to catch only the raised surfaces, creating natural-looking texture and dimension.
Water requires special painting considerations. If you are using translucent materials like resin, paint the underlying base rather than the water surface itself. Use gradations of color to suggest depth, with lighter blues and greens in shallow areas transitioning to deeper blues and even purples in the deepest sections. Add white paint where water froths and foams, particularly at the base of waterfalls and around obstacles in the stream.
Vegetation benefits from varied tones within the same color family. Real foliage is never a single shade of green, so use multiple products in slightly different hues for realistic effects. Apply scenic materials like model railroad grass and lichen using diluted white glue, which dries clear and holds materials securely. A final misting spray of diluted glue helps set everything in place and reduces the risk of loose materials detaching during display or transport.
Common Challenges and Solutions
Every crafter encounters obstacles when building waterfall dioramas. Understanding common issues and their solutions saves frustration and improves final results. One frequent problem involves resin that does not cure properly, remaining sticky or cloudy. This typically results from incorrect mixing ratios or working in temperatures outside the manufacturer’s recommended range. Always measure precisely and work in comfortable room temperatures between 70 and 75 degrees Fahrenheit for best results.

Another challenge involves foam that melts or dissolves when certain paints or adhesives are applied. Some spray paints and solvent-based products attack foam aggressively. Always test products on scrap pieces before applying them to your main project. Water-based products generally remain safe for foam, though they may require multiple coats for good coverage.
Achieving scale-appropriate details challenges many builders. Remember that in miniature scales, even small amounts of materials represent large quantities in real life. A single small rock in your diorama might represent a boulder several feet across. Keep this perspective in mind when adding details, and avoid overcrowding scenes with too many elements that fight for attention.
Displaying and Preserving Your Waterfall Diorama
Once completed, proper display and preservation ensure your waterfall diorama remains beautiful for years. Position the piece away from direct sunlight, which can fade colors and, in the case of resin, cause yellowing over time. Humidity should remain moderate, as extreme dryness can cause glued elements to separate while excessive moisture may promote mold growth on organic materials.
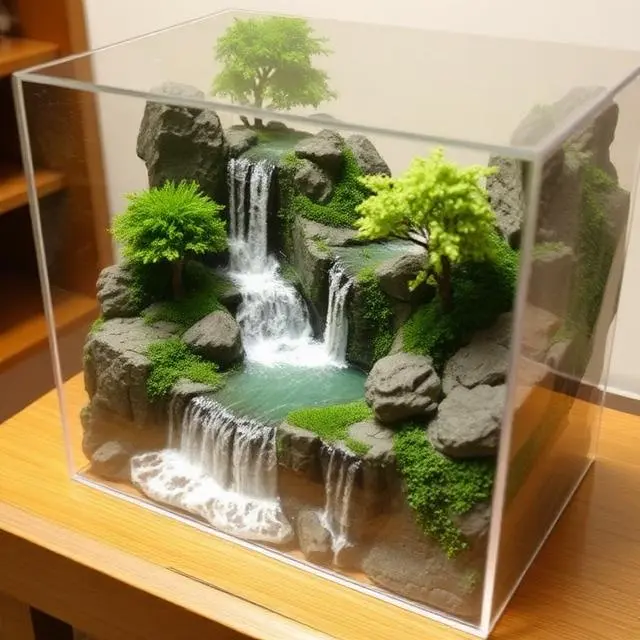
Consider enclosing your diorama in a clear display case, particularly if it contains delicate elements like spun polyfiber mist or fine vegetation. Display cases protect against dust accumulation and accidental damage while still allowing full viewing from all angles. For larger dioramas that cannot be enclosed, regular gentle dusting with a soft brush removes buildup without disturbing carefully placed details.
If you plan to transport your diorama, build it with portability in mind. Secure all elements firmly, and consider adding a removable protective frame around delicate protrusions. Wrap the piece carefully in bubble wrap, ensuring that fragile elements like overhanging trees or waterfalls are well-protected. Transport in a stable box that prevents shifting during movement.
Conclusion
Waterfall dioramas represent a perfect intersection of artistic expression, technical skill, and natural appreciation. Whether you create a simple cardboard and foil waterfall for a school project or an elaborate multi-media masterpiece incorporating advanced resin work and detailed scenery, the process teaches valuable lessons while producing beautiful results. The techniques explored in this guide provide a foundation for countless variations and personal interpretations.
As you develop your skills, experiment with different materials and methods to discover what works best for your style and available resources. Join online communities of miniaturists and diorama builders to share techniques, ask questions, and draw inspiration from others’ work. Remember that every experienced builder started as a beginner, and each project brings new learning opportunities.
The satisfaction of completing a waterfall diorama goes beyond the finished piece itself. You gain practical knowledge of various crafting techniques, develop patience and attention to detail, and create something tangible that reflects your vision and effort. Whether displayed on a shelf, entered in a competition, or given as a gift, your waterfall diorama tells a story and captures a moment of natural beauty in miniature form.
Frequently Asked Questions
What is the easiest method for making a waterfall in a diorama?
The hot glue method offers the simplest approach for beginners. Apply hot glue in strips down your prepared slope, then paint it with white and blue acrylics to suggest flowing water. This technique requires minimal materials and dries quickly, though the results may appear less realistic than resin-based methods.
Can I use real water in a diorama?
Real water is not practical for permanent dioramas as it evaporates, can leak, promotes mold growth, and limits display options. All professional diorama builders use synthetic materials like resin, glue products, or painted surfaces to simulate water while maintaining durability and appearance over time.
How do I prevent air bubbles in resin waterfalls?
Pour resin in thin layers rather than thick applications, and use a heat gun or small torch to gently pass over the surface immediately after pouring. The heat causes bubbles to rise and pop. Working in a warm environment and mixing resin slowly also reduces bubble formation during the curing process.
What scale works best for waterfall dioramas?
The ideal scale depends on your intended display space and available materials. HO scale (1:87) works well for model railroad integration, while 1:24 or 1:12 scales suit standalone display pieces with more visible detail. Choose your scale first, then select appropriate miniatures and materials to maintain consistent proportions throughout the scene.
How long does it take to complete a waterfall diorama?
Project time varies widely based on complexity and chosen techniques. Simple cardboard dioramas can be completed in a few hours, while elaborate multi-material scenes might require several weeks when accounting for curing times between resin layers, paint drying, and detailed finish work. Plan for multiple working sessions rather than rushing through the process for best results.