14+ Creative Wet Cement Ideas for Your Home
wet cement ideas Fresh cement offers a unique canvas for creativity that transforms ordinary concrete surfaces into personalized works of art. Whether you’re pouring a new driveway, creating garden stepping stones, or working on a patio project, the brief window when cement remains workable presents countless opportunities to add character and meaning to your property. These projects range from simple family keepsakes to sophisticated decorative elements that enhance your home’s aesthetic appeal and value.
The beauty of working with wet cement lies in its versatility and permanence. Unlike other craft materials that may fade or deteriorate over time, properly sealed concrete impressions can last for generations. This makes cement projects particularly meaningful for commemorating special moments, creating functional art pieces, or simply adding unique touches that reflect your personality and style. The projects discussed here cater to various skill levels, from beginners looking to make their first handprint impression to experienced DIY enthusiasts ready to tackle more complex decorative applications.
Handprint and Footprint Keepsakes
Creating handprints or footprints in wet cement remains one of the most cherished ways to preserve memories. Parents have long used this technique to capture the tiny hands and feet of their children, creating tangible reminders of how small they once were. The process requires minimal preparation but delivers maximum sentimental value that appreciates over time.
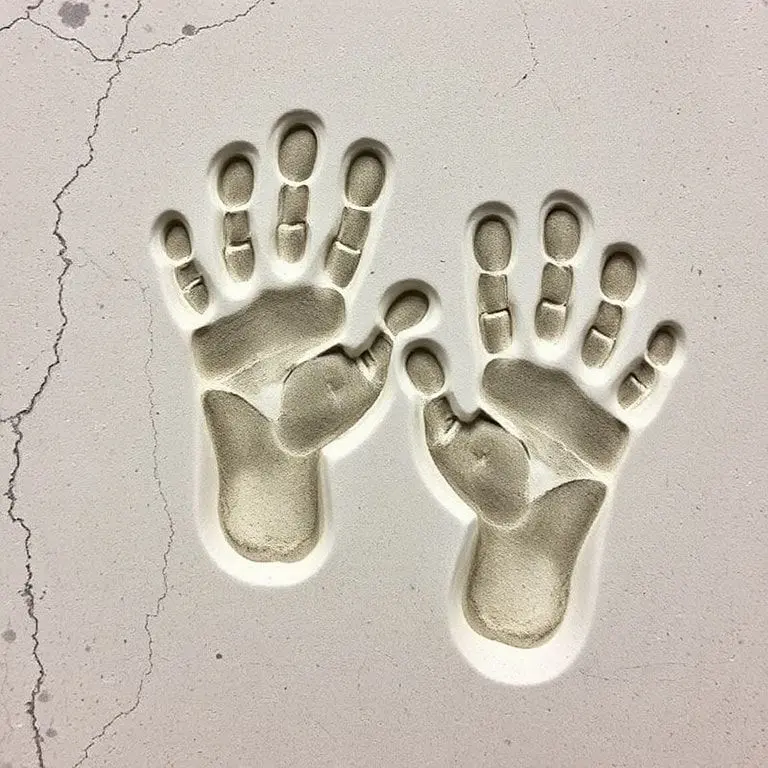
To create lasting impressions, ensure the cement has reached the right consistency. Press firmly but carefully into the surface to achieve clear definition without causing cracks. Consider adding names and dates using wooden craft sticks or specially designed letter stamps. Many families create annual traditions, making new impressions each year to document growth and change.https://casolia.com/wet-cement-ideas/
Beyond children’s prints, pet paw prints have become increasingly popular. Dog and cat owners treasure these permanent reminders of beloved companions. The key to successful pet prints involves patience and sometimes treats to encourage cooperation. Some families create entire garden pathways featuring prints from every family member, including furry ones.
Decorative Garden Stepping Stones
Custom stepping stones transform ordinary garden paths into personalized walkways that guide visitors through your outdoor spaces. These functional art pieces combine practicality with aesthetic appeal, providing stable footing while adding visual interest to landscaping designs.
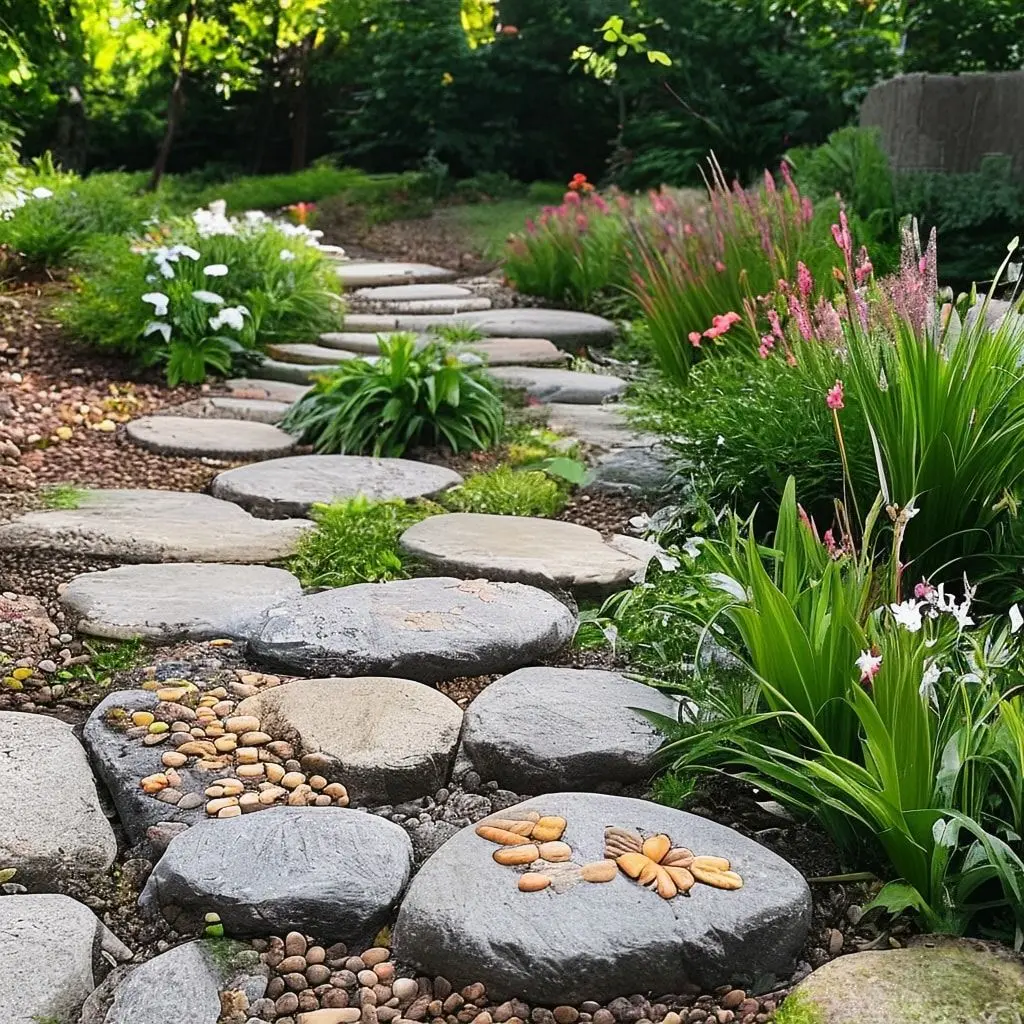
Start with pre-made stepping stone molds available at craft stores, or create custom shapes using wooden frames. Pour cement to the appropriate thickness, typically around two inches for durability. Before the cement sets completely, add decorations such as colored glass pieces, ceramic tile fragments, or natural stones. Press these elements firmly into the surface to ensure they remain secure after curing.
Consider creating themed stepping stones that tell a story or reflect seasonal changes. Spring stones might feature flower impressions, while autumn designs could incorporate leaf patterns. Arrange multiple stones to form intricate pathways that lead to garden focal points like fountains, benches, or flower beds.
Mosaic Patterns and Inlays
Embedding mosaic patterns into wet cement creates stunning visual effects that rival professional masonry work. This technique involves pressing colorful materials into the cement surface to form geometric designs, nature scenes, or abstract compositions.

Gather materials before beginning your project. Broken ceramic tiles, colored glass, smooth river rocks, and even seashells work beautifully for mosaic applications. Sketch your design on paper first to visualize the final result and calculate material quantities. When the cement reaches the right consistency, press materials firmly into place following your pattern.
Work in sections to prevent the cement from hardening before you complete your design. Keep materials clean and wipe excess cement from visible surfaces immediately. The contrast between smooth cement and textured inlay materials creates depth and dimension that catches light throughout the day.
Stamped Concrete Patterns
Concrete stamping allows homeowners to replicate the appearance of expensive materials like natural stone, brick, or decorative tile at a fraction of the cost. Professional contractors often use this technique, but DIY enthusiasts can achieve impressive results with proper tools and techniques.

Stamping mats come in numerous patterns including cobblestone, slate, wood plank, and custom designs. Apply release agents to prevent sticking, then press stamps firmly into freshly poured cement. Work systematically across the surface, ensuring consistent depth and alignment between stamp impressions.
Timing proves critical for stamping success. The cement must be firm enough to hold impressions without collapsing but soft enough to accept detailed patterns. Practice on small test areas before tackling large surfaces. Consider adding color hardeners or stains to enhance the realistic appearance of stamped patterns.
Leaf and Nature Impressions
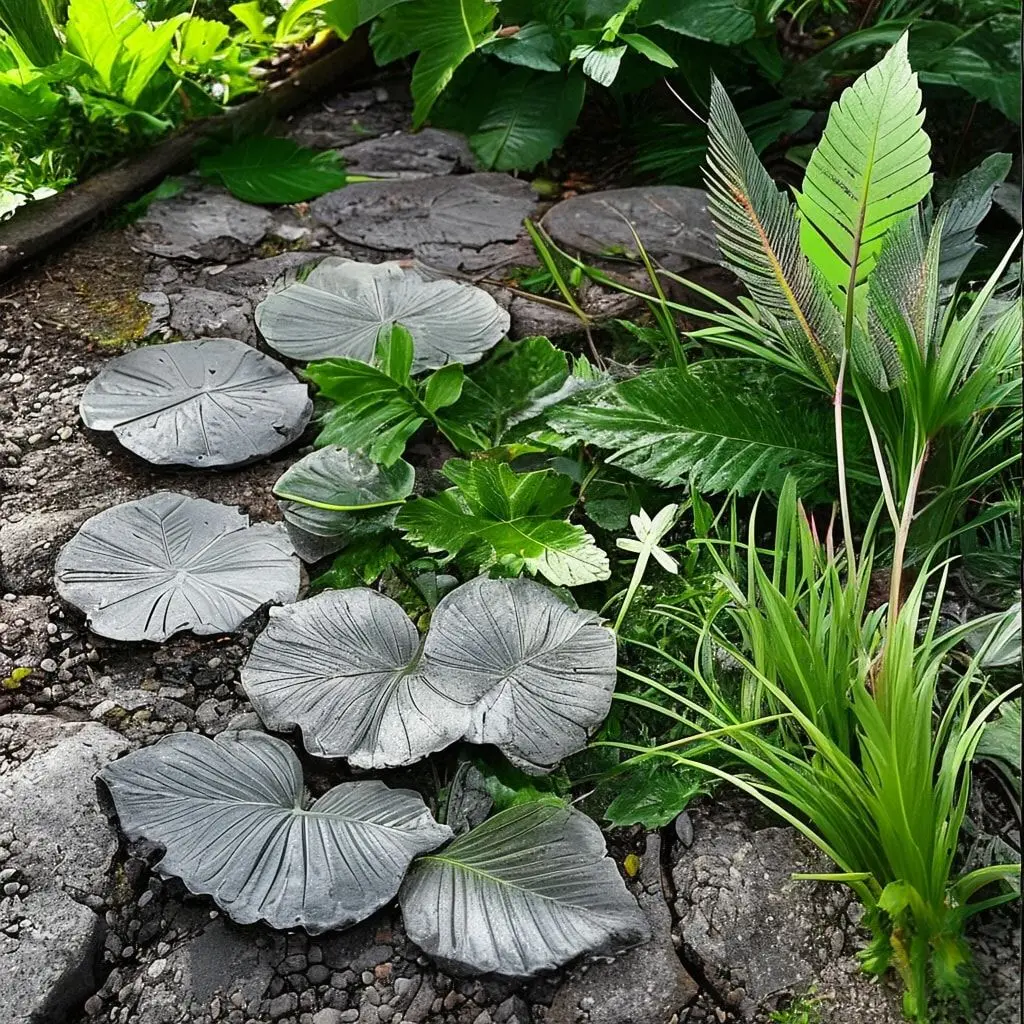
Capturing nature’s intricate details in cement creates organic artwork that celebrates the natural world. Large leaves with prominent veining produce the most dramatic results, though flowers, ferns, and seed pods also create beautiful impressions.
Press fresh plant materials into wet cement immediately after collecting them for the clearest impressions. The moisture in living plants helps create crisp details that dried specimens cannot match. After pressing materials into the surface, carefully remove them before the cement hardens completely to prevent tearing or distortion.
Create leaf impression stepping stones for garden paths, decorative wall plaques, or birdbath bases. Some artists paint finished impressions with metallic or natural colors to enhance visual impact. Seal completed projects with clear concrete sealer to protect details from weathering.
Personalized Welcome Mats
Cement welcome mats offer durability that traditional fiber mats cannot match while providing opportunities for personalization that reflect your home’s character. These permanent fixtures withstand heavy foot traffic and harsh weather without fading or deteriorating.
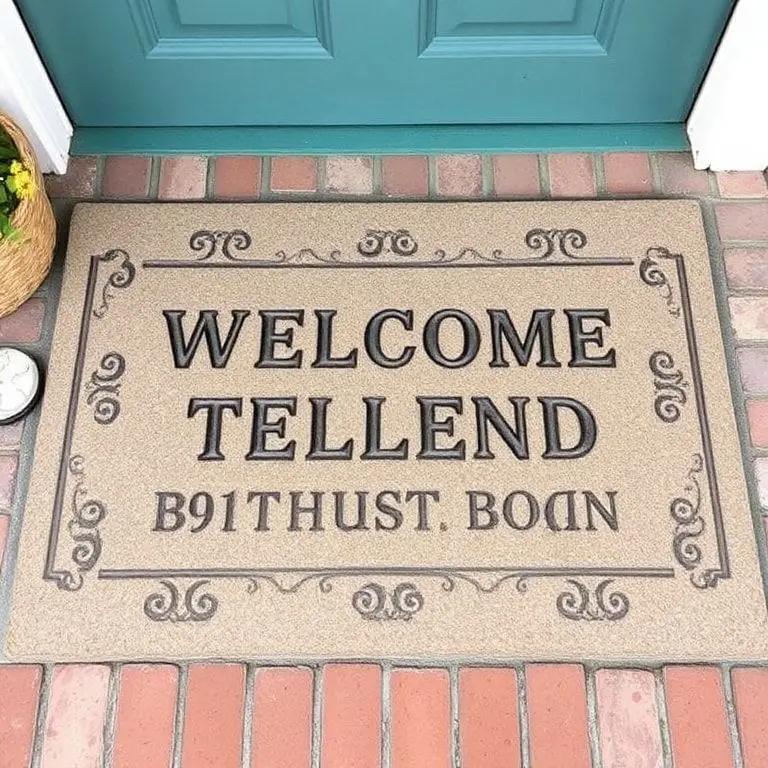
Pour cement into shallow rectangular forms, then use letter stamps or stencils to add welcoming messages, family names, or house numbers. Simple greetings work well, but creative homeowners might add favorite quotes or humorous sayings. Consider surrounding text with decorative borders created using stamps, pressed objects, or carved designs.
Texture the surface surrounding your message to improve traction and add visual interest. Broom finishes provide slip resistance while maintaining a clean, professional appearance. Allow adequate curing time before placing these mats in high-traffic areas to ensure maximum durability.
Memory Garden Markers
Memorial gardens benefit from personalized cement markers that honor loved ones or commemorate significant life events. These permanent tributes withstand outdoor conditions while providing focal points for reflection and remembrance.
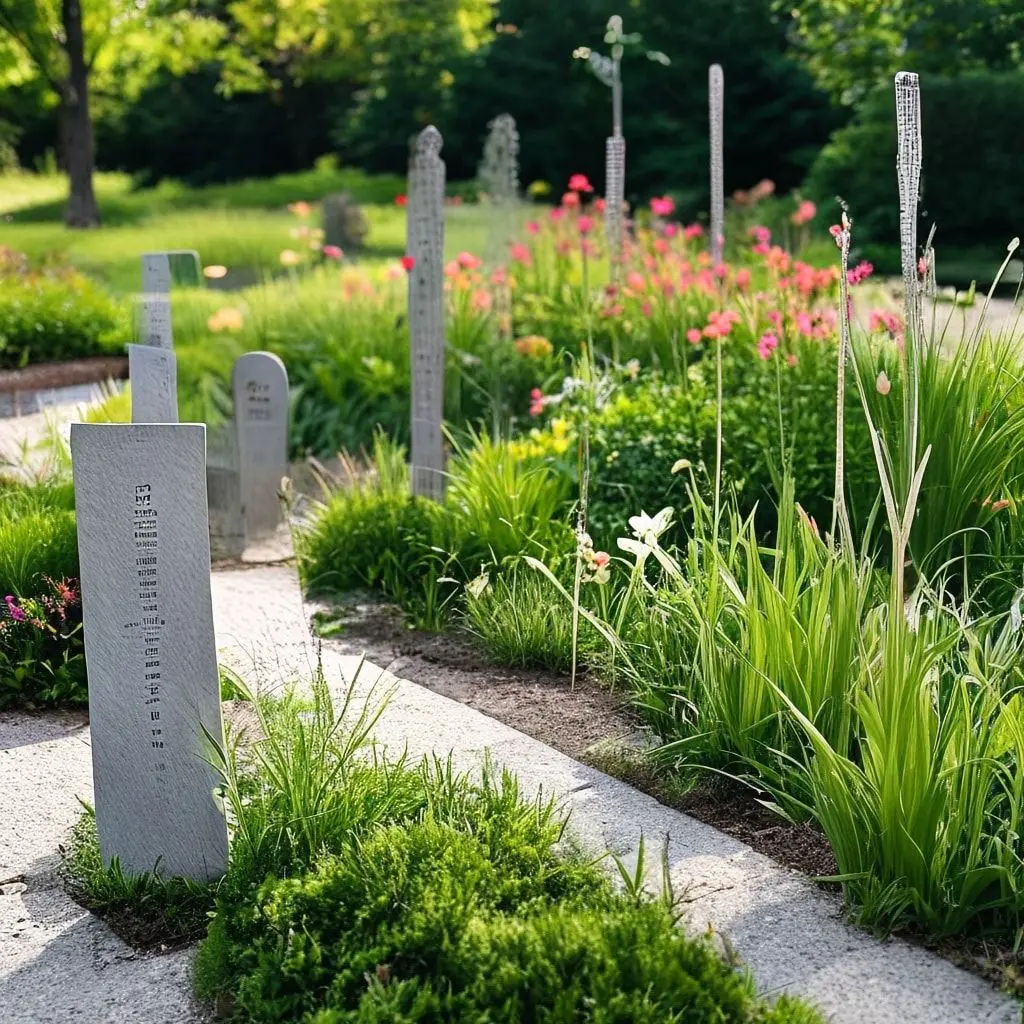
Create markers in various shapes and sizes to fit your garden design. Simple rectangular plaques work well, but hearts, circles, or custom shapes add personal touches. Include names, dates, meaningful quotes, or symbolic imagery. Some people press favorite objects belonging to deceased loved ones into wet cement as three-dimensional remembrances.
Position markers strategically throughout memorial gardens, perhaps marking places where special plants or trees grow. Flat markers double as stepping stones, while vertical markers serve as garden accents. Weather-resistant materials ensure these tributes remain legible and beautiful for years to come.
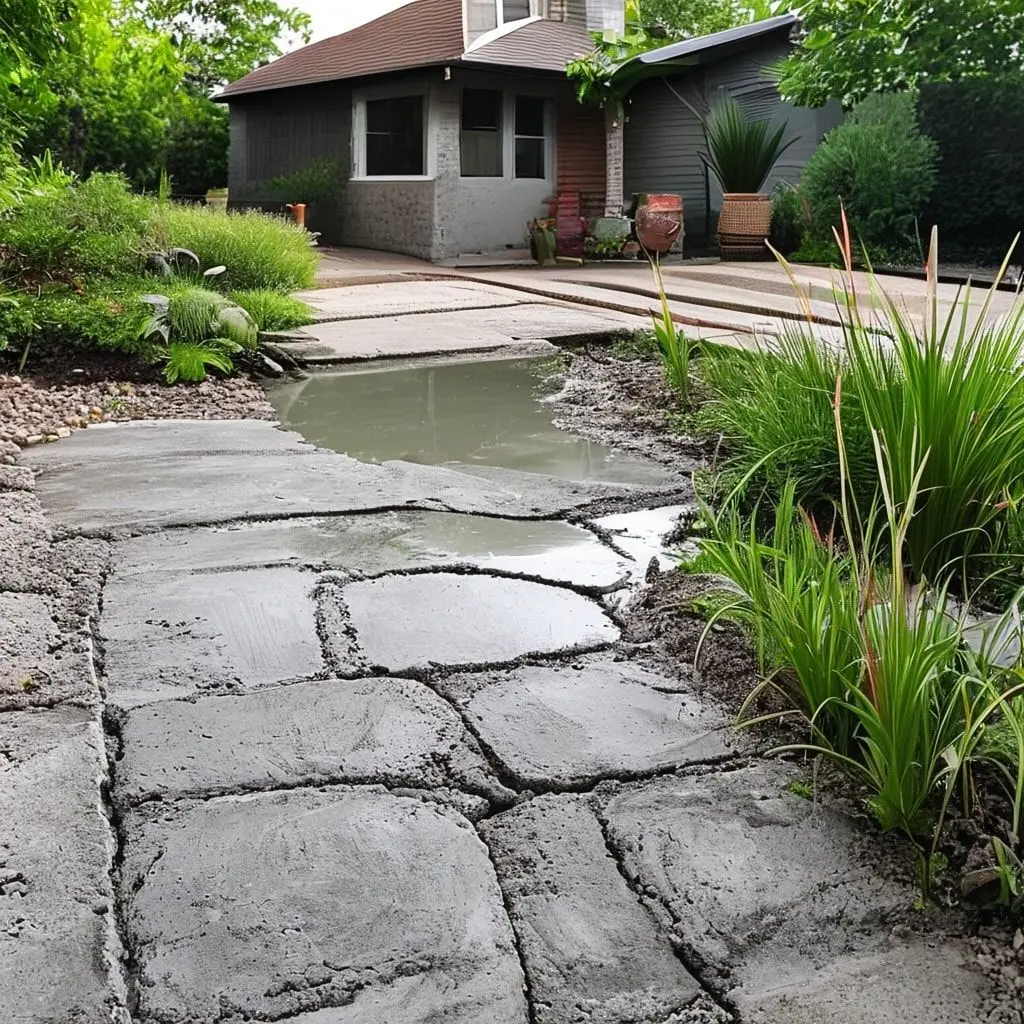
Textured Concrete Finishes
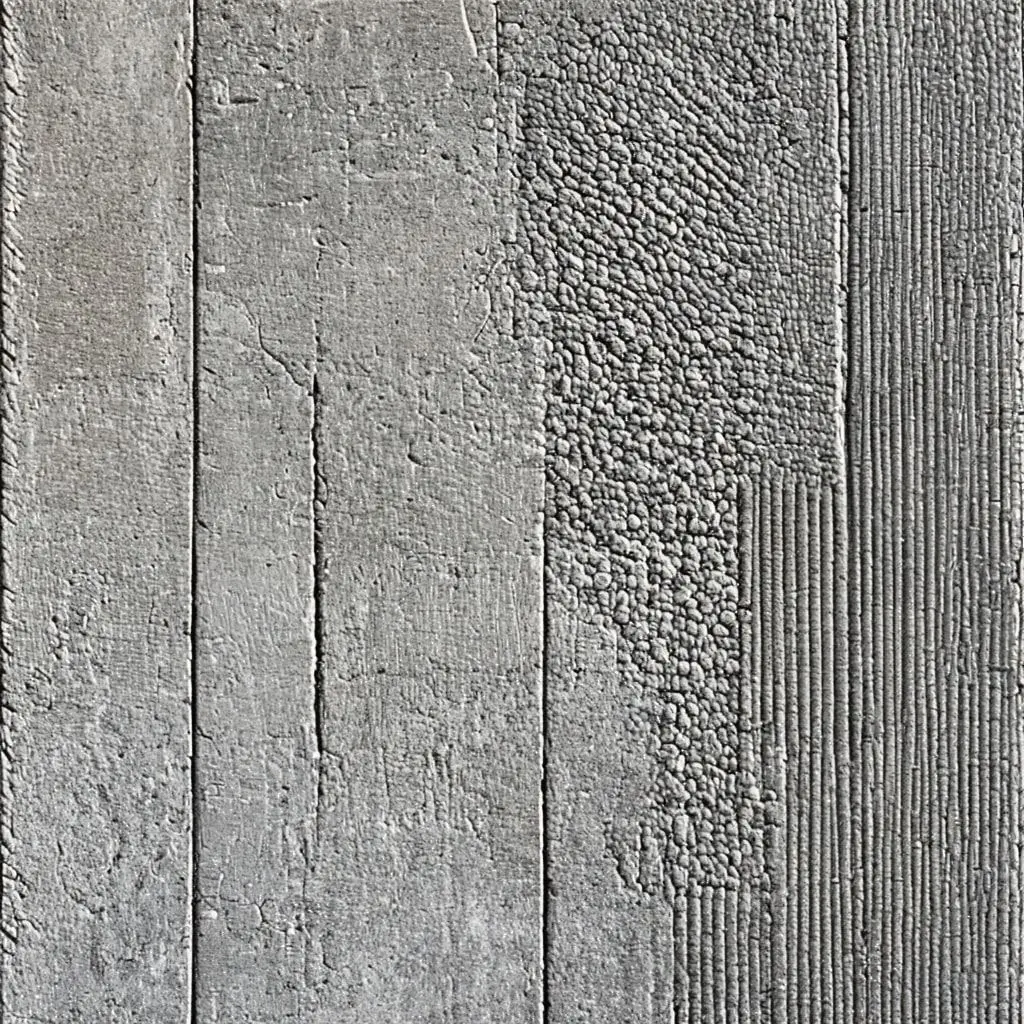
Surface texturing transforms plain cement slabs into visually interesting surfaces that add dimension and character to patios, walkways, and driveways. Various tools and techniques create different effects ranging from subtle to dramatic.
Broom finishes remain the most common texture, created by dragging stiff bristles across wet cement in straight lines or gentle curves. This practical finish improves traction while adding linear visual interest. For more pronounced textures, use specialty rollers that imprint patterns ranging from stone to wood grain.
Experimental techniques produce unique results. Pressing bubble wrap into cement creates organic circular patterns. Running rakes or combs through the surface produces rhythmic lines. Even crumpled aluminum foil can create abstract textures. Allow creativity to guide your choices while considering practical factors like cleaning ease and comfort for bare feet.
Embedded Treasures and Time Capsules
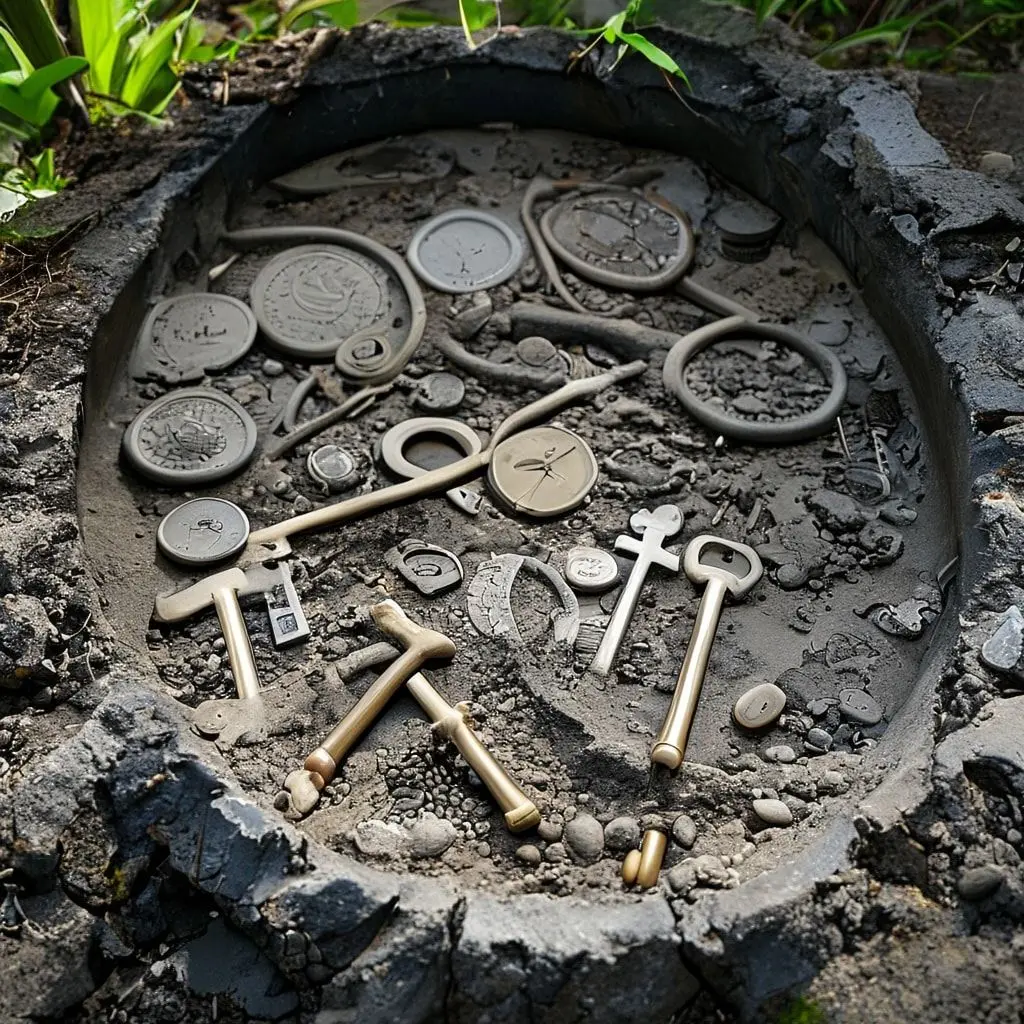
Incorporating meaningful objects into wet cement creates three-dimensional time capsules that preserve memories in innovative ways. This technique works particularly well for commemorating home constructions, renovations, or significant family milestones.
Select flat or slightly raised objects that won’t create tripping hazards. Old keys, coins from birth years, ceramic pieces from broken heirlooms, or children’s artwork laminated for protection work beautifully. Press items firmly into cement, ensuring they sit flush with or slightly below the surface.
Consider creating small embedded areas within larger concrete pours rather than scattering objects randomly. Concentrated collections tell clearer stories and create intentional focal points. Document embedded items with photographs and descriptions to help future generations understand the significance of buried treasures.
Geometric Designs and Patterns
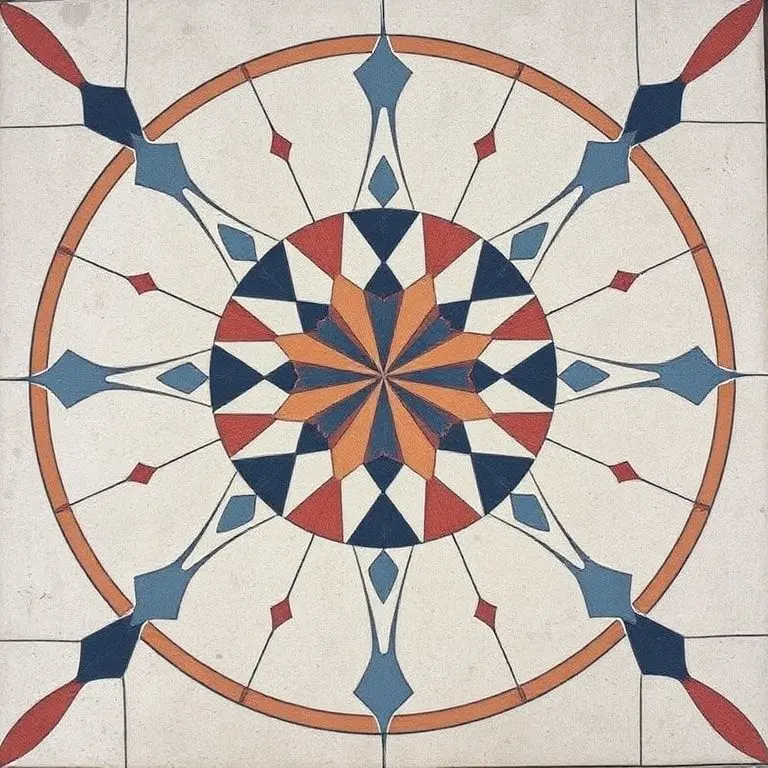
Mathematical precision meets artistic expression when creating geometric patterns in wet cement. These designs range from simple repeating shapes to complex tessellations that demonstrate sophisticated design skills.
Use straightedges, compasses, and templates to mark patterns before cement hardens. Simple squares, triangles, and circles combine to form intricate designs. For more complex patterns, consider using stencils or stamps designed specifically for concrete work. Contrasting colors applied to alternating sections enhance geometric impact.
Radial designs work particularly well for circular spaces like patios or around fire pits. Start from the center and work outward, maintaining consistent spacing and alignment. Grid patterns suit rectangular areas and create clean, modern aesthetics. Geometric designs complement contemporary architecture while adding visual interest to minimalist landscapes.
Game Boards and Entertainment Spaces
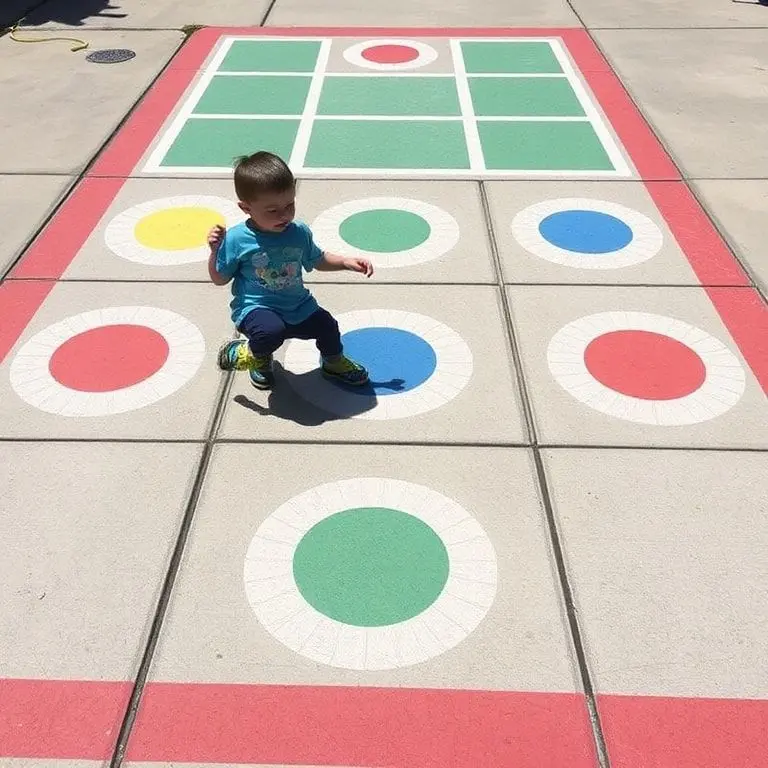
Permanent outdoor game boards embedded in cement surfaces create entertainment spaces that encourage family interaction and outdoor recreation. Popular options include hopscotch grids, tic-tac-toe boards, checkers, and foursquare courts.
Plan game dimensions carefully to ensure proper playability. Use measuring tools to mark accurate squares, circles, or courts before cement sets. Color additions help define playing areas and improve visibility. Consider using different colored concrete or adding paint after curing for the clearest game board markings.
Position game boards near outdoor seating areas or playgrounds for convenient access. Flat, level surfaces prove essential for proper gameplay. Seal finished boards with durable concrete sealer that can withstand constant foot traffic and game piece contact without degrading.
Custom Address Numbers and Signs
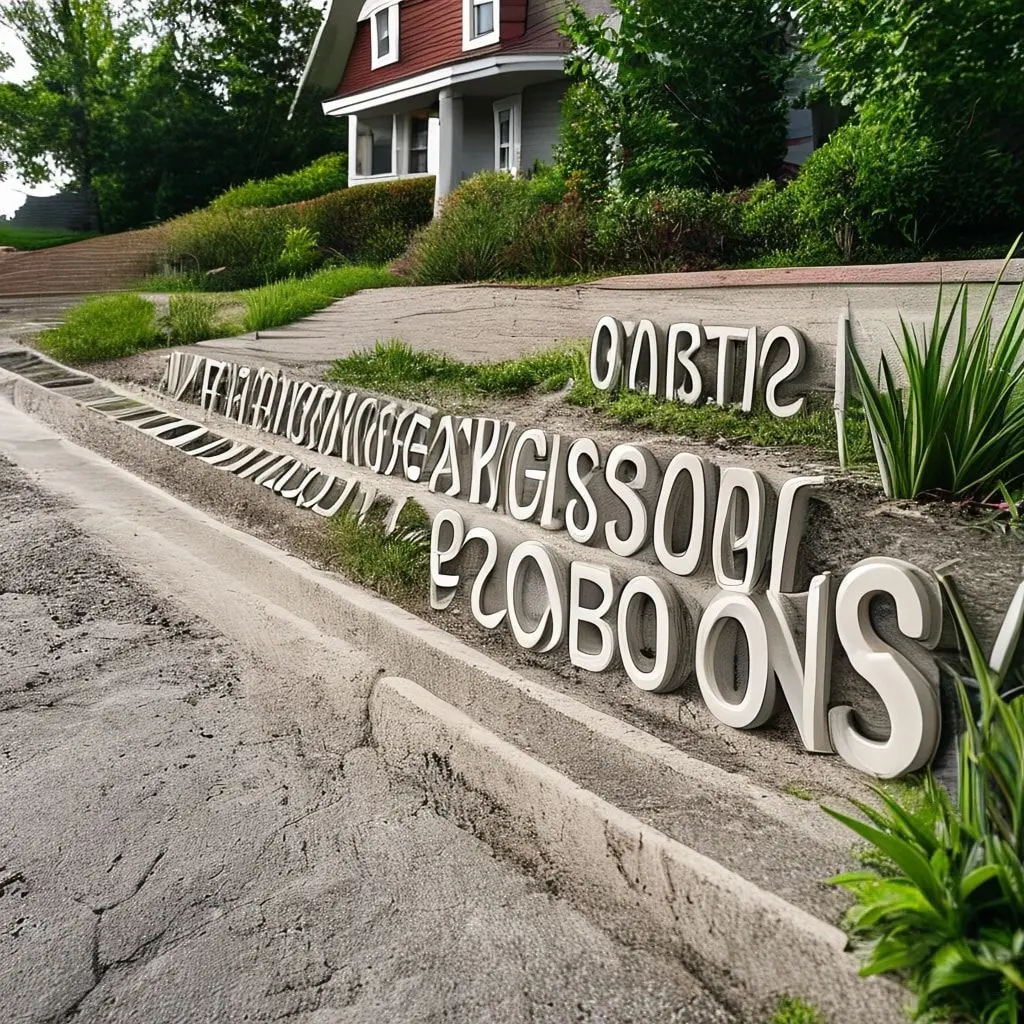
Embedding address numbers or property names into wet cement creates distinctive identification markers that enhance curb appeal while serving practical purposes. These permanent fixtures eliminate the need for replacement signs that fade, rust, or break over time.
Form numbers using various materials including ceramic tiles, metal numerals, or carved impressions. Press materials firmly into cement positioned near entrances, mailboxes, or at driveway beginnings. Ensure numbers are large enough to read from the street for emergency services.
Consider surrounding numbers with decorative elements that complement your home’s architectural style. Simple borders work well for traditional homes, while modern properties might feature minimalist designs. Position signs where they remain visible year-round without obstruction from plants or vehicles.
Artistic Sculptures and Garden Art
Adventurous artists use wet cement as a sculptural medium for creating three-dimensional garden art. From simple abstract forms to detailed figurative pieces, cement offers durability that allows outdoor sculptures to withstand weather extremes.
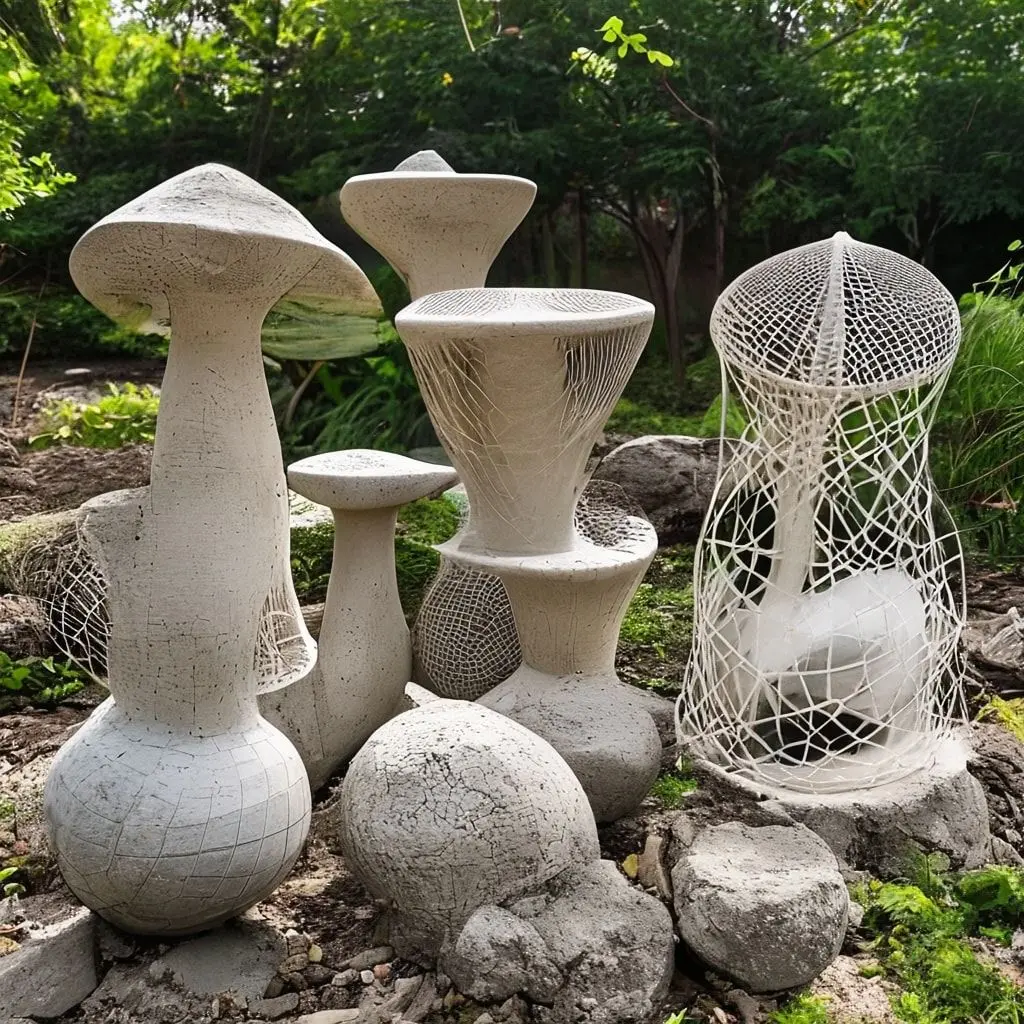
Start with small projects like cement balls, mushrooms, or simple animal forms. Build forms using wire mesh or foam cores, then apply cement layers to create desired shapes. Work cement while pliable to achieve smooth finishes or textured surfaces depending on artistic vision.
Larger sculptures require internal reinforcement using rebar or metal frameworks. Build up cement gradually in layers, allowing each to partially cure before adding more material. Consider creating molds for repeating elements or casting multiple copies of successful designs. Finish sculptures with concrete sealers or specialized paints designed for outdoor use.
Illuminated Pathways with Embedded Lights
Combining cement work with lighting elements creates magical nighttime landscapes that enhance safety while adding ambiance. Embedded solar lights, fiber optics, or LED strips transform ordinary concrete surfaces into illuminated features.
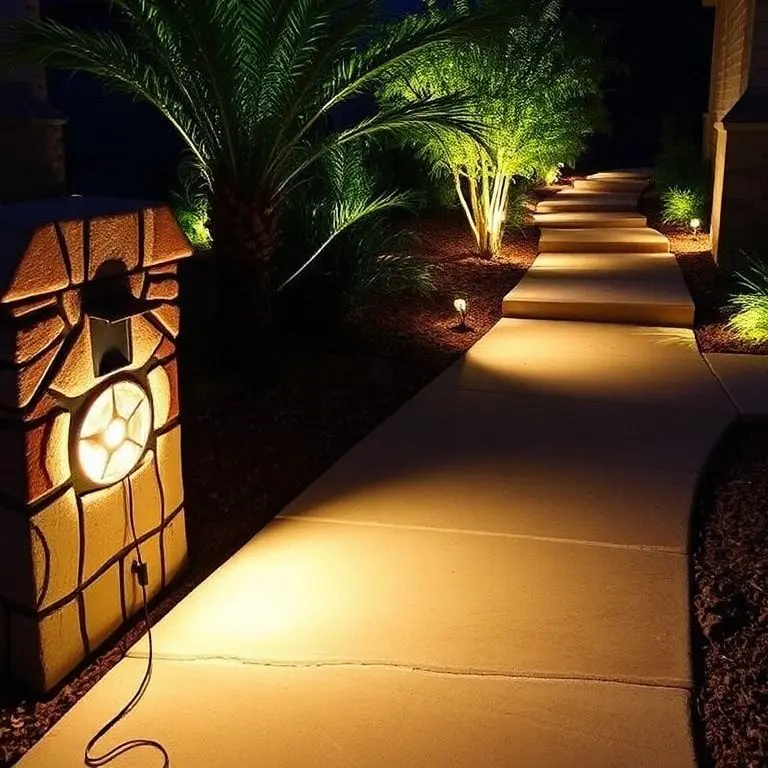
Plan lighting placement before pouring cement to ensure proper positioning and power source access. Solar lights with flat backs press directly into wet cement, providing sustainable illumination without wiring complications. For permanent electrical lighting, install conduit and wiring before cement pours.
Space lights appropriately to provide adequate illumination without creating harsh bright spots. Consider color options that complement your landscape design. Warm white lights suit traditional settings, while color-changing LEDs add contemporary flair. Seal around light fixtures carefully to prevent water infiltration that could damage electrical components.
Seasonal and Holiday Designs
Creating seasonal cement decorations allows homeowners to celebrate holidays and changing seasons with permanent outdoor displays. These themed pieces add festive touches that require no annual setup or storage.
Design seasonal stepping stones featuring autumn leaves, winter snowflakes, spring flowers, or summer suns. Create holiday-specific pieces like pumpkin-shaped stones for Halloween or heart designs for Valentine’s Day. Rotate seasonal pieces throughout the year or create permanent installations that celebrate your favorite time of year.
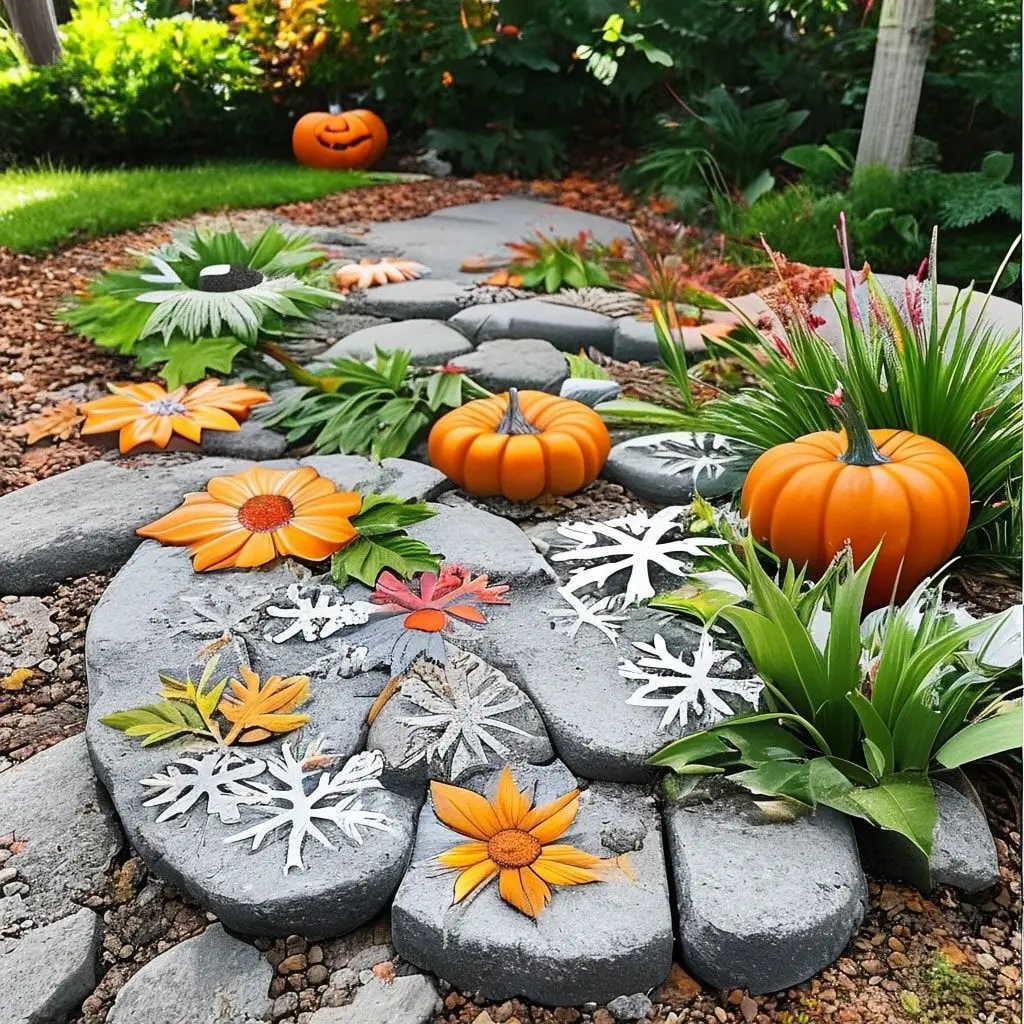
Consider making sets of interchangeable decorative pieces that fit into permanent cement bases. This approach allows seasonal variety without requiring multiple permanent installations. Store off-season pieces in sheds or garages to protect decorative details from unnecessary weathering.
Working with wet cement opens endless creative possibilities for personalizing your home and property. These projects combine practical functionality with artistic expression, creating lasting features that tell your unique story. Whether preserving precious memories through handprints, enhancing garden pathways with decorative stones, or creating functional art pieces, wet cement provides a versatile medium that rewards creativity with permanent, beautiful results. The key to success lies in proper planning, understanding cement working times, and allowing your imagination to guide the transformation of simple concrete into meaningful, personalized creations that enhance your living spaces for years to come.
Frequently Asked Questions:
What is the best time to make impressions in wet cement?
The ideal time to work with wet cement is during the “thumbprint stage,” typically 2 to 4 hours after pouring, depending on weather conditions. The surface should be firm enough to hold shape but soft enough to accept impressions without cracking. Test readiness by pressing your thumb gently into an inconspicuous area. If it leaves a clear impression about a quarter-inch deep without the cement sticking to your skin, the consistency is perfect for most decorative work.
How can I prevent decorative items from falling out of cement?
Ensure decorative elements sit at least halfway into the cement surface and press them firmly without wiggling. Clean items should be free of dust or oils that prevent bonding. For heavier objects, roughen the backs with sandpaper to improve adhesion. Apply a thin layer of cement over edges of flat items for extra security. Allow proper curing time of at least 48 hours before exposing decorated surfaces to heavy use or weather.
Can I add color to wet cement for my projects?
Yes, concrete colorants come in liquid or powder forms that mix directly into wet cement or apply as surface treatments. For uniform color throughout, add pigments during mixing before pouring. Surface applications like concrete stains or dyes can be applied after initial curing. Integral color provides better longevity as it extends throughout the material rather than just coating the surface. Always test colors on small batches first as they appear darker when wet.
How do I seal and protect finished cement projects?
Apply concrete sealer after the cement has fully cured, typically 28 days after pouring, though some fast-cure sealers work after just 24 hours. Clean the surface thoroughly before sealing to remove dirt, dust, or efflorescence. Choose between penetrating sealers that soak into concrete or topical sealers that form surface coats. Outdoor projects benefit from UV-resistant sealers that prevent fading and weathering. Reapply sealer every 2 to 3 years for continued protection.
What tools do I need for basic wet cement projects?
Essential tools include rubber gloves, trowels for smoothing surfaces, and spray bottles for keeping cement workable. Letter stamps or wooden craft sticks help add text and details. Molds or forms contain poured cement in desired shapes. Release agents prevent sticking when using stamps or molds. A level ensures flat, even surfaces. For decorative work, gather materials like stones, tiles, or leaves before beginning. Basic safety equipment includes eye protection and a dust mask when mixing dry cement.