
9+ Creative DIY Grill Ideas for Your Backyard
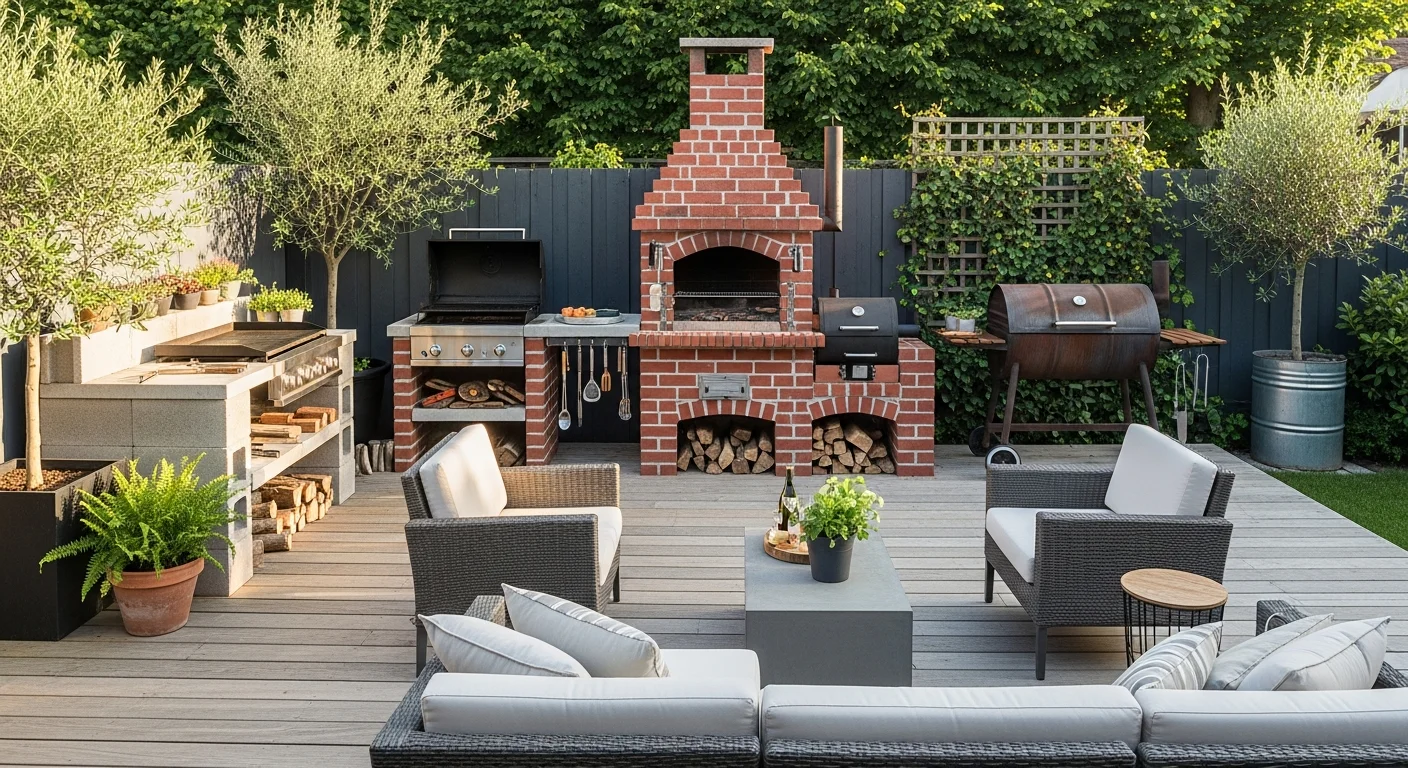
Building your own backyard grill transforms outdoor cooking from a simple activity into a personalized experience that reflects your style and meets your specific needs. Whether you’re working with a tight budget or seeking a weekend project that adds value to your home, creating a custom backyard grill offers satisfaction beyond anything you can purchase at a store. The beauty of DIY grill construction lies in its flexibility, allowing you to choose materials, dimensions, and features that work perfectly for your space and cooking preferences.
Many homeowners hesitate to attempt grill construction, assuming the process requires advanced skills or expensive tools. In reality, most DIY grill projects demand nothing more than basic construction knowledge, readily available materials, and a willingness to invest some time. From simple cinder block stations to elaborate barrel smokers, the options span every skill level and budget range. The following ideas demonstrate how accessible custom grill building can be while delivering results that rival commercial products costing thousands of dollars.
Cinder Block Grill Station
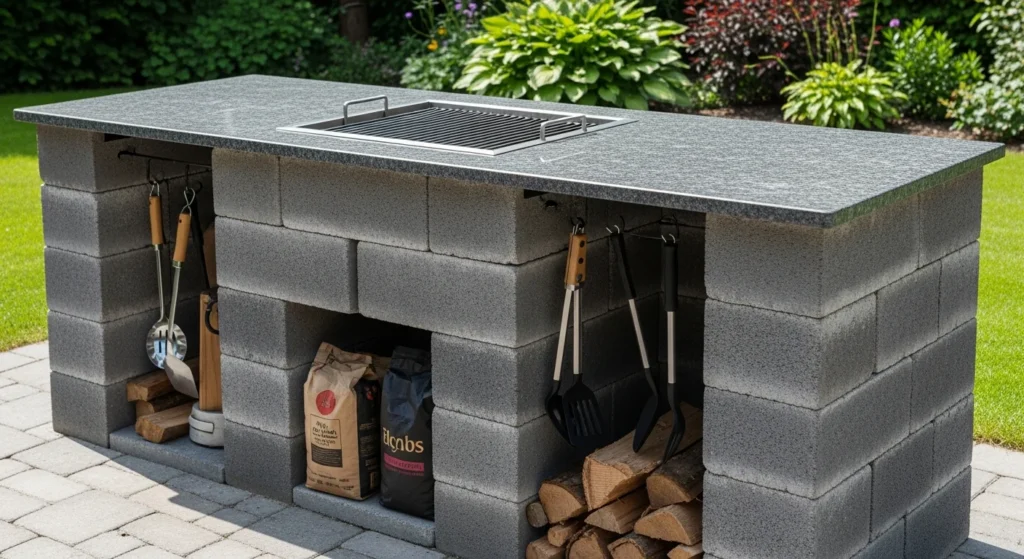
Cinder blocks offer one of the most economical and straightforward approaches to building a functional grill station. These concrete blocks cost around one to two dollars each at most hardware stores, making them accessible for nearly any budget. A basic Backyard Grill station requires approximately 40 to 60 blocks, depending on your desired dimensions and configuration.
The construction process involves stacking blocks to create walls that support a cooking surface, typically made from patio stones or granite slabs. Most builders aim for a counter height of 32 to 34 inches, which translates to eight standard cinder blocks stacked vertically. The beauty of this design lies in its modularity. You can create an L-shaped station, a straight counter, or even a U-shaped outdoor kitchen by simply adjusting the block placement.
To enhance stability and longevity, fill the hollow centers of the blocks with concrete once you complete the stacking. This step transforms loose blocks into a solid structure that withstands weather and regular use. Many builders paint their finished stations with outdoor concrete paint to achieve a more polished appearance while adding a layer of protection against moisture and temperature fluctuations.
The space between blocks provides natural storage areas for propane tanks, grilling tools, and charcoal bags. Some builders install wire shelving on bricks inside these cavities to create organized storage that keeps supplies dry and accessible. This practical feature eliminates trips back to the garage or shed during cooking sessions.
Traditional Brick BBQ Backyard Grill
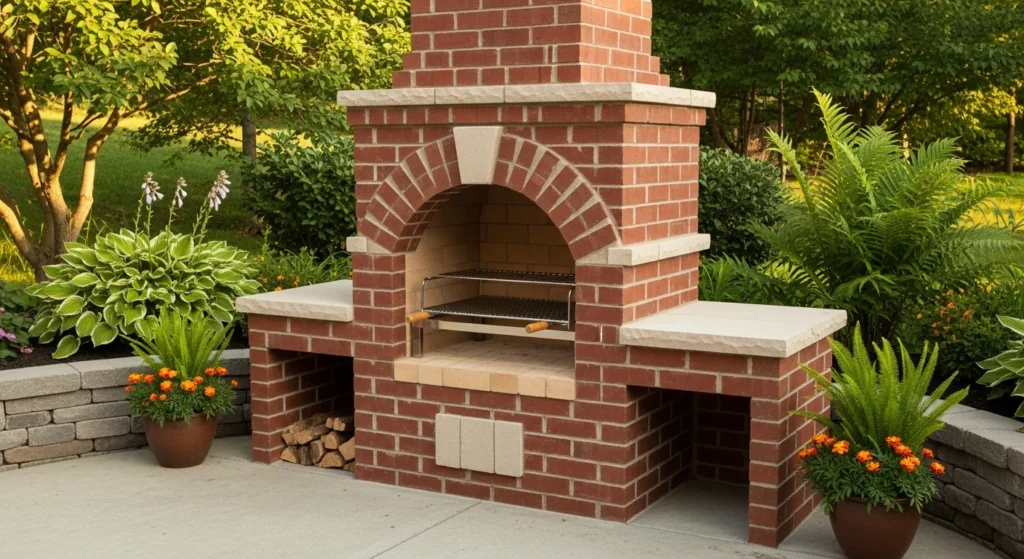
Brick construction creates a permanent, attractive grilling solution that increases property value while providing reliable outdoor cooking capabilities. A traditional brick BBQ typically features three main components: a firebox for charcoal or wood, a cooking grate positioned above the heat source, and often a chimney to direct smoke away from the cooking area.
Building with brick requires more skill than cinder block construction, but the results justify the effort. Start by creating a solid foundation, usually a concrete pad that extends beyond the planned footprint of your grill. This foundation prevents settling and cracking over time. Stack bricks using heat-resistant mortar, creating walls that support your cooking grate at the desired height.
The traditional design includes a fire brick lining in the cooking chamber, protecting the structural bricks from intense heat. Fire bricks withstand temperatures exceeding 2000 degrees Fahrenheit, ensuring your backyard grill remains safe and functional for decades. Position the cooking grate about four inches above the charcoal bed for optimal heat control.
Many builders incorporate side tables or prep areas by extending the brick structure horizontally. These additions transform a simple backyard grill into a complete outdoor cooking station. Consider adding built-in storage compartments during construction to house utensils, charcoal, and cleaning supplies within arm’s reach of your cooking area.
55 Gallon Drum Grill
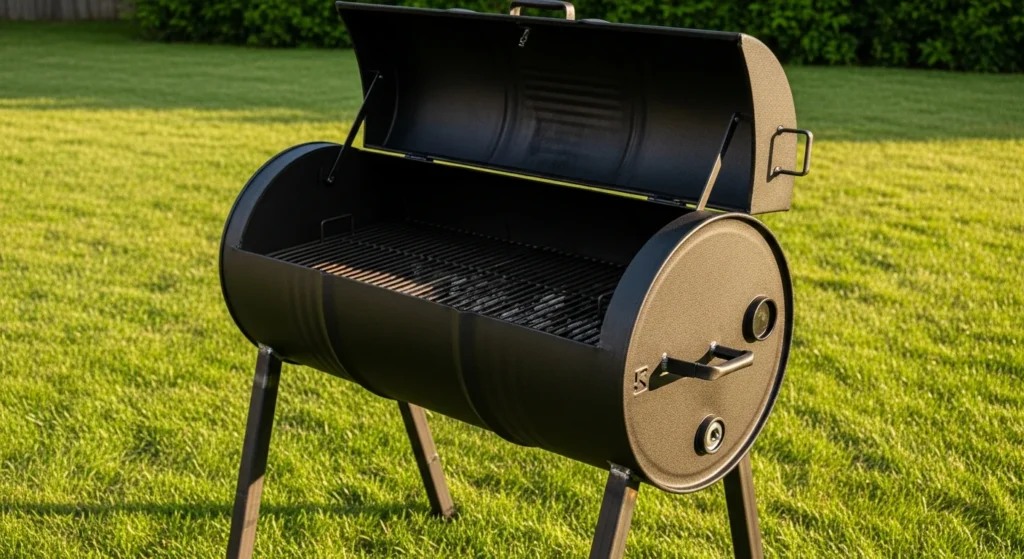
Repurposing a 55-gallon steel drum creates a versatile grill that handles both traditional backyard grilling and low-and-slow smoking. This project requires metal-working tools including an angle grinder, drill, and ideally welding equipment, though some builders successfully complete drum grills using only bolts and brackets.
Safety represents the paramount concern when working with steel drums. Never cut into a drum without thoroughly cleaning it and ensuring it contained no flammable substances. Fill the drum completely with water, drain it, and repeat this process several times before attempting any cutting. Some builders burn out the interior with a controlled fire to eliminate residual coatings and chemicals.
The basic drum grill design involves cutting the drum lengthwise to create a hinged lid. Install metal hinges on one long edge, allowing the top to open and close smoothly. Add legs constructed from angle iron or repurposed metal posts to elevate the drum to a comfortable working height. Install cooking grates using brackets welded or bolted to the interior walls.
Ventilation controls temperature in drum grills. Drill holes near the bottom for air intake and create an exhaust vent in the lid or at the opposite end from the intake. Adjustable dampers on these vents allow precise temperature control, essential for both hot grilling and extended smoking sessions.
Paint the exterior with high-temperature grill paint to prevent rust and add a personalized touch. Many builders achieve professional appearances through careful surface preparation and quality paint application. The cylindrical shape provides excellent heat retention, making drum grills remarkably fuel-efficient compared to many commercial models.
Simple Fire Pit Grill
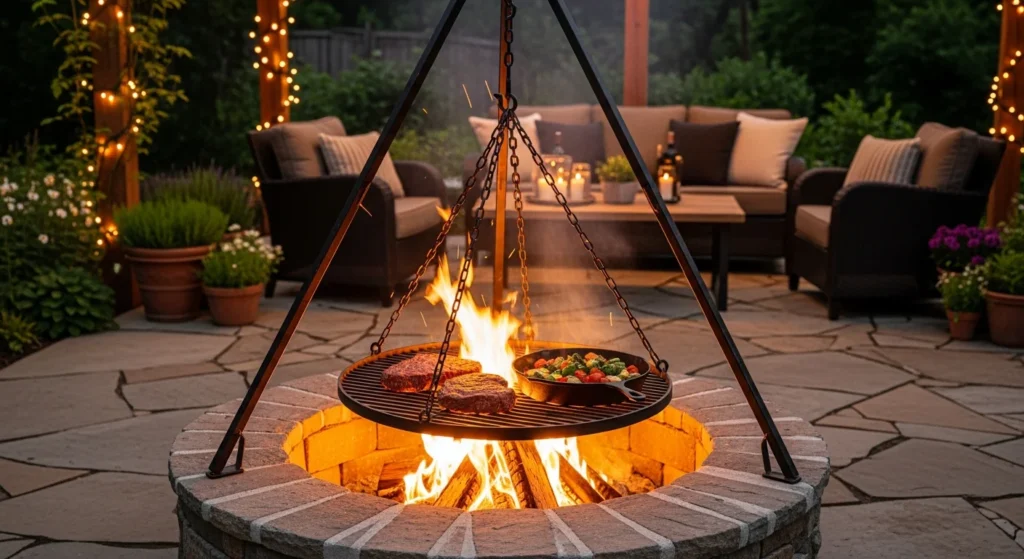
Converting a fire pit into a grilling station offers the dual functionality of ambiance and cooking capability. This approach works particularly well for those who already have a fire pit or plan to build one primarily for warmth and atmosphere.
The simplest fire pit grill requires nothing more than a cooking grate placed across the top of your pit using bricks or metal stands. Adjustable grates mounted on chains or telescoping posts provide better heat control, allowing you to raise or lower the cooking surface as needed. Some designs incorporate a swing arm that pivots the grate over the fire for cooking and away for adding wood or adjusting the flames.
For a more permanent solution, build a dedicated fire pit using fire bricks or cinder blocks arranged in a circle or square. Make the walls three to four courses high, creating enough depth to contain hot coals while elevating the cooking surface to a comfortable height. Leave gaps between blocks on the bottom course to ensure adequate airflow.
Santa Maria style grills represent a popular fire pit cooking system that originated in California’s central coast region. These grills feature a cooking grate suspended on a pulley system, allowing cooks to adjust height with a hand crank. While traditional Santa Maria grills can be expensive, DIY versions using steel pipe, cables, and a simple winch mechanism deliver similar functionality at a fraction of the cost.
Portable Tabletop Grill
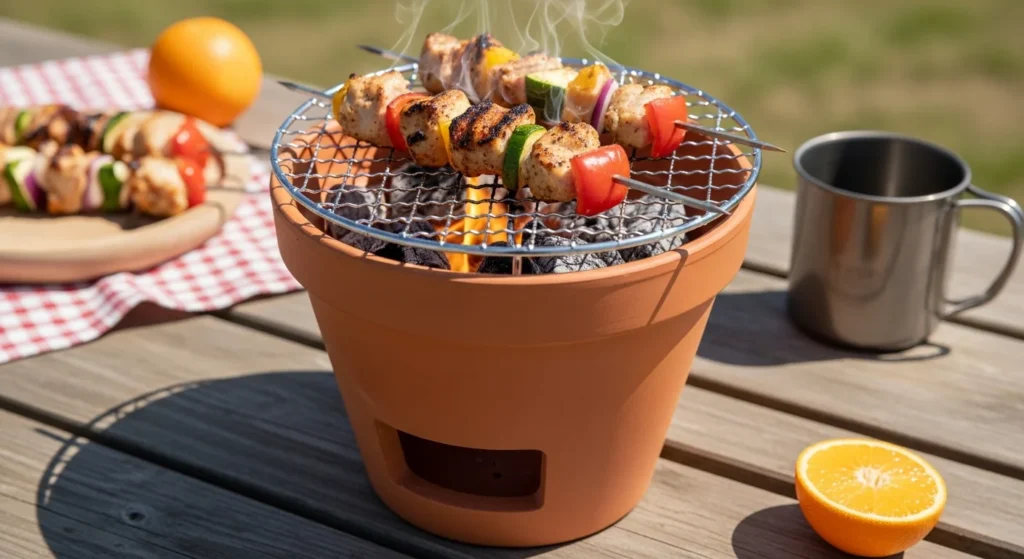
Small-scale grilling solutions suit apartment dwellers, tailgaters, and anyone seeking flexibility in their outdoor cooking setup. A portable tabletop grill can be as simple as a terracotta planter filled with sand and topped with a small cooking grate.
To build a basic tabletop model, select a large terracotta pot, approximately 12 to 16 inches in diameter. Fill the bottom third with sand or gravel for insulation and weight. Place a small metal grate or cake cooling rack across the top. Add a handful of charcoal in the center, light it, and you have a functional miniature backyard grill perfect for kebabs, vegetables, or small cuts of meat.
More elaborate tabletop designs incorporate metal toolboxes, small steel drums, or custom-welded enclosures. These portable units often include hinged lids, adjustable vents, and carrying handles. The compact size means they heat quickly and use minimal fuel, making them economical for regular use.
For parties or events, multiple small grills positioned along a table allow guests to cook their own food while socializing. This interactive cooking experience adds entertainment value beyond the meal itself. Build several identical units for consistency, or create varied designs that spark conversation.
Kamado-Style Grill
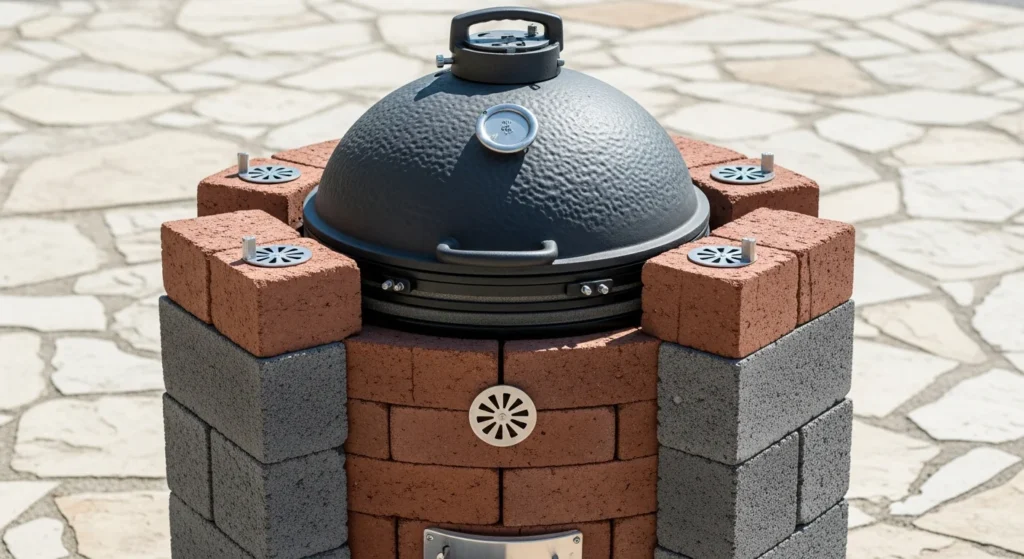
The kamado cooking style, dating back centuries in Asian cultures, provides exceptional heat retention and fuel efficiency. While commercial ceramic kamados carry premium prices, DIY builders can approximate the performance using modern materials and creative engineering.
One approach involves using concrete landscape blocks to create thick walls around a fire chamber. The mass of concrete mimics the thermal properties of ceramic, holding heat effectively for extended cooking sessions. Line the interior with fire bricks for added insulation and heat resistance.
Install a heavy cast-iron or thick steel lid to complete the enclosure. The lid needs sufficient weight to create a tight seal when closed, minimizing air leaks that would reduce temperature control. Add adjustable vents at the bottom and top to regulate airflow and maintain precise temperatures.
Some builders construct wooden surrounds filled with insulation material, creating a kamado-like chamber that retains heat remarkably well. This method requires careful attention to fire safety, ensuring no combustible materials contact hot surfaces. Use cement board or metal barriers between the fire chamber and any wooden components.
The results of a well-built DIY kamado justify the effort. These backyard grills maintain steady temperatures for hours on small amounts of charcoal, excel at both high-heat searing and low-temperature smoking, and protect food from temperature swings caused by wind or ambient conditions.
Wheelbarrow or Wagon Grill
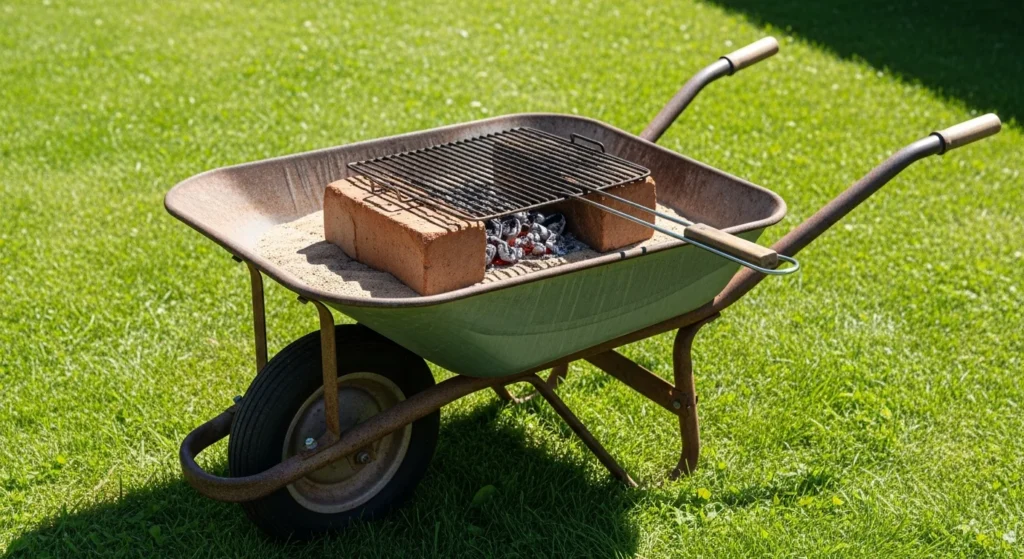
Repurposing old wheelbarrows or children’s wagons creates mobile grilling solutions that move easily around your yard or to different locations. This project works best with metal wagons or wheelbarrows, as plastic versions cannot withstand the heat.
Start by filling the bed with six inches of sand, gravel, or dirt to insulate the bottom from charcoal heat. This protective layer prevents the metal from warping or developing holes from extended exposure to high temperatures. Arrange bricks around the perimeter at the desired height for your cooking grate, typically three to four inches above the fuel bed.
Place charcoal on a layer of aluminum foil spread across the insulating material. The foil prevents ash from mixing into the sand or gravel, simplifying cleanup after cooking. Set your cooking grate on the bricks, and you have a fully functional mobile grill that stores easily when not in use.
The wheels provide mobility that stationary grills cannot match. Move your backyard grill to follow the sun or shade depending on weather, relocate it closer to your outdoor seating for serving, or wheel it into a garage or shed for storage. This flexibility proves especially valuable for renters or those who frequently rearrange their outdoor spaces.
Tire Rim Grill
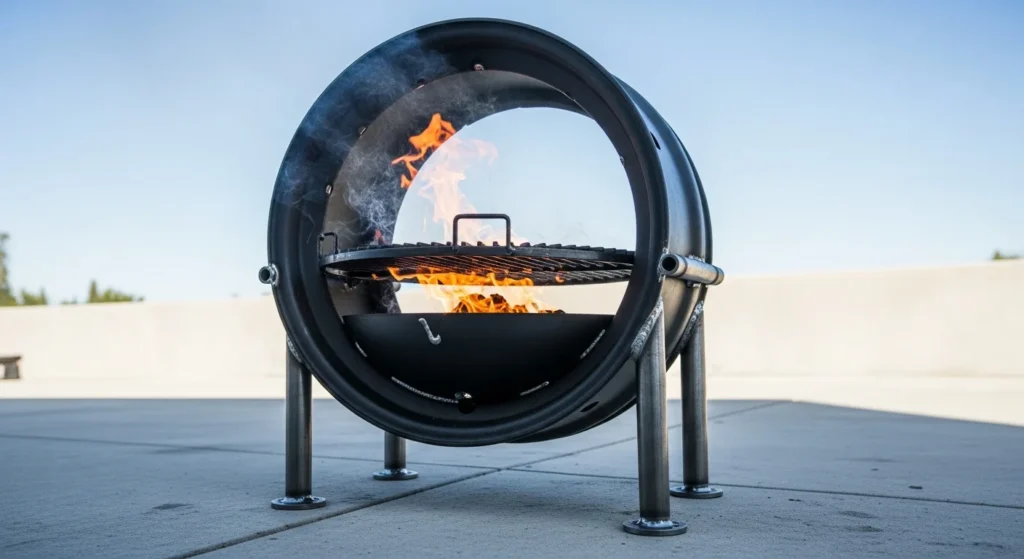
Automotive tire rims offer a ready-made circular structure perfect for small grills. The steel construction withstands high heat, and the rim’s shape naturally accommodates a cooking grate. This project costs almost nothing if you source used rims from junkyards or tire shops, where discarded rims often pile up waiting for recycling.
Select a rim approximately 18 to 24 inches in diameter for adequate cooking surface. Clean the rim thoroughly, removing any tire residue, dirt, or rust. Sand the surface smooth and apply high-temperature paint if desired. Some builders prefer the industrial look of raw steel, while others customize their rims with colorful heat-resistant finishes.
Mount the rim on a stand constructed from steel pipe, rebar, or angle iron. The stand should elevate the rim to a comfortable cooking height while providing stability. Some designs incorporate legs that stake into the ground for added security during use.
Place a cooking grate inside the rim, either resting on the inner lip or suspended from hooks welded to the rim’s sides. Add charcoal directly to the bottom of the rim or use a smaller container inside the rim to contain the coals. The rim’s solid construction contains heat effectively while the open top allows easy access for adding fuel or adjusting food.
Built-In Wood Frame Grill Station
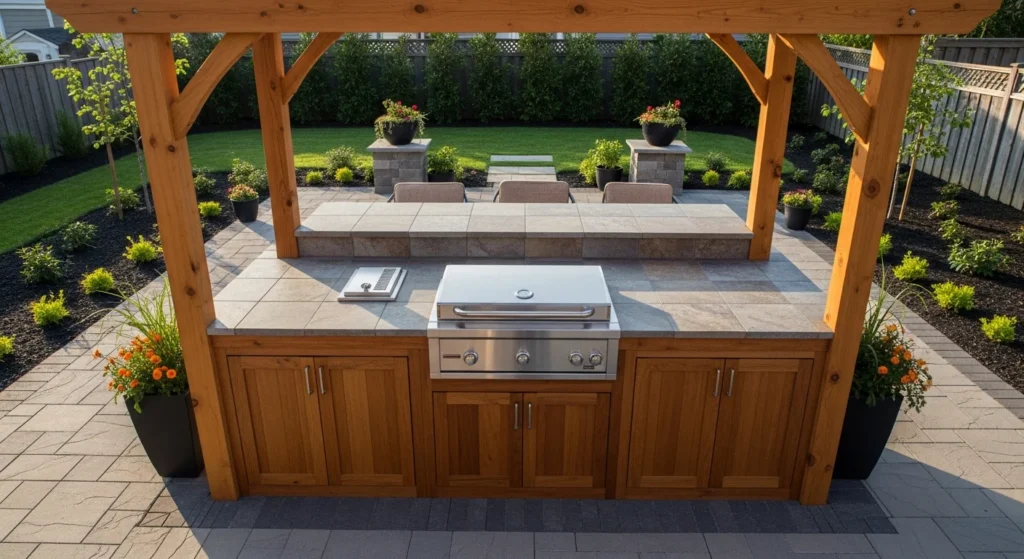
Constructing a wooden frame with a drop-in grill insert creates a finished appearance similar to expensive built-in outdoor kitchens. This approach works well for those comfortable with carpentry but less experienced with masonry or metalwork.
Build a frame using pressure-treated lumber rated for ground contact. The structure should accommodate your grill with enough surrounding counter space for food preparation and serving. Standard construction techniques apply, with vertical corner posts supporting horizontal framework that holds countertop surfaces.
Install cement backer board on surfaces that will be near the grill or exposed to weather. This material resists heat and moisture far better than plywood or standard lumber. Cover the backer board with outdoor-rated tile, stone veneer, or stucco to create an attractive, durable finish.
The countertop represents the most visible component, so choose materials carefully. Granite, concrete, or thick stone pavers provide heat resistance and visual appeal. Ensure the countertop has a cutout sized precisely for your grill, allowing it to drop into place with adequate support underneath.
Add cabinet doors to the front of your station to conceal storage areas for propane tanks, tools, and supplies. Use marine-grade hardware that resists corrosion from moisture and temperature changes. Paint or stain all wood surfaces with products specifically formulated for outdoor exposure.
Stacked Stone Outdoor Kitchen
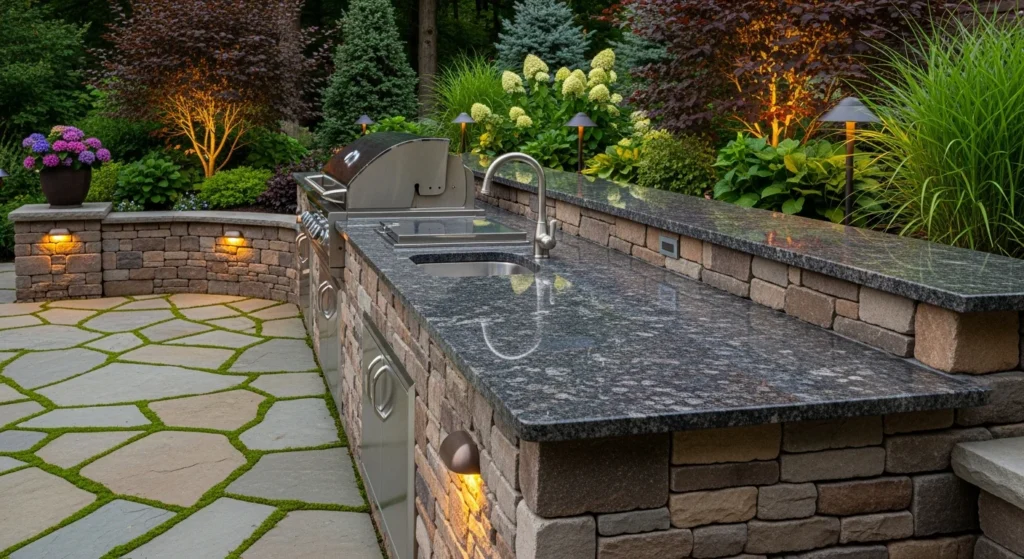
Natural stone construction creates a premium appearance that integrates beautifully with landscaping and outdoor living spaces. While this option requires more investment in materials and time, the results deliver exceptional durability and aesthetic appeal.
Begin with a sturdy foundation, typically a poured concrete slab that extends beyond your planned structure. Stack flat stones using heat-resistant mortar, creating walls that support countertops and house your grill. The irregular shapes of natural stone require patience and problem-solving, but the unique patterns that emerge make each project one of a kind.
Select stones that stack relatively flat to simplify construction and improve structural integrity. Fieldstone, flagstone, and cut limestone work well for this application. Mix different sizes to create visual interest while maintaining stability through proper placement and adequate mortar coverage.
Install a horizontal surface of cut stone or poured concrete to serve as your countertop. This smooth working area contrasts nicely with the textured stone walls below. Create an opening sized for your backyard grill, ensuring proper ventilation and heat management around the cooking area.
The space within stone walls provides excellent storage for grilling equipment. Install wooden or metal shelving to organize supplies, keeping everything protected from weather while remaining easily accessible. Many builders add lighting under counters or within storage areas, enhancing functionality for evening cooking and entertaining.
Conclusion
Creating your own backyard grill opens possibilities limited only by imagination, budget, and available space. Each project covered here offers distinct advantages, from the economy of cinder blocks to the rustic charm of barrel grills and the permanence of stone construction. The skills developed through DIY grill building extend beyond outdoor cooking, teaching valuable lessons in planning, problem-solving, and working with various materials.
Start with a project matching your current skill level, available tools, and budget. Simple designs like the cinder block station or fire pit grill provide entry points requiring minimal investment and basic construction knowledge. As confidence grows, tackle more complex builds incorporating multiple materials, integrated storage, and custom features tailored to your specific cooking style.
Remember that safety always takes precedence over aesthetics or convenience. Use appropriate materials rated for high heat exposure, ensure adequate ventilation around fuel sources, and maintain safe distances between grills and combustible structures. Regular maintenance keeps your custom grill functioning safely and efficiently for years, protecting your investment while ensuring reliable performance.
The satisfaction of cooking on a grill you built yourself transforms ordinary meals into celebrations of self-reliance and creativity. Friends and family will admire your handiwork while enjoying the food it produces, creating memories that extend far beyond the construction process. Whether you choose a weekend project or a months-long endeavor, the result adds value to your home and enriches your outdoor living experience.
Frequently Asked Questions
What is the cheapest material for building a DIY grill?
Cinder blocks represent the most economical option for DIY grill construction, costing between one and two dollars per block at most hardware stores. A functional backyard grill station requires 40 to 60 blocks, totaling less than 100 dollars for the base structure. Adding patio stones for countertops and a basic grill grate keeps total costs under 200 dollars for a complete setup.
Is it safe to build a grill from a 55-gallon drum?
Building a drum grill is safe when proper precautions are followed. Always verify the drum’s previous contents and thoroughly clean it before cutting or welding. Fill the drum with water multiple times and allow it to dry, or burn out the interior with a controlled fire to eliminate chemical residues. Use food-safe paint on all interior surfaces that contact food or smoke.
How high should a DIY grill cooking surface be?
The ideal cooking surface height ranges from 32 to 36 inches above ground level, matching standard kitchen counter height. This measurement allows comfortable food preparation and grilling without excessive bending or reaching. Adjust height based on your own measurements, ensuring you can comfortably reach across the grill surface and manipulate food without strain.
Do I need special permits to build a backyard grill?
Permit requirements vary by location and project scope. Temporary or portable backyard grills typically require no permits, while permanent structures may need approval from local building departments or homeowners associations. Check regulations before beginning construction, especially for projects involving gas lines, electrical connections, or structures exceeding specific size thresholds.
How long does it take to build a basic DIY grill?
A simple cinder block grill station can be completed in four to six hours by one person with basic tools. More complex projects like brick BBQs or drum grills may require several weekends, depending on skill level and available time. Concrete curing times, paint drying, and other waiting periods often extend project timelines beyond active construction hours.
One Comment