

14+ Charming DIY Lake House Decor Ideas
Creating the perfect lake house atmosphere doesn’t require a designer’s budget or professional expertise. With the right approach and a bit of creativity, you can transform your waterfront retreat into a charming sanctuary that captures the essence of lakeside living. Whether you own a full-time residence on the water or maintain a seasonal cottage, these handmade decorating projects will help you craft a space that feels both welcoming and connected to nature.
The beauty of lake house decoration lies in its inherent flexibility and connection to the natural world. Unlike formal interior design schemes that demand precision and expensive materials, lakeside aesthetics embrace imperfection, celebrate organic textures, and welcome the patina of time. This decorating philosophy makes it particularly well-suited for hands-on projects that anyone can tackle, regardless of skill level.
When you choose to create your own lake house decor, you gain more than just cost savings. You develop a deeper connection to your space, infuse your home with personal meaning, and craft an environment that reflects your unique relationship with the water. Each piece you make carries a story, whether it’s driftwood collected during an early morning walk or rope purchased from a local marina that reminds you of lazy afternoons spent by the dock.To see more lake house decor ideas visit Country Living.
Weathered Wood Wall Art
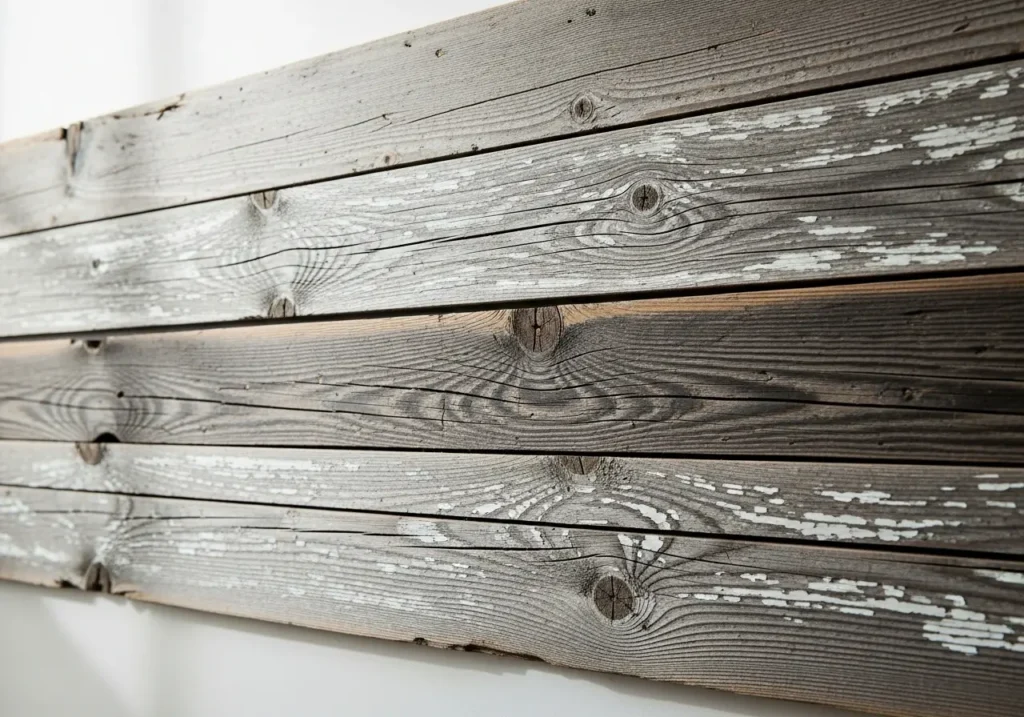
Nothing captures the essence of lake living quite like weathered wood. This versatile material serves as the foundation for countless decorating projects and brings instant character to any room. Start by collecting pieces of aged wood from your property, local beaches, or salvage yards. The natural graying and texture that develops over years of exposure to sun and water cannot be replicated artificially.
Creating Horizontal and Vertical Patterns
Create simple yet striking wall art by arranging different lengths of weathered boards in horizontal or vertical patterns. Secure them to a backing board with wood glue and finish nails, leaving intentional gaps between pieces for visual interest. Some homeowners prefer to add painted elements, such as a silhouette of their lake’s outline or coordinates marking their exact location on the water.
Adding Dimensional Depth
For a three-dimensional effect, consider layering pieces of varying thickness. This technique creates shadows and depth that change throughout the day as natural light shifts across your walls. The irregular edges and varying shades of gray, brown, and silver create an organic composition that serves as a focal point without overwhelming the space.
Rope-Wrapped Accent Pieces
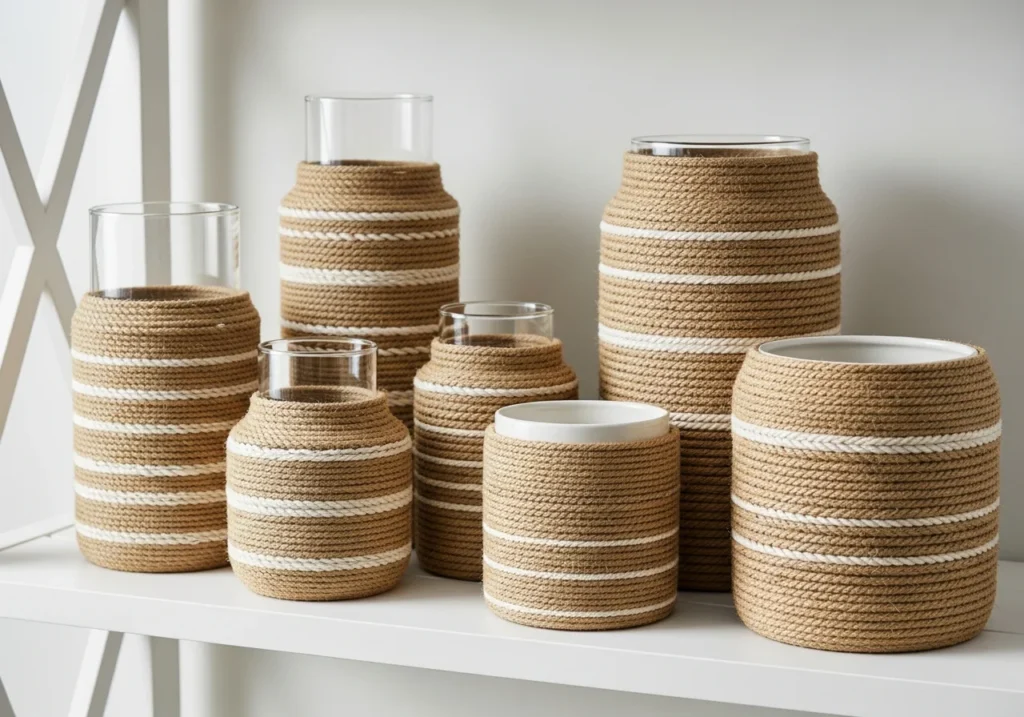
Rope brings nautical authenticity to any lake house while offering surprising versatility as a crafting material. Purchase natural fiber rope from marine supply stores or online retailers, selecting a thickness appropriate for your project scale. Sisal and manila rope provide that classic maritime look, while cotton rope offers a softer, more refined appearance.
Transforming Everyday Containers
Transform plain ceramic vases, glass bottles, or tin cans into textured accent pieces by wrapping them tightly with rope. Begin at the base, applying hot glue in small sections as you work upward in a spiral pattern. Keep tension consistent to avoid gaps, and finish with a clean cut secured with additional adhesive. These wrapped containers work beautifully as utensil holders, flower vases, or simply as standalone decorative objects on shelves and mantels.
Wrapping Furniture Elements
Rope also excels as a material for creating drawer pulls, mirror frames, and lamp bases. Consider wrapping the legs of a simple wooden stool or small table to add maritime flair to functional furniture. The tactile quality of rope invites touch and adds warmth to spaces that might otherwise feel cold or impersonal.
Mason Jar Lighting Fixtures
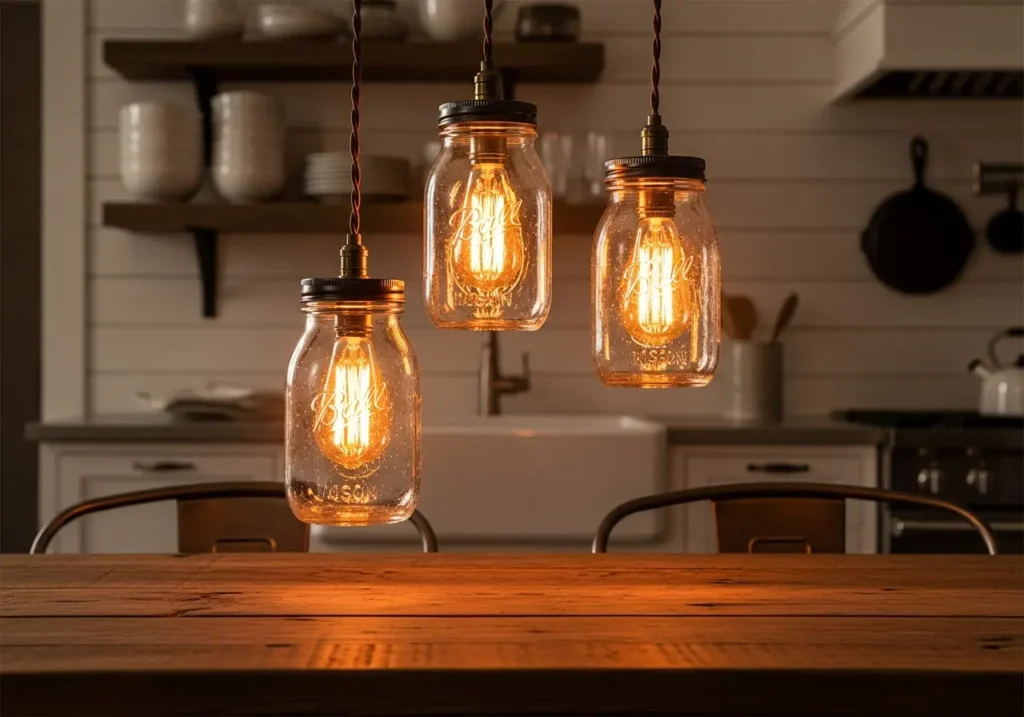
Mason jars have become synonymous with rustic decorating, and for good reason. These durable glass containers possess a nostalgic charm while remaining entirely functional and affordable. Convert them into pendant lights for your kitchen or dining area by purchasing pendant light kits from hardware stores.
Installing Pendant Lights
Thread the electrical cord through a hole drilled in the jar lid, attach the socket according to kit instructions, and suspend your new fixture at the desired height. Use vintage-style Edison bulbs to enhance the rustic aesthetic. Group three or five jars at varying heights above a dining table or kitchen island for maximum visual impact.
Creating Cordless Options
For a cordless option, fill mason jars with battery-operated fairy lights or LED candles. Line them along your porch railing, arrange them as a centerpiece, or hang them from shepherd’s hooks in your garden. During evening gatherings, these simple luminaries create an enchanting atmosphere that celebrates the gentle, unhurried pace of lake life.
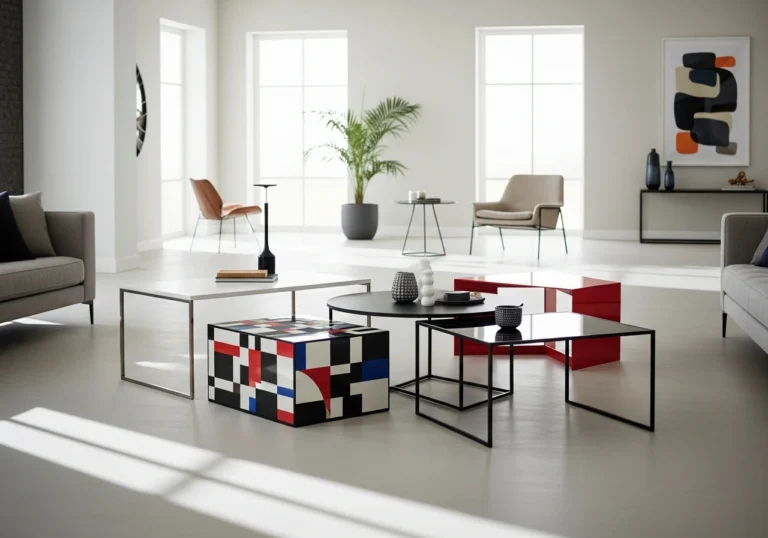
Painted Furniture with Distressed Finishes
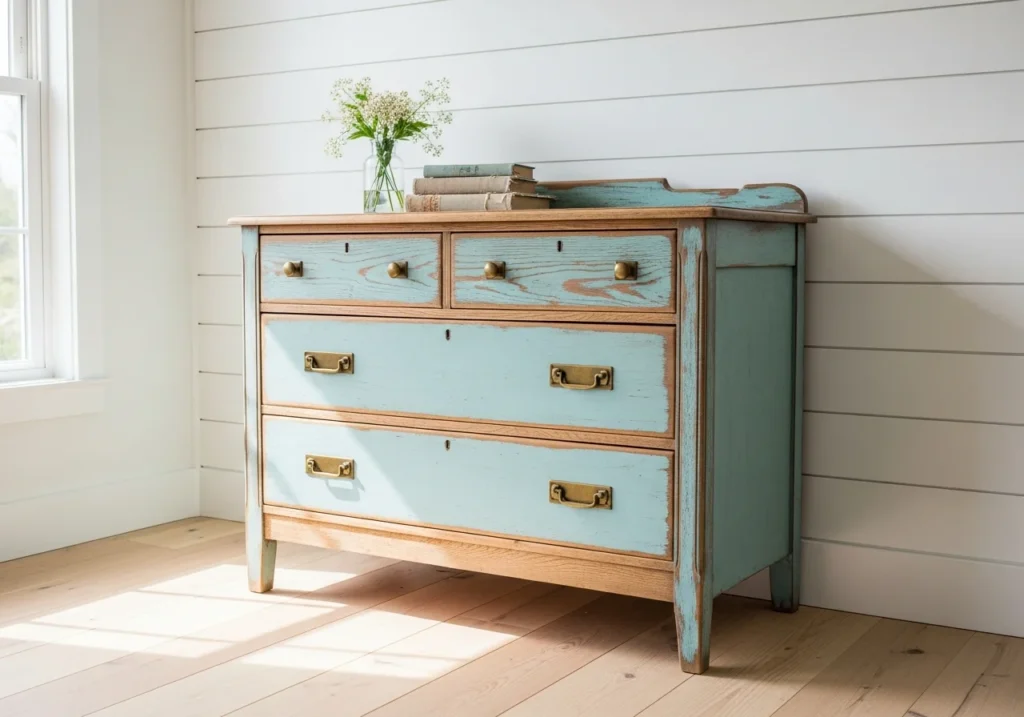
Furniture painting offers one of the most transformative yet accessible decorating projects. Scout thrift stores, estate sales, and online marketplaces for solid wood pieces with good bones but dated finishes. Dressers, side tables, chairs, and cabinets all present excellent opportunities for personalization.
Choosing Lake-Inspired Colors
Choose colors that reflect your lake environment. Soft aqua blues, weathered grays, creamy whites, and gentle greens all evoke waterside settings. After cleaning your piece thoroughly, apply a coat of primer followed by two coats of your chosen paint color. Allow proper drying time between applications.
Perfecting the Distressing Technique
The distressing process adds character and prevents your painted furniture from looking too perfect or new. Once the final coat has dried completely, use medium-grit sandpaper to wear through the paint in areas that would naturally experience wear over time, such as edges, corners, and around hardware. Work gradually, as you can always remove more paint but cannot easily replace it. Some decorators apply a dark wax or glaze to crevices and details, then buff it away from flat surfaces, creating the appearance of decades of use.
Driftwood Sculptures and Mobiles
Driftwood collected from your lake’s shoreline carries inherent beauty shaped by water, weather, and time. These naturally sculpted pieces need minimal intervention to become compelling decorative objects. Select pieces with interesting shapes, varied textures, or multiple branches that suggest movement or form.
Building Freestanding Displays
Create freestanding sculptures by mounting larger pieces on simple wooden bases. Drill a hole in the base slightly smaller than your driftwood’s diameter, add wood glue, and insert the piece securely. Display these natural sculptures on mantels, bookshelves, or side tables where their organic forms contrast beautifully with manufactured surfaces.
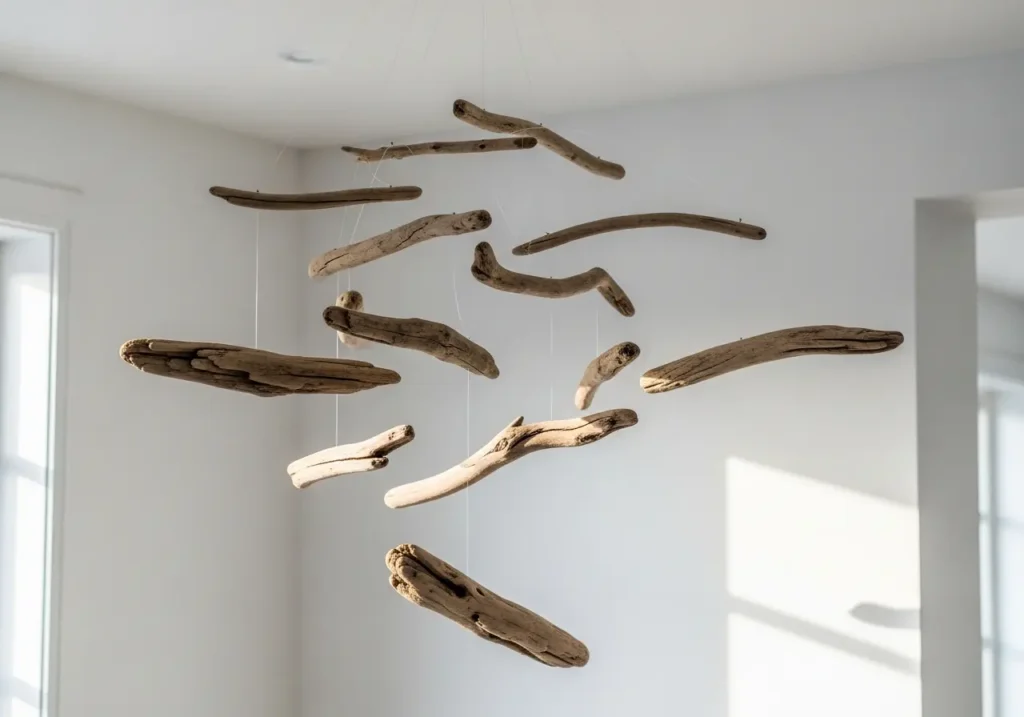
Crafting Hanging Mobiles
Hanging mobiles offer another approach to showcasing driftwood’s beauty. Drill small holes through thinner pieces and suspend them at different heights using fishing line or thin jute twine. Attach everything to a larger horizontal piece of driftwood that serves as the mobile’s crossbar. Hang your creation near a window where moving air will create gentle motion, or suspend it above a dining table as a unique centerpiece that sparks conversation.
Vintage Oar Wall Display
Old wooden oars possess sculptural qualities that make them ideal for vertical wall displays. Source them from antique shops, online auctions, or perhaps your own garage or boathouse. Even damaged oars with cracked blades or missing paint work beautifully as decorative elements.
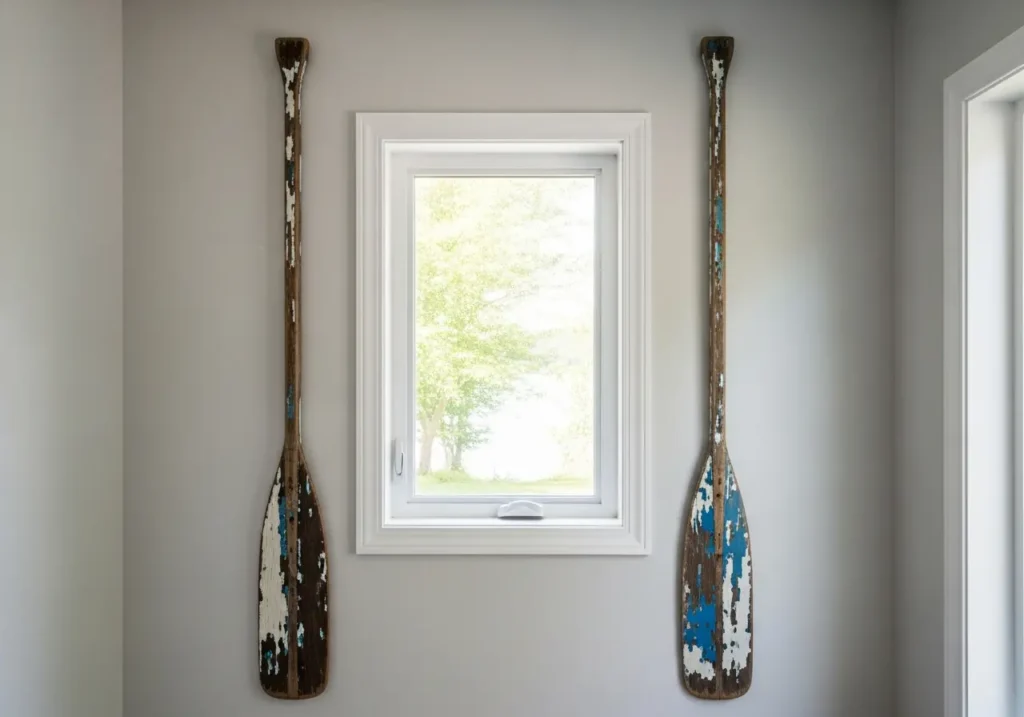
Arranging Single and Multiple Oars
Mount oars vertically using simple brackets or heavy-duty picture hanging hardware rated for their weight. A single oar makes a bold statement in a narrow space like a hallway or between windows. Pairs of oars create symmetry flanking a doorway or piece of artwork. For larger walls, consider arranging three or five oars at slightly different heights, creating a rhythmic pattern that draws the eye upward.
Personalizing Your Display
Some homeowners prefer to paint their oars in colors that complement their decorating scheme, while others embrace the aged, weathered appearance of vintage wooden oars. You might also add personal touches like stenciled family names, your lake’s name, or the year you purchased your property.
Natural Element Shadow Boxes
Shadow boxes provide an elegant way to display collections of small natural objects gathered during walks along your lake. Purchase ready-made shadow boxes from craft stores or build simple wooden frames with enough depth to accommodate three-dimensional objects.
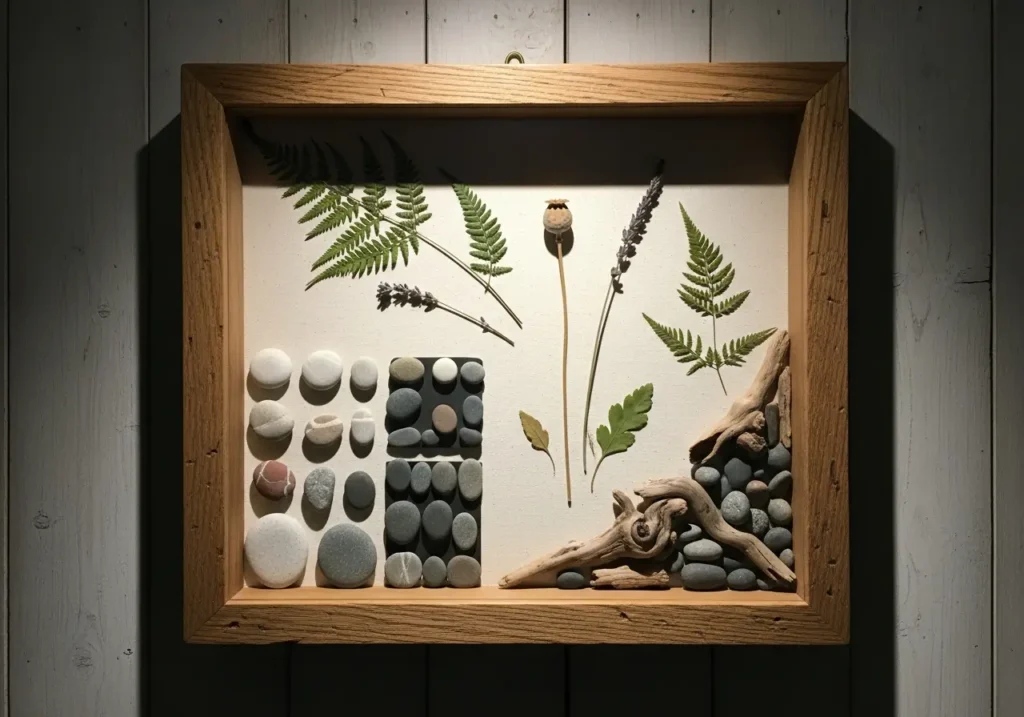
Curating Your Collection
Fill your shadow boxes with arrangements of shells, interesting stones, small pieces of driftwood, dried seed pods, feathers, or other natural treasures. Consider organizing items by color, size, or type, or create a more organic, mixed arrangement. Some decorators include handwritten labels identifying each item or noting where and when it was found, adding layers of personal history to the display.
Selecting Background Materials
Backing material choices affect the overall mood of your shadow box. Natural linen creates a soft, neutral foundation that allows objects to shine. Painted wood backs in coastal blues or weathered grays reinforce the lake house theme. For a more formal presentation, use black backing to create dramatic contrast with lighter-colored specimens.
Rope Ladder Blanket Display
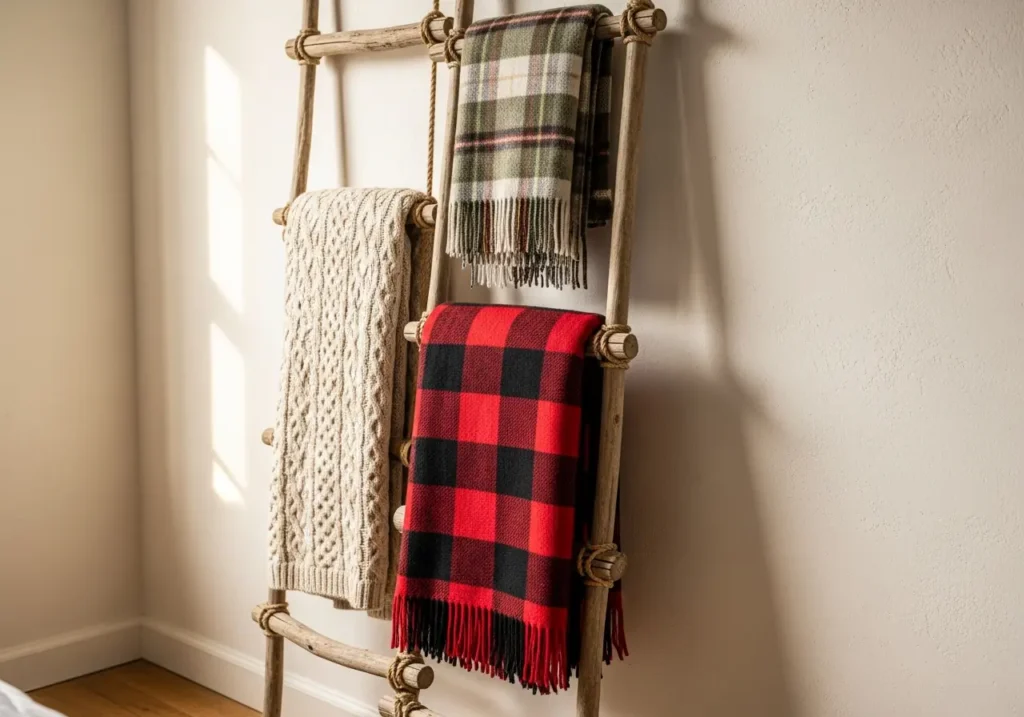
A rustic rope ladder serves both functional and decorative purposes in lake house interiors. Construct one using two long pieces of thick rope and several smooth wooden dowels or branches cut to equal lengths. Knot the rope securely around each rung, spacing them about twelve to fifteen inches apart.
Styling Your Ladder
Lean your completed ladder against a wall in your living room or bedroom and drape blankets, throws, or quilts across the rungs. This approach keeps cozy textiles accessible while creating a casual, layered look that enhances your space’s visual interest. The vertical display also works well in smaller rooms where traditional blanket storage might consume valuable floor space.
Matching Your Aesthetic
Choose rope and wood tones that complement your existing furniture and color scheme. Lighter ropes and whitewashed dowels suit brighter, airier spaces, while darker manila rope and natural wood create a more grounded, traditional appearance.
Painted Rock Garden Markers

If your lake property includes a garden or outdoor planters, painted rocks offer a charming way to identify herbs, vegetables, or flowers. Collect smooth, flat stones from your shoreline, wash them thoroughly, and allow them to dry completely.
Painting and Sealing Techniques
Apply a base coat of white or cream acrylic paint to create a clean surface for your designs. Once dry, paint the name of each plant in a contrasting color, adding simple illustrations if desired. A clear acrylic sealer protects your artwork from weather and watering.
Making It a Family Activity
These handmade markers add personality to your garden while serving a practical purpose. Children especially enjoy participating in this project, making it an excellent activity for families spending summer weeks at the lake. The rocks’ natural origins create a seamless connection between your cultivated garden and the wild landscape surrounding it.
Nautical Flag Bunting
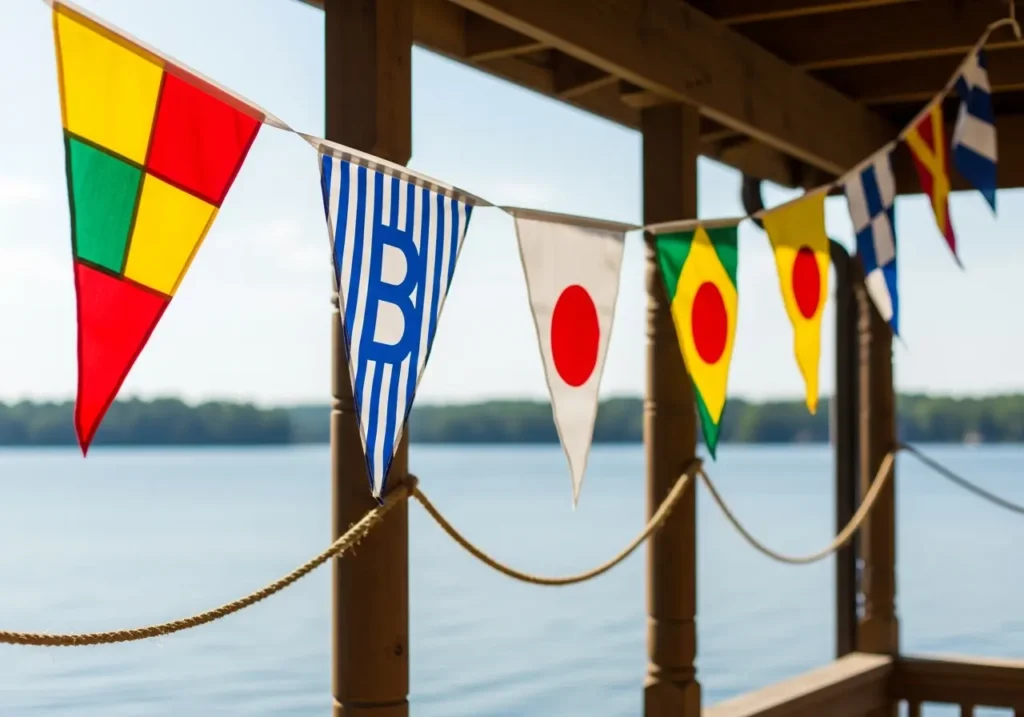
Signal flags have communicated messages between boats for centuries, and their bold colors and geometric patterns translate beautifully into decorative bunting. Create your own version using canvas or heavy cotton fabric cut into triangular pennants.
Designing Your Flags
Research traditional nautical flag meanings and replicate them with fabric paint or by piecing together colored fabric scraps. Alternatively, design your own flag alphabet spelling out welcome messages, family names, or simple phrases like “Lake Life” or “Gone Fishing.”
Hanging and Displaying
Attach completed flags to sturdy rope or wide ribbon, spacing them evenly along the length. Hang your bunting across your porch, along your dock, or inside across a long wall or beam. This project brings vibrant color to your space while celebrating maritime traditions and the sense of community found in lake settings.
Reclaimed Wood Floating Shelves
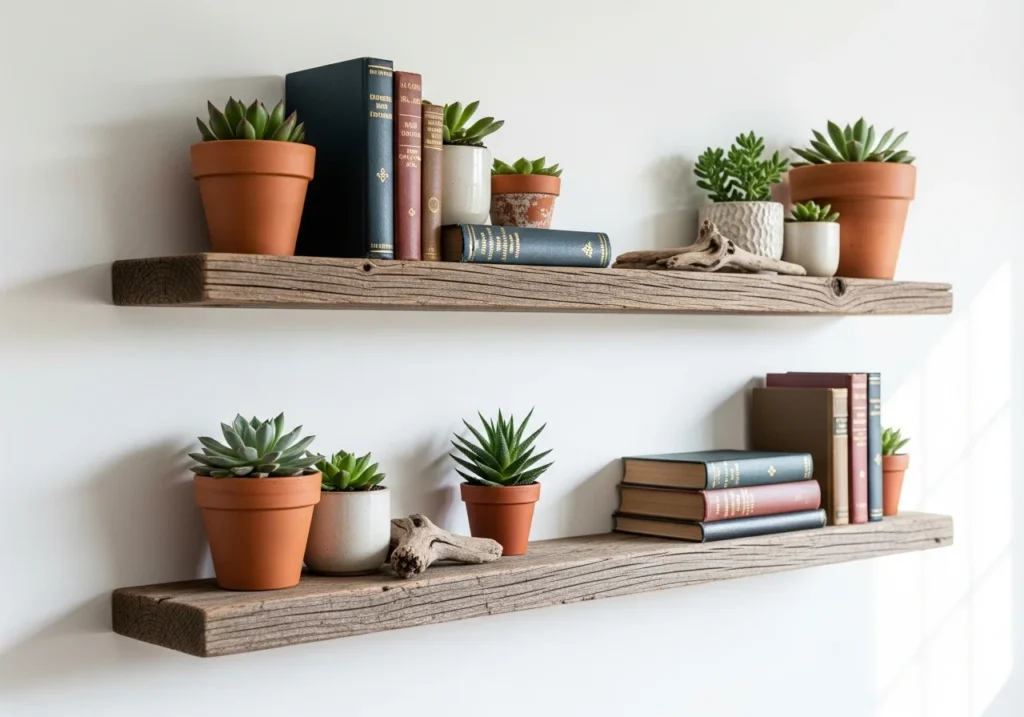
Floating shelves constructed from reclaimed wood add storage and display space while maintaining an uncluttered, contemporary appearance. Source your wood from salvaged barn boards, old fencing, or disassembled pallets.
Installing Your Shelves
Cut boards to your desired length and sand any rough edges or splinters while preserving the wood’s weathered character. Install hidden shelf brackets rated for the weight you plan to display, ensuring they’re anchored securely into wall studs. Slide your wood planks onto the brackets and secure them according to the hardware manufacturer’s instructions.
Styling with Purpose
Style your new shelves with a curated selection of items that reflect your connection to the lake. Mix functional pieces like books and small plants with decorative objects such as vintage fishing lures, small pieces of driftwood, or framed family photos taken on the water. Avoid overcrowding shelves, as negative space allows each item to make its own visual statement.
Beach Stone Coasters
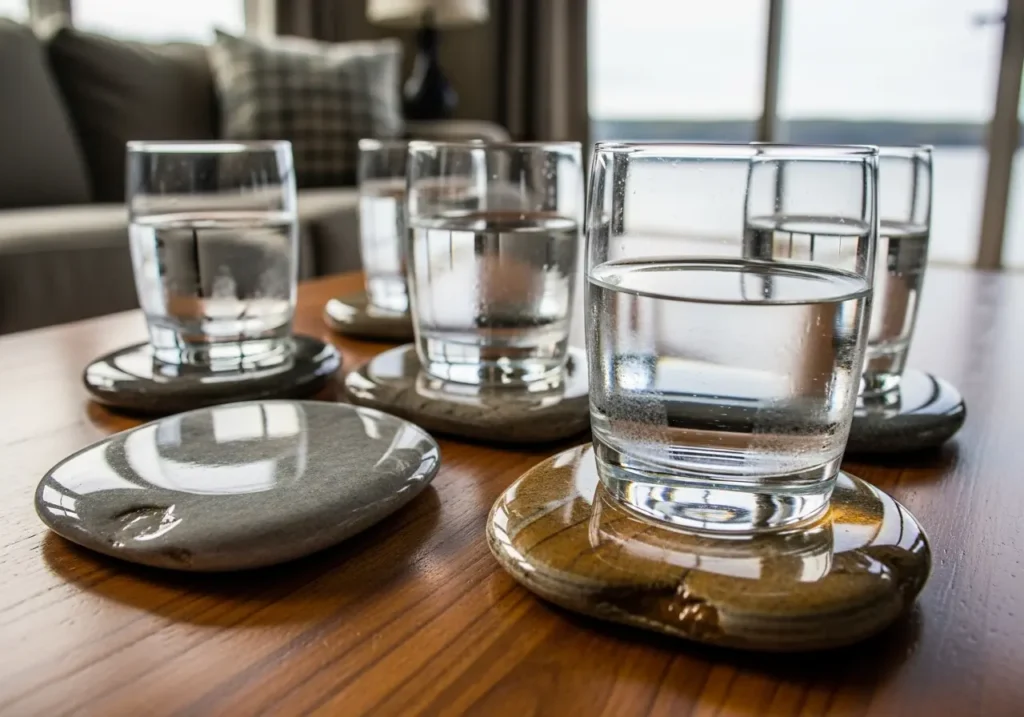
Smooth, flat stones collected from your lake make excellent coasters that protect furniture while celebrating your natural surroundings. Select stones approximately four inches in diameter with relatively flat surfaces on both sides.
Sealing and Finishing
Clean stones thoroughly and allow them to dry. Apply several coats of clear polyurethane or food-safe epoxy resin to the top surface, allowing proper drying time between coats. This sealing process prevents moisture from being absorbed and protects your furniture.
Adding Protective Backing
Attach small felt pads to the bottom of each stone coaster to prevent scratching table surfaces. Create sets of four or six coasters and display them on coffee tables, side tables, or your outdoor dining area. These functional pieces require minimal effort to create yet provide daily reminders of peaceful walks along the water’s edge.
Porthole Mirror Frame

Circular mirrors framed to resemble ship portholes bring nautical style to bathrooms, entryways, or any space needing a decorative mirror. Purchase a round mirror in your preferred size along with rope and basic lumber for the frame.
Constructing the Frame
Construct a simple circular frame from thin wood strips bent and secured into a ring slightly larger than your mirror’s diameter. Paint or stain the frame, then wrap it completely with thick rope, securing it with hot glue as you work around the circumference. Insert the mirror from behind and secure it with additional wood strips or heavy-duty adhesive.
Enhancing the Porthole Effect
Some crafters enhance the porthole effect by dividing the frame into sections with additional rope or thin wooden strips radiating from the center like wheel spokes. This added detail increases the maritime authenticity while creating a more complex, finished appearance.
Personalized Lake House Sign

A custom wooden sign announcing your family name or property designation creates a welcoming focal point for your home’s exterior or entryway. Begin with a large piece of wood in your preferred shape, whether rectangular, oval, or a silhouette of your lake.
Creating Your Design
Sand the surface smooth, then apply your chosen background color. Once dry, use stencils, vinyl lettering, or freehand painting to add your text. Include your family name, the year you purchased your property, your lake’s name, or a favorite saying that captures your feelings about waterside living.
Weatherproofing for Longevity
Protect your finished sign with multiple coats of outdoor polyurethane if it will be exposed to weather. Mount it on your porch, above your door, or near your driveway where it greets visitors and announces that they’ve arrived at a special place dedicated to relaxation, family, and the simple pleasures of lake life.
Conclusion
Transforming your lake house into a personalized retreat through handmade decor projects offers rewards that extend far beyond the finished products themselves. Each piece you create strengthens your connection to your waterfront sanctuary while developing skills and confidence that will serve future projects. The imperfect, handcrafted quality of these decorations perfectly suits the relaxed, authentic atmosphere that defines exceptional lake living.
Remember that successful lake house decorating prioritizes comfort and personal meaning over perfection or trends. Your space should reflect your family’s unique relationship with the water, incorporating colors, textures, and objects that hold significance for you. Some projects will succeed beyond your expectations, while others might require adjustment or reimagining. This experimental, evolving approach to decorating keeps your space feeling fresh and prevents it from becoming static or overly styled.
Start with one or two projects that genuinely excite you rather than attempting to complete everything at once. Allow yourself time to source materials, work through challenges, and refine your techniques. Many lake house owners find that decorating projects become beloved rainy-day activities or family traditions that span multiple generations. Children who help paint furniture or arrange shadow boxes often recall these creative sessions years later, associating the finished pieces with cherished memories of time spent together at the lake.
Your lake house represents more than just a building on the water. It serves as a repository for memories, a gathering place for loved ones, and a refuge from the demands of everyday life. By filling it with handmade decorations that reflect your creativity and values, you create an environment that nurtures connection, celebrates simplicity, and honors the natural beauty that drew you to lakeside living in the first place.
Frequently Asked Questions
What is the best wood to use for lake house DIY projects?
Reclaimed barn wood, weathered fence boards, and driftwood work exceptionally well for lake house projects. These materials already possess the aged, textured appearance that complements waterside aesthetics. Cedar and pine are good choices if purchasing new wood, as they weather beautifully and resist moisture damage better than many hardwoods.
How can I create a coastal look without living near an ocean?
Lake house decor shares many elements with coastal style, including natural textures, nautical accents, and blue color palettes. Focus on materials like rope, weathered wood, and natural fibers rather than explicitly beach-themed items like seashells or anchors. This approach creates a sophisticated waterside atmosphere appropriate for any lakefront property.
What colors work best for lake house interiors?
Soft blues, aquas, greens, whites, creams, and grays all evoke lake environments while creating calm, restful spaces. Consider pulling colors directly from your surroundings by observing the water, sky, trees, and stones visible from your windows. Avoid overly bright or saturated colors that might compete with the natural views outside.
How do I protect outdoor DIY decor from weather damage?
Apply multiple coats of marine-grade polyurethane or exterior sealant to any wood projects that will be exposed to weather. Choose fade-resistant fabrics for outdoor textiles and bring cushions and decorative items inside during extended periods of harsh weather. Regular maintenance and seasonal touch-ups will significantly extend the life of your outdoor decorations.
Where can I find affordable materials for lake house DIY projects?
Thrift stores, estate sales, salvage yards, and online marketplaces offer excellent sources for affordable materials and furniture pieces ready for transformation. Your own property provides free natural materials like driftwood, stones, and branches. Marine supply stores often discount rope and hardware at the end of boating season, while craft stores run frequent sales on paint and basic supplies.


One Comment