
20+ Creative Painted Christmas Ball Ideas
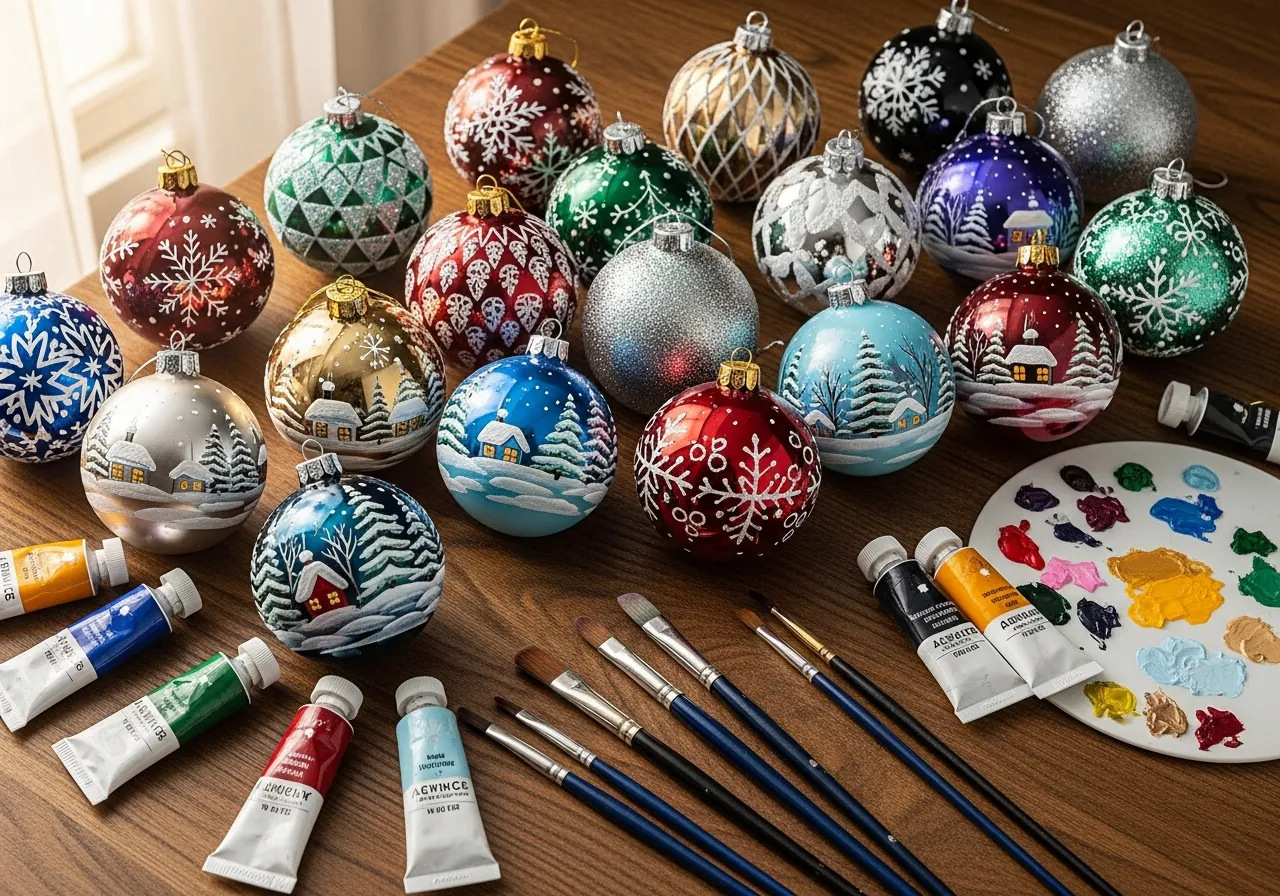
The holiday season brings with it a wonderful opportunity to express creativity and add personal touches to your home decor. Among the most versatile and rewarding DIY projects are painted Christmas balls. These delightful ornaments transform ordinary clear or plain baubles into stunning works of art that reflect your unique style and celebrate the spirit of the season. Whether you’re an experienced crafter or just beginning your creative journey, painted Christmas balls offer endless possibilities for customization and beauty.
Creating your own painted ornaments provides more than just decoration. It offers a chance to gather with family, establish new traditions, and craft keepsakes that will be treasured for generations. The process itself can be meditative and joyful, allowing you to slow down during the busy holiday rush and focus on something meaningful. Each brushstroke becomes part of your family’s story, and every design choice reflects your personal aesthetic.
The beauty of painted Christmas balls lies in their accessibility. With basic supplies and a bit of imagination, anyone can create professional-looking ornaments that rival expensive store-bought options. From classic winter scenes to contemporary geometric patterns, the design possibilities are limited only by your creativity. This guide will walk you through more than twenty inspiring ideas, along with practical tips and techniques to help you achieve beautiful results.
Essential Materials and Preparation
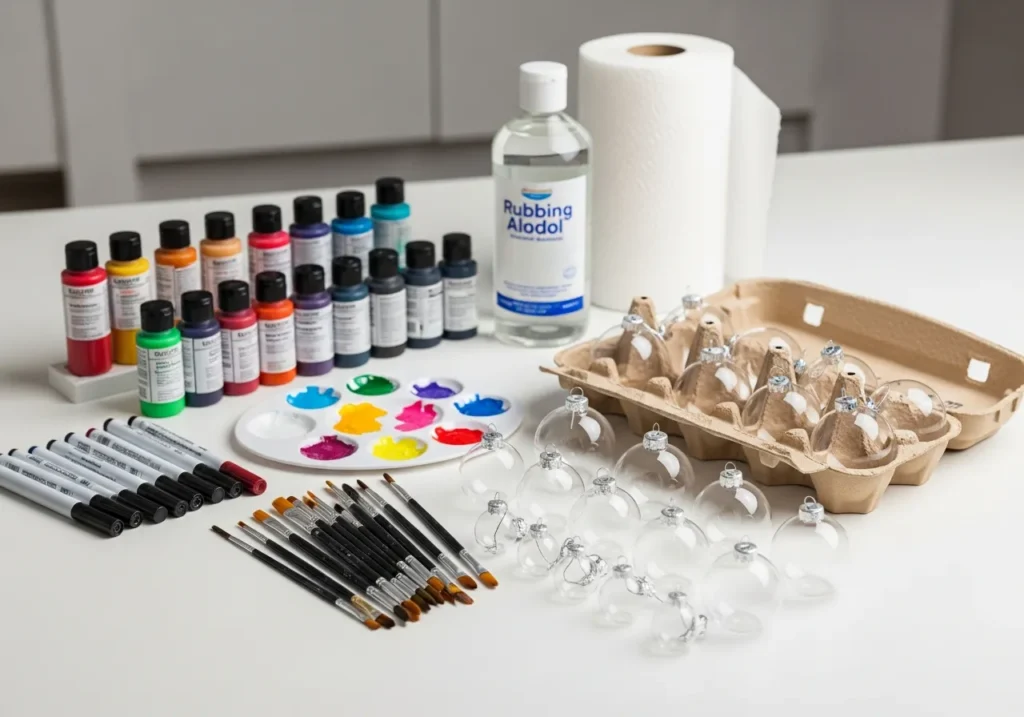
Before diving into specific design ideas, understanding the right materials makes all the difference in your finished ornaments. Clear glass or plastic balls serve as the foundation, available in various sizes from miniature to statement pieces. Acrylic paint remains the most popular choice due to its versatility, quick drying time, and vibrant colors. For finer details, paint markers provide precision and control.
Proper preparation ensures your paint adheres correctly and lasts for years. Clean each ornament thoroughly with rubbing alcohol to remove any oils or residue. This simple step prevents paint from beading or peeling. Remove the metal caps carefully and set them aside in a safe place. Consider using a foam block or egg carton to hold ornaments while painting and drying.
The workspace setup influences your experience and results. Cover your surface with newspaper or a plastic tablecloth. Gather all supplies within reach, including brushes in various sizes, a palette or paper plate for mixing colors, water for cleaning brushes, and paper towels. Good lighting helps you see details clearly and mix colors accurately.
Classic Winter Wonderland Designs
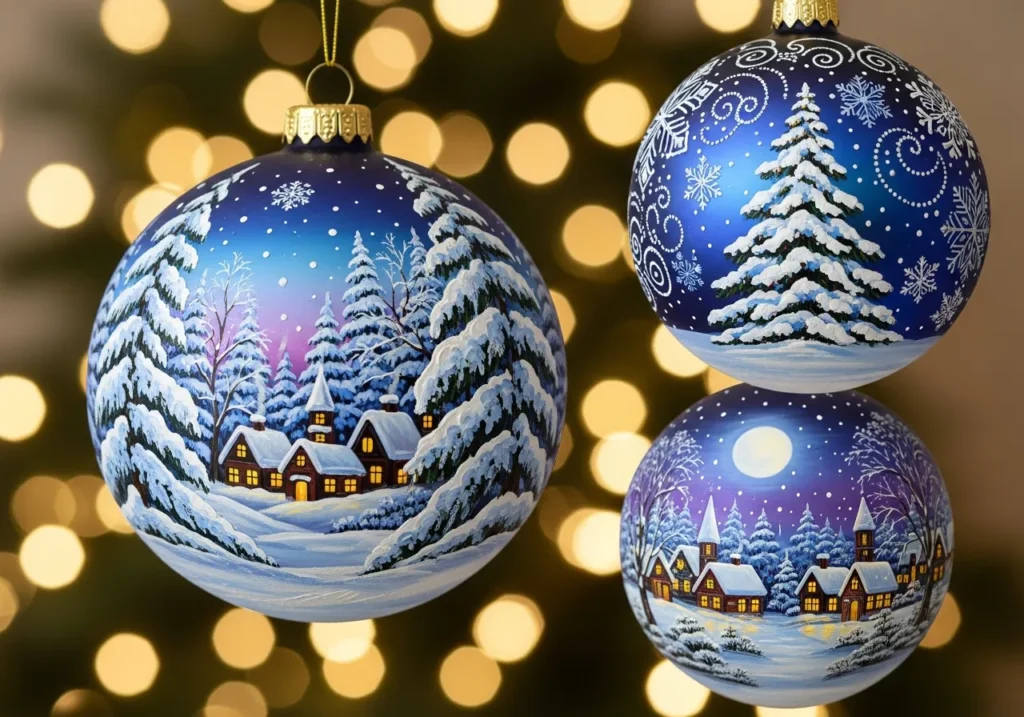
Traditional winter scenes never go out of style and bring timeless elegance to any tree. Snowy pine trees painted in graduating shades of green with white-tipped branches create depth and dimension. Add tiny dots of white paint to suggest falling snow, and perhaps a small brown trunk at the base. This simple yet effective design works beautifully on ornaments of any size.
Snowflake patterns offer another classic option with infinite variations. Start with a base coat of icy blue or winter white. Once dry, use a fine brush or paint marker to draw delicate snowflake designs. Each snowflake can be unique, mimicking nature’s own diversity. Metallic silver or pearl white paint adds an ethereal quality that catches the light beautifully.
Village scenes evoke nostalgic holiday memories and look particularly charming on larger ornaments. Paint a simple silhouette of houses with glowing windows against a twilight blue background. Add a church steeple, bare trees, and perhaps a crescent moon. The contrast between dark buildings and warm window lights creates a cozy, inviting atmosphere.
Modern Geometric and Abstract Patterns
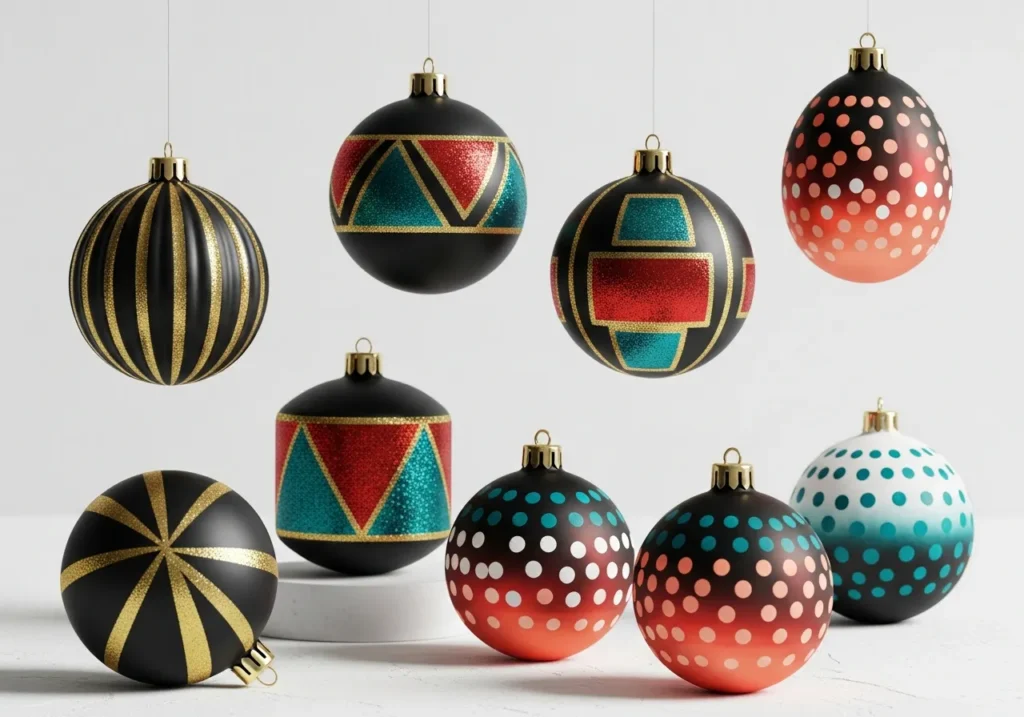
Contemporary design enthusiasts will appreciate bold geometric patterns that bring a fresh perspective to traditional ornaments. Metallic gold stripes against matte black create striking sophistication. Use painter’s tape to achieve crisp, clean lines. Vary the width of stripes for added visual interest, or create a chevron pattern by angling the tape.
Color blocking transforms ordinary baubles into modern art pieces. Divide the ornament into sections using tape, then paint each section a different color. Jewel tones like emerald, sapphire, and ruby create rich luxury, while pastels offer soft, Scandinavian-inspired minimalism. Remove the tape carefully while paint is still slightly tacky to prevent peeling.
Abstract dot patterns provide a playful, contemporary look. Using the end of a paintbrush or a dotting tool, create random or organized patterns of dots in varying sizes. Ombre effects, where dots gradually change from one color to another, add depth and movement. This technique works wonderfully for beginners since it requires no drawing skills.
Nature-Inspired Organic Themes
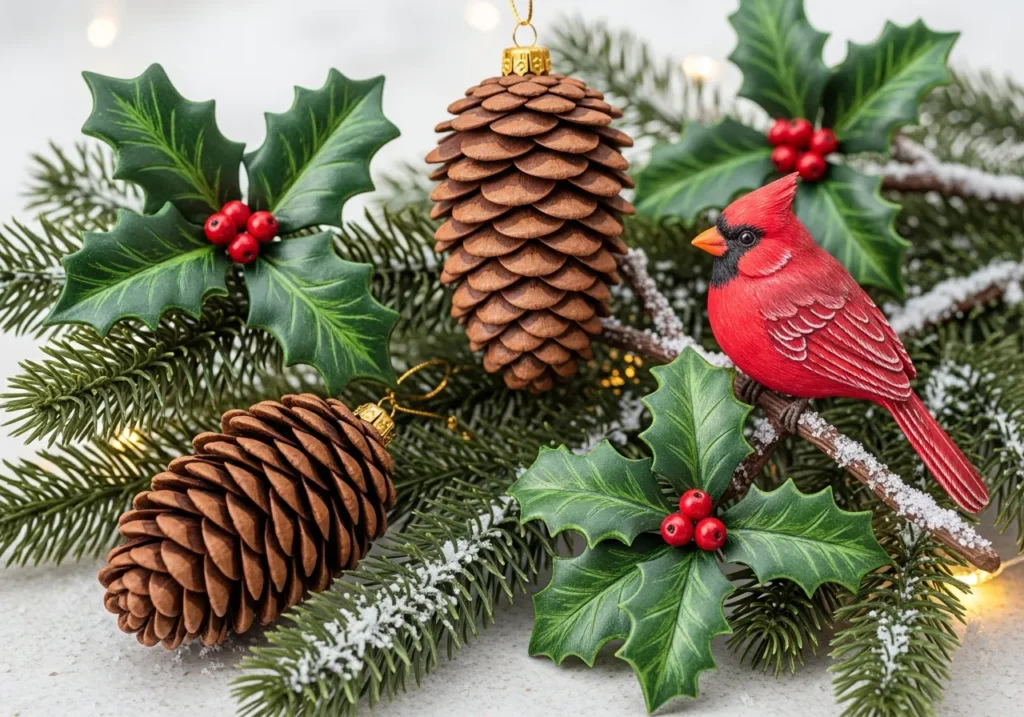
Bringing elements of the natural world into your Christmas decor creates warmth and connection to the season’s roots. Holly leaves and berries remain a beloved motif. Paint glossy green leaves with pointed tips, adding small red berries clustered in groups of three or five. A few touches of white or yellow create highlights that give the leaves dimension.
Pinecone designs work beautifully in earth tones. Start with a brown base coat, then use a small brush to create overlapping scales that mimic a pinecone’s texture. Layer different shades of brown, tan, and copper for realistic depth. These ornaments complement rustic and woodland themed trees perfectly.
Cardinal ornaments add vibrant life to winter branches. The bright red bird against snowy white backgrounds creates stunning contrast. Paint the cardinal’s body in crimson, adding a black mask around its eyes and beak. Include a simple branch for the bird to perch on, and perhaps a few pine needles or berries for context.
Whimsical Character and Figure Designs
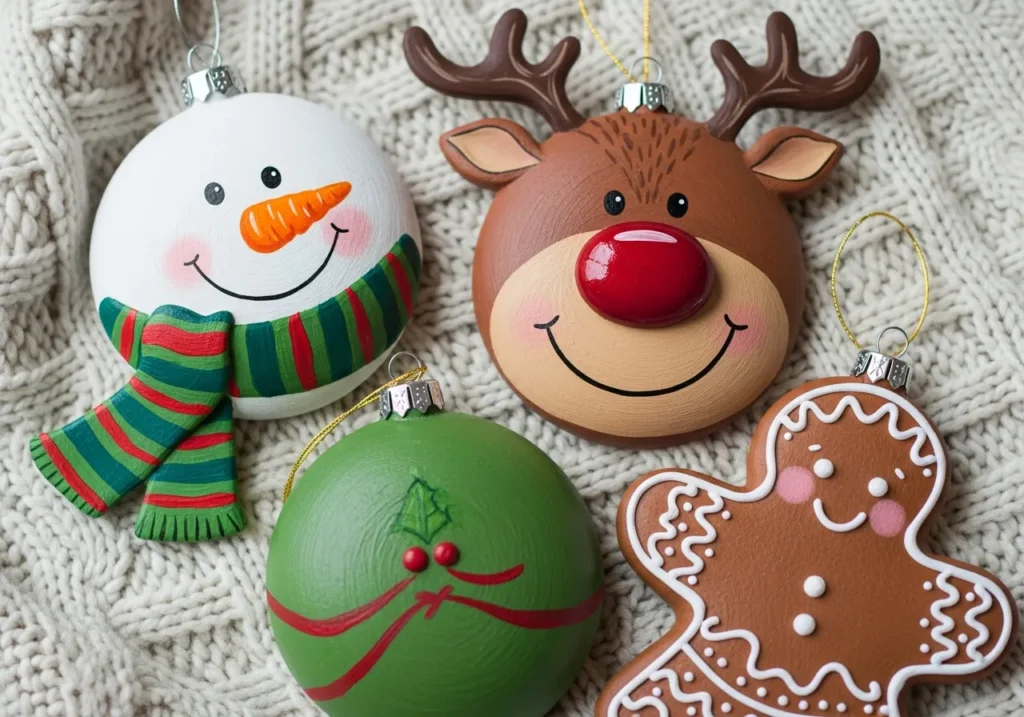
Character-based ornaments bring personality and storytelling to your tree. Snowmen remain perennial favorites and adapt easily to various skill levels. Paint a white snowman face with coal eyes and a carrot nose, adding a colorful scarf wrapped around the top. More advanced painters can create a full snowman body with stick arms and button details.
Reindeer faces charm both children and adults. A brown base coat forms the face, with a prominent black or red nose. Add simple antlers using brown paint or even draw them with a marker. Large, expressive eyes give your reindeer personality, and you might add a festive bow or holly sprig for extra holiday flair.
Gingerbread themes evoke the warmth of holiday baking. Paint the ornament in warm brown tones, then add white icing details along the edges to mimic frosted cookies. Include gumdrop buttons, a smiling face, and decorative swirls. These sweet designs bring a touch of whimsy and nostalgia to any collection.
Elegant Metallic and Luxury Finishes
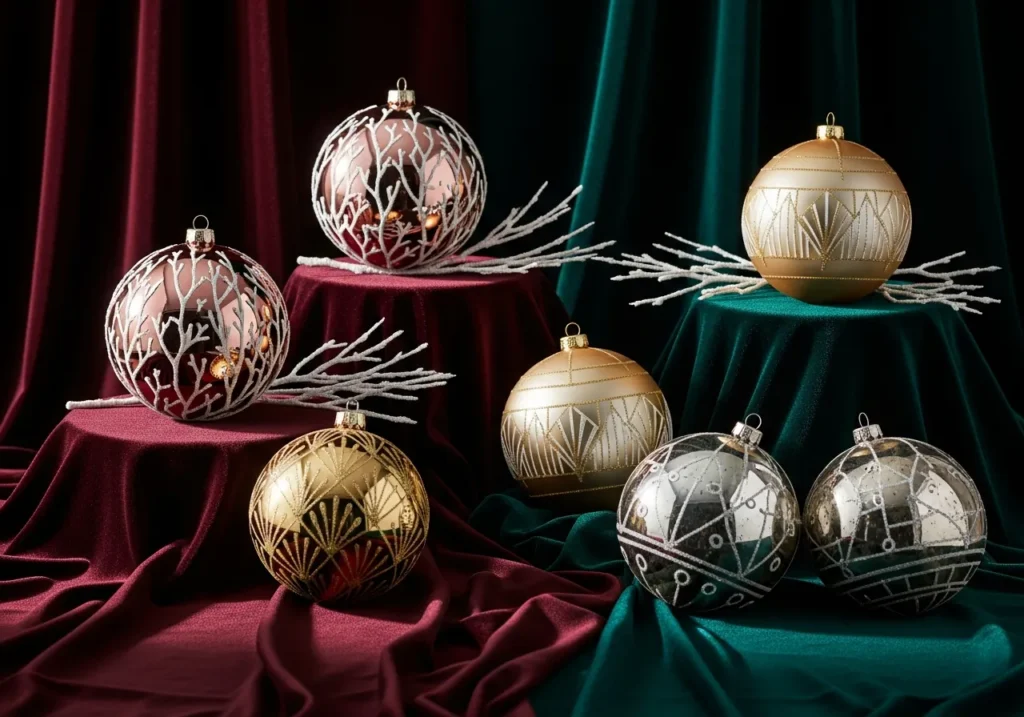
Metallic paints elevate ornaments from simple crafts to sophisticated decor. Rose gold has become increasingly popular for its warm, contemporary elegance. Apply a base coat of rose gold, then add delicate white or cream designs like branches, flowers, or script lettering. The combination feels both modern and timeless.
Champagne and gold combinations create opulent luxury. Paint the ornament in champagne as a base, then add gold leaf details or painted accents. Geometric patterns, art deco inspired designs, or simple dots in gold provide just enough contrast while maintaining an elegant, cohesive look.
Antiqued silver finishes offer vintage charm. Apply silver paint, then while still wet, dab with a paper towel to create texture and variation. Once dry, lightly dry brush with darker gray or black paint in the crevices to create an aged patina. This technique produces ornaments that look like treasured heirlooms.
Festive Text and Typography Designs
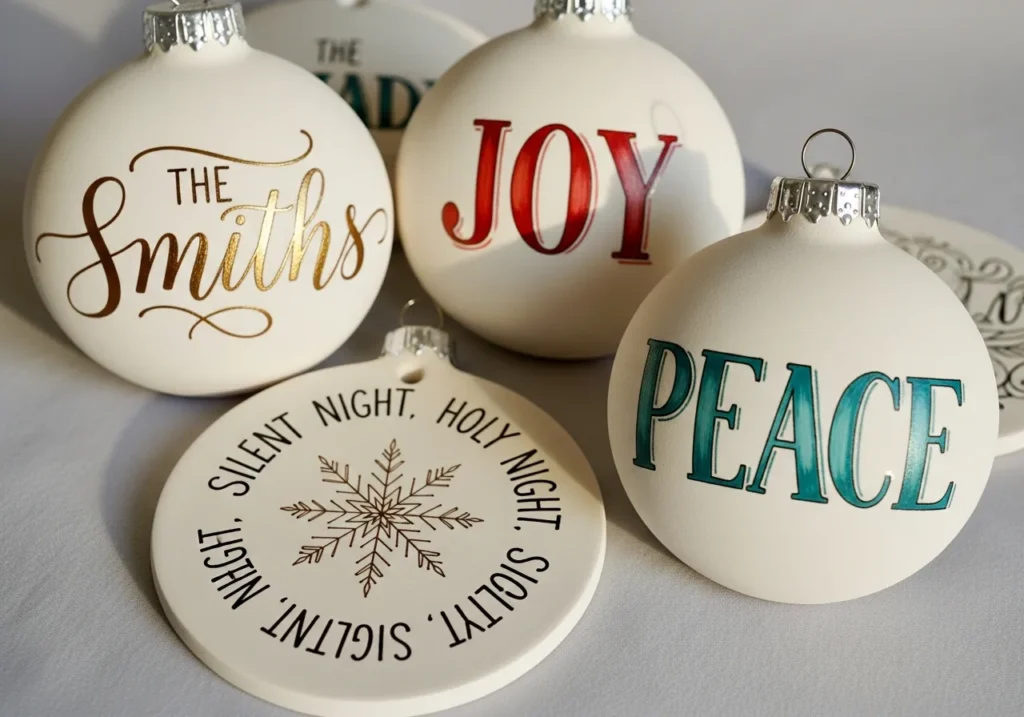
Words and phrases add meaningful personalization to Christmas balls. Family names painted in elegant script create custom ornaments that mark each year. Use a fine brush or paint marker to write names, dates, or special messages. These become cherished keepsakes that document your family’s growth.
Inspirational words like Peace, Joy, Love, or Hope serve as daily reminders of the season’s meaning. Paint the ornament in a solid color, then add the word in contrasting paint. Surround the text with subtle details like stars, dots, or flourishes. The simplicity of single-word ornaments creates powerful visual impact.
Carol lyrics or Bible verses connect ornaments to deeper traditions. Choose a meaningful phrase and paint it in circular format around the ornament, or write it in straight lines. Keep the text legible by choosing contrasting colors and appropriately sized lettering for your ornament’s dimensions.
Ombre and Gradient Techniques
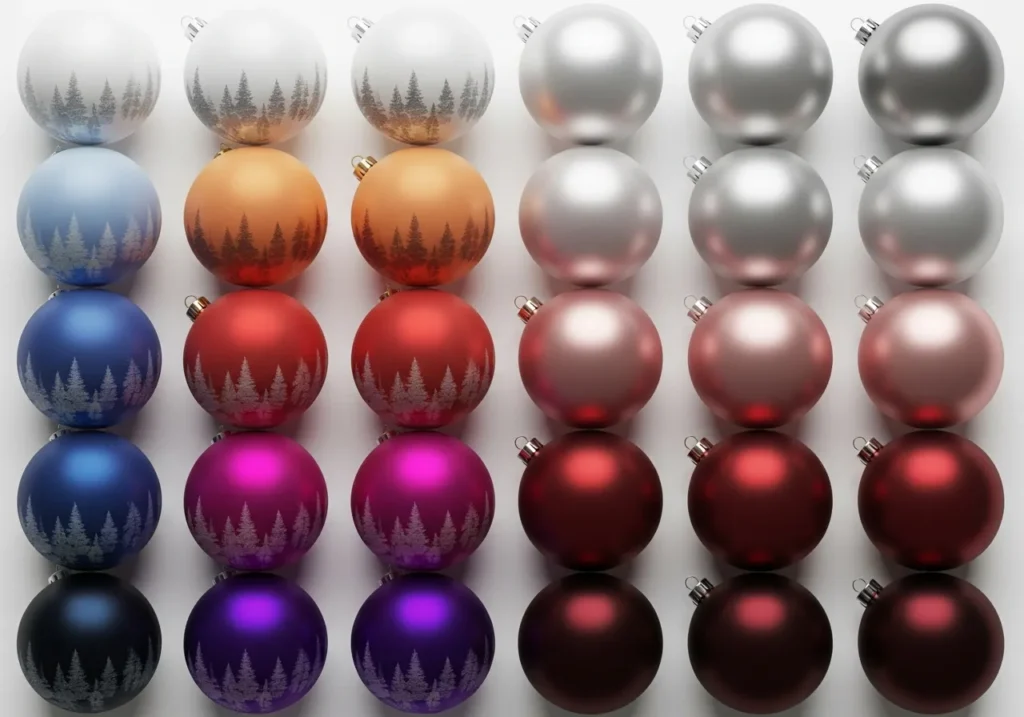
Ombre effects create smooth color transitions that add sophistication and depth. Start with your lightest color at the top of the ornament, gradually blending into darker shades toward the bottom. Work quickly while paint is wet, using a soft brush or sponge to blend where colors meet. This technique works beautifully with blues moving from ice to navy, or pinks transitioning from blush to burgundy.
Sunset gradients bring warmth and drama. Blend orange, pink, and purple to create a stunning sky effect. Add a simple silhouette of trees or a nativity scene in black against the colorful background for a striking contrast. The gradient serves as artwork in itself while providing a canvas for additional details.
Monochromatic gradients offer subtle elegance. Choose a single color family and blend from nearly white to deep, saturated tones. This technique creates sophisticated ornaments that coordinate easily with various decor styles while providing visual interest through tonal variation.
Cultural and Traditional Patterns
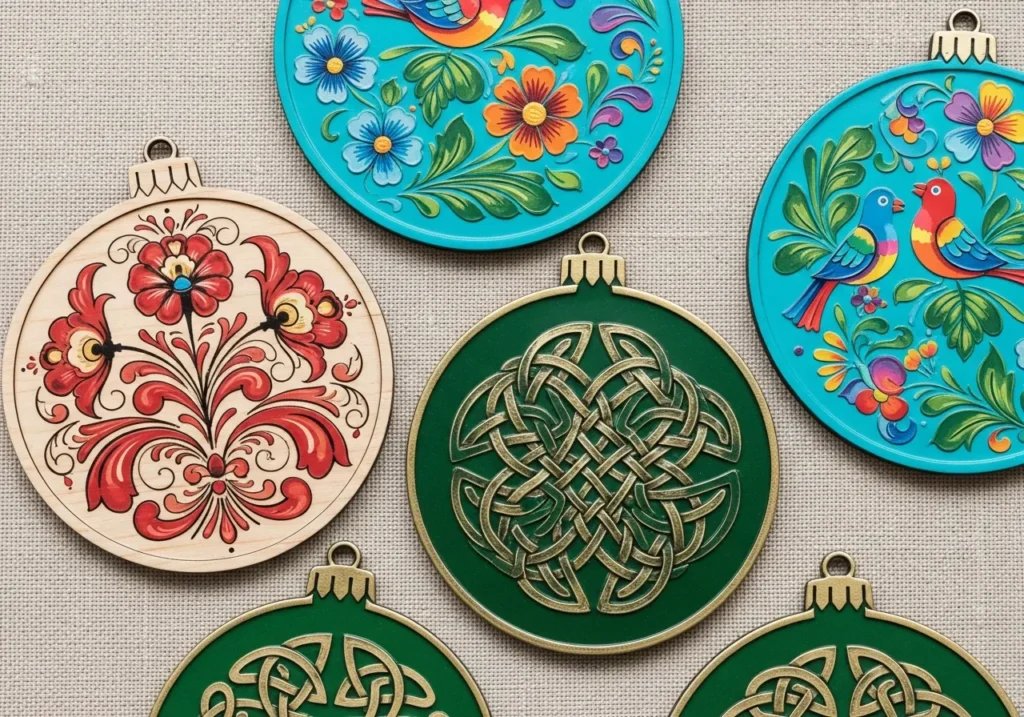
Scandinavian folk art patterns bring charming simplicity and cultural richness. Paint a base coat in classic red or white, then add traditional rosemaling designs featuring stylized flowers, leaves, and scrollwork. Blue and white combinations create that distinctive Nordic feel, while red and white feel festive and traditional.
Mexican folk art inspired ornaments burst with vibrant color and life. Paint flowers in bright pinks, oranges, yellows, and blues against white or turquoise backgrounds. Include decorative borders and patterns that echo traditional pottery and textile designs. These joyful ornaments celebrate cultural heritage and add energy to your tree.
Celtic knot patterns offer intricate beauty for patient crafters. Draw continuous interwoven designs in metallic gold or green against darker backgrounds. While complex, these patterns create stunning results that showcase skill and dedication. Simpler versions using just a few crossings work well for beginners.
Marbled and Swirled Effects
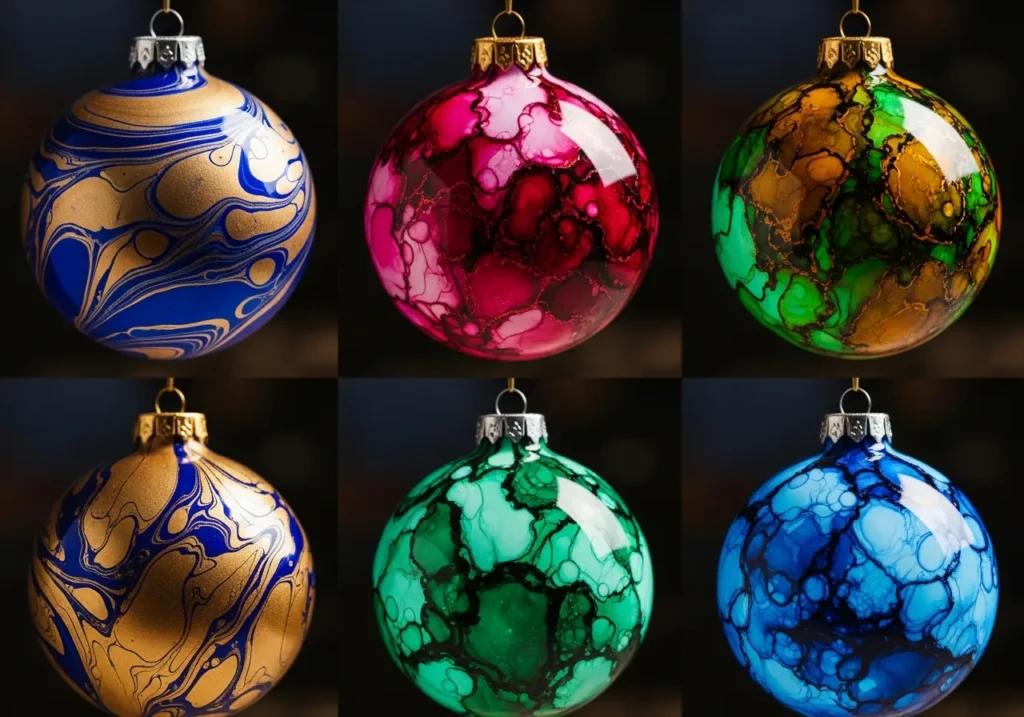
Marbling creates unpredictable, one-of-a-kind ornaments with mesmerizing patterns. Pour small amounts of two or three paint colors inside a clear ornament, then rotate and tilt to spread the paint across the interior surface. The colors swirl and blend naturally, creating unique patterns with each ornament. Metallic paints mixed with coordinating regular colors produce especially striking results.
Water marbling offers another approach with different effects. Float paint on water’s surface, swirl with a toothpick to create patterns, then dip the ornament through the design. This technique requires practice but produces professional-looking results with organic, flowing patterns.
Alcohol ink creates vibrant, translucent swirls with minimal effort. Drop various ink colors onto the ornament’s surface, then tilt to spread. The inks blend and create their own patterns as they dry, resulting in luminous, stained-glass effects that glow when backlit by tree lights.
Glitter and Sparkle Enhancements

Adding glitter elevates painted ornaments with festive shimmer. After painting your base design, brush a thin layer of clear-drying glue over areas where you want sparkle. Sprinkle fine glitter generously, then tap off excess. Seal with a clear acrylic spray to prevent glitter shed. This technique works beautifully for snow on winter scenes or to highlight specific design elements.
Glitter gradients combine color transitions with sparkle. Apply glitter more densely at the bottom of an ornament, gradually decreasing toward the top. This creates the illusion of snow accumulation or adds weight and grounding to the design visually.
Rhinestones and gems provide dimensional sparkle. Use craft glue or a hot glue gun to attach small rhinestones as accents. They work beautifully as ornament centers, snowflake details, or to create patterns like crosses or stars. The three-dimensional quality adds luxury and catches light dynamically.
Monogram and Initial Designs
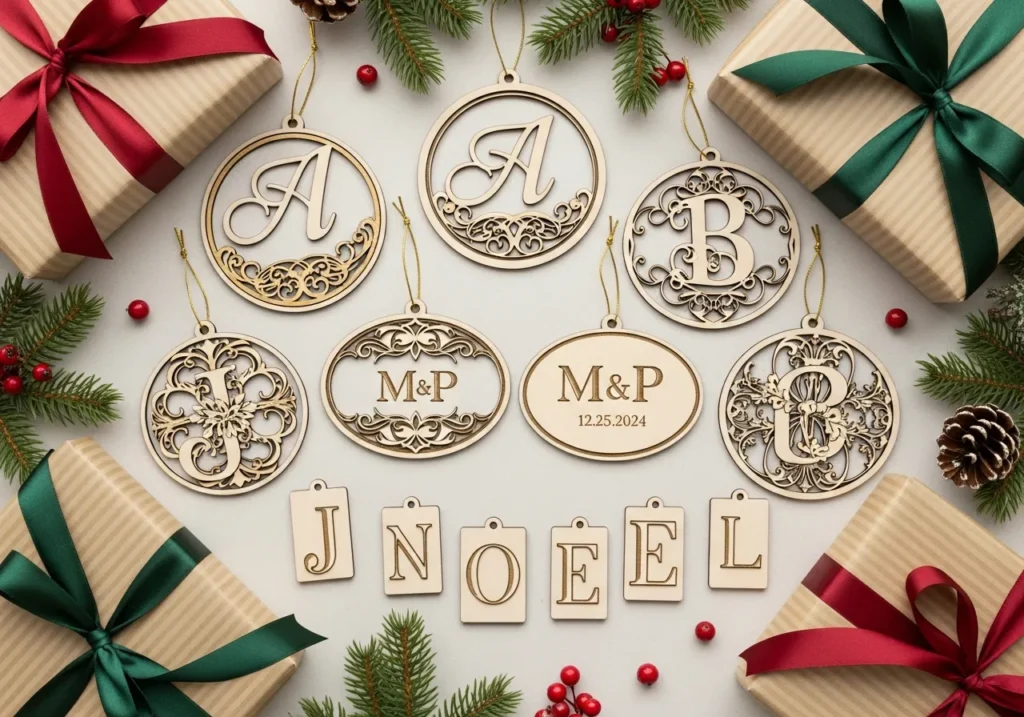
Personalized monogram ornaments make thoughtful gifts and family keepsakes. Paint the ornament in a solid color, then add a large initial in contrasting paint. Surround the letter with decorative flourishes, flowers, or geometric patterns. Consider family colors or the recipient’s favorite hues for extra personalization.
Coupled initials celebrate marriages and partnerships. Paint two initials with an ampersand or heart between them. Add the wedding date or anniversary year below. These ornaments commemorate special relationships and mark milestones worth remembering each holiday season.
Full alphabet sets create advent countdown opportunities or spell out holiday words. Paint twenty-four ornaments with letters A through X for advent, or spell words like MERRY CHRISTMAS across multiple ornaments. Display them together as a cohesive installation or spread throughout the tree.To see more ideas visit Our Crafty Mom.
Kid-Friendly Simple Designs

Handprint ornaments preserve childhood in tangible form. Paint a child’s hand with acrylic paint and press onto the ornament’s surface. Once dry, add details like eyes and a carrot nose to transform the handprint into a snowman, or add antlers and a nose to create a reindeer. Include the child’s name and year for a treasured keepsake.
Fingerprint designs allow even very young children to participate. Create fingerprint holly berries, lights on a painted tree, or snowman buttons. The imperfect, organic quality of fingerprints adds charm and authenticity that perfectly manufactured ornaments cannot match.
Simple shapes like hearts, stars, and trees suit developing motor skills. Children can paint solid shapes in bright colors, then adults can add details later if desired. The process matters more than perfection, and these ornaments become cherished reminders of time spent creating together.To see more painted ornament ideas visit Feeling Nifty.
Advanced Techniques for Experienced Crafters
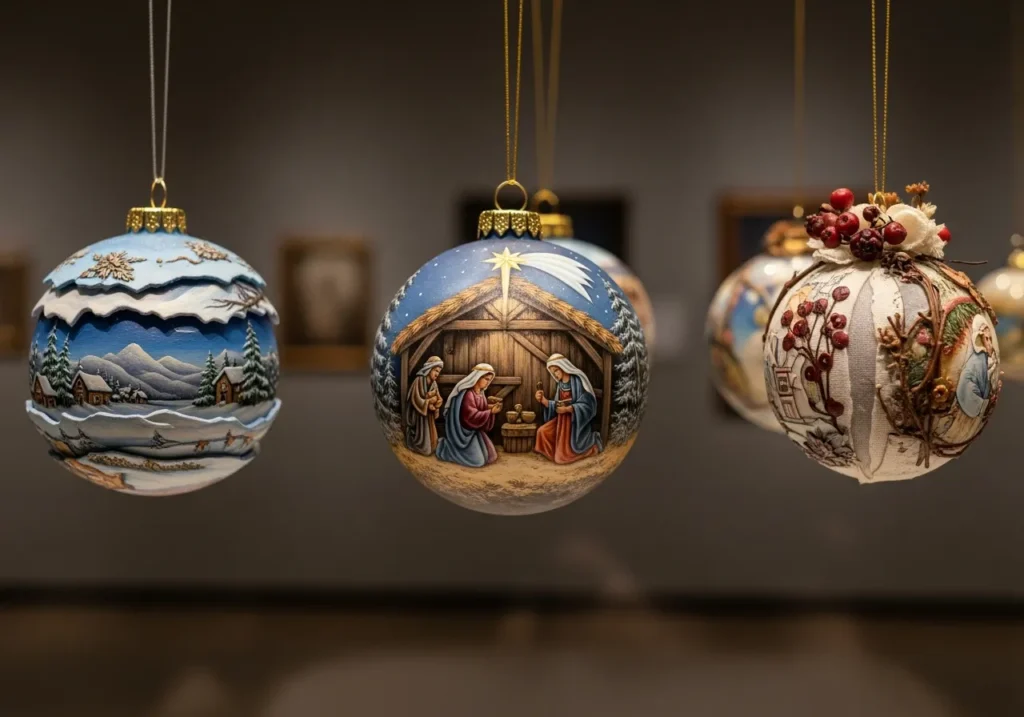
Detailed portrait work transforms ornaments into miniature canvases. Paint nativity scenes, Santa’s workshop, or family portraits with careful attention to proportion, shading, and color mixing. This level of detail requires patience and skill but produces heirloom-quality results worthy of prominent display.
Layering techniques create depth and complexity. Start with a background, let it dry completely, then add middle-ground elements, and finally foreground details. Each layer adds dimension, making flat surfaces appear three-dimensional. This approach works beautifully for winter landscapes, city scenes, or nature vignettes.
Mixed media incorporation pushes creative boundaries. Combine painted elements with fabric scraps, small buttons, twine, or pressed flowers. Glue these materials to the ornament’s exterior after painting, creating texture and visual interest. Seal everything with clear acrylic spray for durability.
Sealing and Finishing Your Ornaments
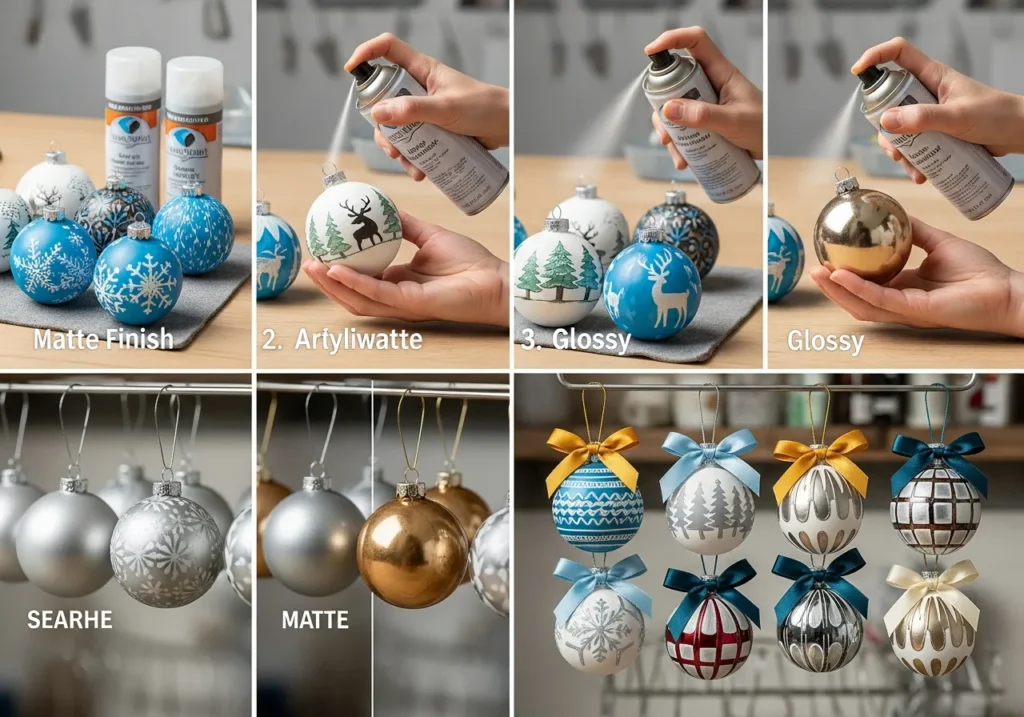
Proper sealing protects your artwork and ensures longevity. Once paint is completely dry, typically twenty-four hours after the final coat, apply a clear acrylic sealer. Spray sealers provide even coverage without brush marks. Hold the ornament by its cap and spray in a well-ventilated area, applying thin, even coats.
Matte finishes create a sophisticated, non-reflective surface that highlights the paint itself. Glossy finishes add shine and depth, making colors appear more vibrant. Satin finishes offer a compromise between the two. Consider your overall design and tree aesthetic when choosing finishes.
Adding ribbon or decorative caps completes the ornament. Replace basic metal caps with decorative versions in coordinating colors or metallic finishes. Attach ribbon loops for hanging, choosing widths and colors that complement your design. A simple bow at the top adds a polished, gift-ready appearance.
Storage and Care for Longevity
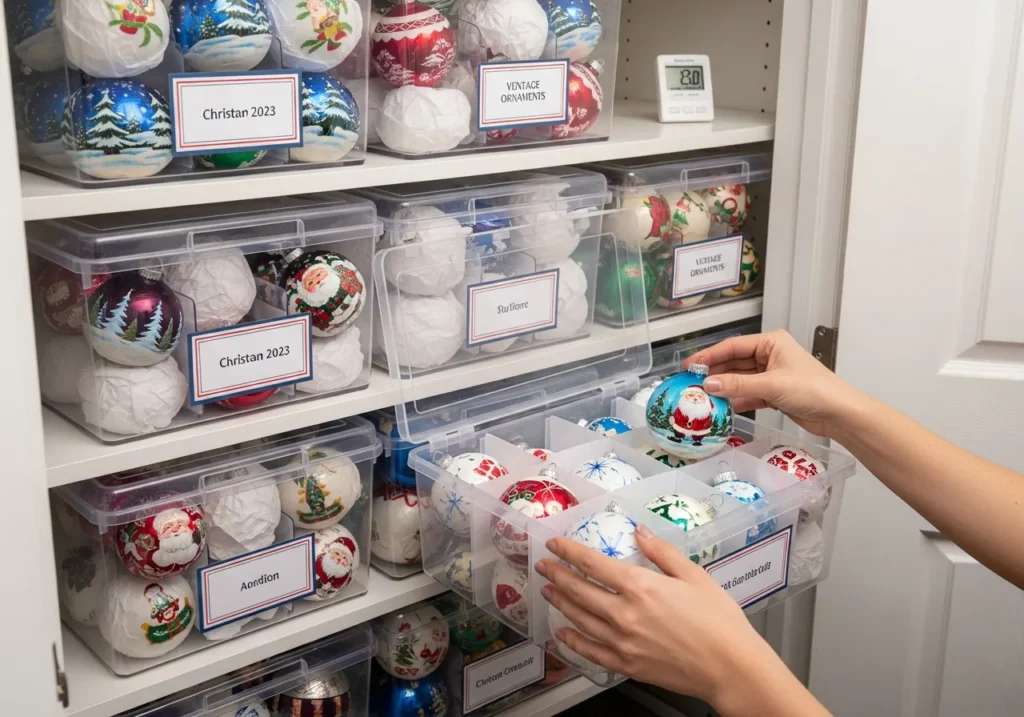
Proper storage prevents damage and preserves your handmade ornaments for years. Wrap each ornament individually in tissue paper or bubble wrap before placing in storage containers. Divided ornament boxes prevent ornaments from knocking together and chipping. Label boxes clearly to make setup easier each year.
Climate-controlled storage protects paint from temperature extremes and humidity. Avoid attics and basements where conditions fluctuate dramatically. A closet in the main living area provides more stable conditions that prevent cracking, peeling, or discoloration.
Handling ornaments with care during decorating extends their life. Hold ornaments by their caps rather than the painted surface to prevent fingerprints and wear. Teach children to appreciate the handmade quality and handle ornaments gently, turning decoration time into lessons about caring for treasured items.
Displaying Your Painted Creations
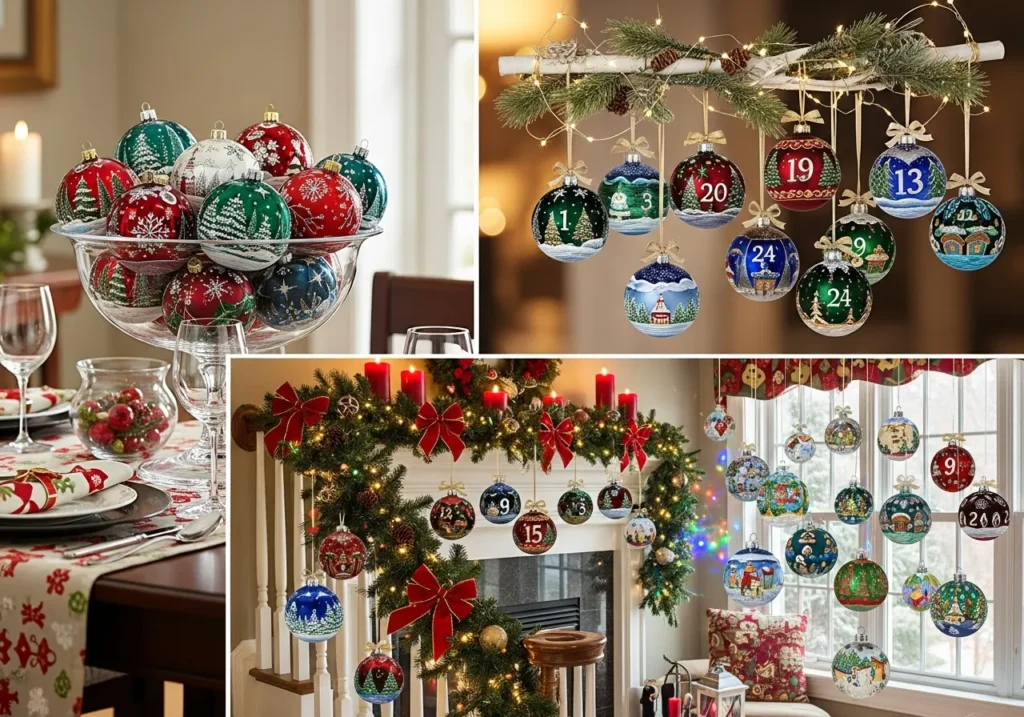
Beyond the Christmas tree, painted ornaments enhance holiday decor throughout your home. Fill glass bowls or apothecary jars with coordinating ornaments as coffee table centerpieces. Hang them in windows where light illuminates the paint, creating colorful displays. Attach them to garlands, wreaths, or chandelier decorations for unexpected touches of personalization.
Creating an ornament advent calendar adds interactive fun. Hang twenty-four numbered ornaments on a special display. Each day, a child removes one ornament and hangs it on the main tree, building excitement as Christmas approaches. This tradition combines decoration with anticipation beautifully.
Gallery walls of framed ornament photos document your growing collection and artistic development. Photograph each year’s creations before storing them, then create a photo gallery showing your progression. This visual timeline celebrates creativity and provides inspiration for future designs.
Conclusion
Painted Christmas balls offer a perfect blend of creativity, tradition, and personalization that enriches the holiday season. Whether you choose simple designs that children can help create or intricate artwork that showcases advanced skills, each ornament becomes a meaningful addition to your family’s celebration. The time invested in painting ornaments pays dividends in joy, both during the creative process and each year when you unwrap these treasures.
The beauty of this craft lies in its accessibility and endless variety. With basic supplies and a willingness to experiment, anyone can create ornaments that reflect their unique style and tell their family’s story. From classic winter scenes to contemporary geometric patterns, from whimsical characters to elegant metallics, the possibilities truly are limitless.
As you begin your ornament painting journey, remember that perfection is not the goal. Each brushstroke carries intention and love, making even imperfect ornaments precious. Start with simple designs to build confidence, then gradually challenge yourself with more complex techniques. Most importantly, enjoy the process of creating something beautiful with your own hands, establishing traditions that will warm hearts for generations to come.
Frequently Asked Questions
What type of paint works best for Christmas ornaments?
Acrylic paint is the ideal choice for painting Christmas ornaments because it adheres well to glass and plastic surfaces, dries quickly, and offers vibrant, long-lasting colors. For detailed work, acrylic paint markers provide excellent control and precision. Always seal finished ornaments with clear acrylic spray to protect your artwork from chipping and fading.
How do I prevent paint from smudging while working on ornaments?
Allow each layer of paint to dry completely before adding additional details or handling the ornament. Use a foam block, egg carton, or ornament stand to hold the ornament without touching painted surfaces. Work in sections, completing one area fully before moving to another. Patience during the drying process ensures clean, professional-looking results.
Can I paint ornaments with children safely?
Yes, painted ornament projects work wonderfully for children when you use non-toxic acrylic paints and provide appropriate supervision. Choose simpler designs like dots, handprints, or basic shapes that match their skill level. Plastic ornaments are safer than glass for young children. The activity builds fine motor skills while creating lasting holiday memories and keepsakes.
How long do painted Christmas ornaments last?
Properly sealed painted ornaments can last for decades with appropriate care. Using quality acrylic paints, allowing adequate drying time, and applying a protective clear coat significantly extends longevity. Store ornaments carefully wrapped in tissue paper within climate-controlled areas to prevent damage from temperature fluctuations and humidity.
Do I need artistic skills to create beautiful painted ornaments?
No special artistic training is required to create attractive painted ornaments. Simple techniques like dotting, sponging, marbling, and using stencils or tape for clean lines produce impressive results regardless of skill level. Start with basic designs and gradually experiment with more complex patterns as your confidence grows. The handmade quality itself adds charm and value beyond technical perfection.


One Comment