
17+ Spooky Halloween Resin Ideas to Try at Home
Halloween enthusiasts know that the best decorations and accessories are the ones you create yourself. Resin crafting has emerged as one of the most versatile and rewarding ways to bring your spooky season visions to life. Whether you’re a seasoned crafter or just beginning your creative journey, working with epoxy resin opens up endless possibilities for creating unique Halloween pieces that range from elegantly eerie to playfully spooky.
The beauty of resin crafting lies in its accessibility and adaptability. With just a few basic supplies and your imagination, you can transform ordinary materials into extraordinary Halloween treasures. From jewelry that adds a festive touch to your everyday wardrobe to functional home decor that impresses your guests, resin projects offer something for every skill level and aesthetic preference.
What makes Halloween resin crafting particularly exciting is the opportunity to experiment with different techniques, colors, and embedded elements. You can create crystal-clear pieces that showcase tiny Halloween charms, or swirl together deep purples and oranges for a dramatic marbled effect. Add glow-in-the-dark pigments for an extra spooky touch, or keep things sophisticated with sleek black and gold designs.
This guide will walk you through more than 17 inspiring Halloween resin ideas that you can tackle right at home. We’ll explore projects ranging from quick and simple creations perfect for beginners to more elaborate pieces that allow experienced crafters to showcase their skills. Each idea offers room for personalization, so you can adapt the concepts to match your unique style and Halloween vision.
Haunting Jewelry Creations
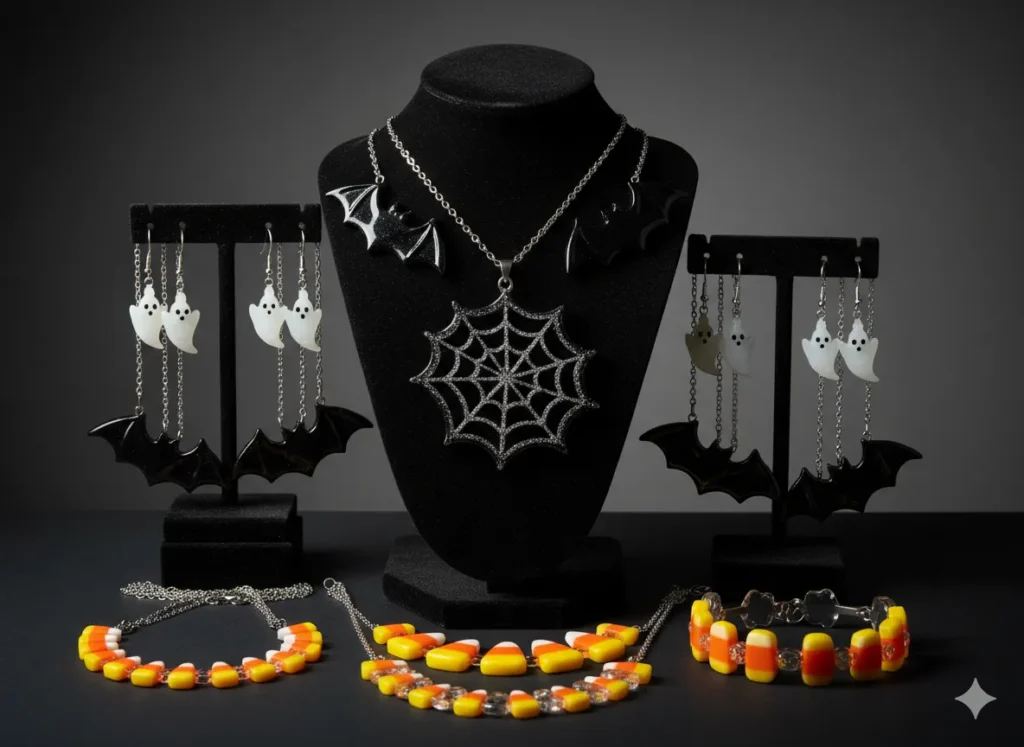
Spider Web Pendants
Creating delicate spider web pendants is an excellent starting point for resin jewelry making. These pieces capture the ethereal beauty of autumn morning webs while maintaining a subtle Halloween theme that works throughout the season. Start by printing a small spider web design or drawing one yourself on watercolor paper. Place the design into a bezel or pendant mold, seal it with a clear adhesive, and pour your resin mixture over top. The result is a glossy, professional-looking pendant that catches the light beautifully.
For added dimension, consider layering your resin pours. Apply a thin first coat, let it partially cure, then add tiny silver or black beads to represent dewdrops on the web. A final clear coat seals everything together and creates that signature resin shine.
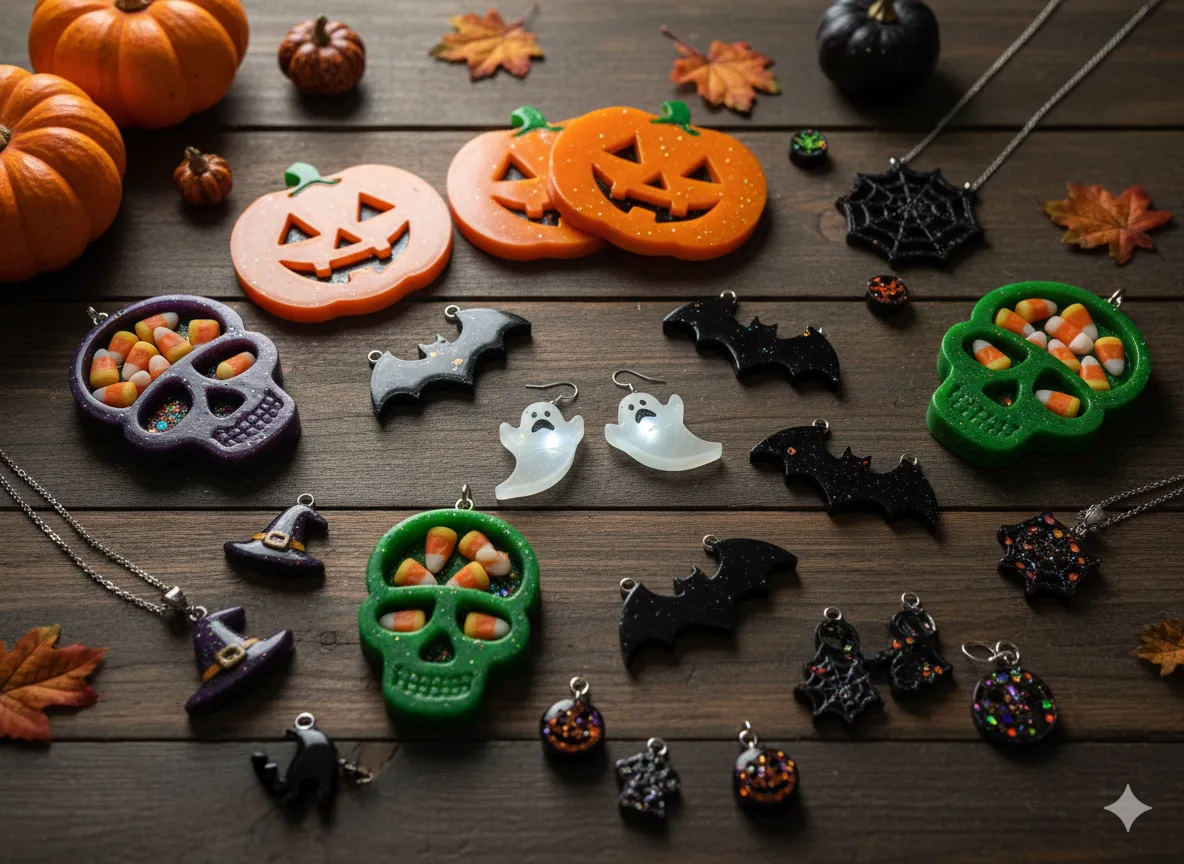
Ghost Earrings with Glow Power
Nothing says Halloween quite like glow-in-the-dark accessories. Ghost-shaped earrings made with luminescent resin pigments create a playful accessory that transitions from cute during the day to spooky at night. Use small ghost-shaped silicone molds and mix your resin with glow powder. White or light blue glow pigments work particularly well for creating that ethereal ghost appearance.
These earrings are lightweight and comfortable to wear, making them perfect for Halloween parties or everyday October wear. Add tiny black beads for eyes and mouths, or keep them simple and minimalist for a more modern aesthetic.
Bat and Moon Necklace Sets
Combine multiple small resin pieces to create coordinated jewelry sets. Cast tiny bats in black resin and pair them with crescent moon pieces made with metallic pigments. These elements can be assembled into necklaces, bracelets, or even hair accessories. The contrast between the solid black bats and shimmering moon creates visual interest and captures the classic Halloween night sky imagery.
Candy Corn Statement Pieces
For those who prefer their Halloween on the sweeter side, candy corn-inspired jewelry offers a nostalgic and colorful option. Layer orange, yellow, and white resin in triangular molds to replicate the iconic candy’s appearance. These pieces work wonderfully as bold statement earrings or fun pendants that celebrate the playful side of Halloween.
Spooky Home Decor Accents
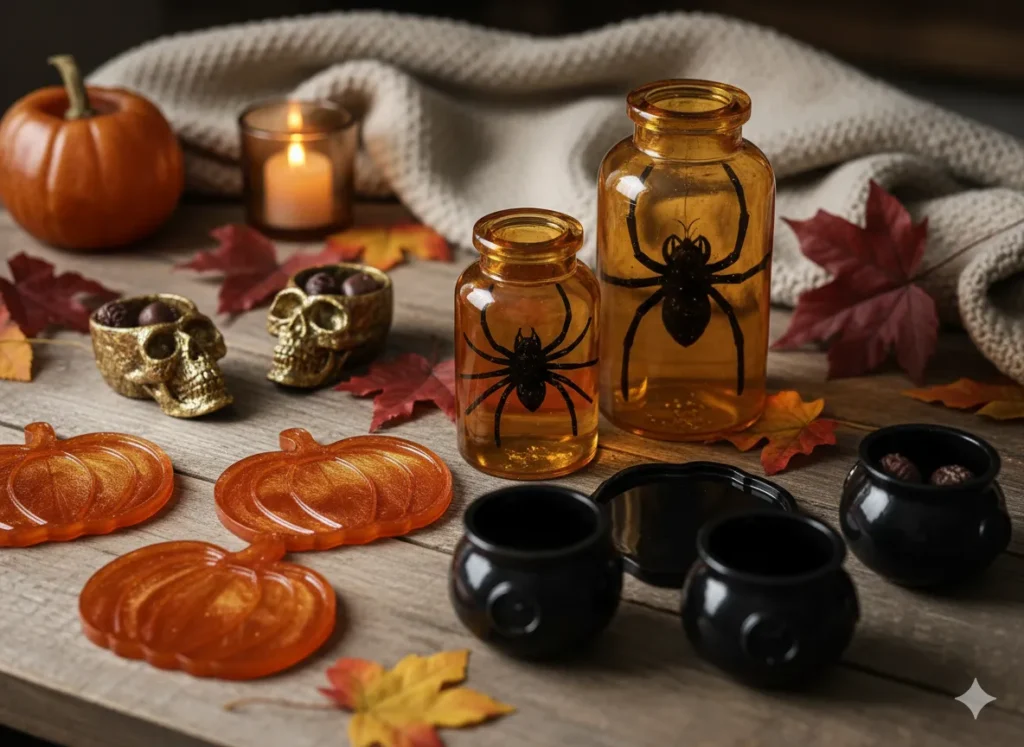
Pumpkin Coasters with Marbled Effect
Coasters are one of the most practical resin projects, and Halloween-themed versions serve double duty as both functional items and seasonal decorations. Create stunning pumpkin coasters by swirling together orange, deep red, and touches of brown resin in round molds. The marbling technique creates organic patterns that resemble real pumpkin surfaces.
Add gold leaf flakes before the final pour for an upscale autumn aesthetic, or embed small metallic pumpkin charms for added dimension. Seal the bottoms with cork or felt to protect your furniture surfaces.
Skull-Shaped Trinket Dishes
Small skull molds make perfect vessels for creating decorative trinket dishes. These versatile pieces can hold jewelry on a dresser, keys by the front door, or candy during Halloween parties. Mix your resin with metallic pigments like copper, silver, or iridescent purple to create eye-catching finishes.
For a more dramatic effect, try a two-tone approach by pouring black resin first, letting it partially set, then adding a layer of colored or glittered resin on top. This creates depth and visual interest in the finished piece.
Cauldron Coaster Collection
Witch-themed cauldron coasters bring magical energy to your Halloween tablescape. These round coasters can feature embedded glitter, small metallic stars, or even tiny potion bottle charms suspended in crystal-clear resin. The beauty of this design is its versatility you can make them dark and gothic with black and purple hues, or bright and whimsical with greens and oranges.
Specimen Jar Displays
For those drawn to a more scientific or vintage Halloween aesthetic, resin specimen jars offer an intriguing decorative option. Create small resin pieces that look like preserved specimens by embedding plastic spiders, insects, or eyeballs in amber-tinted resin. Pour these into small glass jars or vials for display. These conversation-starting pieces work beautifully in Halloween vignettes or as part of a larger seasonal display.
Wearable Halloween Accessories
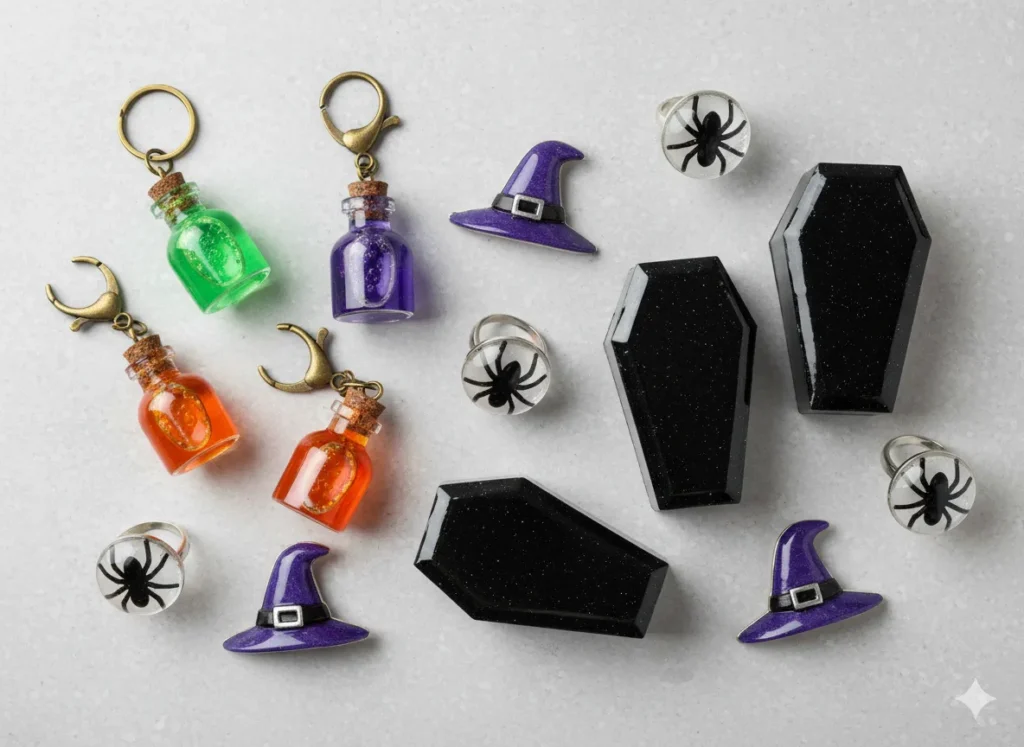
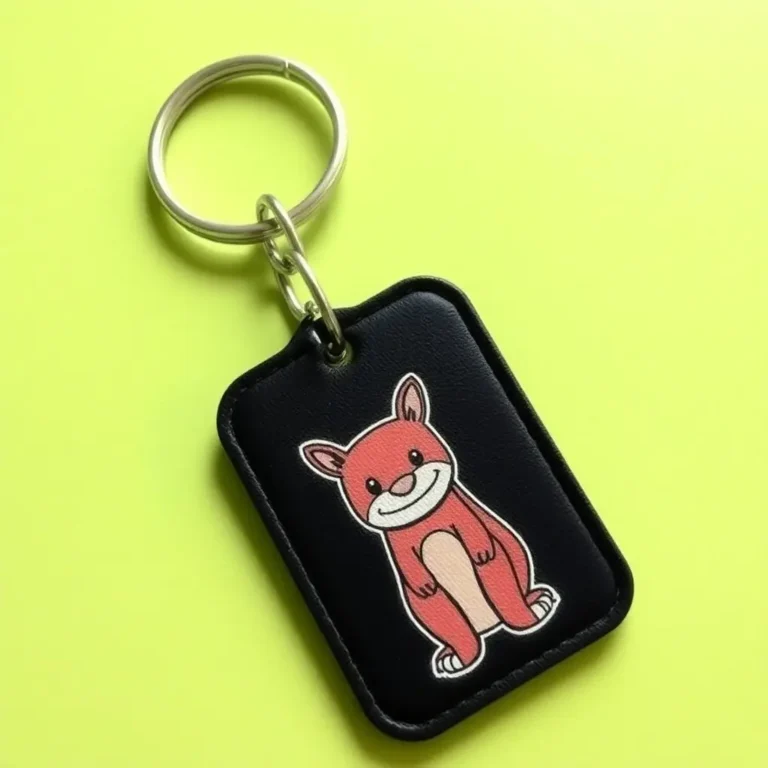
Potion Bottle Keychains
Miniature potion bottles filled with colored resin make charming keychains or bag accessories. Use small glass vial molds or actual tiny bottles, and fill them with resin tinted in mysterious colors like deep purple, emerald green, or midnight blue. Add fine glitter or small charms before the resin sets to create the appearance of magical ingredients.
Attach these to keyring hardware or lobster clasps, and you have practical accessories that celebrate the season wherever you go.
Coffin-Shaped Jewelry Boxes
While slightly more advanced, small coffin-shaped resin boxes make stunning storage solutions for Halloween jewelry. Cast the base and lid separately using coffin molds, then add decorative elements like gold paint along the edges or embed small crystals into the lid surface. These boxes become keepsakes that can be used year after year.
Spider Ring Collection
Delicate spider rings offer a subtle way to incorporate Halloween themes into everyday accessories. Use small spider charms as the focal point, embedding them in clear or slightly tinted resin within ring molds. The transparency of the resin creates an interesting effect where the spider appears to be suspended in crystal.
Witch Hat Brooches
Dimensional witch hat pieces make excellent brooches or pins that add Halloween flair to jackets, bags, or scarves. Create these using cone-shaped molds for the hat portion and circular molds for the brim. Assemble the pieces with strong adhesive and attach pin backs to the finished product.
Festive Tabletop Creations
Haunted House Scene Coasters
Take coaster making to the next level by creating miniature haunted house scenes within each piece. Use black silhouettes of haunted houses, bare trees, and flying bats layered with translucent colored resin backgrounds. These artistic coasters function as both practical items and miniature artworks.
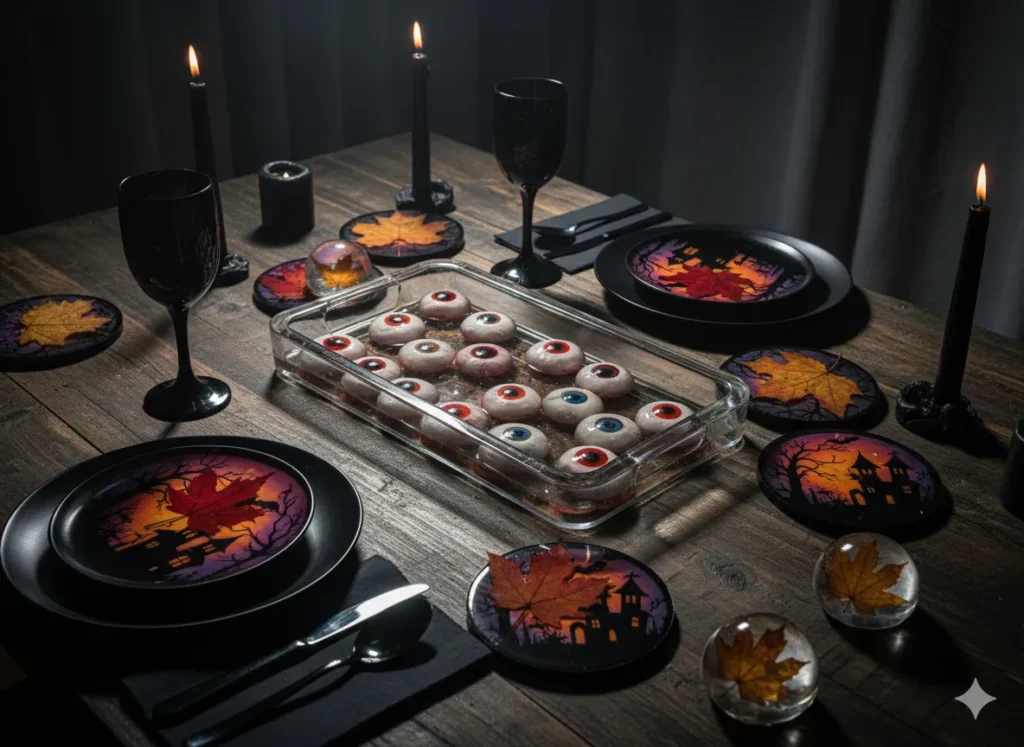
Eyeball Serving Tray
A larger serving tray project makes an impressive centerpiece for Halloween gatherings. Embed realistic-looking eyeball candies or crafted resin eyeballs in a clear or lightly tinted resin base. The result is both unsettling and fascinating, perfect for serving Halloween treats.
Autumn Leaf and Acorn Accents
Not all Halloween decor needs to be overtly spooky. Preserve real autumn leaves and acorns in resin to create sophisticated seasonal pieces. These work beautifully as paperweights, display objects, or incorporated into larger decorative arrangements.To see more spooky halloween resin ideas do visit Art Resin.
Creative Wall and Display Art

Bat Swarm Wall Pieces
Create dramatic wall art by casting multiple bat shapes in black resin and arranging them on a backing board or directly on the wall in a swirling formation. The three-dimensional nature of resin bats creates shadows and depth that flat decorations cannot achieve.
Moon Phase Display Set
Craft a series of circular resin pieces representing different moon phases using white, gray, and black pigments. Arrange these in sequence for an elegant Halloween display that works equally well for autumn decor. Add metallic accents or embedded stars for extra visual appeal.
Framed Spiderweb Art
Larger spider web designs can be created in square or rectangular molds and framed as standalone art pieces. Experiment with different web patterns and background colors to create unique pieces that range from delicate and intricate to bold and graphic.
Essential Materials and Getting Started
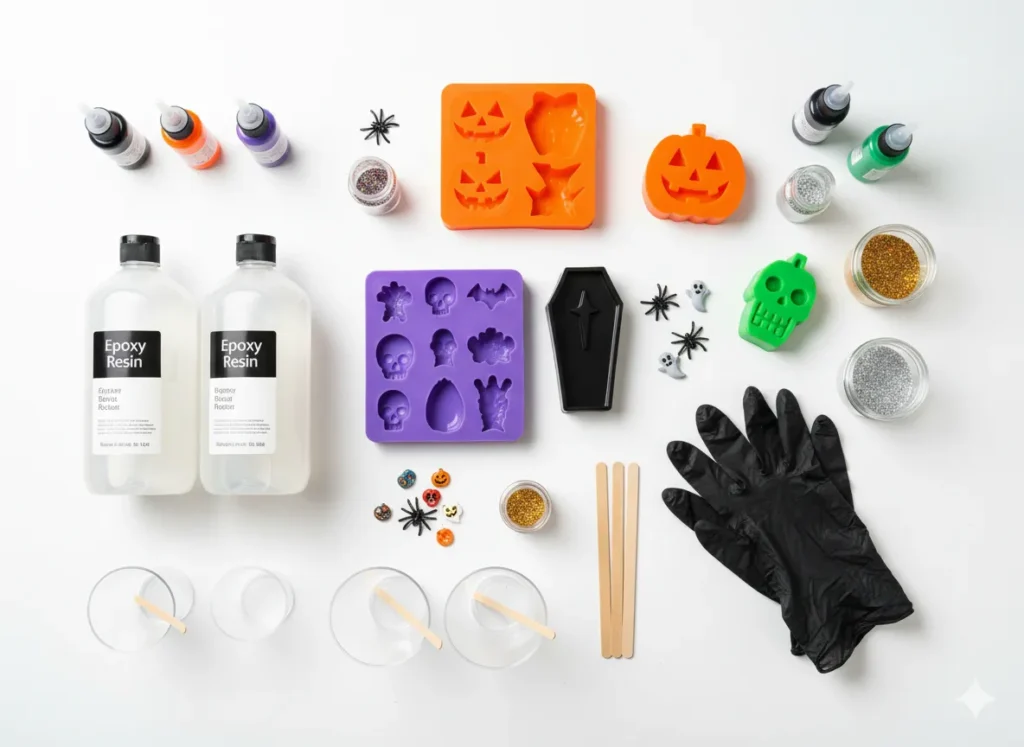
Before diving into these projects, gather your basic supplies. You’ll need epoxy resin and hardener, silicone molds in various Halloween shapes, mixing cups and stirring sticks, protective gloves, and a level workspace. Optional additions include resin pigments, alcohol inks, glitter, embedded charms, and glow-in-the-dark powder.
Safety remains paramount when working with resin. Always work in a well-ventilated area, wear protective gloves, and follow manufacturer instructions precisely for mixing ratios and curing times. Resin fumes can be harmful, so proper ventilation is not optional.
Temperature and humidity affect resin curing, so maintain a workspace between 70 and 80 degrees Fahrenheit for best results. Too cold, and your resin may not cure properly. Too warm, and it may cure too quickly, trapping bubbles or creating an uneven finish.
Techniques for Professional Results
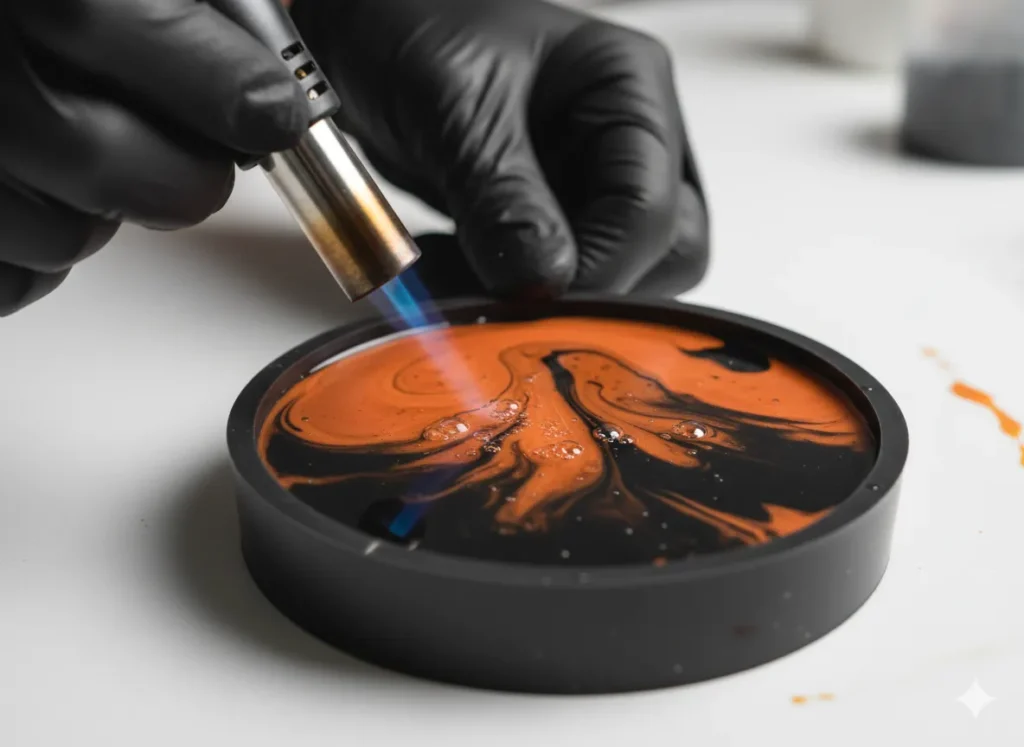
Achieving bubble-free finishes requires patience and the right approach. Mix your resin slowly to minimize air incorporation, then use a small torch or heat gun to gently pop surface bubbles after pouring. Multiple thin layers often produce better results than one thick pour, especially for projects with embedded elements.
Color mixing opens up unlimited possibilities. Start with small amounts of pigment and add gradually until you achieve your desired shade. Remember that resin appears darker when wet than when cured, so test small batches before committing to large pours.
Demolding techniques vary by project size and mold type. Flexible silicone molds generally release easily once resin is fully cured, but some pieces benefit from time in the freezer to contract slightly before removal. Never force a piece out of a mold, as this can cause cracks or breakage.
Personalization and Creative Variations
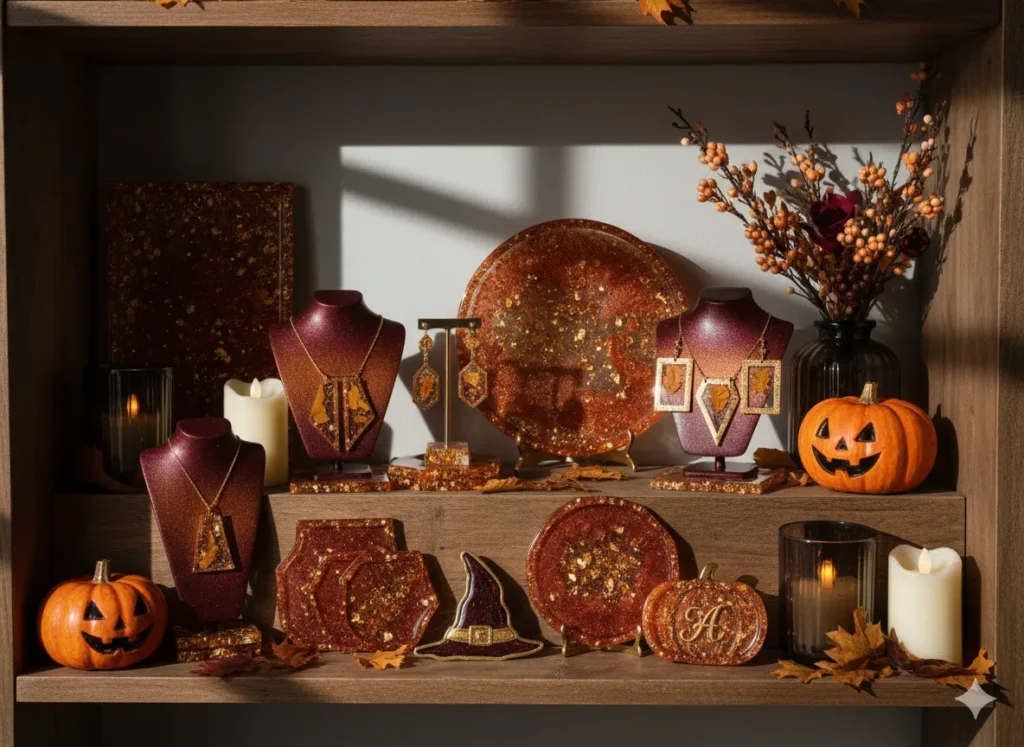
The beauty of resin crafting lies in its endless customization options. Take any of these base ideas and make them uniquely yours by adjusting colors to match your decor, scaling projects up or down to suit your needs, or combining multiple techniques in single pieces.
Consider creating coordinated sets that tie your Halloween decorating together. Match coaster colors to your jewelry pieces, or create wall art that complements your tabletop displays. This cohesive approach elevates your Halloween aesthetic from random decorations to intentional design.
Seasonal transitions become easier when you plan ahead. Make pieces that work for Halloween but transition into general autumn decor by choosing sophisticated color palettes and avoiding overtly spooky elements. Pumpkins, autumn leaves, and warm metallic tones work beautifully from September through Thanksgiving. To see more resin crafting ideas do visit Homeliaa.
Conclusion
Halloween resin crafting offers the perfect blend of creativity, practicality, and festive fun. These seventeen-plus project ideas provide starting points for crafters of all skill levels to create unique, personalized Halloween pieces. Whether you’re drawn to wearable accessories, functional home items, or purely decorative displays, resin gives you the tools to bring your spooky visions to life.
The projects shared here represent just the beginning of what’s possible with Halloween resin crafting. As you gain experience and confidence, you’ll develop your own techniques and discover new ways to combine materials and methods. Each piece you create becomes a reflection of your personal style and adds handmade charm to your Halloween celebrations.
Start with simpler projects like coasters or small pendants to build your skills and understanding of how resin behaves. As you master the basics, graduate to more complex creations that showcase advanced techniques. Remember that even experienced crafters encounter occasional failures, so approach each project as a learning opportunity rather than demanding perfection.
The memories you create while crafting often become as valuable as the finished pieces themselves. Involve family members in age-appropriate projects, host crafting parties with friends, or simply enjoy quiet creative time preparing for your favorite spooky season. Halloween resin crafting combines artistic expression with practical skill-building in ways that few other hobbies can match.
Frequently Asked Questions
What type of resin is best for Halloween crafts?
Epoxy resin works best for most Halloween projects due to its crystal-clear finish, durability, and versatility. Look for low-odor formulations specifically designed for crafting. Two-part epoxy resins that mix in equal ratios tend to be easiest for beginners to work with successfully.
How long does resin take to cure for Halloween projects?
Most epoxy resins reach a demolding stage within 24 hours, but full cure typically takes 72 hours. Exact timing depends on the specific product, room temperature, and project thickness. Always check manufacturer guidelines, and avoid using pieces before they’re fully cured to prevent damage or warping.
Can you add real Halloween items like candy to resin?
Some items work well in resin while others do not. Dry items like plastic toys, metal charms, and sealed candies generally succeed. Fresh organic materials, moisture-containing items, or certain candies may deteriorate or create bubbles. Always test small samples before committing to larger projects.
How do you prevent bubbles in Halloween resin pieces?
Mix resin slowly and deliberately to minimize air incorporation during the mixing process. After pouring, use a small torch or heat gun held several inches away to pop surface bubbles. Working in a warm room and letting mixed resin sit for a few minutes before pouring also helps release trapped air.
Are Halloween resin crafts safe for children to make?
Adult supervision is essential when children work with resin due to chemical exposure risks. Choose child-safe, non-toxic resin formulas, ensure excellent ventilation, and have children wear protective gloves. Kids can help with design planning and decoration selection while adults handle the actual resin mixing and pouring.


2 Comments