15 Smart Ideas for Covering Popcorn Ceilings
Popcorn ceilings have long overstayed their welcome in the world of home design. Popular from the 1950s through the 1990s, they were once praised for their ability to hide imperfections, absorb sound, and provide a measure of fire resistance. Today, that same bumpy texture reads as dated, dusty, and frankly difficult to love in a modern home.
The instinct for most homeowners is to scrape the whole thing off and start fresh. But that process is messy, time-consuming, and potentially hazardous, particularly in homes built before 1978, when asbestos was still a common ingredient in ceiling texture compounds. Disturbing those materials can pose serious health risks, and the cleanup alone can turn a weekend project into a weeks-long ordeal.
The good news is that you do not have to remove a popcorn ceiling to be rid of it. There are numerous smart, cost-effective, and even beautiful ways to cover it entirely. Whether you are a seasoned DIYer or someone who simply wants a cleaner-looking home without the drama of a full renovation, these ideas for covering popcorn ceilings give you real options. Here are 15 of the best.
1. Skim Coat Over the Texture
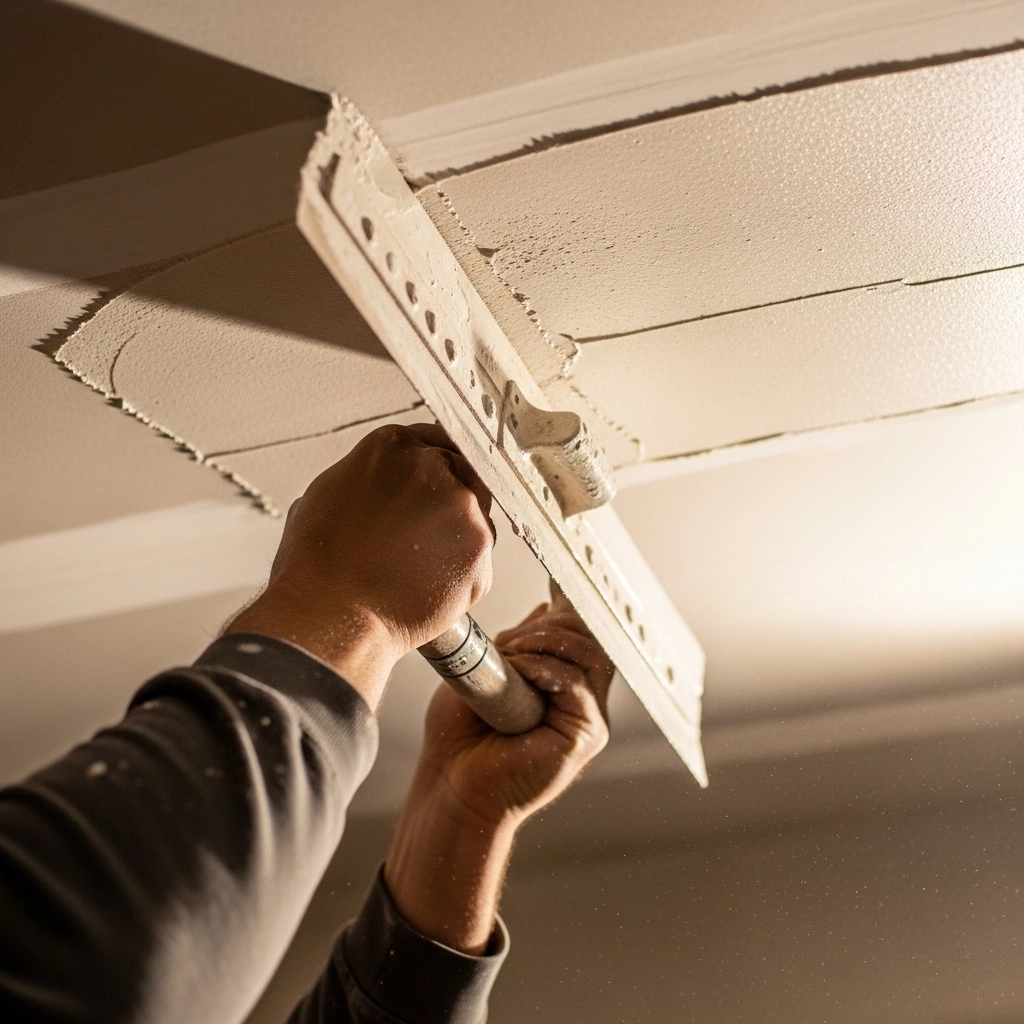
One of the most straightforward ideas for covering popcorn ceilings is applying a skim coat directly over the existing texture. A skim coat is a thin layer of diluted joint compound that is spread across the ceiling surface using a trowel or a wide drywall knife. Once it dries, it creates a smooth, paintable surface that looks professionally finished.
The process typically requires two or three coats, with light sanding between each application. It demands patience and a steady hand, but the results can be nearly indistinguishable from a brand-new drywall ceiling. This method works best when the existing texture is firmly attached and shows no signs of peeling or moisture damage.
2. Install New Drywall Directly Over It

For homeowners dealing with badly damaged or heavily textured ceilings, installing a new layer of drywall is one of the most reliable covering solutions available. Using 3/8-inch gypsum board is the most popular choice for this application because it is lighter than standard half-inch drywall, making it easier to hold in place while fastening it to ceiling joists.
Once the panels are screwed in, the seams are taped and mudded, the surface is primed, and a fresh coat of paint is applied. The result is a perfectly flat ceiling that completely encapsulates the old popcorn texture beneath. This is also considered the safest approach in older homes where asbestos may be present, since the new drywall acts as a permanent containment barrier.
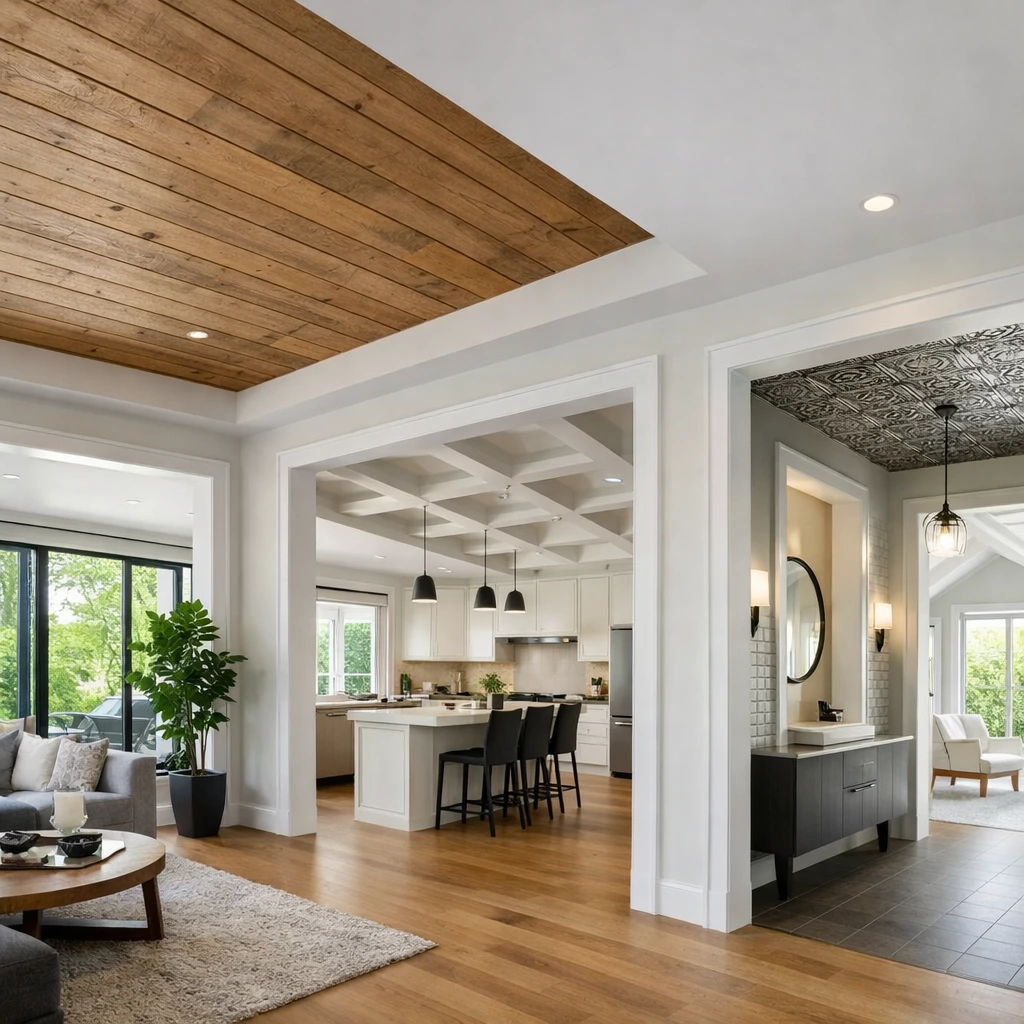
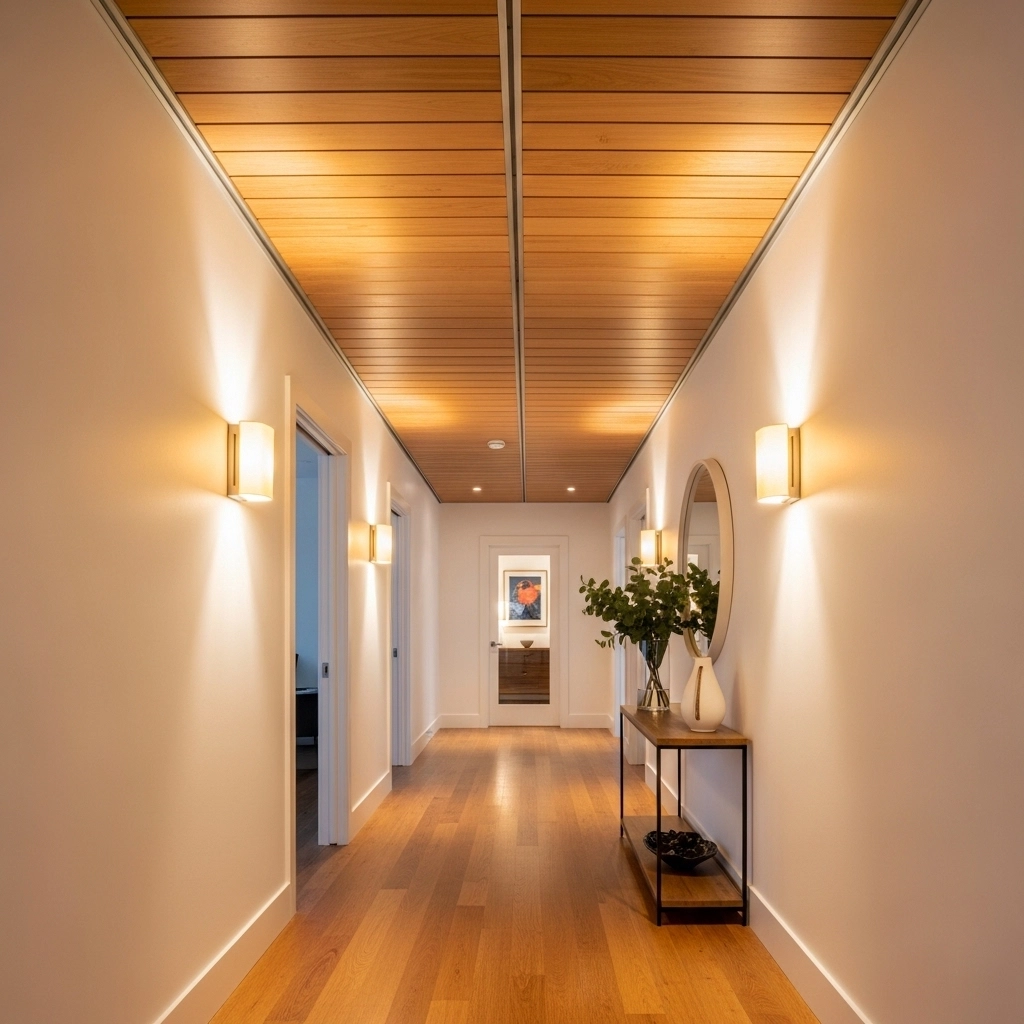
3. Apply Wood Planks or Shiplap
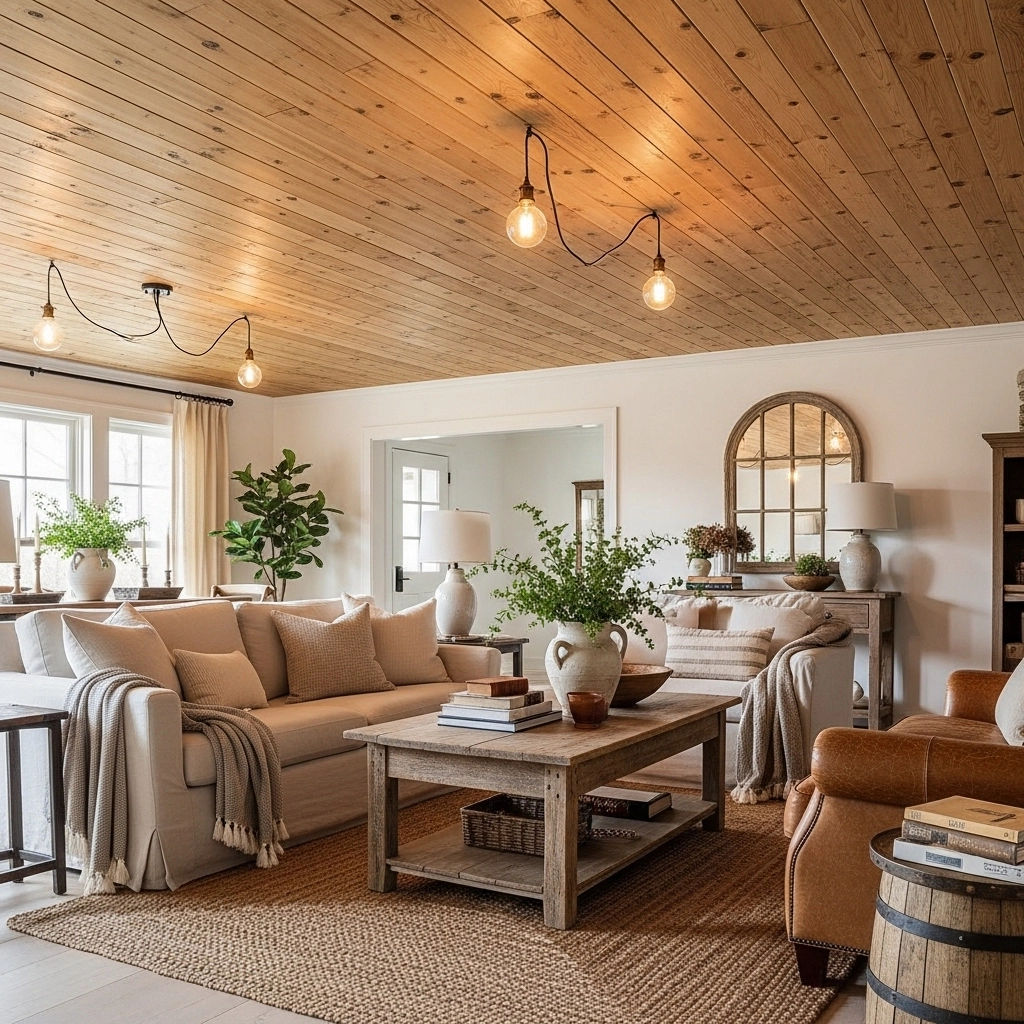
Wood planks have surged in popularity as a ceiling treatment over the past decade, and for good reason. They add warmth, texture, and architectural character that a plain white ceiling simply cannot provide. Cedar planks, pine boards, or MDF shiplap can all be nailed or glued directly over an existing popcorn ceiling.
How to Get the Best Results
Lightweight planks are the most practical choice for a DIY installation. You can stain them, paint them white for a farmhouse aesthetic, or leave them natural for a rustic feel. On average, this project runs around two dollars per square foot in materials, making it one of the more affordable design-forward options available.
4. Use Beadboard Panels
Beadboard is a classic material that pairs beautifully with cottage, coastal, and traditional interior styles. Rather than installing individual planks one at a time, beadboard comes in full sheets that can be cut to fit the room and fastened to the ceiling in a fraction of the time.
It is lighter and more forgiving than solid wood, and it paints extremely well. A coat of bright white paint transforms a beadboard ceiling into something that looks intentional and stylish, completely obscuring whatever texture lies beneath it.
5. Install Faux Tin Ceiling Tiles
Tin ceiling tiles carry a nostalgic charm that suits older homes, craftsman bungalows, and any space that benefits from ornate detail. Authentic pressed metal tiles are available, but faux versions made from lightweight PVC are a far more budget-friendly option and are surprisingly convincing when painted.
Installation Tips
These tiles can be glued directly to the existing ceiling surface using construction adhesive. They come pre-embossed with patterns, so once they are painted in your chosen color, they create a striking focal point that draws the eye rather than hiding from it. The entire installation can typically be completed within a single day.
6. Add a Drop Ceiling or Suspended Grid System
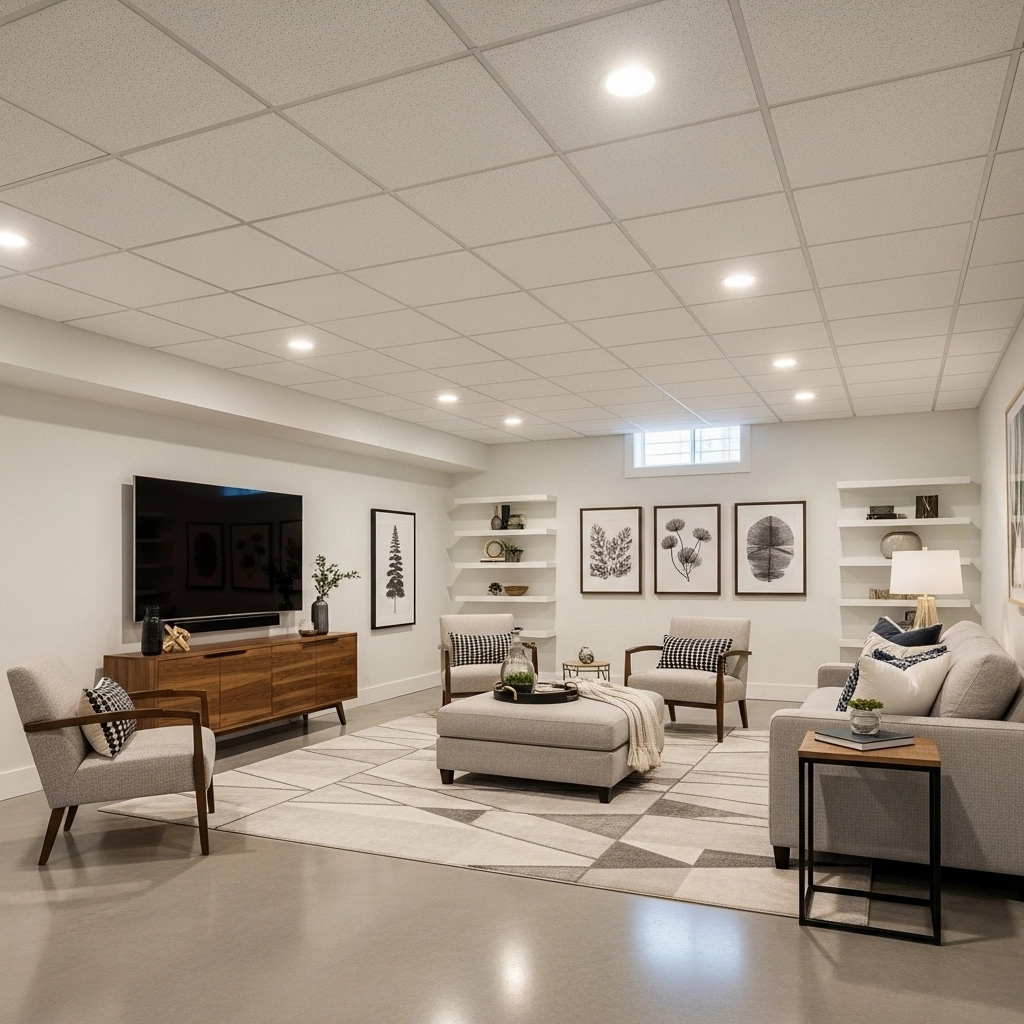
A drop ceiling system, also known as a suspended ceiling, involves installing a metal grid below the existing ceiling and dropping lightweight tiles into the grid. This is an especially practical solution for basements, utility rooms, and spaces where you want easy access to plumbing or electrical components above.
Modern drop ceiling tiles have come a long way from the sterile commercial look of earlier decades. Many now mimic wood, pressed metal, or clean white finishes that work well in residential spaces.
7. Use Surface-Mount Ceiling Planks with a Track System
Products like the Armstrong Woodhaven plank system are specifically designed with popcorn ceilings in mind. The planks clip into a track that is screwed directly into ceiling joists, meaning nothing is ever glued to the bumpy surface beneath.
This approach is ideal for renters or homeowners who want a solution they can potentially reverse later. The planks are available in multiple finishes, including faux wood and pressed metal styles, and the installation process is manageable for a confident DIYer working over a weekend.
8. Apply Wallpaper to the Ceiling

Wallpaper on a ceiling sounds ambitious, but it is entirely achievable when the texture is not too heavily pronounced. For light to moderate popcorn texture, a thick wallpaper can be applied directly after a coat of primer seals the surface.
Choosing the Right Wallpaper
Grasscloth, linen-textured, and bold geometric papers all look striking overhead. For rooms with heavier texture, a thin skim coat first will create a better base for the paper to adhere to. This is one of the most creative ideas for covering popcorn ceilings when you want something truly distinctive.
9. Paint Over the Popcorn Texture
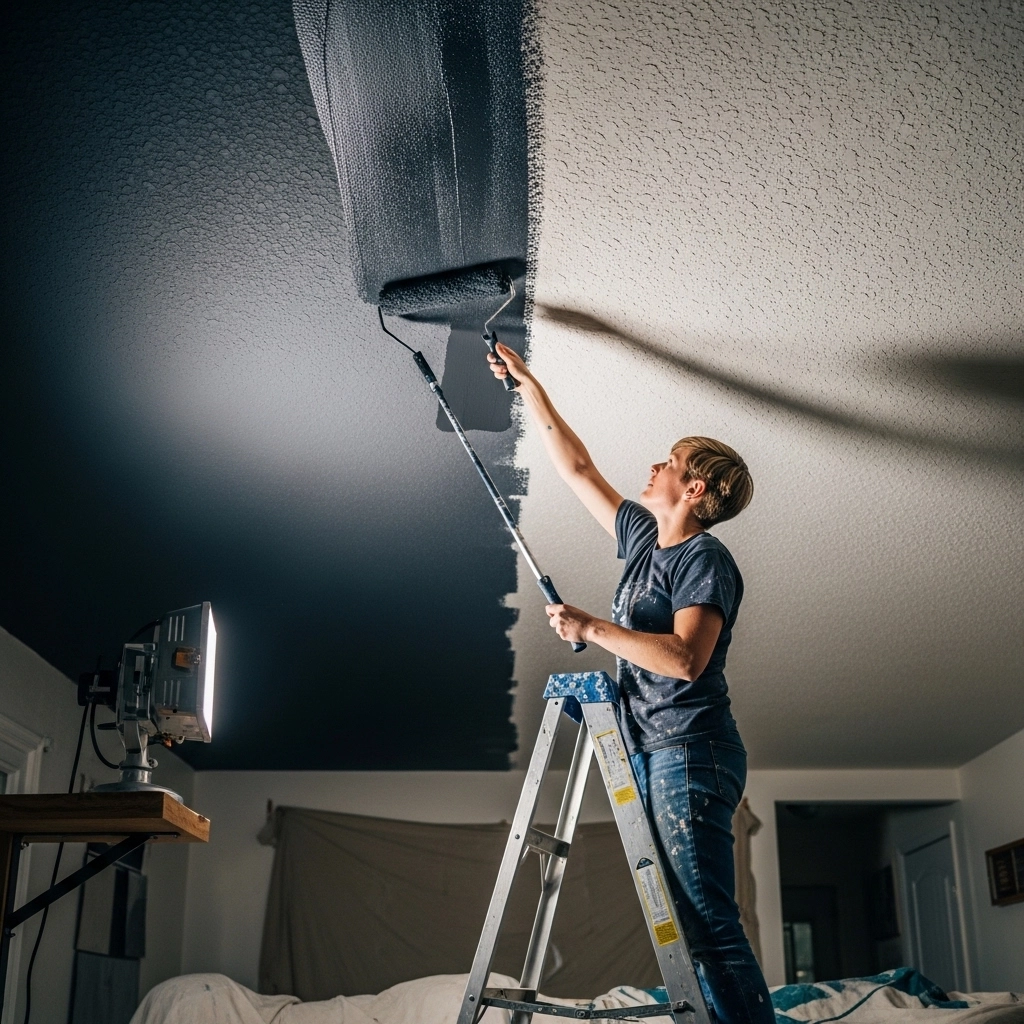
Sometimes the simplest solution is the right one. Painting over a popcorn ceiling does not eliminate the texture, but it can dramatically reduce its visual impact. The key is to use a flat or matte finish paint, which minimizes the shadowing effect that makes popcorn texture so visually noisy.
Using a darker paint color on the ceiling is a particularly effective strategy. Deep charcoal, navy, or forest green actually causes the bumpy texture to recede from view, turning the ceiling into a moody design feature rather than an eyesore. Apply with a thick-nap roller and plan on two generous coats.
10. Hang Fabric as a Canopy or Stretched Panel
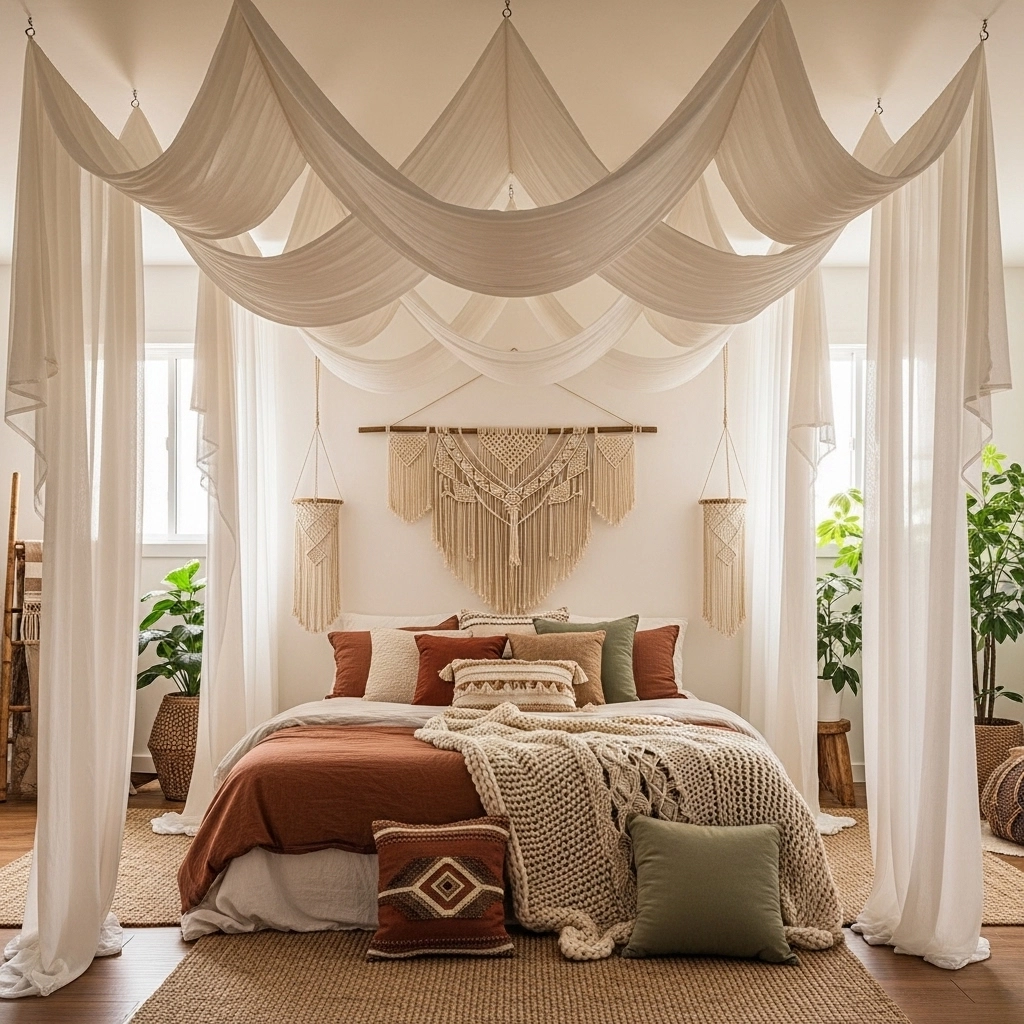
For a soft, bohemian, or budget-conscious approach, fabric is an surprisingly effective ceiling covering. Large panels of fabric can be gathered and draped from ceiling hooks to create a canopy effect, or stretched flat across the ceiling for a cleaner look.
This method works best in bedrooms, reading nooks, or informal spaces where the effect feels intentional rather than provisional. It requires no permanent modifications and can be changed as often as your style evolves.
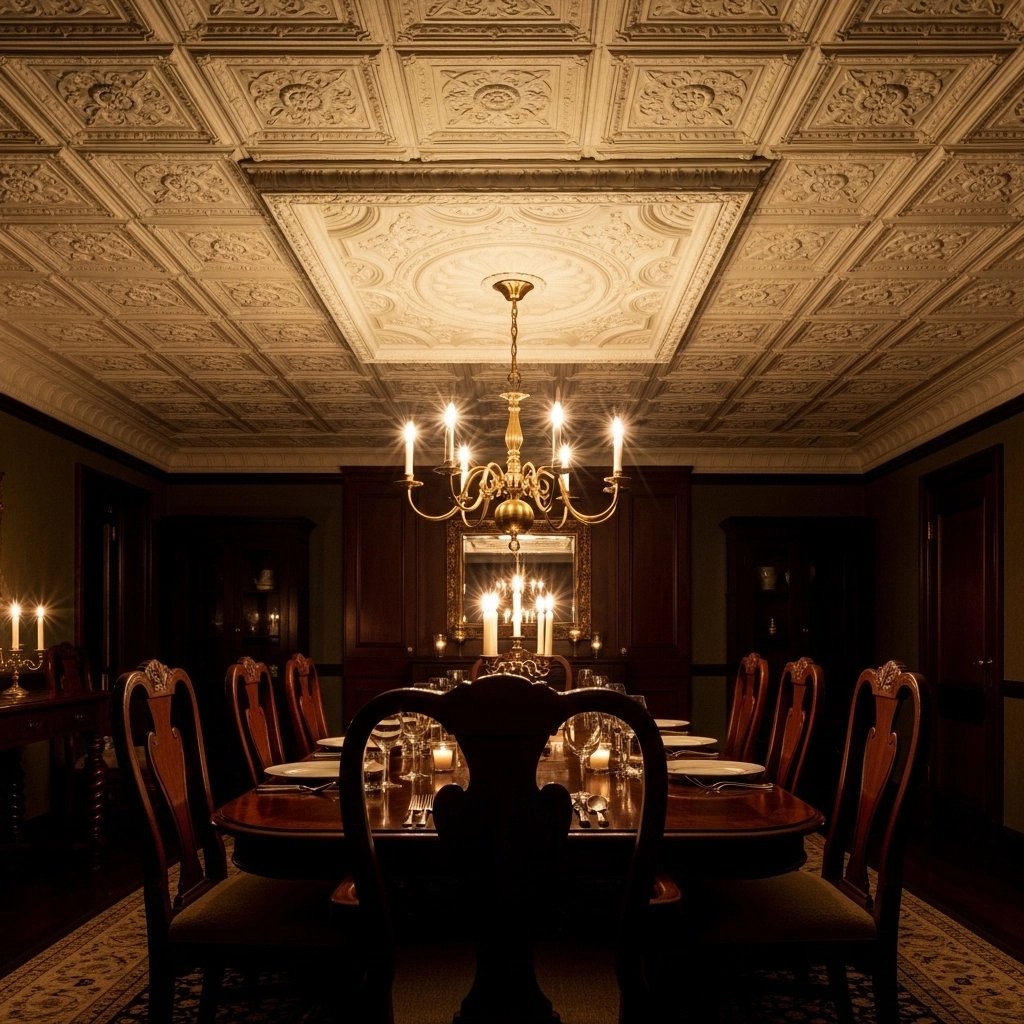
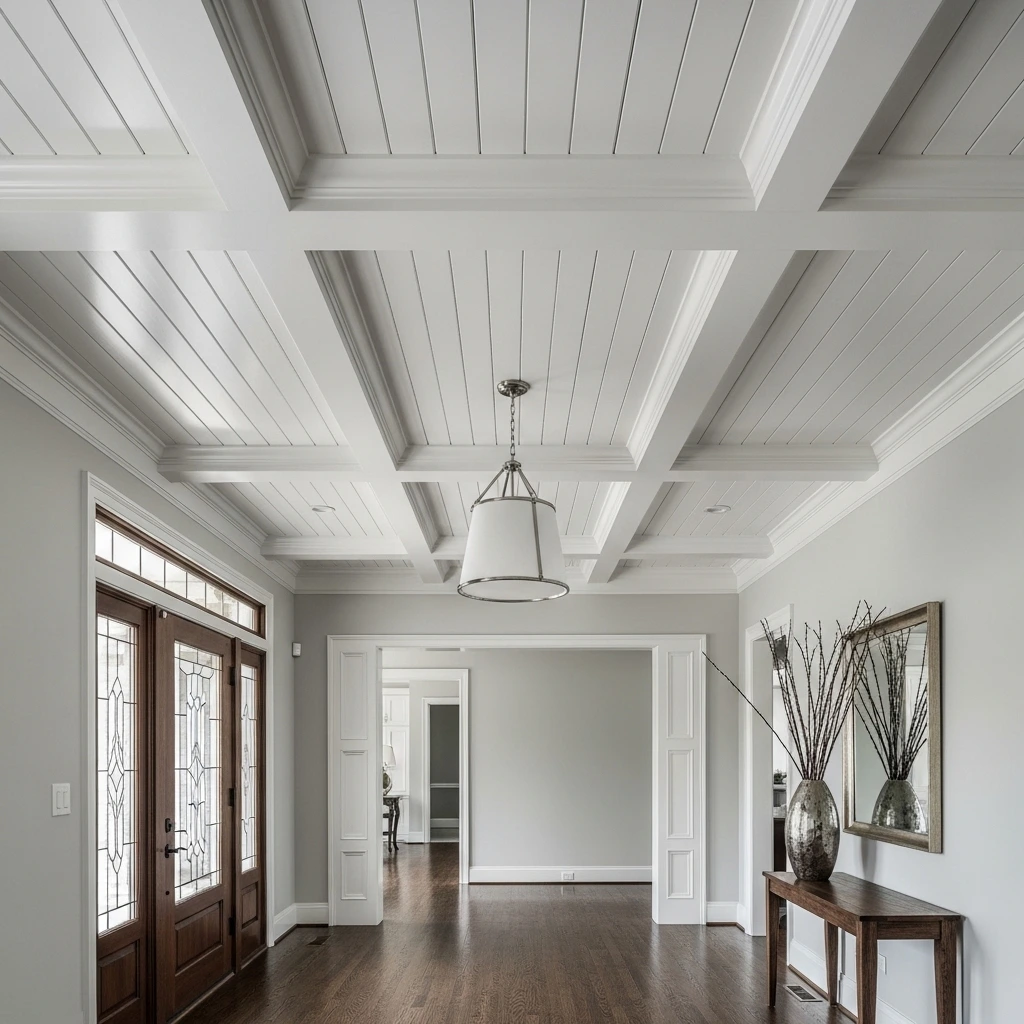
11. Install a Coffered Ceiling Frame Over the Texture
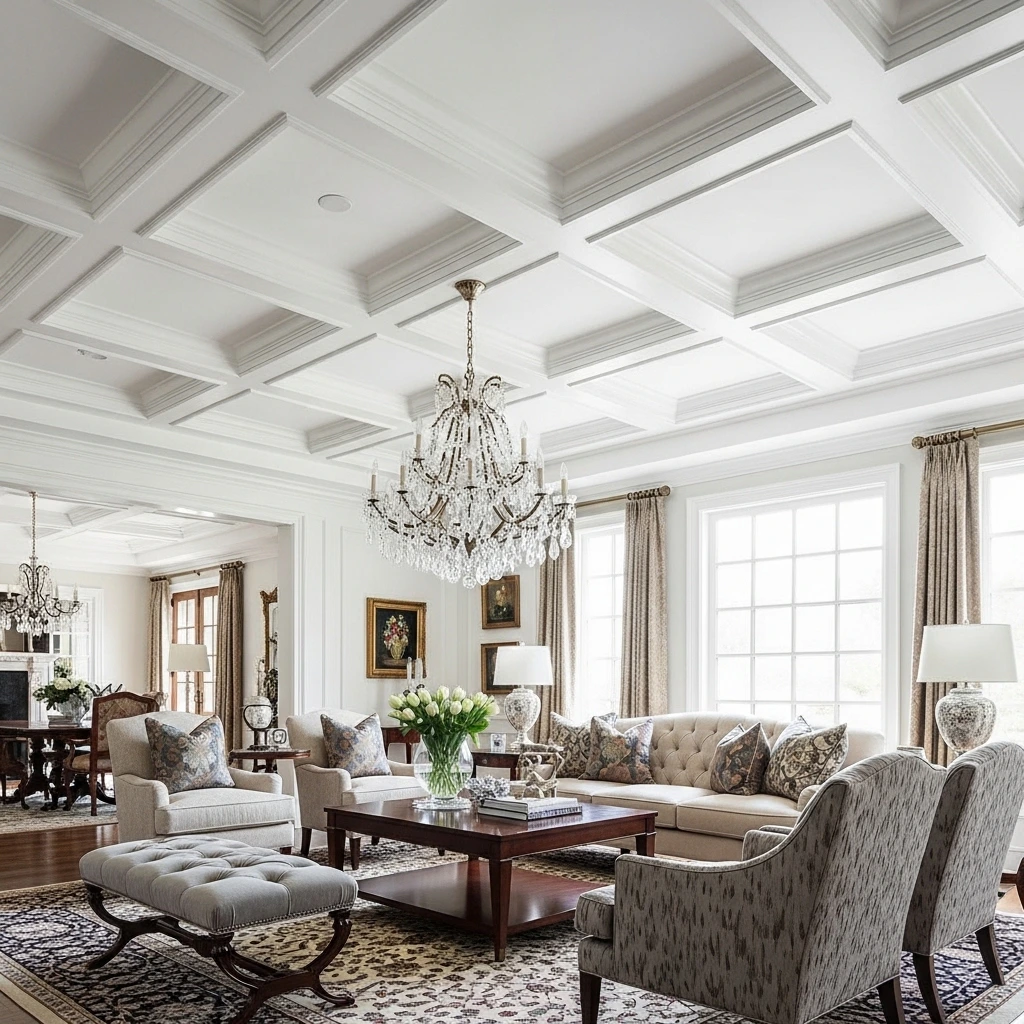
Coffered ceilings consist of a series of recessed panels framed by intersecting beams. Building a faux coffered ceiling directly over a popcorn surface is a dramatic transformation that adds architectural gravitas to any room.
Keeping Costs Manageable
Lightweight MDF or foam beams are available specifically for this purpose and are far easier to install than solid wood. When painted in a uniform color, the finished look is completely convincing, and the underlying popcorn texture becomes entirely irrelevant.
12. Add Decorative Ceiling Medallions

If a full ceiling overhaul is beyond your current budget or timeline, ceiling medallions offer a targeted, decorative solution. These ornamental pieces are installed around light fixtures and ceiling fans, drawing attention to a central feature while minimizing the visual presence of the surrounding texture.
Medallions are available in foam, polyurethane, and plaster, with sizes ranging from modest to grand. Painted to match the ceiling or finished in a contrasting color, they add a polished, deliberate quality to an otherwise troubled surface.
13. Use PVC or Vinyl Ceiling Panels
PVC ceiling panels are moisture-resistant, lightweight, and remarkably easy to install. They are an especially practical choice for bathrooms, kitchens, and laundry rooms where humidity is a concern. The panels clip together using tongue-and-groove connections and can be fastened to the existing ceiling or to a simple furring strip framework.
Many PVC ceiling products come pre-finished in white or off-white, though they can also be painted. They require virtually no maintenance once installed and hold up exceptionally well in damp environments where wood-based materials might struggle.
14. Apply a Foam or Rigid Insulation Layer

Rigid foam insulation boards serve a dual purpose when used to cover a popcorn ceiling. They conceal the old texture while also improving the room’s thermal performance. This is particularly valuable in attic-adjacent spaces where temperature regulation is a challenge.
After installing the foam panels, a layer of drywall should be applied over them to satisfy fire code requirements in most residential settings. The combined result is a ceiling that is smoother, better insulated, and fully compliant with building standards.
15. Create a Board-and-Batten Ceiling Design
Board-and-batten is a classic architectural detail that translates beautifully to ceilings. Wide, flat boards are attached across the ceiling surface, and narrower strips, called battens, are then nailed over the seams to create a grid or linear pattern.
This technique works particularly well in dining rooms, entryways, and home offices where a structured, formal look is desired. The boards lay flat against the popcorn surface without requiring its removal, and the finished ceiling has the kind of crafted quality that genuinely elevates a room.
A Note on Safety Before You Begin
Before pursuing any of these ideas for covering popcorn ceilings, homeowners with houses built before 1980 should have the existing texture tested for asbestos. A professional testing service can analyze a small sample and confirm whether the material is safe. If asbestos is present, covering rather than disturbing the ceiling is almost always the recommended course of action, which makes the methods described above not just cosmetically appealing but practically essential.
Conclusion
A popcorn ceiling does not have to define a room forever, and removing it is rarely your only option. From the budget-conscious skim coat to the architecturally ambitious coffered ceiling, there is a solution in this list for every skill level, aesthetic preference, and financial situation.
What makes these ideas for covering popcorn ceilings so valuable is that they empower homeowners to make meaningful improvements without the mess, risk, and expense of full removal. Many of these projects can be completed over a single weekend, and nearly all of them result in a ceiling that looks far better than the original ever could. For more insight visit Homeliaa.
The fifth wall of any room deserves as much consideration as the four surrounding it. With the right approach, your ceiling can become one of the most compelling features in your home.
Frequently Asked Questions
1. Is it safe to cover a popcorn ceiling that may contain asbestos?
Yes, covering it is generally considered safer than disturbing it. Encapsulation through drywall, planks, or tiles keeps the asbestos material sealed and prevents fiber release. Always have the ceiling tested by a certified professional before starting any work.
2. What is the cheapest way to cover a popcorn ceiling?
Painting over the texture with a flat or matte finish paint is the least expensive option. A skim coat of joint compound is another affordable approach that delivers a much smoother final result for a modest investment in materials and time.
3. Can I install wood planks over a popcorn ceiling without professional help?
Yes, most homeowners with basic DIY skills can manage a wood plank installation. Lightweight planks or a track-based clip system make the project manageable for one or two people working with standard tools over a weekend.
4. Will covering a popcorn ceiling affect the room’s height?
Most covering methods add between a quarter inch and one inch of depth to the ceiling, which is generally imperceptible in rooms with standard eight-foot ceilings. Drop ceiling systems can reduce height by several inches, so they are best reserved for spaces with adequate clearance.
5. Do I need to prime a popcorn ceiling before covering it with tiles or panels?
If you are using adhesive to attach tiles or panels, applying a primer or sealer first helps create a stable bonding surface. This is especially important with older texture that may be chalky or porous. For track-based systems, priming is not typically required since nothing is being glued to the surface.