16+ Creative DIY Crystal Chandelier Ideas
Introduction
Crystal Chandelier Ideas, chandelier does something to a room that no other light fixture can quite replicate. It announces itself. It draws the eye upward, catches the light, throws it across the walls and ceiling in scattered, dancing patterns, and transforms an ordinary space into something that feels considered, elegant, and full of intention. For decades, people assumed that kind of beauty required a significant budget, a specialty lighting store, and a professional electrician. That assumption, it turns out, was entirely wrong.
The DIY crystal chandelier movement has grown steadily into one of the most rewarding and accessible home décor projects available to anyone willing to spend an afternoon with a hot glue gun, some jewelry wire, and a collection of crystal beads. The results can look extraordinarily expensive. The actual cost is often under fifty dollars. Some of the most stunning DIY crystal chandeliers featured by home decor blogs and design communities were built for twenty dollars or less using materials sourced from dollar stores, craft shops, flea markets, and online bead suppliers.
What makes this project category so appealing is its flexibility. You can choose a look that suits your existing décor, whether that is classic and formal, rustic and farmhouse, modern and geometric, or loose and bohemian. You can work with a brand-new wire frame, an old thrift store fixture, a wreath form, a hoop, or a simple length of driftwood. The crystals themselves can be genuine glass prisms, plastic faux crystal beads, acrylic drops, or even repurposed chandelier parts salvaged from estate sales. Each option produces a different quality of sparkle, and each has its own charm.
This article takes you through 17 detailed DIY crystal chandelier ideas, covering a full range of styles, skill levels, and material approaches. Whether you are a seasoned crafter or someone who has never picked up a glue gun before, there is a project here that will suit your space, your budget, and your confidence level. Let the ideas below inspire you to create something truly beautiful for your home.
1. Wire Frame Crystal Chandelier
The wire frame crystal chandelier is one of the most classic and widely attempted DIY projects in this category. It starts with a simple wire lamp shade frame, which can be found at flea markets, thrift stores, and online for very little money. The frame provides the structure around which everything else is built.
Begin by spray painting the frame in your chosen finish. Silver, gold, matte black, and antique bronze are all popular choices that give the finished chandelier a polished, intentional look. Once the paint is dry, drill or bend small attachment points at regular intervals around the horizontal rings of the frame. Use jewelry wire to string your crystal beads in varying lengths, securing each strand at the top and allowing the beads to hang freely in cascading curtains of sparkle.
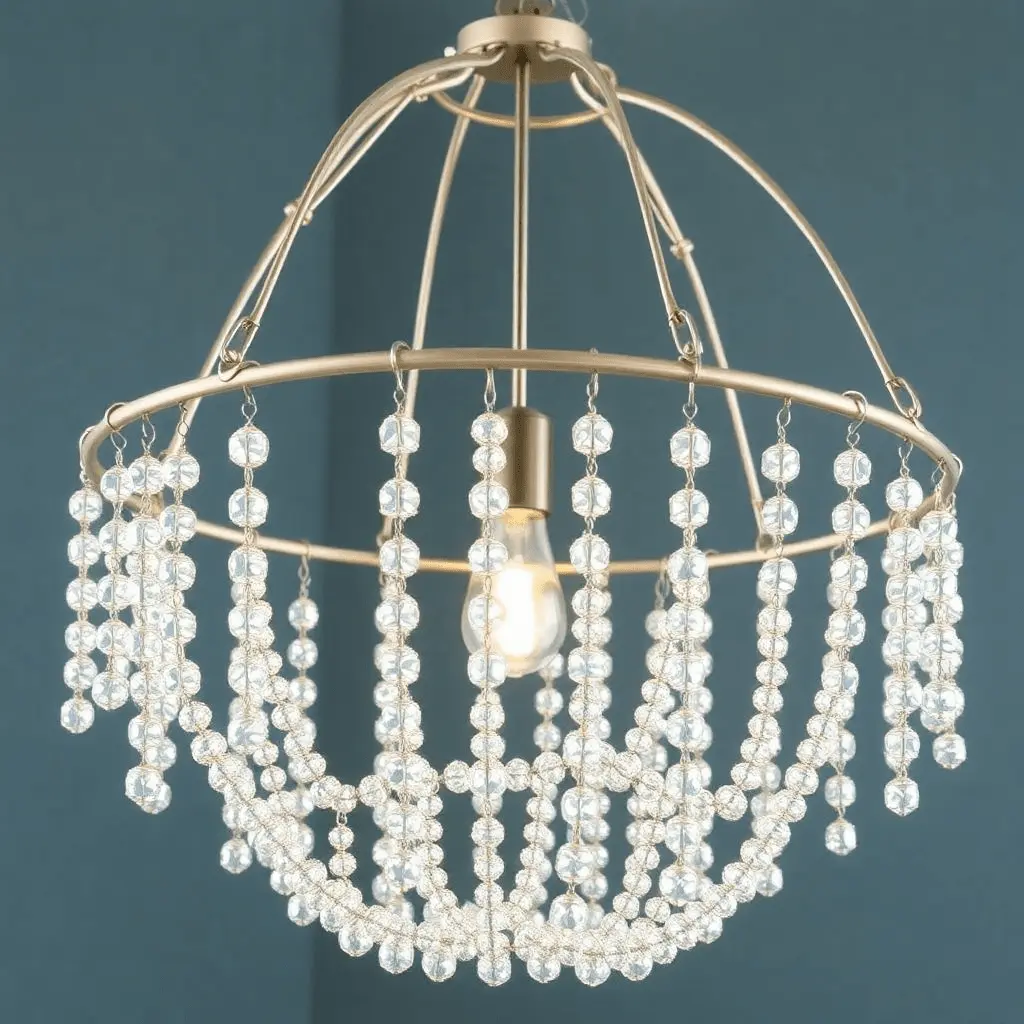
The most important decision in this project is the placement and rhythm of the bead strands. Uniform lengths create a clean, formal silhouette. Varying lengths produce something more organic and free-flowing. You can combine both approaches by keeping the outer edges uniform and allowing the inner strands to hang in graduated lengths toward the center. Hot glue additional crystal accents directly onto the frame itself for added detail and density. The total cost of this project, including frame, beads, wire, and paint, typically falls between thirty and fifty dollars.
2. Dollar Tree Budget Crystal Chandelier
The Dollar Tree crystal chandelier idea has become something of a legend in the DIY home decor community, and with good reason. Using nothing more than a few wreath frames, a package of faux crystal strands, transparent cord, metallic spray paint, and a hot glue gun, crafters regularly produce chandeliers that look like they came from a high-end lighting boutique. The total budget for this project typically sits between fifteen and twenty-five dollars.
Select wreath frames in two or three descending sizes, such as a twelve-inch, an eight-inch, and a six-inch frame. Remove certain hoops from each frame to reduce the tiers to their most elegant shapes. Spray paints all metal components with silver or gold metallic spray paint and allow them to dry completely. Connect the tiers to each other using short lengths of transparent cord and a dot of hot glue at each connection point.
Once the tiered frame is assembled and the proportions look balanced, begin attaching crystal strands to the lowest tier first, working upward. Clip the strands evenly around the outer ring, then fill in the inner sections. The overlapping layers of crystal create a dense, glamorous effect that catches light beautifully. Attach a hanging chain to the top of the assembled frame and add a ceiling hook to complete the installation.
3. Vintage Brass Chandelier with Crystal Makeover
One of the most satisfying DIY crystal chandelier projects involves taking an old, unloved brass chandelier from a thrift store, estate sale, or flea market and transforming it into something fresh, elegant, and completely personal. Brass chandeliers are remarkably common in secondhand markets and usually sell for between ten and thirty dollars, making them an excellent starting point for a crystal makeover.
Start by disassembling the chandelier carefully, separating the arms, cups, and any existing decorative elements. Clean every component thoroughly to remove dust, oxidation, and old finish. If you want to change the color, spray paint the entire frame in your preferred finish. White chandeliers with added crystals have a very romantic, French country quality. Matte black with clear crystal drops creates something far more modern and graphic.
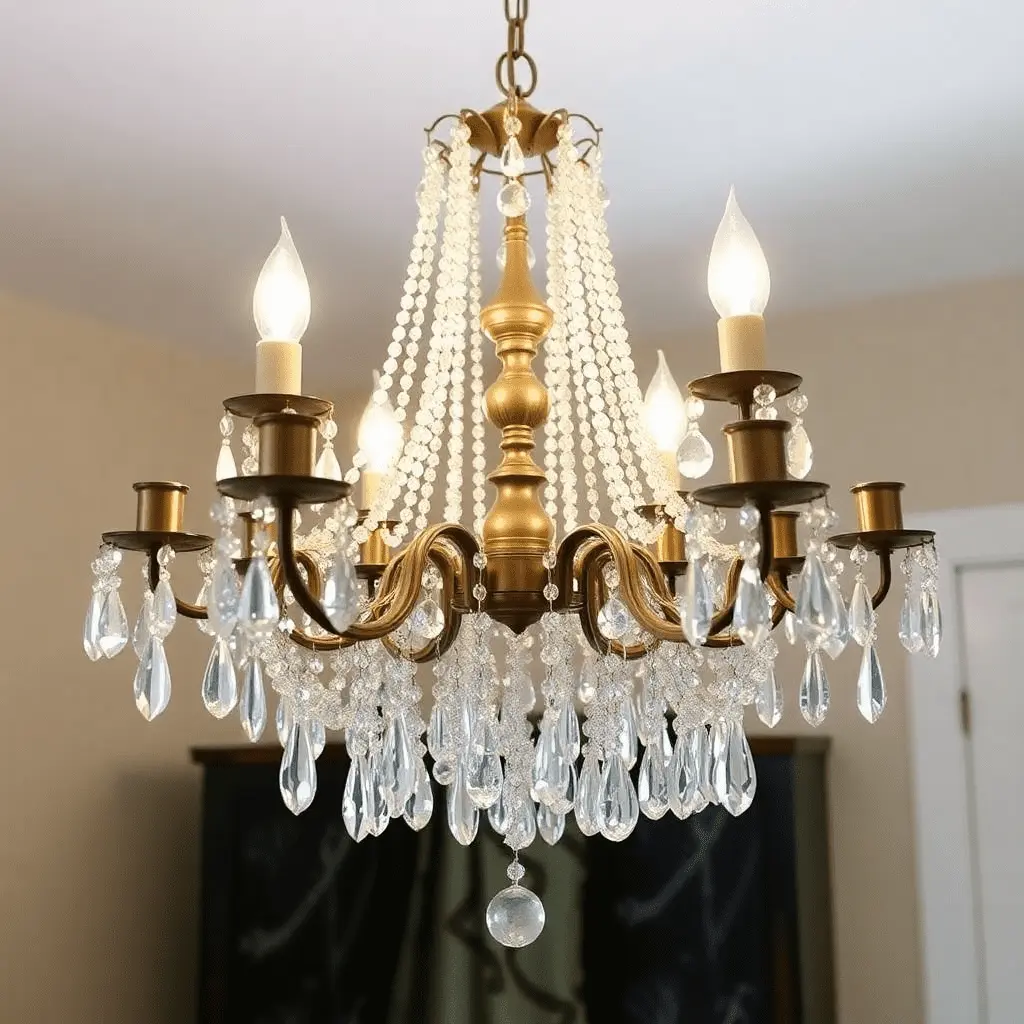
Once the frame is painted and reassembled, begin adding crystals systematically. Teardrop prisms hanging from individual headpins clipped onto the arms of the chandelier are the classic approach. You can also string bead chains across horizontal sections of the frame for an added layer of depth. The key to a cohesive result is to maintain a consistent crystal style throughout, mixing teardrop prisms, round beads, and crystal chains without letting any single element overwhelm the others.
4. Crystal Ball Chandelier
The crystal ball chandelier is one of the most dramatic and visually striking DIY options available. This idea borrows from high-end designer lighting, where spherical crystal pendants suspend from a ceiling mount in staggered clusters, scattering light across a room in complex, overlapping patterns.
The most practical approach for a DIY version involves sourcing a decorative hanging gold or crystal ball tea light holder, which serves as the central orb, and then rigging it to hang from a ceiling-mounted lamp cord and socket assembly. Lamp cord can be purchased by the foot at any home improvement store and is straightforward to work with even for someone with no electrical experience.
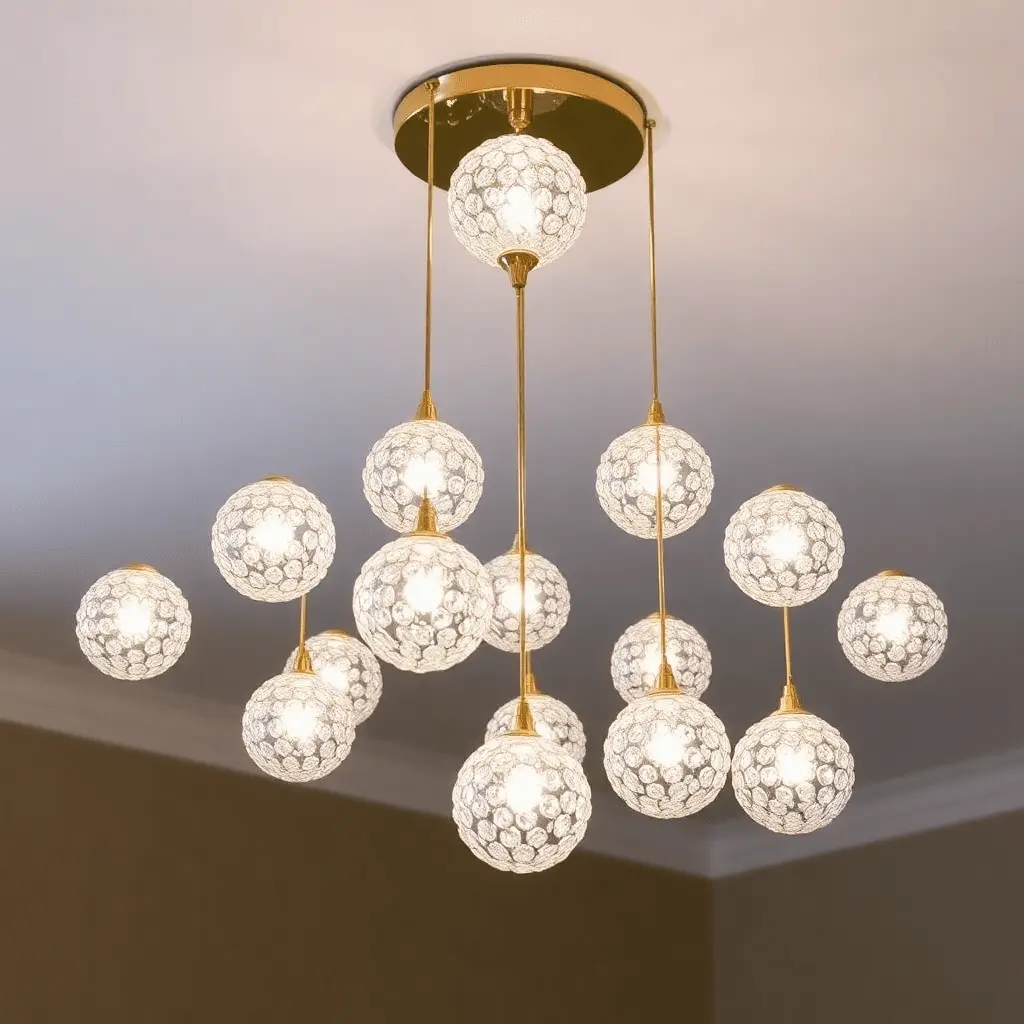
Thread the lamp cord through the socket fitting, connect the wires according to the socket instructions, and thread the assembled cord through the top of the ball pendant. Add a ceiling canopy plate to cover the mounting hardware and give the installation a clean, finished appearance. The result is a chandelier that looks architectural and expensive. Multiple ball pendants suspended at different heights from a single ceiling plate create a cluster installation that feels genuinely luxurious.
5. Rustic Wood and Crystal Chandelier
The combination of raw, natural wood with sparkling crystal drops represents one of the most beautiful and currently popular aesthetic territories in interior design. This pairing, often called rustic glam, brings together the earthiness and warmth of organic materials with the elegant sparkle of crystal, and the result suits farmhouse, cottage, and modern country interiors particularly well.
Source a length of weathered driftwood or a section of rough-hewn timber in a scale appropriate to your room. Sand any rough edges lightly, but preserve as much of the natural texture and character of the wood as possible. Screw small eye hooks along the length of the wood at regular intervals. These become the hanging points for your crystal drops and bead strands.
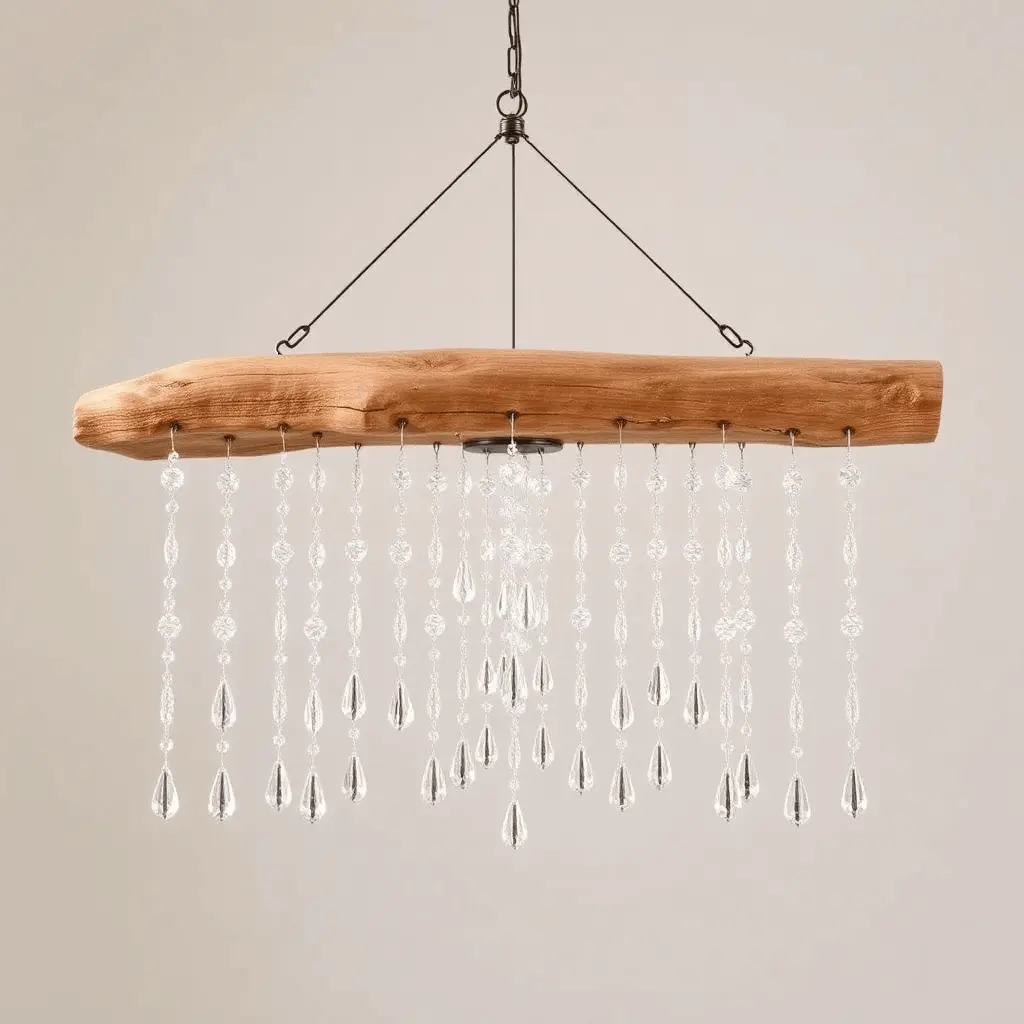
String crystal teardrop pendants from the eye hooks using thin jewelry wire or transparent monofilament, varying the lengths to create a flowing, organic silhouette beneath the wood. Add a few longer crystal strands at the center of the arrangement for visual drama. Wire the whole piece to a ceiling-mounted lamp cord assembly, or simply hang it as a decorative non-lit piece if your ceiling already has ambient lighting. The contrast between the rough wood grain and the delicate crystalline drops is genuinely stunning.
6. Geometric Metal and Crystal Chandelier
A geometric crystal chandelier replaces the traditional round or tiered silhouette with clean architectural shapes, angular frames, and precisely placed crystal drops. The result has a distinctly modern quality that works beautifully in contemporary interiors and serves as a statement piece in minimal spaces.
Construct or source a geometric metal frame in a shape that appeals to you. Hexagons, triangles, and open cubes are all popular choices. Metal tubing, copper pipe, and craft wire can all be bent and joined to create angular frames at home. Solder or use strong binding wire to secure the joints, then spray paint the entire frame in a metallic or matte finish.
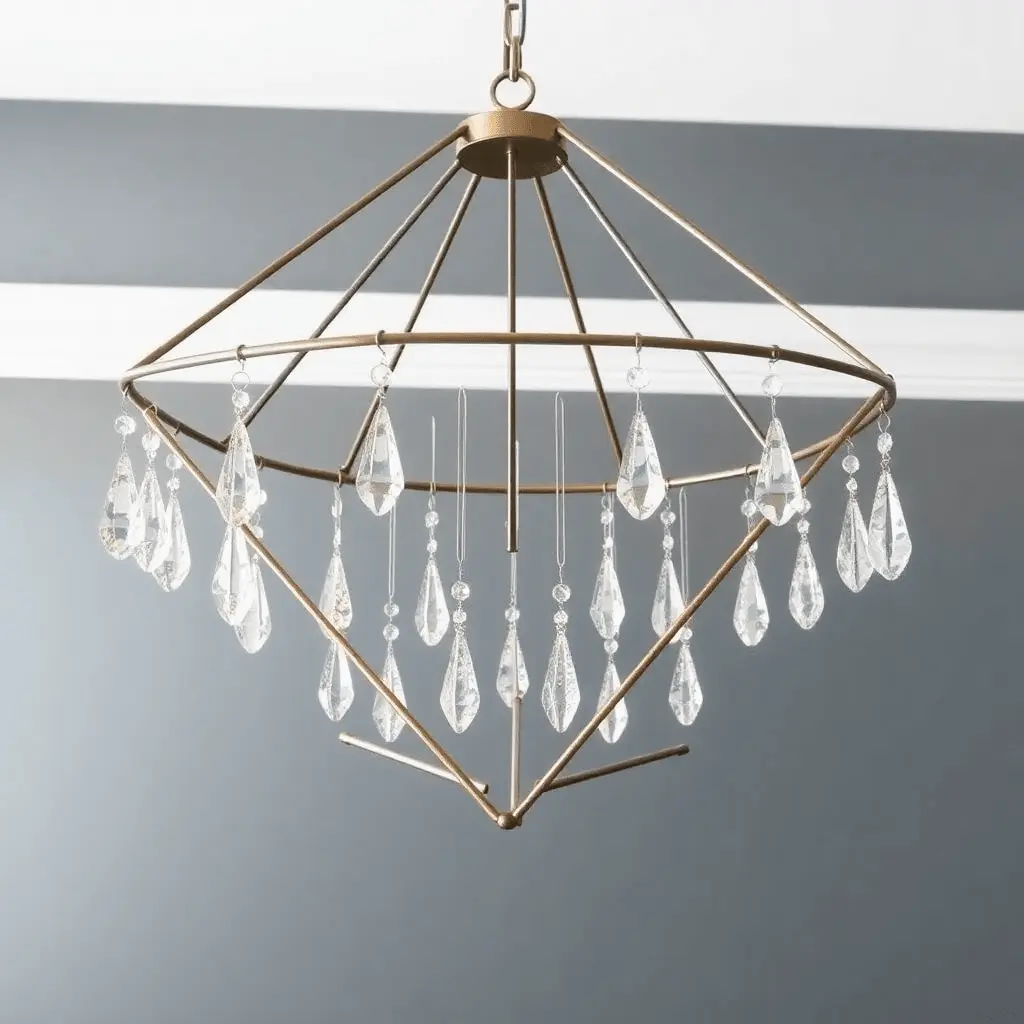
Hang crystal pendants from each corner and along each arm of the geometric form using short lengths of thin wire. The regularity of a geometric frame means the crystal placement can be very intentional and precise, with each drop positioned at a consistent angle. The interplay between the hard geometric lines and the soft sparkle of the crystal creates a sophisticated visual tension that makes this design feel genuinely architectural and gallery-worthy.
7. Ombre Crystal Bead Chandelier
An ombre crystal chandelier uses graduated color across the bead strands to create a soft, flowing transition from one hue into another. This idea adds a layer of artistic sophistication to the basic bead strand chandelier and produces something that feels genuinely unique and thoughtfully designed.
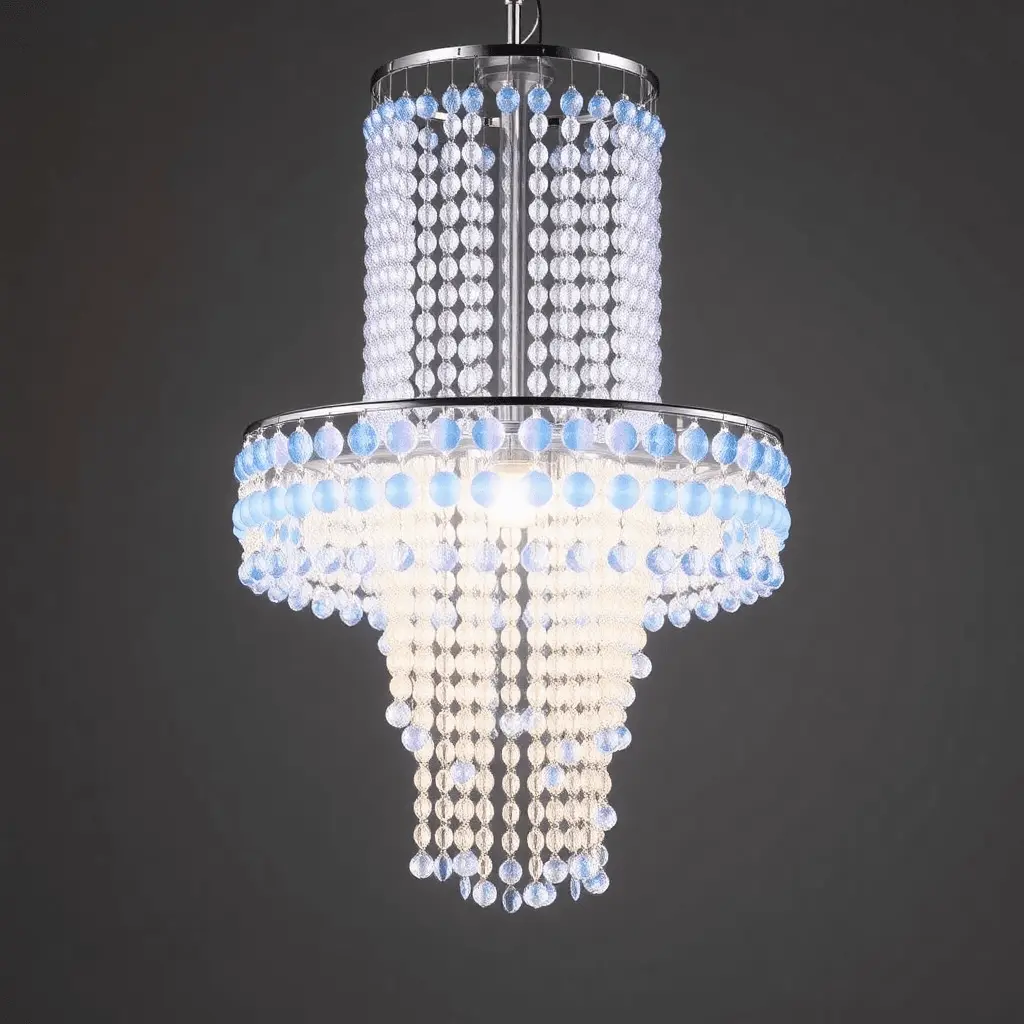
The most popular ombre combinations for crystal chandeliers include clear to pale blue, clear to blush pink, pale lavender to deep violet, and warm gold to champagne. Source crystal beads in three or four tones within your chosen range. String the darkest tones in the upper positions on each strand and graduate toward the lightest or clearest tones at the tips. When the strands hang together across the chandelier frame, the color shifts gradually across the whole piece, creating a beautiful wash of shifting hue that changes in quality depending on the light. https://www.unknownbrewing.com/diy-crystal-chandelier-ideas/
This technique works particularly well on a simple wire hoop frame where the strands hang freely without interruption, allowing the full length of each ombre strand to be visible and appreciated. The effect is soft and romantic, and it translates beautifully into bedroom chandeliers, nursery fixtures, and bathroom pendant lights.
8. Lace and Crystal Vintage Chandelier
A lace and crystal chandelier brings a romantic, nostalgic quality to a space that no other material combination can quite achieve. This project layers delicate fabric texture with the hard brilliance of crystal, and the result sits beautifully in cottage, Victorian, French country, and shabby chic interiors.
Begin with a wire chandelier frame of any shape. Drape lengths of fine antique lace, cotton lace trim, or crochet ribbon over the arms and around the body of the frame, securing it in place with small dots of hot glue or by tying it with thin satin ribbon. Allow the lace to fall naturally in soft folds rather than pulling it tight against the frame.
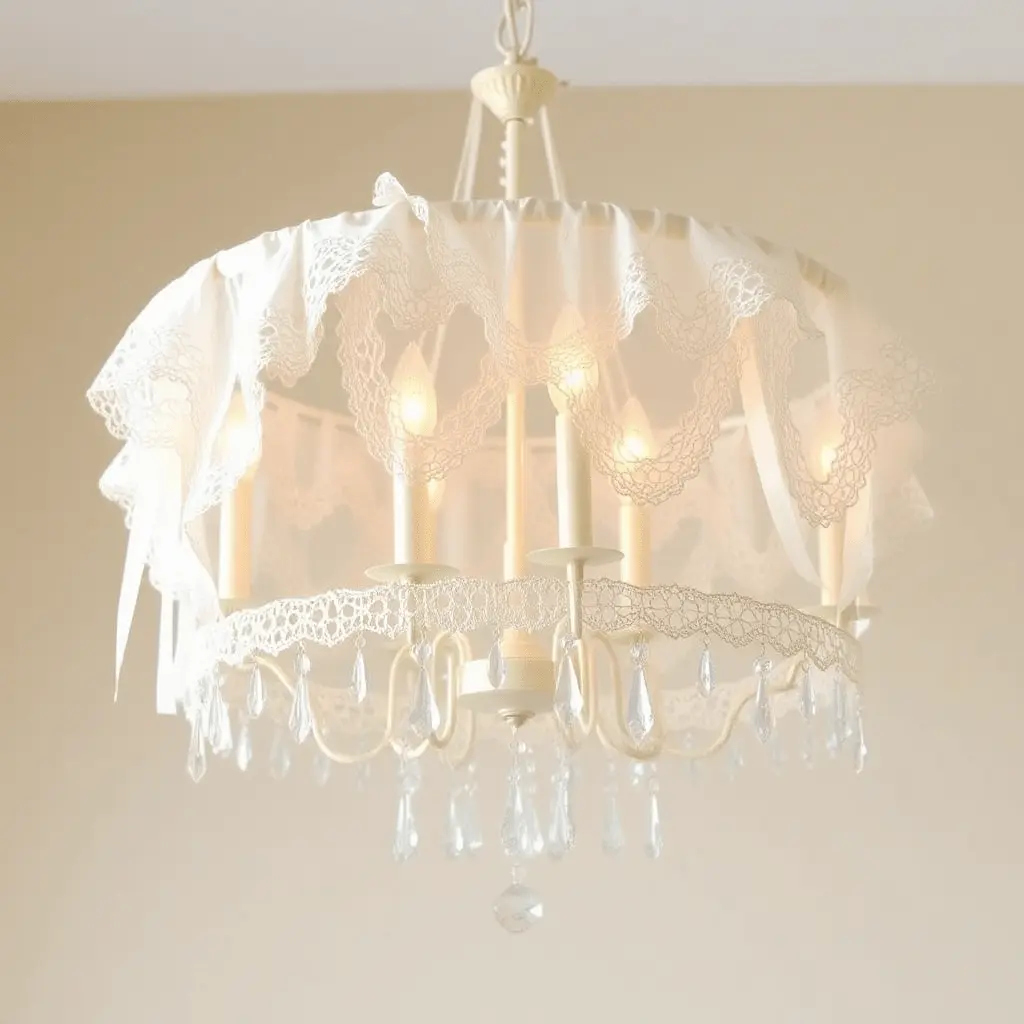
Once the lace layer is complete, attach small crystal teardrop pendants at regular intervals along the lower edge of the lace draping. The weight of the crystal drops will pull the lace downward slightly, creating a beautiful interplay between the soft fabric and the hard, sparkling prisms. Finish the frame in a matte white or pale cream paint before applying the lace for a cohesive, antique look. This chandelier works particularly well in a craft room, a bedroom, or a feminine home office.
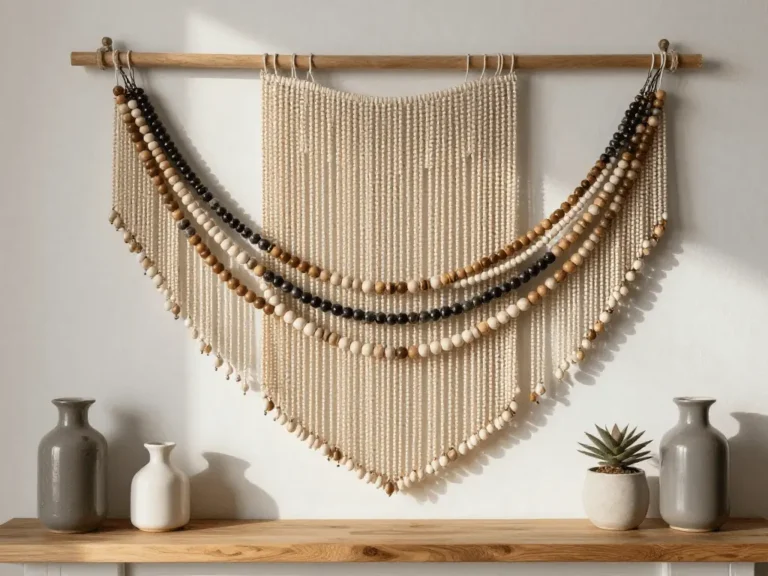
9. Boho Macrame and Crystal Chandelier
The bohemian macrame chandelier brings natural texture, handcraft, and earthy warmth into a crystal project, producing something that feels genuinely artisanal and completely original. This style suits boho, global, eclectic, and natural interiors with great ease.
Select a basic circular or square chandelier frame and cut lengths of natural cotton rope or jute cord into equal sections. Attach these lengths to the frame using simple lark’s head knots at regular intervals around the entire circumference. Work downward from the frame using basic macrame knots such as square knots, half hitches, and spiral patterns to build up a loose, textural body beneath the frame.
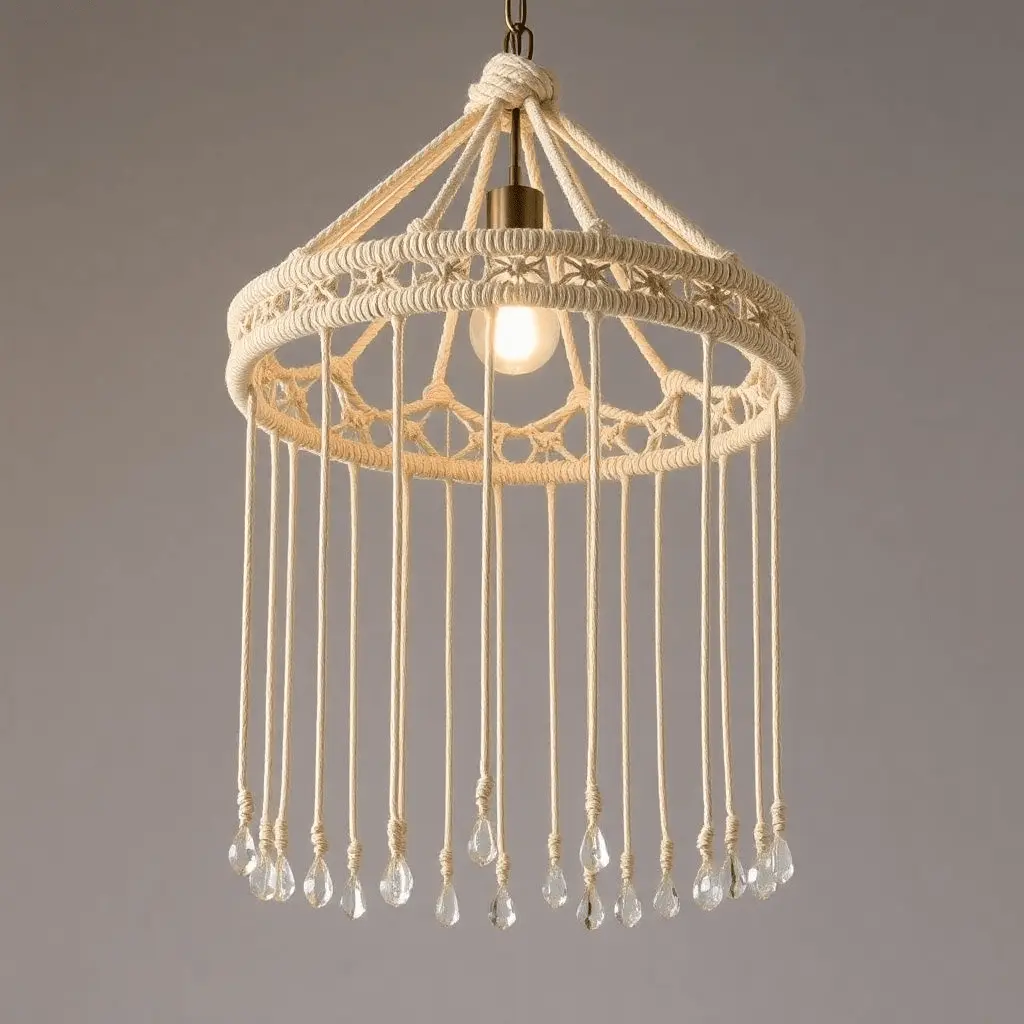
As you approach the lower end of each knot section, begin incorporating crystal beads or small clear acrylic drops directly into the knotwork. Threading beads onto individual strands before knotting holds them permanently in place. The contrast between the rough natural fiber and the delicate crystal accents gives this chandelier a particularly appealing quality, simultaneously grounded and glamorous, earthy and light catching.
10. Starburst Crystal Chandelier
The starburst chandelier is one of the most visually impactful DIY crystal designs available. Rather than allowing crystals to hang in vertical drops, this design arranges them in radiating spokes extending outward from a central point, creating a dramatic sunburst or starburst silhouette that fills a ceiling space with extraordinary presence.
Start with a circular metal frame or a simple wooden ring as your central hub. Attach lengths of rigid wire or thin metal rods extending outward from the ring at regular intervals, like spokes on a wheel, giving them an upward and outward angle for the most dramatic effect. String crystal beads along each spoke, securing them at intervals with small loops of jewelry wire so they cannot slide.
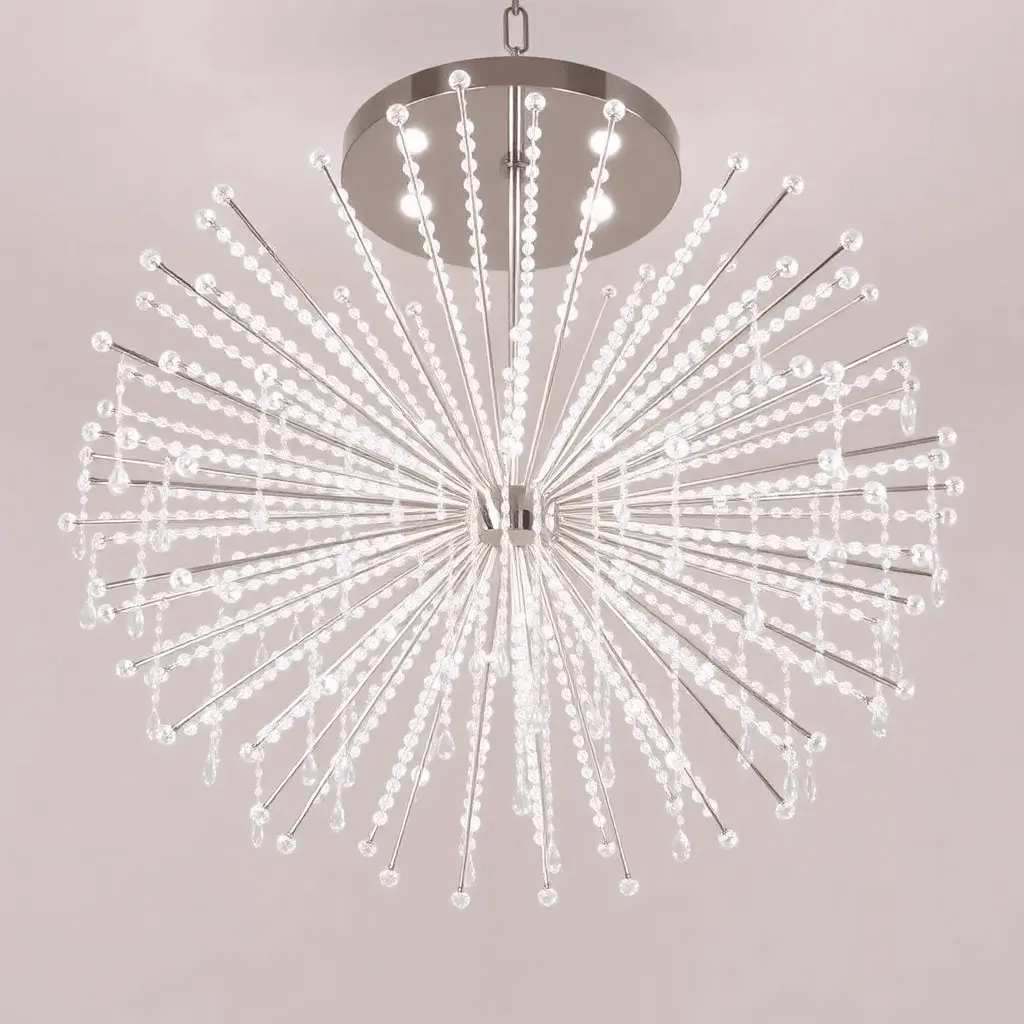
Add longer crystal drops hanging downward from the tips of each spoke and additional drops suspended from the central hub. When lit from above, the starburst chandelier scatters light in every direction across the room, creating a constantly shifting, almost kinetic pattern of reflections that makes the entire space feel alive and transformative.
11. Repurposed Embroidery Hoop Crystal Chandelier
Large embroidery hoops offer one of the most budget-friendly and accessible bases for a DIY crystal chandelier. They are inexpensive, available in multiple sizes, lightweight, and easy to work with using basic craft supplies. The finished chandeliers they produce are delicate, airy, and deeply charming.
Select one or more wooden or metal embroidery hoops in the size appropriate for your space. If using wood, paint or stain the hoop in your preferred finish before assembly. Attach three or four lengths of transparent cord to equidistant points around the circumference of the hoop, joining them at the top to a single central hanging point. This creates the suspension structure.
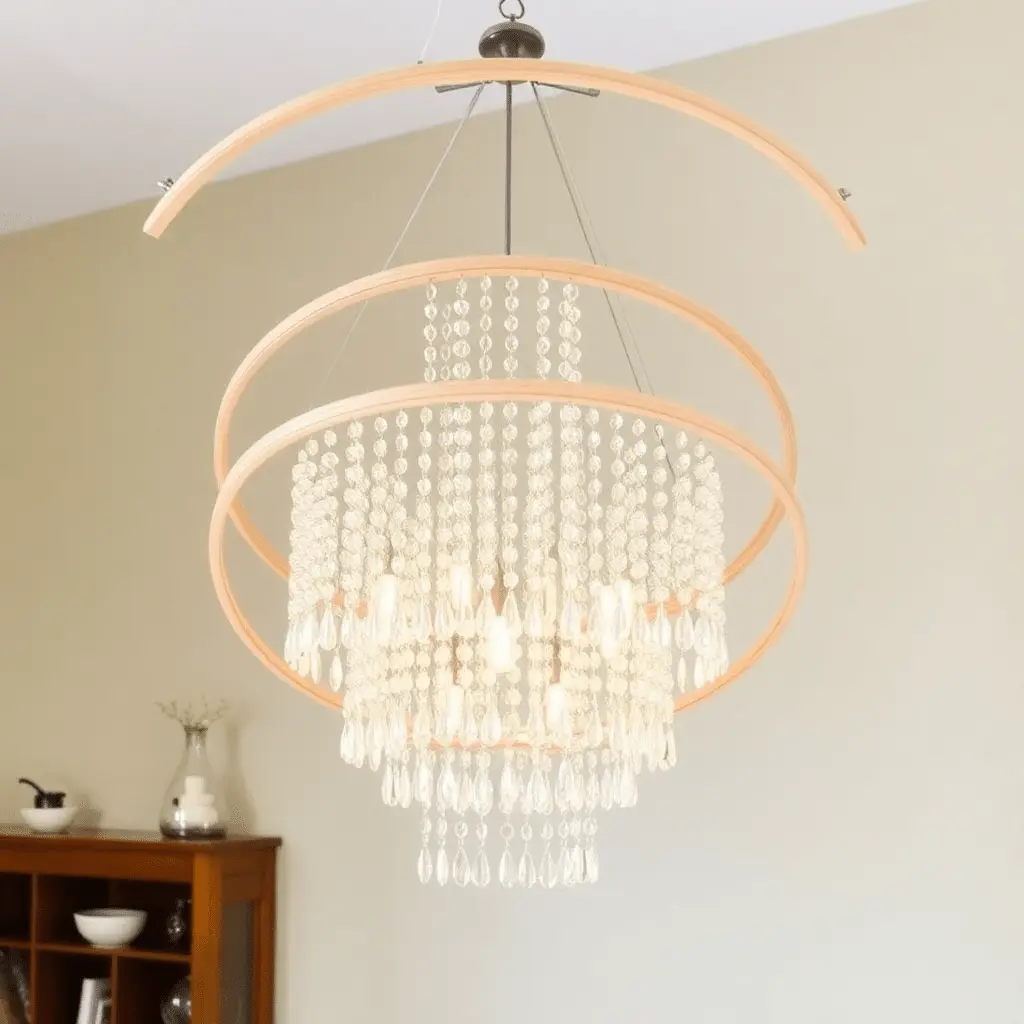
Begin attaching crystal strands, beaded chains, and teardrop pendants to the inner circumference of the hoop using thin wire or small S-hooks. Allow the crystal strands to hang at graduated lengths, with the longest strands at the center and shorter ones toward the outer edge, creating a tent or dome shape within the hoop. Multiple hoops assembled at different heights create a tiered version of this chandelier with extraordinary visual richness.
12. Linear Crystal Chandelier
A linear crystal chandelier breaks away from the traditional round silhouette and extends horizontally instead, making it particularly well suited to dining tables, kitchen islands, and other rectangular or elongated spaces where a centered round fixture would feel out of proportion.
Begin with a straight metal rod or a length of wooden dowel in a scale appropriate to your table or island. Mount small lamp sockets at regular intervals along the rod, connecting them all to a single ceiling canopy plate with a shared electrical run. Between and around each socket, string crystal bead garlands and hang teardrop pendants from the underside of the rod at staggered intervals.

The crystals running the full length of the linear frame create a connected, glittering line of light that echoes the shape of the furniture below it. This design has a distinctly contemporary quality while remaining warm and welcoming through the inherent beauty of the crystal drops. Finished in brass or warm gold, it suits modern farmhouse and transitional interiors with particular grace.
13. Floating Candle and Crystal Chandelier
The floating candle chandelier blends the warm, intimate glow of candlelight with the sparkle of hanging crystal drops to create something that feels genuinely magical, particularly in dining rooms and bedroom spaces. Battery-operated flameless LED candles make this idea fully safe and practical for permanent installation.
Build or source a tiered round chandelier frame with candle cup holders at regular positions along each arm. Place battery-operated LED candles in each cup and secure them with a small ring of hot glue at the base. Hang crystal teardrop strands from the rim of each candle cup and from the underside of each tier of the frame.

When the candles are lit, their warm flicker bounces off the crystal drops in a way that creates a soft, endlessly moving glow around the entire chandelier. This lighting effect is particularly beautiful at dinner parties, and the chandelier itself functions as a decorative centerpiece even when the LED candles are not lit. Adding a few strands of tiny fairy lights woven through the crystal drops enhances the effect further.
14. Minimalist Single Crystal Pendant Chandelier
Not every crystal chandelier needs to be a large, complex, multi-tiered installation. Sometimes the most powerful design statement is also the simplest one. The minimalist crystal pendant chandelier uses a single large crystal element or a small cluster of crystal drops suspended from a clean ceiling cord to create an effect that is quiet, confident, and very sophisticated.
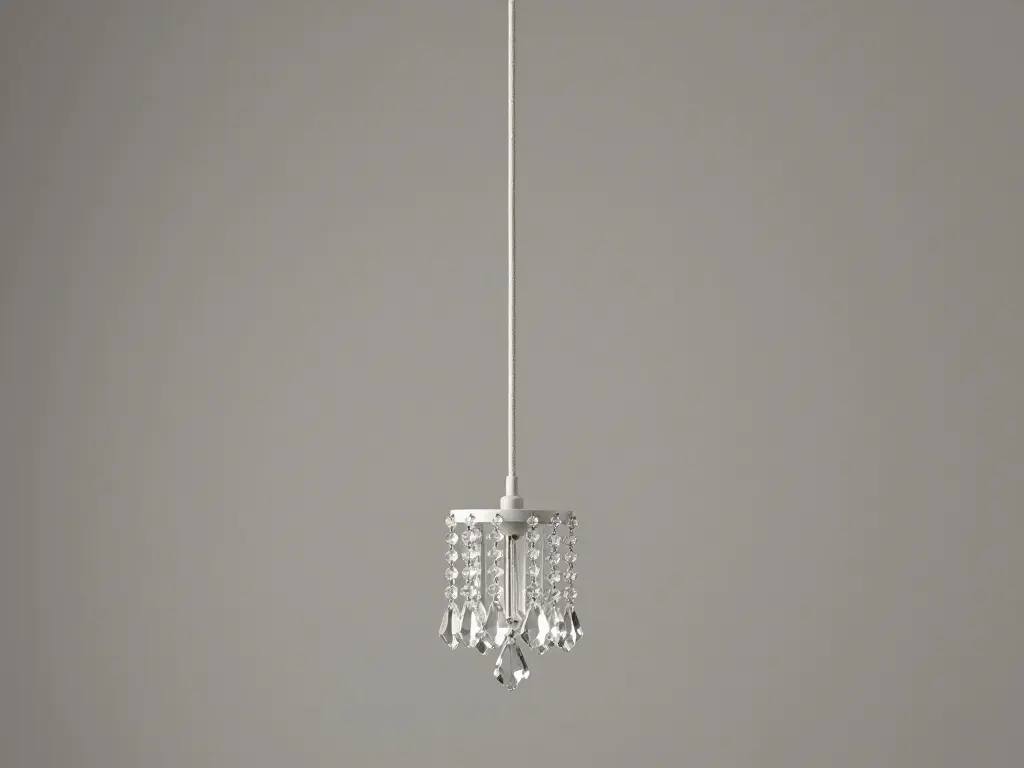
Source a large, high-quality crystal pendant, whether that is a single faceted prism, a cluster of smaller drops arranged on a small hub, or a simple string of crystal beads looped into a compact pendant. Suspend it from a length of textile-covered lamp cord in a neutral or contrasting color. The cord itself becomes part of the design, so choose its color and texture with as much care as you give to the crystal.
This type of chandelier works particularly well in small rooms, bathrooms, home offices, and reading nooks, where a large fixture would overwhelm the space but where a single point of deliberate sparkle adds exactly the right amount of elegance. The minimalist crystal pendant is also the most approachable project for anyone attempting their first DIY chandelier, requiring almost no tools and very little construction time.
15. Vintage Spoon and Crystal Chandelier
The vintage spoon chandelier is one of the most genuinely original and conversation-provoking DIY crystal ideas in this entire collection. By bending and repurposing old silver or silverplate spoons into hooks and decorative arms, and then hanging crystal drops from each one, you create something that is simultaneously whimsical, elegant, and completely unexpected.
Visit thrift stores and flea markets to collect a set of mismatched silver-toned spoons in similar sizes. Using pliers, bend the handle of each spoon backward and around to form a closed hook or an open curve that can be drilled and hung from a frame. Arrange the shaped spoons in a radiating pattern around a central ring or chandelier base and secure each one with jewelry wire or strong craft glue.

Hang crystal teardrop pendants from the bowl of each spoon and from the hooked handle ends. The reflective surface of the silverplate catches and amplifies the sparkle of the crystal drops, and the unexpected use of cutlery as a structural element gives the chandelier a quality of wit and charm that immediately draws people into conversation. This idea works particularly well in an eclectic kitchen or a vintage-inspired dining room.
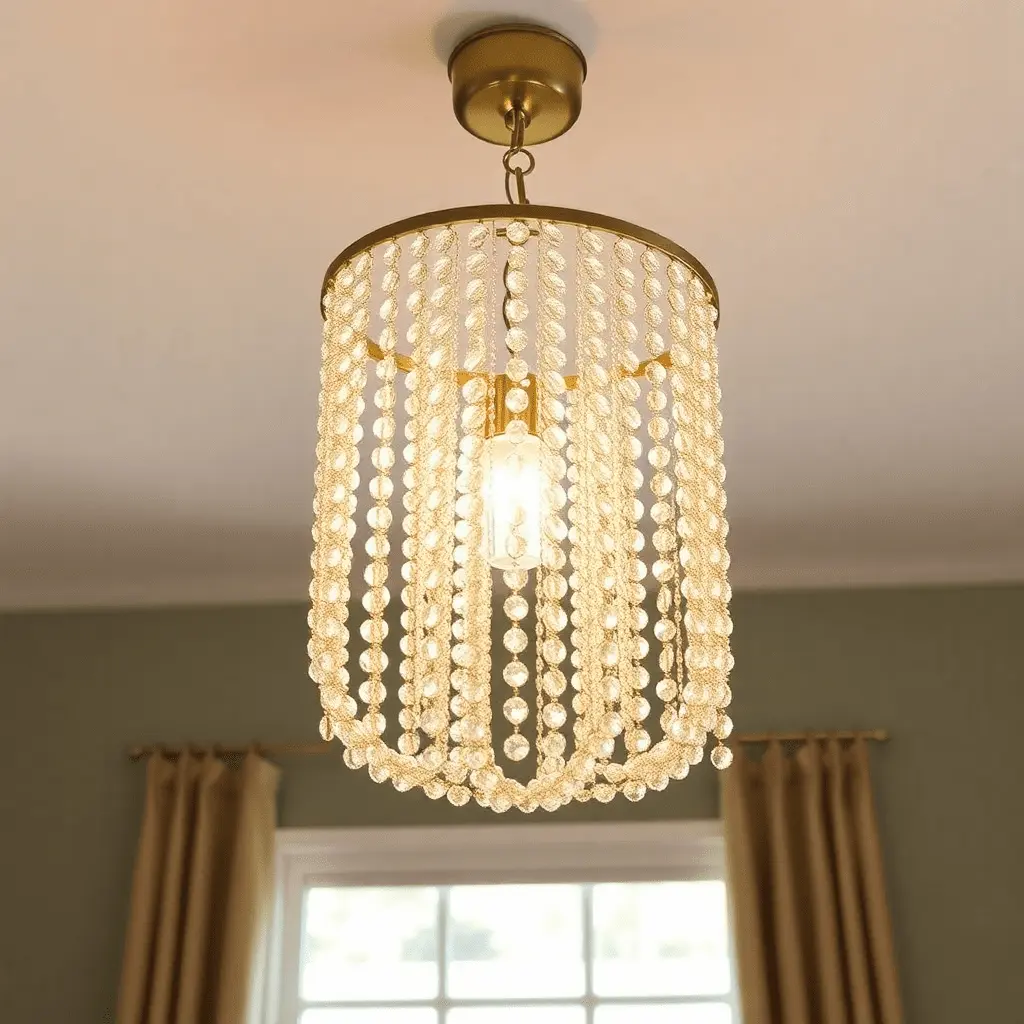
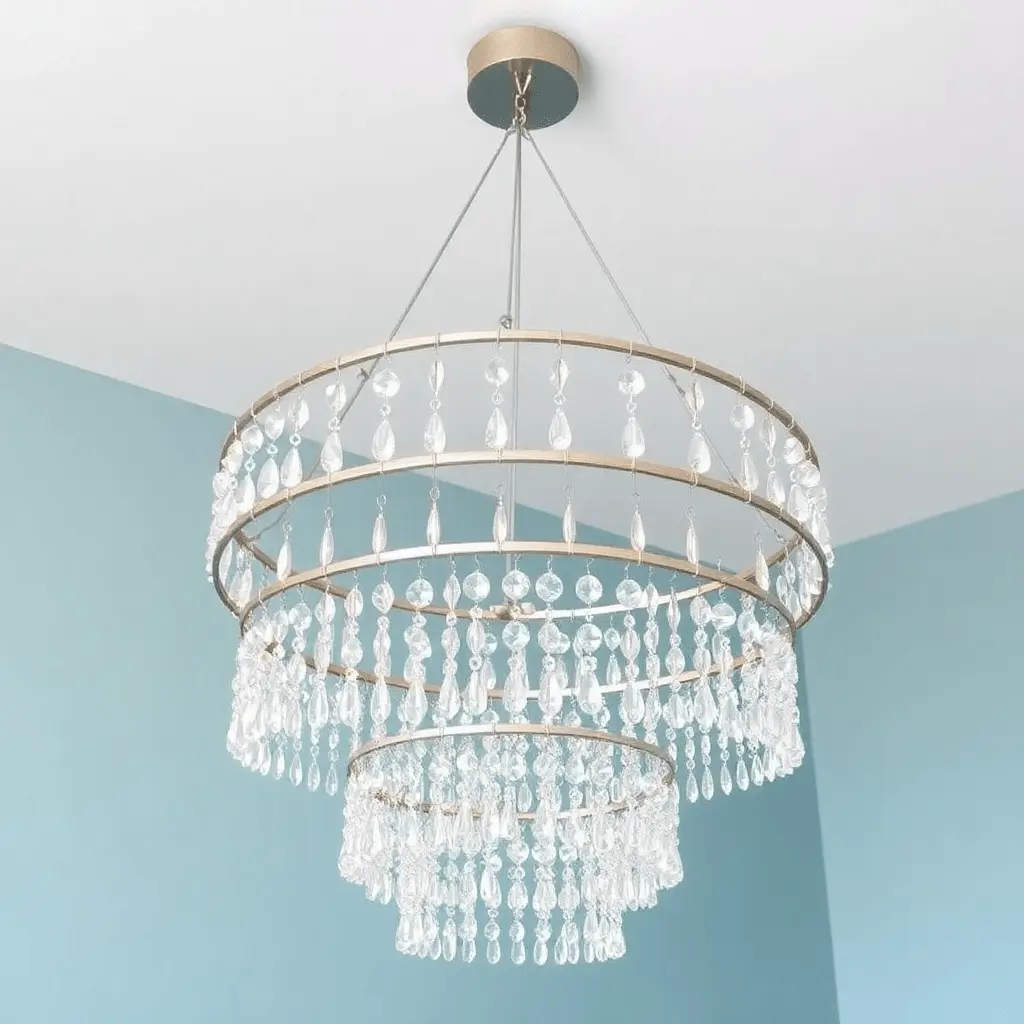
16. Tiered Crystal Bead Chandelier
The tiered crystal bead chandelier is perhaps the most traditional and widely recognizable of all the designs in this collection. Its layered, wedding-cake silhouette has graced dining rooms and ballrooms for centuries, and the DIY version brings that classic elegance within reach of any crafter working with a modest budget.
Select three round frames in descending sizes. Metal hoops, wire wreath frames, and even wooden craft rings all work well for this purpose. Suspend the largest ring from the ceiling using three or four equal-length chains spaced evenly around the circumference. Hang the medium ring from the bottom of the large ring using shorter chains, and the smallest ring from the bottom of the medium ring.
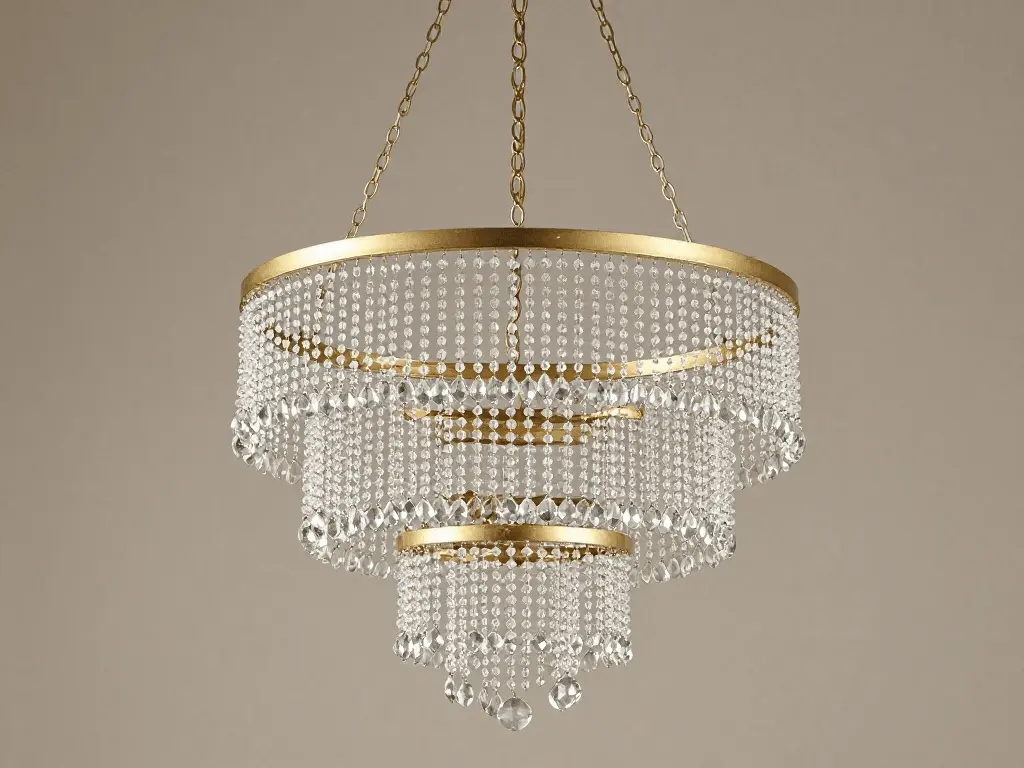
Fill each tier with crystal bead strands, hanging them from the lower edge of each ring and allowing them to cascade downward in uniform curtains of sparkle. The layered structure creates a visual rhythm that the eye moves through from top to bottom, always discovering another layer of detail and another level of crystalline brilliance. Finishing the frame in gold or silver spray paint before assembling the tiers gives the entire piece a unified, professional quality.
17. Outdoor Garden Crystal Chandelier
A crystal chandelier in an outdoor setting, whether hanging from a pergola, under a canopy, or from the branch of a large tree, creates one of the most romantic and memorable decorating effects imaginable. Sunlight and natural breezes turn the crystal drops into constantly moving sources of scattered rainbow light that no indoor electric fixture can replicate.
Choose acrylic crystal drops rather than glass for an outdoor installation, as they are far more resistant to breakage in wind and are unaffected by moisture. Use rust-resistant metal components throughout, including stainless steel wire, galvanized chain, and aluminum or powder-coated frames. Avoid wooden elements unless they are sealed with exterior-grade weatherproofing varnish.
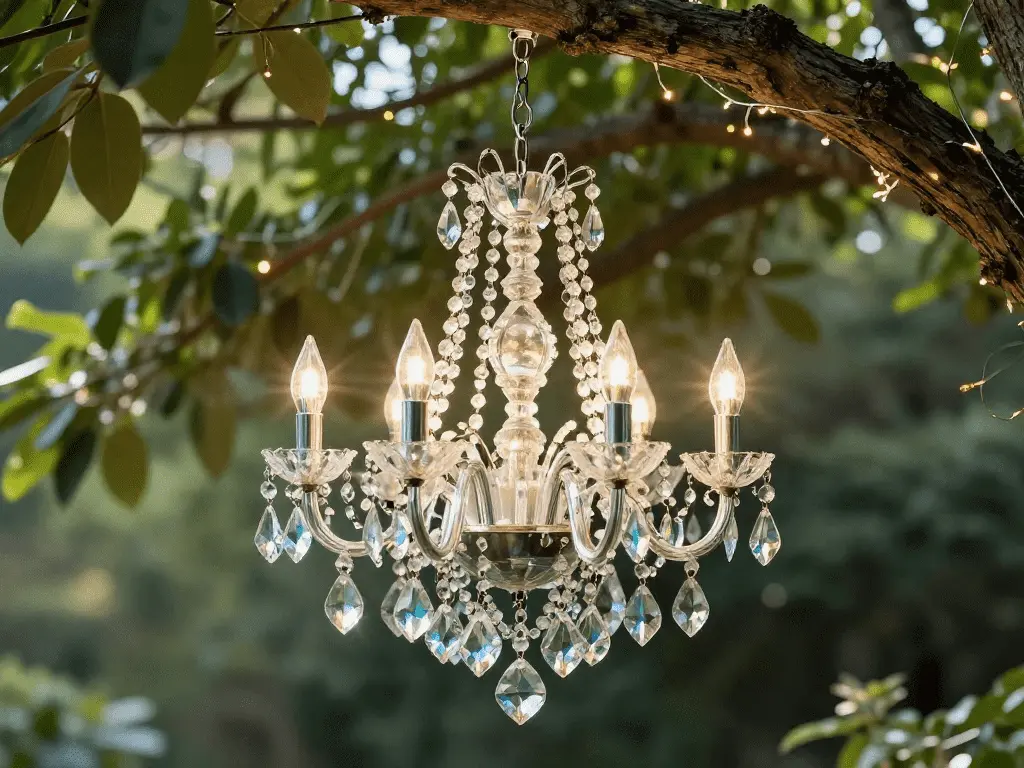
Hang the chandelier using a chain of appropriate weight for the combined mass of the fixture and ensure the ceiling hook or branch anchor is genuinely capable of holding the load securely. For evening events and permanent installations, weave a string of outdoor-rated LED fairy lights through the crystal strands to add a soft warm glow once the sun has set. The combination of crystal sparkle with the textures and sounds of a garden setting is simply extraordinary.
Conclusion
A DIY crystal chandelier is one of those rare home projects that combines genuine creative satisfaction with a result that genuinely transforms a space. These are not projects that look homemade in a way that apologizes for itself. When approached with care, good materials, and a clear vision of the style you are working toward, a handmade crystal chandelier holds its own against anything you might find in a lighting showroom.
The seventeen ideas explored in this article cover a full spectrum of styles, from the ultra-budget Dollar Tree build to the architecturally sophisticated geometric frame, from the romantic lace and crystal vintage chandelier to the unexpected wit of the vintage spoon design. Every one of them is achievable with patience, basic craft tools, and materials available at any craft store or online marketplace.
The beauty of building your own chandelier is that it is entirely yours. The proportions, the crystal density, the finishing color, the length of the drop strands, the rhythm of the bead arrangement, all of these decisions reflect your taste and your space in a way that a purchased fixture simply cannot. That personal dimension is what elevates a handmade chandelier above its store-bought equivalent. Start with the idea that excites you most, gather your materials, and begin building. The sparkle you add to your home is well worth the effort.
Frequently Asked Questions
Q1. How much does it typically cost to make a DIY crystal chandelier?
The cost depends almost entirely on the size of the project and the quality of the crystals you choose. A small DIY crystal chandelier made with a Dollar Tree or craft store frame and acrylic crystal beads can cost as little as fifteen to twenty-five dollars. A larger project using glass crystal prisms, a vintage thrift store base, and multiple bead strands will typically fall in the range of forty to eighty dollars, still a fraction of what a comparable store-bought fixture would cost.
Q2. Do I need electrical experience to make a DIY crystal chandelier?
Many DIY crystal chandelier projects require no electrical work at all. Non-lit decorative chandeliers, candle cup versions using flameless LED candles, and fairy light installations are all fully accessible without any electrical knowledge. If you want to wire a functional light socket, lamp cord kits are available at hardware stores with straightforward instructions, but for anything involving permanent ceiling wiring, consulting a licensed electrician is the safest and most practical choice.
Q3. What is the best type of crystal to use for a DIY chandelier?
Glass crystal prisms and beads produce the most brilliant, authentic sparkle and are the premium choice for any DIY chandelier. Acrylic crystal beads are significantly less expensive, very widely available, and still produce a beautiful effect, particularly in smaller or more casual projects. For outdoor installations, acrylic is strongly preferred over glass because of its resistance to impact and moisture.
Q4. How do you hang a DIY crystal chandelier safely?
Always locate a ceiling joist or use a ceiling anchor rated for the weight of your chandelier before installing the hanging hook. The total weight of a finished chandelier including all crystal strands can be heavier than expected, particularly in larger tiered designs. Use a hook with a rated load capacity that comfortably exceeds the actual weight of your fixture. For decorative non-lit chandeliers, adhesive ceiling hooks rated for the appropriate weight can work in many situations.
Q5. Can a DIY crystal chandelier be made without any tools?
Yes, several of the simpler designs in this collection require nothing more than scissors, a package of S-hooks or wire clips, and a hot glue gun. The embroidery hoop chandelier, the minimalist pendant design, and the basic wire frame bead chandelier can all be assembled in an afternoon using only these minimal tools. As the complexity of the design increases, you may need jewelry wire cutters, pliers, a drill, and spray paint, but none of these represent a significant investment or a high skill threshold.