
5+ Creative Disco Ball Craft Ideas to Try
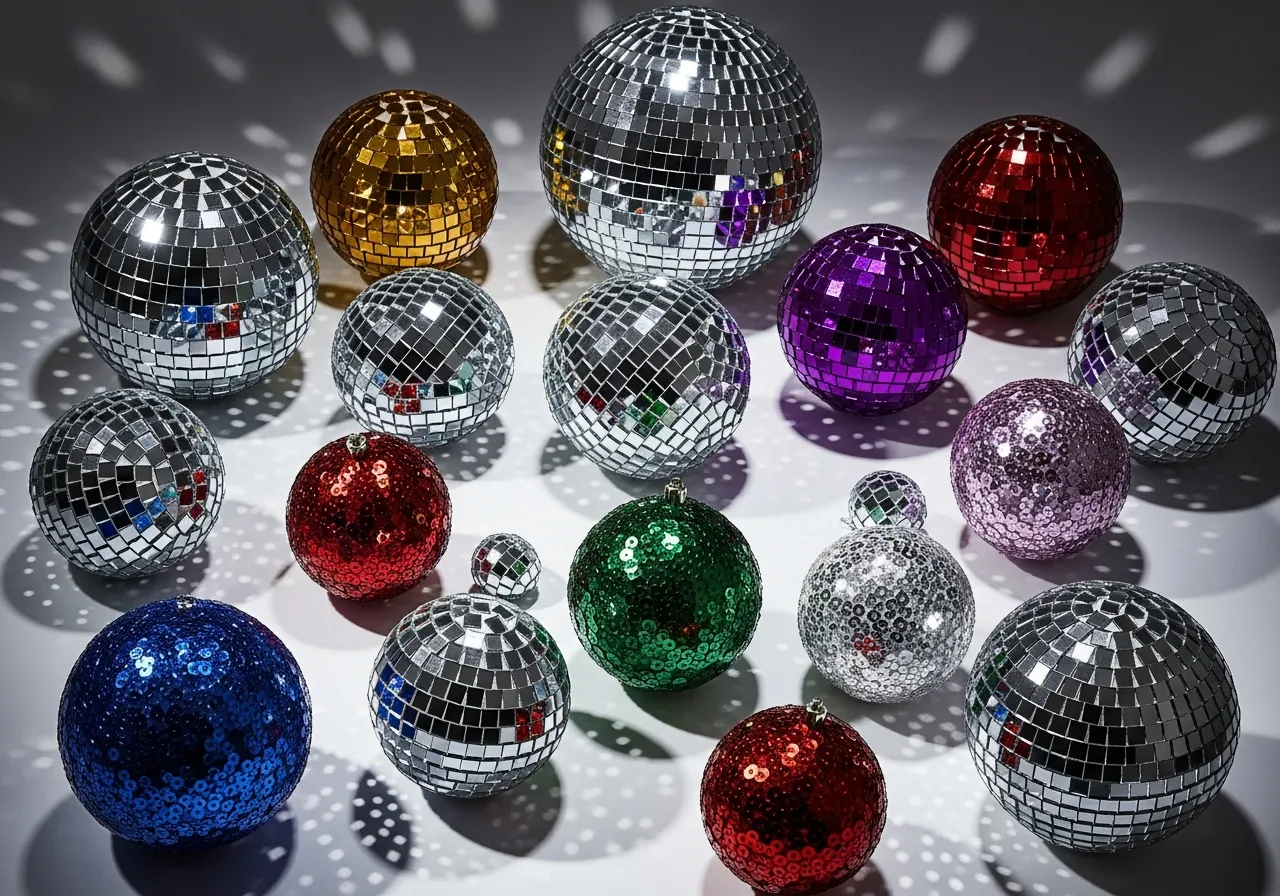
The shimmering allure of a disco ball brings instant glamour and nostalgia to any space. Whether you’re planning a themed party, looking to add sparkle to your home decor, or searching for a unique handmade gift, creating your own disco ball crafts offers endless creative possibilities. These projects range from simple designs perfect for beginners to more intricate creations that showcase advanced crafting skills. The beauty of disco ball crafts lies in their versatility and the satisfying transformation of ordinary materials into dazzling statement pieces.
Making disco ball crafts at home is surprisingly accessible and budget-friendly. Most projects require basic supplies you might already have or can easily find at craft stores. The reflective, light-catching quality of these creations makes them perfect for celebrations, room makeovers, or as eye-catching decorations that spark conversation. Beyond their aesthetic appeal, these crafts provide an excellent opportunity to upcycle materials like old CDs, practice precision work with small pieces, and experiment with different textures and finishes.
The following collection of disco ball craft ideas will guide you through various techniques and applications. From classic mirrored ornaments to innovative interpretations using unexpected materials, each project offers a unique approach to capturing that iconic disco sparkle. Whether you’re crafting alone, with friends, or involving children in age-appropriate versions, these ideas will inspire you to bring retro glamour into modern spaces.
Classic Mirror Tile Disco Ball Ornament
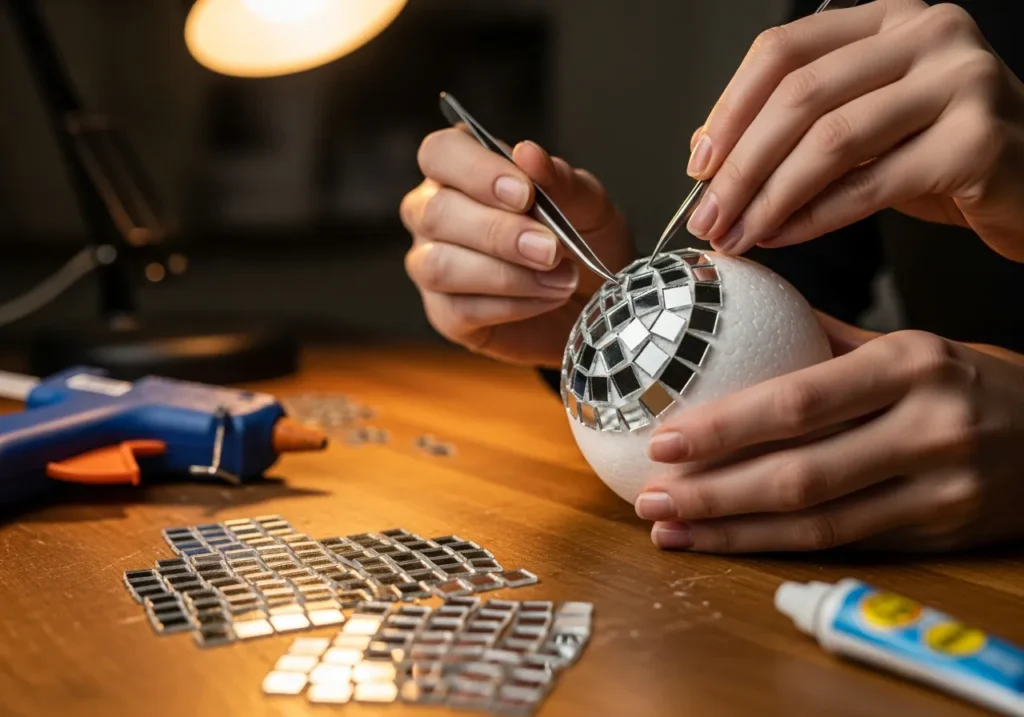
The traditional approach to creating a disco ball ornament uses small mirror tiles to achieve an authentic reflective surface. This technique produces stunning results that closely resemble professional disco balls, making it ideal for special occasions or permanent decorations.
Begin with a smooth spherical base such as a Styrofoam ball, which provides an excellent surface for adhesion. The size can vary based on your intended use, but three to four inch diameter balls work well for ornaments. Purchase self-adhesive mirror tiles from craft stores, typically available in small square sheets that you’ll cut into uniform pieces. The cutting process requires patience and safety precautions, as mirror tiles can have sharp edges.
Plan your tile placement before applying adhesive. Starting at the top of the ball ensures even coverage as you work downward. Apply strong craft glue or a hot glue gun to attach each mirror piece, leaving minimal gaps between tiles. The spacing creates the characteristic grid pattern that allows light to bounce between facets. Work in rows around the sphere, adjusting tile angles slightly to accommodate the curved surface.
For hanging, insert a small screw eye or create a loop with wire before you begin tiling, positioning it where your first tile will go. This ensures a secure hanging mechanism. The finished ornament can be customized further by varying tile sizes, mixing in colored mirror pieces, or adding a decorative cap at the top and bottom of the sphere.
This classic approach delivers the most authentic disco ball appearance and creates a weighty, substantial ornament that catches light beautifully. The reflective quality intensifies in spaces with multiple light sources, creating dancing light patterns across walls and ceilings.
Upcycled CD Disco Ball Creation

Transforming old CDs and DVDs into disco ball decorations offers an eco-friendly crafting solution while achieving impressive reflective effects. This method works exceptionally well for larger projects and provides a satisfying way to repurpose media that might otherwise end up in landfills.
Gather unwanted CDs or DVDs, ensuring they’re clean and free from labels. Using heavy-duty scissors or a paper cutter, slice the discs into small pieces. The size depends on your base sphere, but quarter-inch to half-inch squares typically work best. The cutting process reveals the prismatic layers within the disc, creating additional color reflection in certain lights.
Select your base material based on the project scale. Papier-mache balls work wonderfully for medium-sized creations, while inflated balloons covered in papier-mache can create larger installations. For smaller projects, Styrofoam remains an excellent choice. Ensure your base is completely dry and smooth before beginning the attachment process.
Apply CD pieces using strong adhesive suitable for plastic-to-foam or plastic-to-paper bonds. Industrial strength craft glue provides reliable hold without the heat concerns of hot glue, which can sometimes warp thin CD pieces. Position each fragment with the reflective side facing outward, overlapping edges slightly for complete coverage.
The resulting surface creates a unique mosaic effect with rainbow undertones that traditional mirror tiles cannot achieve. When light hits the CD surface, it produces spectacular color shifts and patterns. This technique particularly shines in outdoor settings or spaces with natural sunlight, where the prismatic qualities become most apparent.
Sequin and Glitter Disco Ball Variations
For crafters seeking softer, more tactile disco ball alternatives, sequins and glitter offer beautiful results with simplified construction methods. These materials work particularly well for projects involving children or when creating decorations that need to be lightweight and safe.
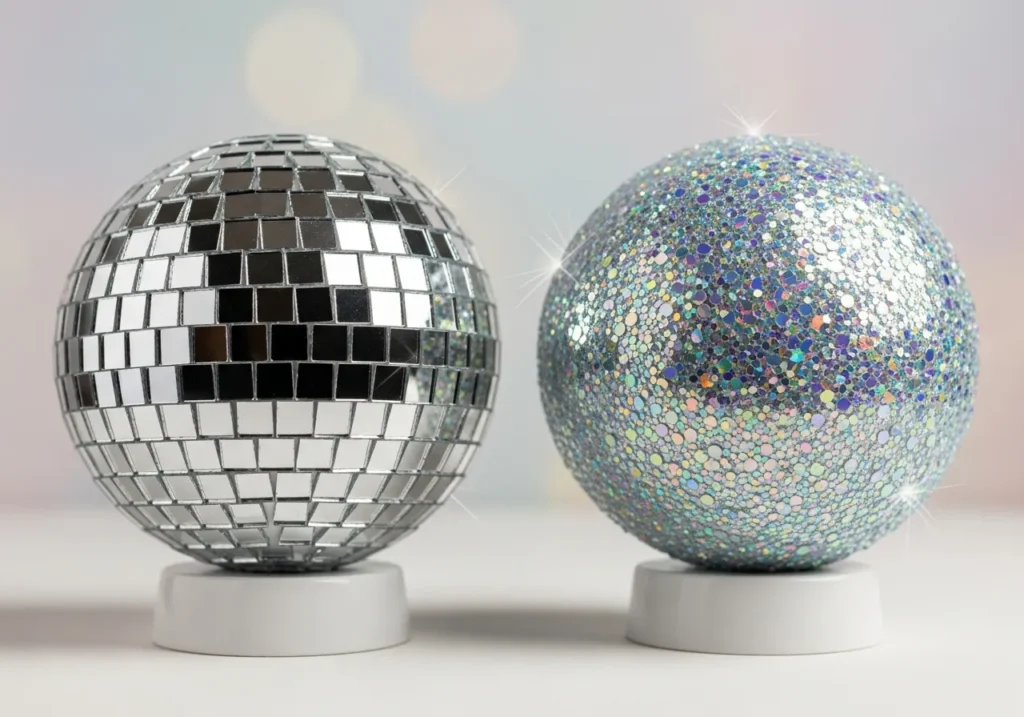
Sequin disco balls begin with applying a base coat of metallic paint to your sphere, typically in silver or gold. This undercoat ensures no gaps show through between sequins. Once dry, begin attaching sequins using craft glue, starting from the top and working in concentric circles. Overlapping sequins like scales creates dimensional texture and maximizes light reflection. Choose large sequins for quick coverage or mix sizes for varied visual interest.
Pin-style sequins can be pushed directly into Styrofoam bases, eliminating the need for glue entirely. This technique allows for easy adjustments and creates a satisfying tactile project. Arrange colors in patterns or gradients, or stick with monochromatic schemes for classic elegance. The finished sequin ball has a softer appearance than mirror tiles while still catching and reflecting light effectively.
Glitter disco balls require a different approach focused on adhesive application. Cover your sphere in sections with craft glue, then roll or sprinkle chunky glitter over the wet surface. Working in sections prevents premature drying and ensures even coverage. Multiple layers intensify the sparkle effect. Fine glitter creates a subtle shimmer, while chunky or holographic glitter produces more dramatic light reflection.
Seal glitter projects with a clear acrylic spray to prevent shedding and add durability. This finishing step is particularly important for decorations that will be handled frequently or displayed in high-traffic areas. The sealed surface maintains its sparkle while becoming more resistant to wear.
Mini Disco Ball Garland Project
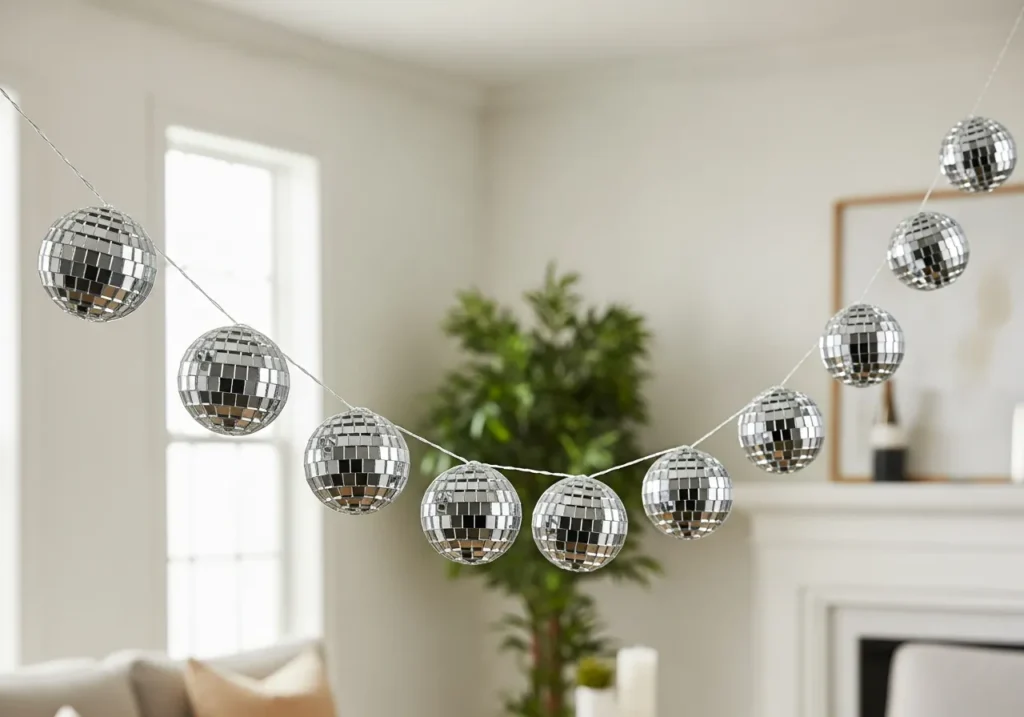
Creating a garland featuring multiple small disco balls transforms the individual craft into a versatile decoration perfect for parties, photography backdrops, or permanent room decor. This project scales the disco ball concept into a linear design that can be customized for any space.
Begin by preparing multiple small spheres, typically one to two inches in diameter. Wooden beads, small Styrofoam balls, or even large jingle bells serve as excellent bases for mini disco balls. The quantity depends on your desired garland length, but plan for one ball every four to six inches for balanced spacing.
Decorate each sphere using your preferred technique. For variety within a single garland, alternate between different materials like mirror tiles on some balls, glitter on others, and sequins on the remainder. This mixed-media approach creates visual interest while maintaining cohesive sparkle throughout.
Before fully covering each ball, thread a long piece of fishing line, metallic cord, or ribbon through the center. This requires planning ahead to ensure the threading mechanism is accessible. Alternatively, attach completed balls to a pre-strung cord using small wire loops or by gluing directly onto the string.
Space balls evenly along the garland, securing each position with knots or dabs of glue to prevent sliding. Between disco balls, consider adding metallic beads, crystals, or tassels to enhance the design. The negative space between elements prevents the garland from appearing too heavy while maintaining the sparkling theme.
Hang the completed garland across doorways, along mantels, as a photo booth backdrop, or draped across walls. The linear arrangement allows light to hit multiple reflective surfaces, multiplying the disco ball effect throughout the space. This project works equally well for temporary event decorations and permanent installations.
Statement Disco Ball Planter
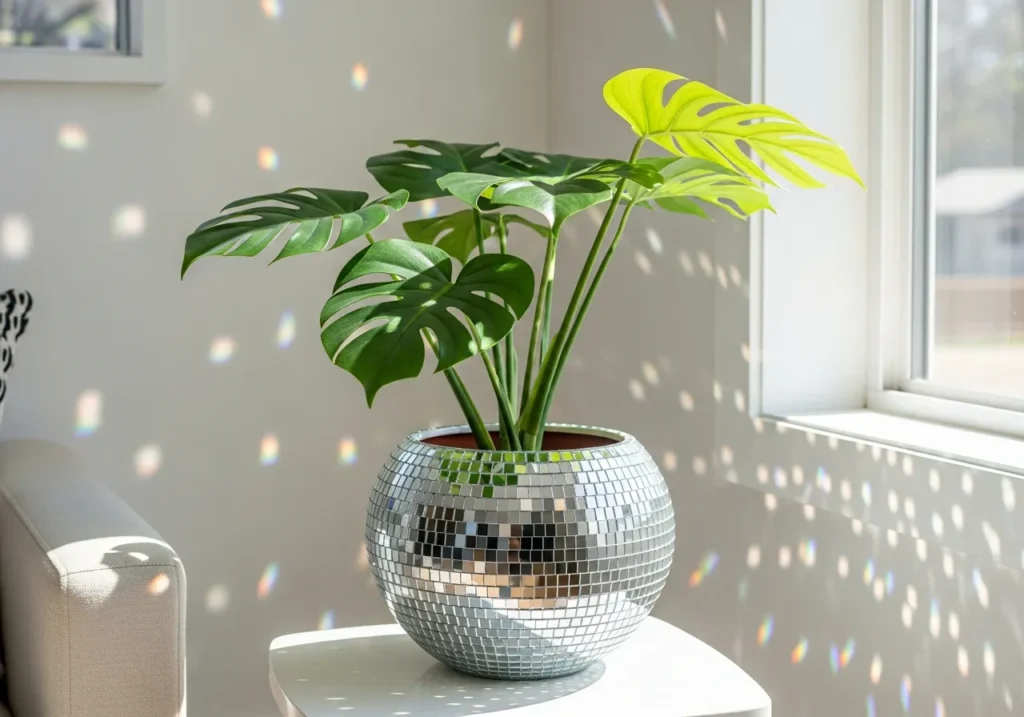
Combining functionality with decorative flair, a disco ball planter brings unexpected glamour to indoor gardening. This project transforms a practical container into a conversation piece that elevates any plant display.
Select a planter with smooth surfaces, avoiding those with heavy textures or deep ridges that complicate tile application. Terracotta pots work beautifully and provide excellent breathability for plants, while plastic or ceramic containers offer lighter weight options. Ensure the planter has adequate drainage holes regardless of material choice.
Clean and dry the planter thoroughly before beginning decoration. Apply a primer if working with porous materials like terracotta, creating better adhesion for mirrors or other reflective materials. Plan your design to leave the interior untiled, focusing decorative efforts on the exterior visible surfaces.
Apply your chosen reflective material using waterproof adhesive, as planters will be exposed to moisture from watering. Mirror tiles create the most traditional disco ball appearance, while metallic mosaic tiles offer similar effects with easier handling. Consider leaving the rim area undecorated for a clean edge, or continue the pattern all the way to the top for complete coverage.
Seal the finished planter with a waterproof sealant appropriate for your materials. This protection prevents water damage and makes cleaning easier. Allow adequate curing time before adding soil and plants to ensure all adhesives have properly set.
Choose plants that complement the glamorous aesthetic. Trailing plants like pothos or string of pearls create beautiful contrast against the reflective surface, while sculptural succulents add modern sophistication. The disco ball planter works particularly well in bright spaces where natural light can activate the reflective surfaces throughout the day.
Disco Ball Wall Art Installation

Moving beyond spherical forms, disco ball-inspired wall art brings the reflective magic into two-dimensional space. This approach allows for larger-scale projects and creates permanent art pieces that serve as room focal points.
Design your composition on paper first, planning the arrangement of reflective elements. Consider geometric patterns like chevrons or hexagons, create gradient effects using different shades of mirror tiles, or spell out words and initials. The planning phase ensures you purchase adequate materials and have a clear roadmap for execution.
Prepare a sturdy backing board as your canvas. Plywood, heavy cardboard, or canvas boards all work depending on the weight of your materials. If creating a particularly large or heavy piece, ensure you have appropriate hardware for secure wall mounting.
Transfer your design to the backing board using pencil marks or a printed template. This guides placement and ensures symmetry if your design requires it. Begin adhering reflective materials according to your plan, working from one corner or the center outward depending on the pattern.
Mirror tiles remain popular for wall art, but consider mixing materials for added dimension. Combine mirrors with metallic paint, glitter sections, or even small actual disco balls attached to the surface. The varied textures create depth while maintaining the cohesive disco theme.
Frame the completed piece for a polished presentation, or leave edges raw for contemporary appeal. Mount in a location where light will interact with the surface throughout the day, ideally across from windows or near light fixtures. The wall art becomes an active element in the room, changing appearance as lighting conditions shift.
Disco Ball Jewelry and Accessories
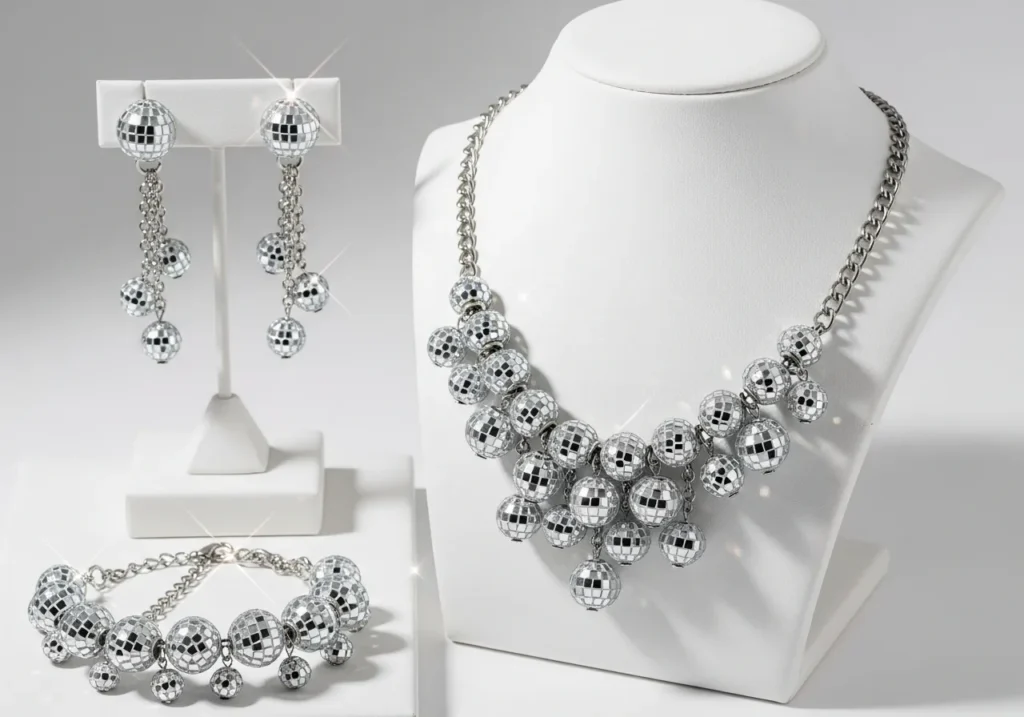
Scaling disco ball aesthetics down to wearable size creates unique jewelry and accessories that add sparkle to personal style. These miniature versions carry the disco spirit into everyday fashion.
Earrings offer the perfect canvas for tiny disco ball creations. Purchase small wooden or Styrofoam beads, typically quarter-inch to half-inch diameter, available at craft stores. Decorate using fine glitter, tiny sequins, or cut small pieces of reflective tape into minute squares. The reduced scale requires precision but creates impressive results.
Attach jewelry findings before fully decorating the bead, ensuring the loop is secure and properly positioned. Complete the decoration, working carefully around the finding. Seal with clear nail polish or jewelry sealant to protect the surface and add shine.
Create matching necklace pendants using slightly larger beads, or design elaborate statement pieces incorporating multiple disco ball elements. String several small decorated beads together for bracelet designs that catch light with every movement.
Hair accessories benefit from disco ball embellishments as well. Glue decorated beads onto bobby pins, hair clips, or headband bases. The reflective elements add festive flair to hairstyles and work particularly well for special occasions or themed events.
Keychains and bag charms represent another application for miniature disco balls. These accessories endure more handling and movement, so ensure particularly strong adhesive and thorough sealing. The constant motion actually enhances the disco ball effect, creating sparkle as the accessory swings and rotates.
Conclusion
Disco ball crafts offer remarkable versatility in scale, materials, and application, making them accessible to crafters of all skill levels. From the authentic mirror-tiled ornaments that capture classic disco glamour to innovative interpretations using upcycled materials, these projects bring sparkle and personality to homes, events, and personal accessories. The fundamental appeal of reflective, light-catching surfaces transcends trends, ensuring these creations remain relevant whether you embrace full retro aesthetics or incorporate subtle hints of shimmer into modern decor.To see more home decor ideas must visit Lake House Decor.
The process of creating disco ball crafts provides rewards beyond the finished product. The meditative quality of placing individual tiles or sequins, the satisfaction of watching a plain sphere transform into a dazzling object, and the problem-solving involved in adapting techniques to different applications all contribute to a fulfilling creative experience. These projects also offer excellent opportunities for customization, allowing you to match existing color schemes, adjust sizes for specific spaces, or combine techniques for truly original results.
As you explore these disco ball craft ideas, remember that experimentation leads to the most interesting outcomes. Try unconventional materials, mix techniques within single projects, or scale ideas up or down based on your needs. The fundamental concept of creating reflective surfaces remains constant, but your interpretation can be entirely unique. Whether you’re preparing for a celebration, refreshing your living space, or simply enjoying the creative process, disco ball crafts deliver sparkle, style, and satisfaction in equal measure.
Frequently Asked Questions
What is the best glue for attaching mirror tiles to Styrofoam balls?
E6000 craft adhesive or a low-temperature hot glue gun works best for mirror tiles on Styrofoam. E6000 provides industrial strength without melting foam, while low-temp glue guns prevent heat damage. Avoid regular hot glue, which can melt Styrofoam. Apply small amounts directly to each tile rather than the ball surface for better control.
Can I make outdoor disco ball decorations that withstand weather?
Yes, but weatherproofing is essential. Use waterproof adhesives, seal all surfaces with outdoor-grade clear sealant, and choose materials like glass mirror tiles rather than foil-backed options that deteriorate in moisture. Plastic or resin spheres work better than Styrofoam for bases. Bring decorations inside during extreme weather to extend their lifespan.
How do I cut CDs safely for disco ball projects?
Use heavy-duty kitchen shears or old scissors you don’t mind dulling. Score the CD surface first with a craft knife, then cut along the score line. Wear safety glasses as small pieces can fly during cutting. Cut over a contained area like a box to catch fragments. Alternatively, some crafters break CDs in sealed plastic bags, though this produces less uniform pieces.
What size sphere works best for hanging disco ball ornaments?
Three to four inch diameter Styrofoam balls create ideal hanging ornaments. This size provides enough surface area for impressive light reflection while remaining light enough for standard ornament hooks. Smaller two-inch balls work for garlands or tree decorations, while larger six-inch or bigger spheres make statement pieces but require secure hanging mechanisms due to increased weight.
How can I make disco ball crafts kid-friendly and safe?
Use soft materials like sequins, glitter, and rounded plastic gems instead of glass mirror tiles. Choose white school glue rather than hot glue or industrial adhesives. Pre-cut any materials requiring sharp tools. Foam or plastic balls eliminate breakage concerns. Supervise younger children closely and focus on larger pieces they can handle easily. The sequin pin method works particularly well for kids, providing immediate gratification without glue mess.

One Comment