18+ Creative DIY Table Top Ideas for Your Existing Table
Your dining table has seen better days. Maybe the surface is scratched beyond recognition, or perhaps the style no longer matches your evolving taste. Before you haul that table to the curb or spend hundreds on a replacement, consider this: transforming your existing table top can be an incredibly rewarding project that costs a fraction of buying new furniture.
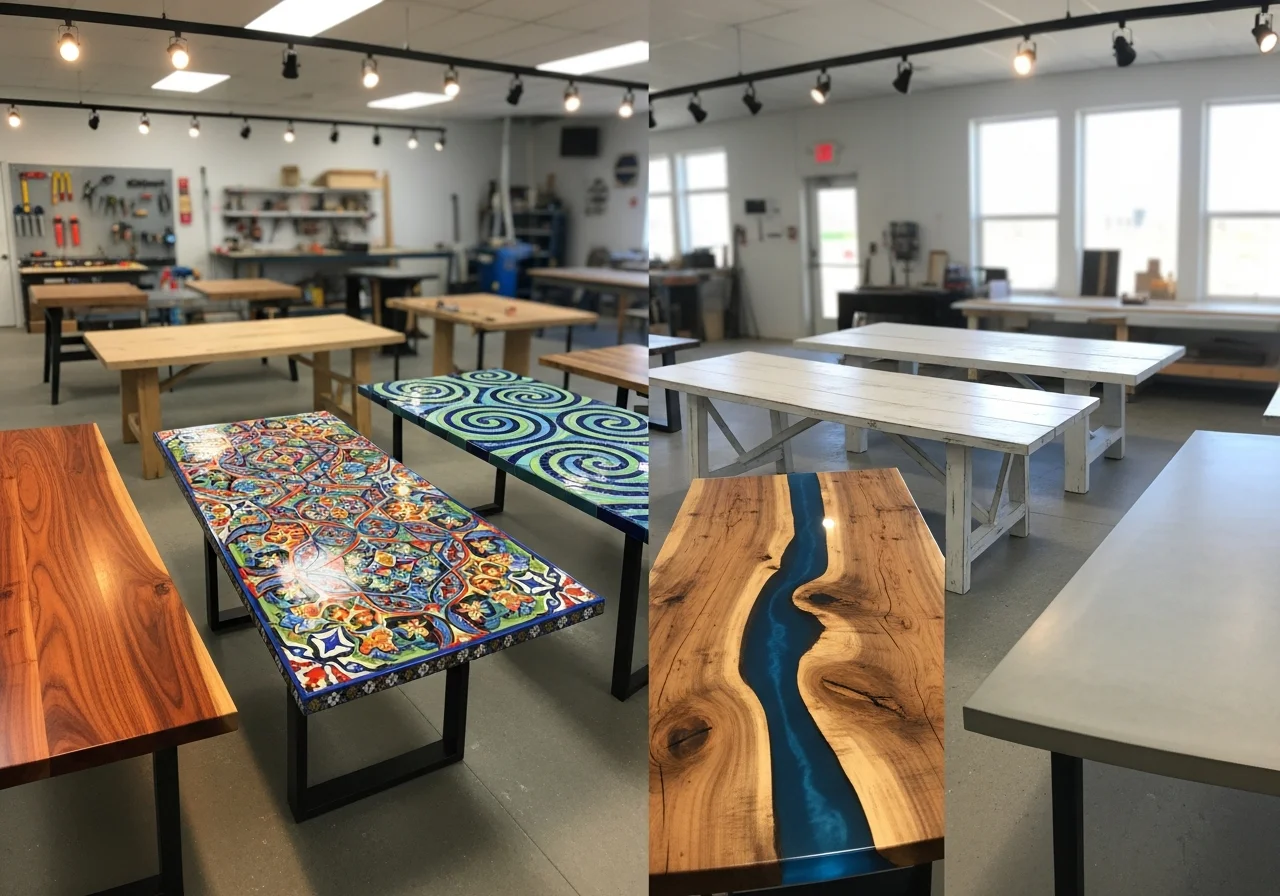
The beauty of DIY table top renovations lies in their versatility. Whether you’re working with a solid wood piece, a laminate surface, or even a damaged table that’s structurally sound, there’s a creative solution waiting to breathe new life into your furniture. These projects range from simple weekend updates to more involved transformations, but each one offers the satisfaction of creating something uniquely yours.
This comprehensive guide explores over eighteen innovative approaches to revamping your table top, covering various skill levels, budgets, and design aesthetics. From classic wood refinishing to contemporary epoxy resin pours, you’ll discover techniques that can turn an eyesore into a conversation piece.
Classic Wood Stain Refinishing
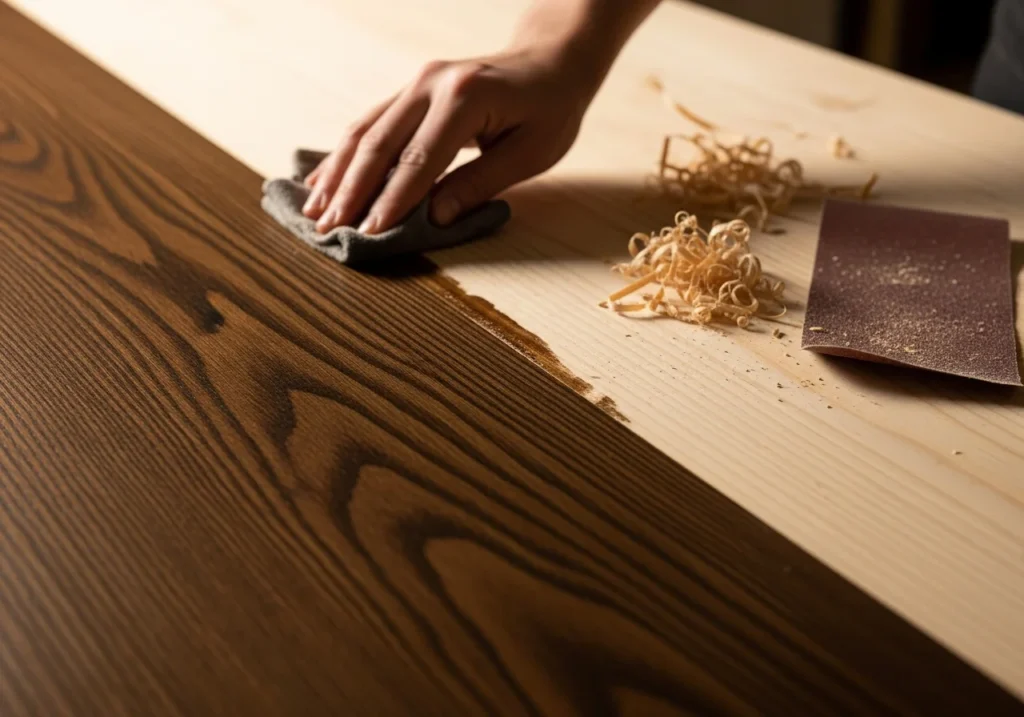
Refinishing a wood table top with fresh stain remains one of the most transformative projects you can undertake. This technique works beautifully on solid wood surfaces and can dramatically alter the appearance of your furniture. Start by stripping the existing finish using a chemical stripper or intensive sanding with progressively finer grits, beginning at 80-grit and working up to 220-grit for a smooth surface.
The magic happens when you apply your chosen stain. Darker stains like espresso or ebony create dramatic, sophisticated looks perfect for formal dining spaces, while lighter options like natural oak or weathered gray suit casual, airy environments. Always apply stain with the grain using a brush or cloth, allowing proper drying time between coats. Finish with a protective polyurethane topcoat in your preferred sheen to ensure durability against daily use.
Whitewashed Farmhouse Finish
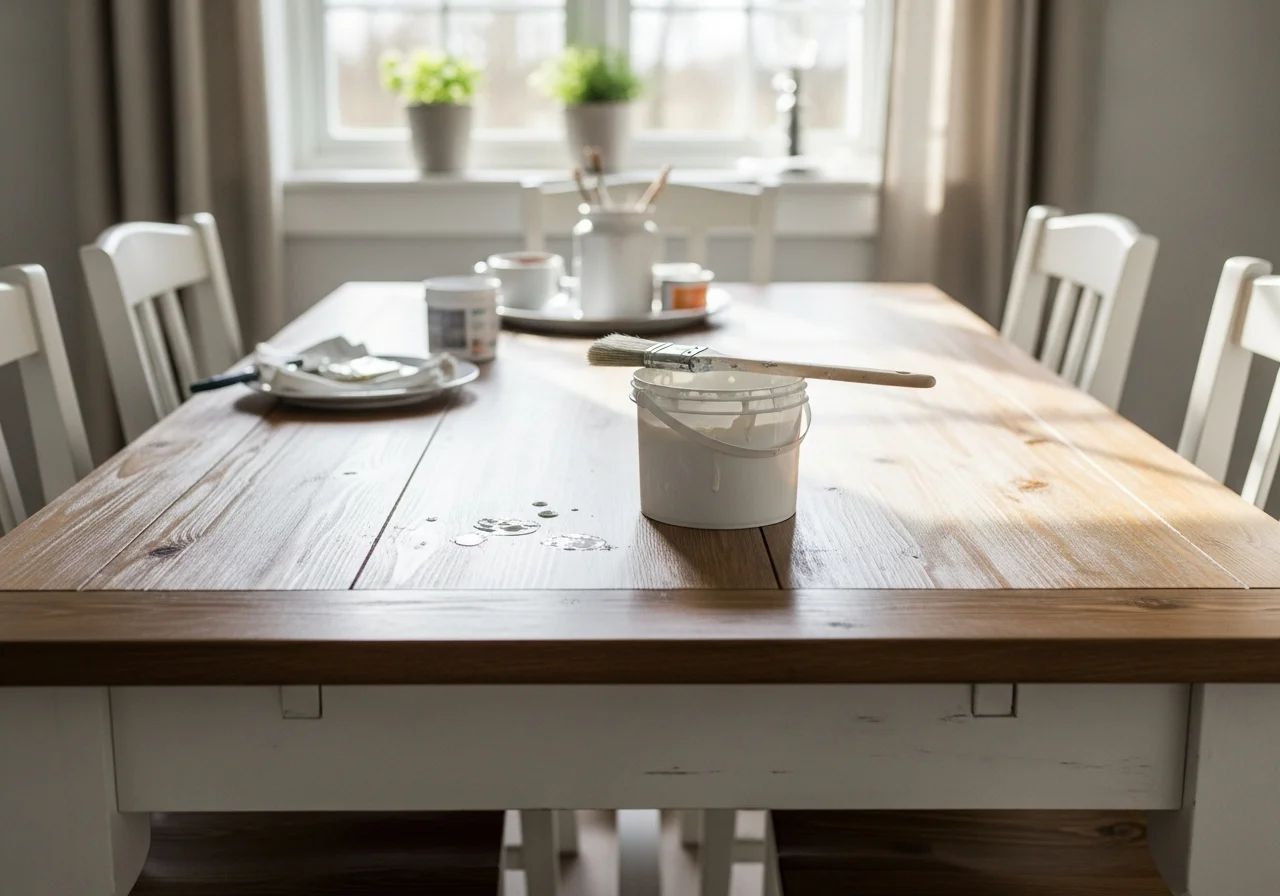
The whitewashed technique delivers that coveted farmhouse aesthetic without completely obscuring the wood grain beneath. This approach works exceptionally well on pine, oak, or any wood with prominent grain patterns. Create your whitewash mixture by diluting white latex paint with water at a ratio of about one part paint to one part water, adjusting for your desired opacity.
Apply the mixture with a brush, working in sections and wiping away excess with a clean cloth before it fully dries. This process allows you to control how much wood grain shows through, creating anything from a heavily distressed look to a subtle, sun-bleached appearance. Multiple thin coats provide more control than one heavy application. Seal your whitewashed surface with a water-based polyurethane to protect the finish while maintaining the light, bright appearance.
Painted Geometric Patterns
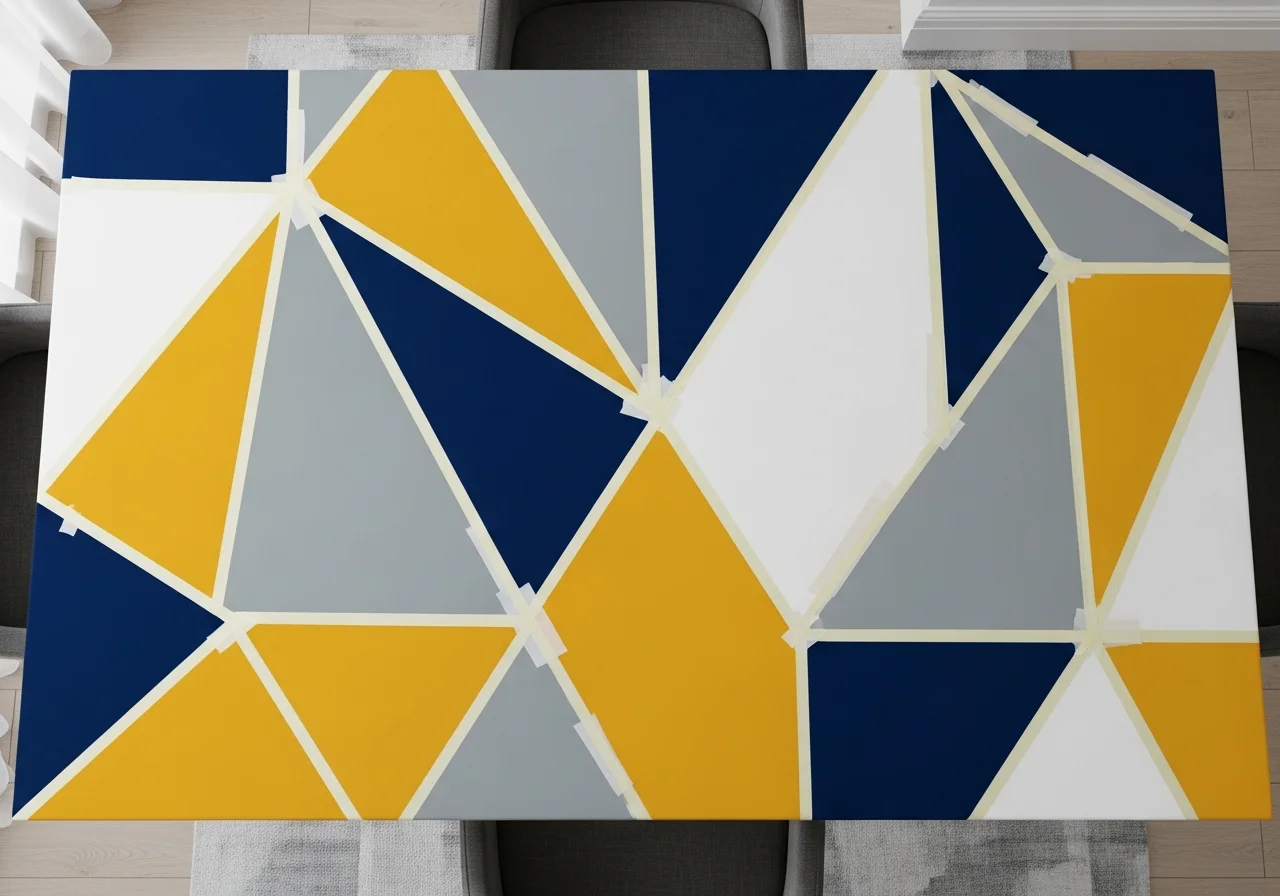
Geometric patterns inject personality and modern flair into any table top. This technique suits both wood and laminate surfaces, making it ideal for updating builder-grade furniture. Plan your design carefully using painter’s tape to create clean lines for triangles, hexagons, chevrons, or abstract color-blocked sections.
Choose a cohesive color palette of two to four colors that complement your existing decor. Chalk paint works wonderfully for this application because it adheres well to various surfaces with minimal prep work and provides excellent coverage. Apply base coats evenly, remove tape at appropriate intervals to prevent peeling, and consider adding a clear protective finish over painted surfaces to prevent chips and scratches from daily use.
Tile Mosaic Transformation
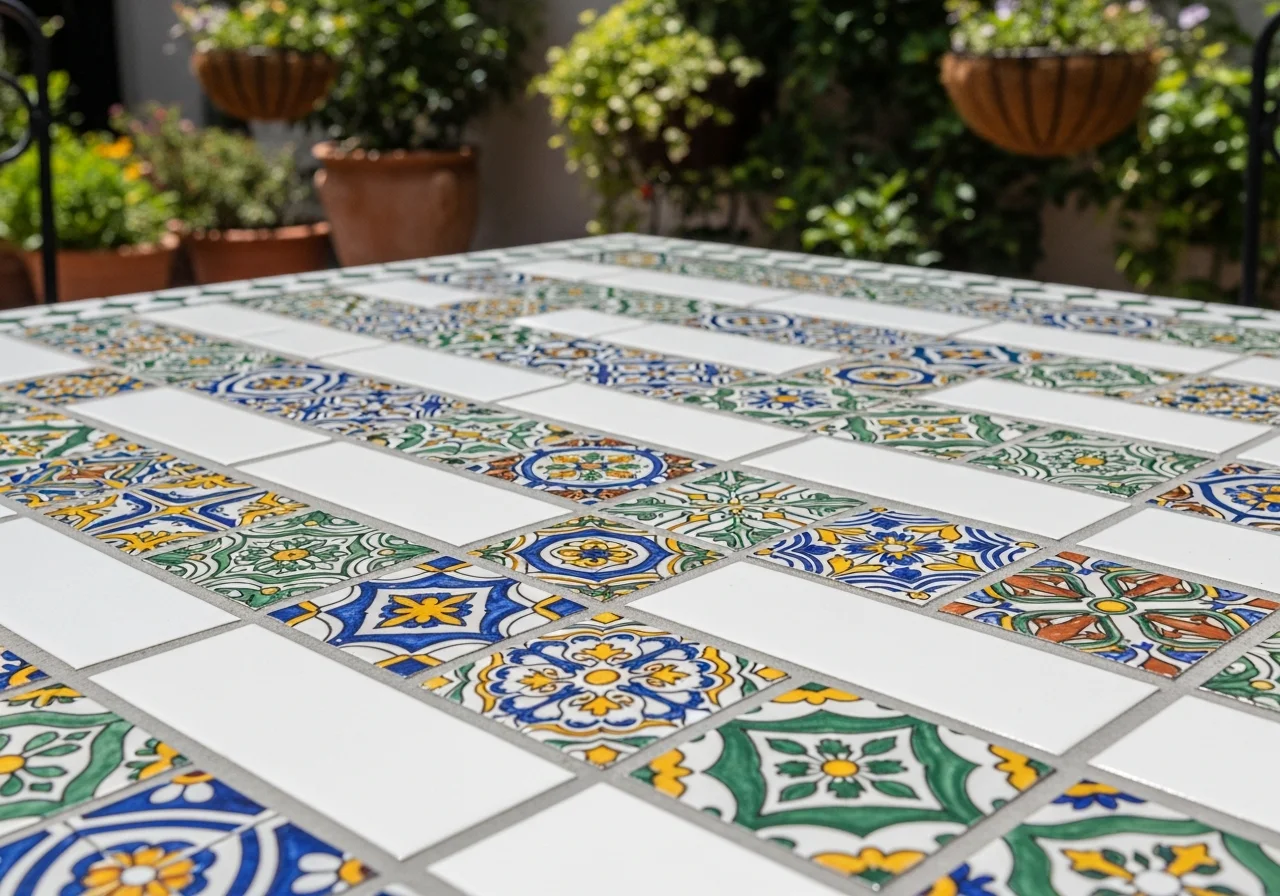
Installing tile creates a durable, heat-resistant, and completely waterproof table top surface that’s ideal for outdoor furniture or high-traffic areas. Ceramic, porcelain, or glass tiles offer countless design possibilities, from uniform subway tile patterns to intricate mosaic arrangements using broken tile pieces.
Prepare your surface by ensuring it’s clean, level, and properly primed. Apply thin-set mortar with a notched trowel, working in small sections to prevent premature drying. Press tiles firmly into place, using spacers for consistent grout lines. After the mortar cures for at least 24 hours, apply grout with a rubber float, working it into all joints and wiping away excess. Seal the grout to prevent staining, and you’ll have a virtually indestructible table top that handles hot dishes and spills without concern.
Reclaimed Wood Plank Top

Nothing captures rustic charm quite like a table top constructed from reclaimed wood planks. Source your materials from architectural salvage yards, old barns, pallets, or specialty suppliers who offer pre-cleaned reclaimed lumber. Each piece brings its own character through nail holes, weathering, and varied patinas.
Cut planks to your desired length and arrange them in your preferred pattern, mixing widths and tones for visual interest. Secure planks to your existing table base using wood glue and finishing nails or screws from underneath to avoid visible fasteners. Sand the surface smooth, being careful not to remove too much character, then finish with a natural oil or matte polyurethane that enhances the aged appearance while protecting the wood.
Epoxy Resin River Table
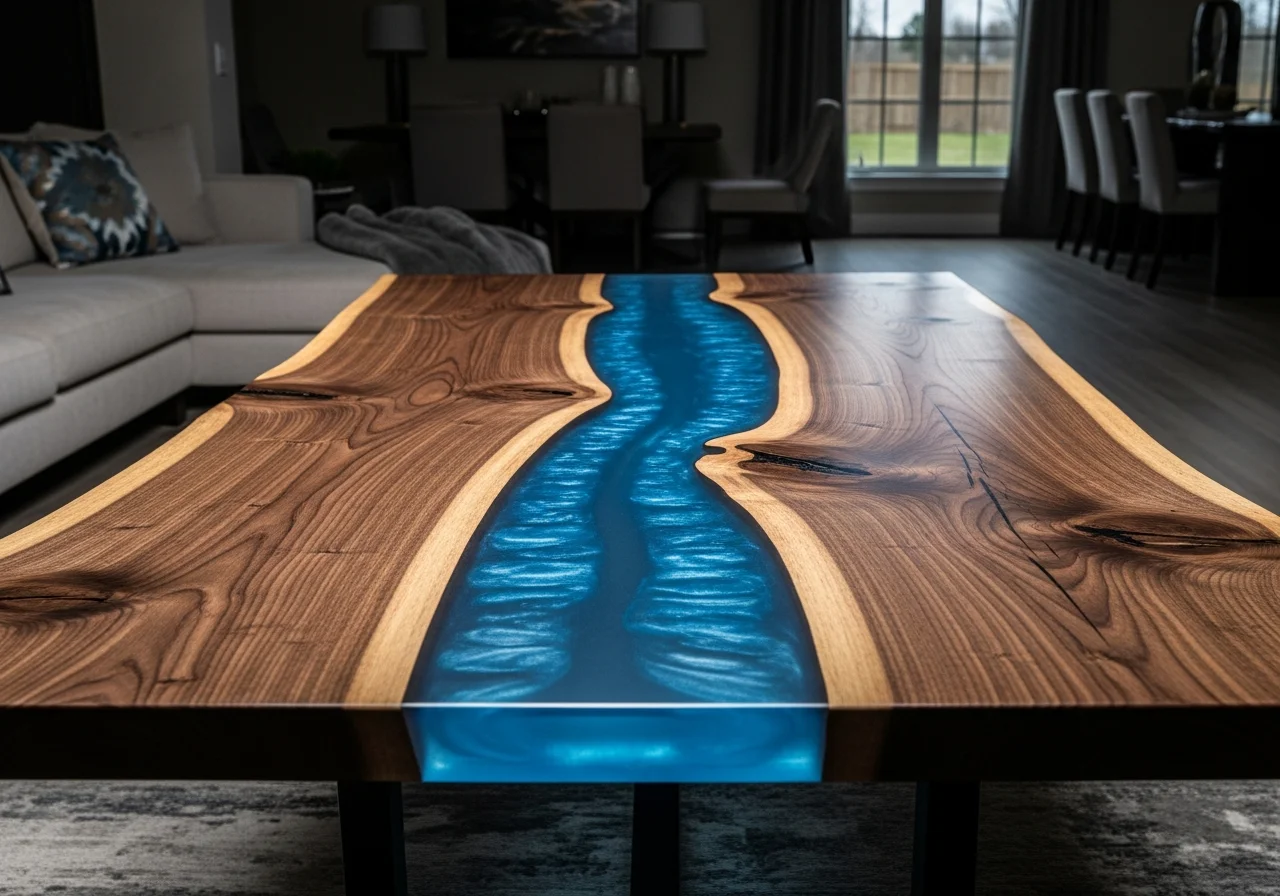
Epoxy resin projects have exploded in popularity, and for good reason. These stunning creations feature translucent resin “rivers” flowing through or around wood sections, often incorporating metallic pigments, glow-in-the-dark powder, or embedded objects. While more advanced than some techniques, the results are absolutely breathtaking.
Select your wood pieces, often choosing slabs with interesting edges or deliberate gaps. Build a dam around your work surface using melamine or sealed wood to contain the liquid resin. Mix your two-part epoxy according to manufacturer instructions, add any colorants or additives, and pour carefully into your prepared space. Multiple thin pours prevent overheating and ensure proper curing. After full curing (typically 72 hours), sand the surface progressively smooth and finish with additional flood coats of resin for a glass-like surface.
Concrete Overlay Technique
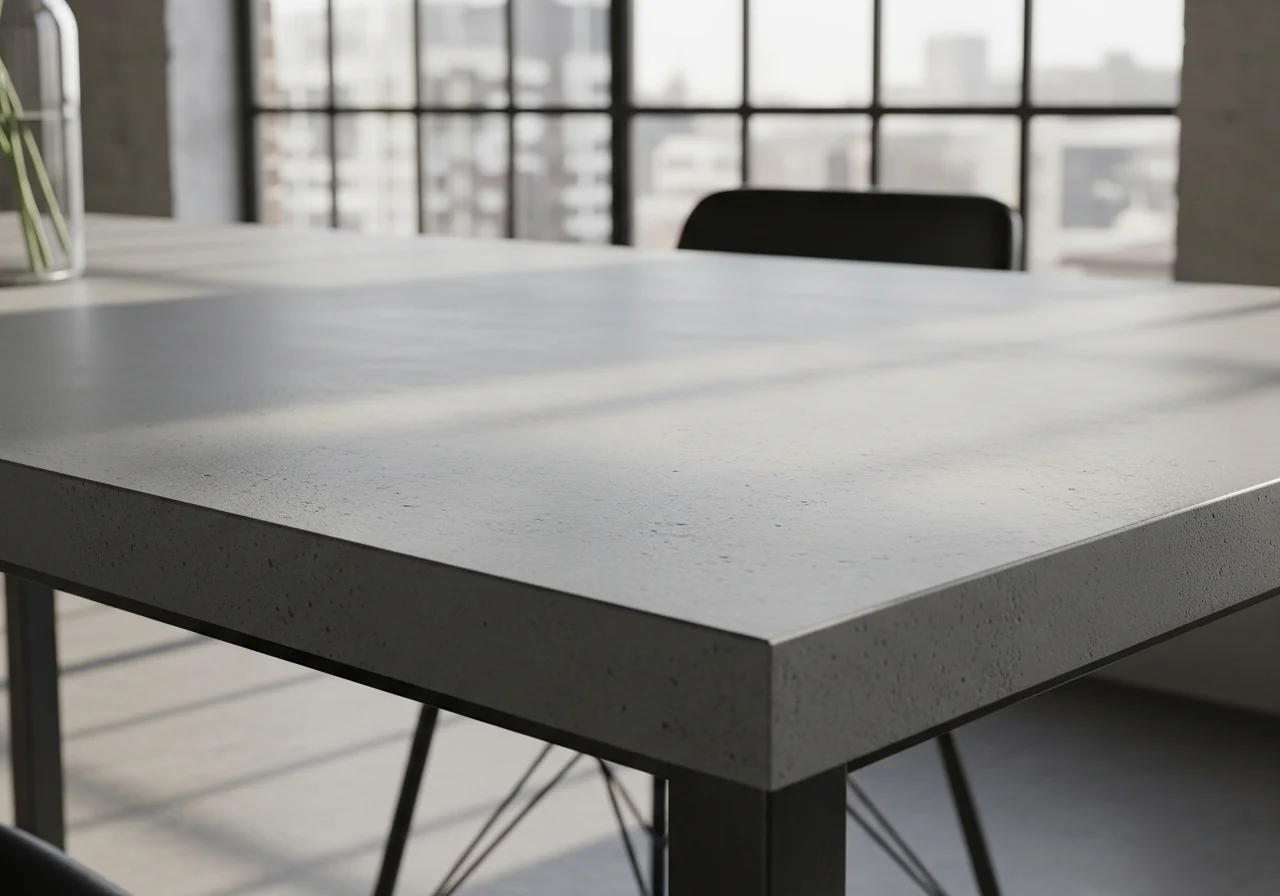
For an industrial-modern aesthetic, concrete overlays transform ordinary table tops into architectural statements. This technique involves applying a thin layer of concrete resurfacer or specialized furniture concrete over your existing surface. The material provides incredible durability while offering unique finishing possibilities.
Prepare your surface by thoroughly cleaning and roughening smooth areas to improve adhesion. Mix your concrete according to package directions and trowel it smoothly across the table top in thin, even layers. Work quickly as concrete sets fast. Experiment with different trowel techniques to create intentional texture, or achieve a smooth finish by working the surface carefully. After curing, seal the concrete with a food-safe sealer to prevent staining and make cleanup easier.
Decoupage with Maps or Book Pages

Decoupage offers an artistic, personalized approach to table top renovation that’s surprisingly simple to execute. This technique involves adhering paper materials to your surface using decoupage medium, creating anything from vintage elegance to quirky charm depending on your chosen materials.
Vintage maps create sophisticated, conversation-starting surfaces perfect for home offices or libraries. Sheet music suits music rooms beautifully, while book pages from damaged novels can honor beloved stories. Cut or tear your paper into manageable pieces, apply decoupage medium to both the table surface and the back of each piece, then smooth carefully to eliminate air bubbles. Overlap edges slightly for complete coverage. After drying completely, apply multiple coats of decoupage medium over the entire surface, sanding lightly between coats for a smooth finish.
Chalkboard Paint Surface

Chalkboard paint transforms any table top into an interactive surface perfect for kids’ rooms, craft spaces, or casual dining areas where menu planning happens table side. This approach works on wood, laminate, or previously painted surfaces with minimal preparation.
Sand your surface lightly to improve adhesion, then apply two to three coats of chalkboard paint, allowing proper drying time between applications. Most chalkboard paints require curing for several days before first use. Condition the surface by rubbing the side of a piece of chalk over the entire area, then erasing it. This prevents ghosting with future drawings. Consider adding a decorative border or leaving the table apron in a contrasting color for visual interest.
Pallet Wood Herringbone Pattern

The herringbone pattern adds sophisticated geometry to rustic pallet wood, creating visual interest that elevates simple materials. Source clean pallets, disassemble carefully, and remove all nails. Cut wood strips to uniform width, varying lengths as needed for your pattern.
Create a center guideline down your table length. Working outward from this center, apply wood glue to each piece and position at 45-degree angles, alternating direction to form the classic herringbone V-shape. Use a miter saw to ensure precise angle cuts at the table edges. After the entire surface is covered and glue has dried, sand thoroughly to level any height differences between boards. Finish with stain or paint as desired, followed by a protective topcoat.
Fabric-Covered Glass Protection
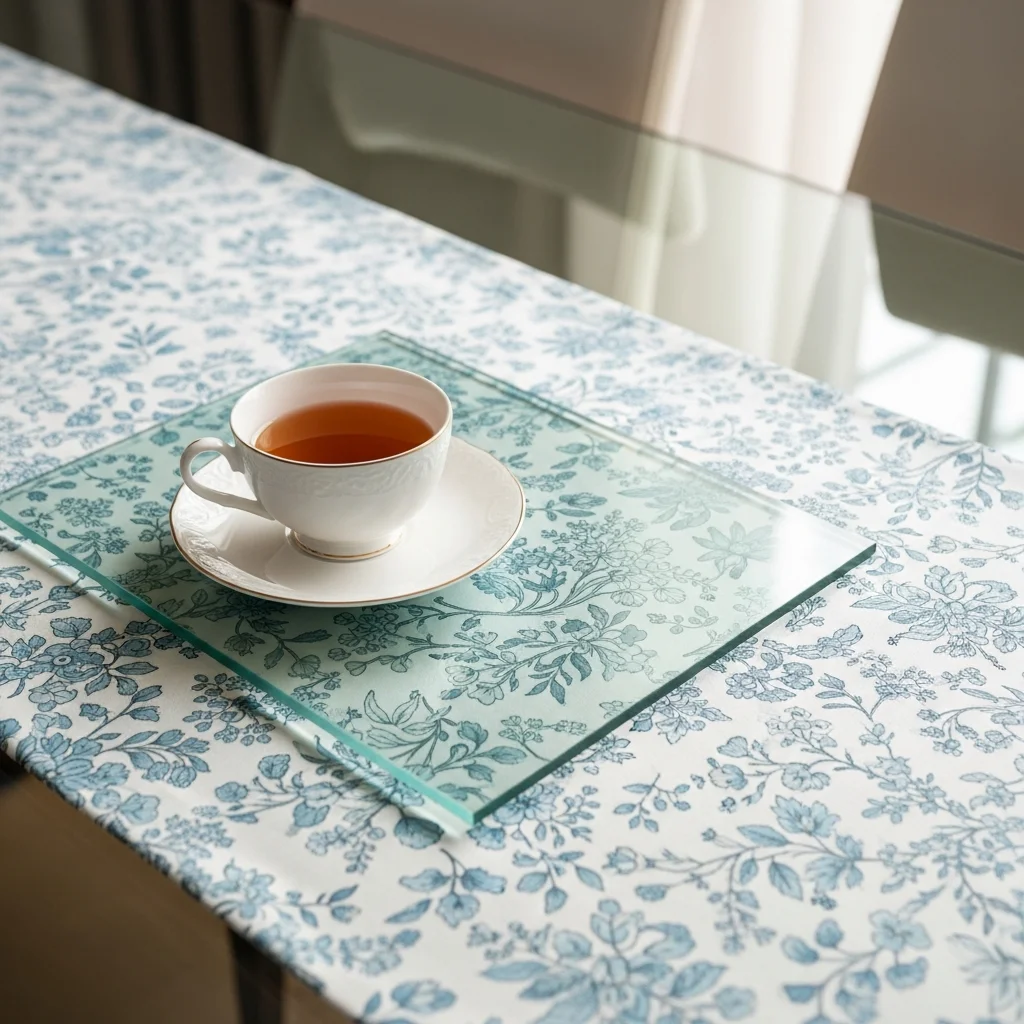
This clever technique preserves damaged wood surfaces while adding pattern and protecting against future wear. Choose a decorative fabric that complements your space, then have a piece of glass cut to fit your table top dimensions with polished edges for safety.
Apply the fabric to your existing table top using spray adhesive, smoothing carefully to eliminate wrinkles. Trim excess fabric along the edges with a sharp utility knife. Place the glass over the fabric-covered surface, creating a protective barrier that’s easy to clean while showcasing your chosen pattern beneath. The glass weight typically holds it in place, but you can add clear rubber bumpers underneath corners for additional stability.
Butcher Block Construction
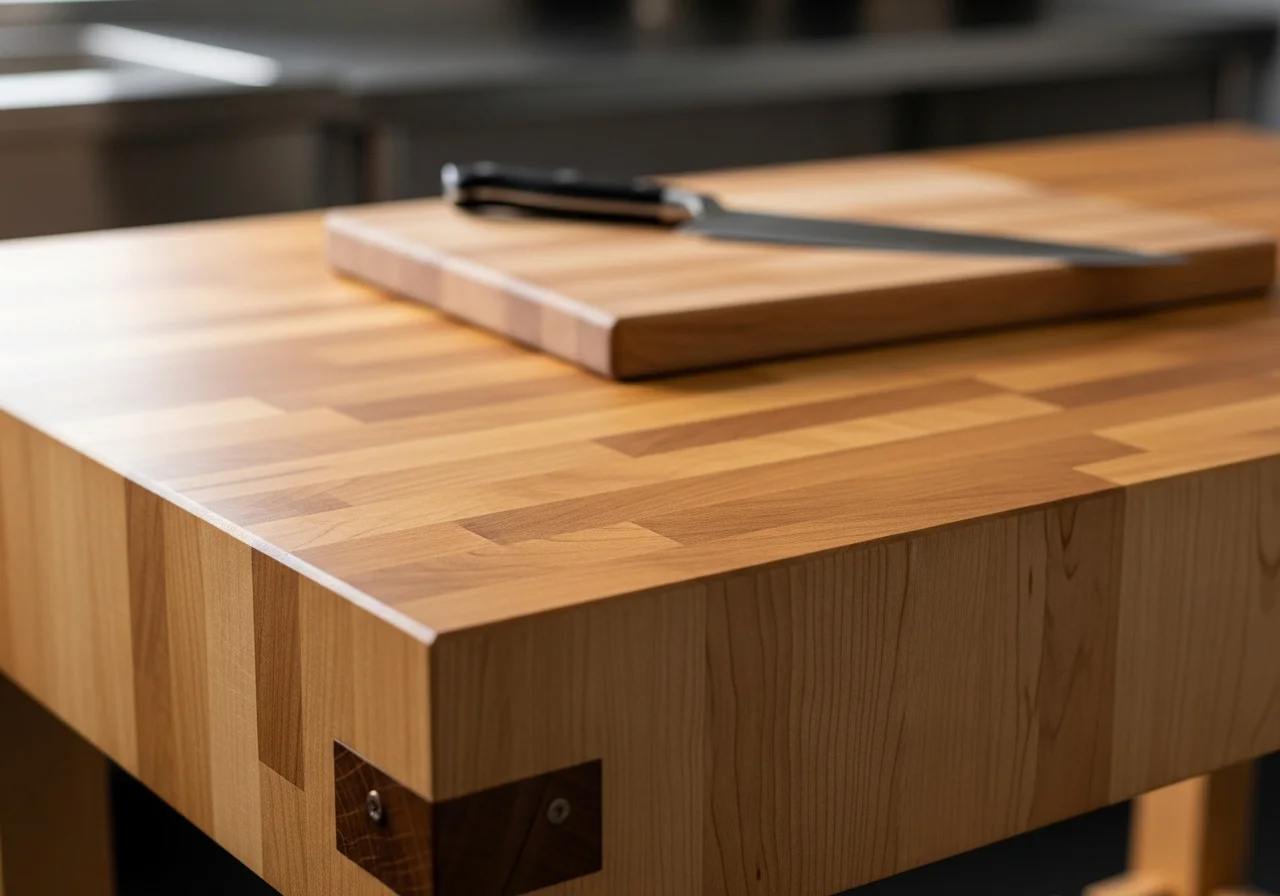
Creating a butcher block surface provides the ultimate in durability and timeless appeal. This project requires purchasing hardwood boards (maple, oak, or walnut work beautifully), cutting them to uniform size, and edge-gluing them together to form a solid slab.
Alternate grain direction for stability, apply generous amounts of wood glue to edges, and clamp tightly overnight. After the glue cures, sand the entire surface flat using a belt sander followed by orbital sanding with progressively finer grits. Finish butcher block surfaces with food-safe mineral oil or specialized butcher block conditioner, applying multiple coats and allowing absorption between applications. This finish requires regular maintenance but develops a beautiful patina over time.
Metallic Paint Effects
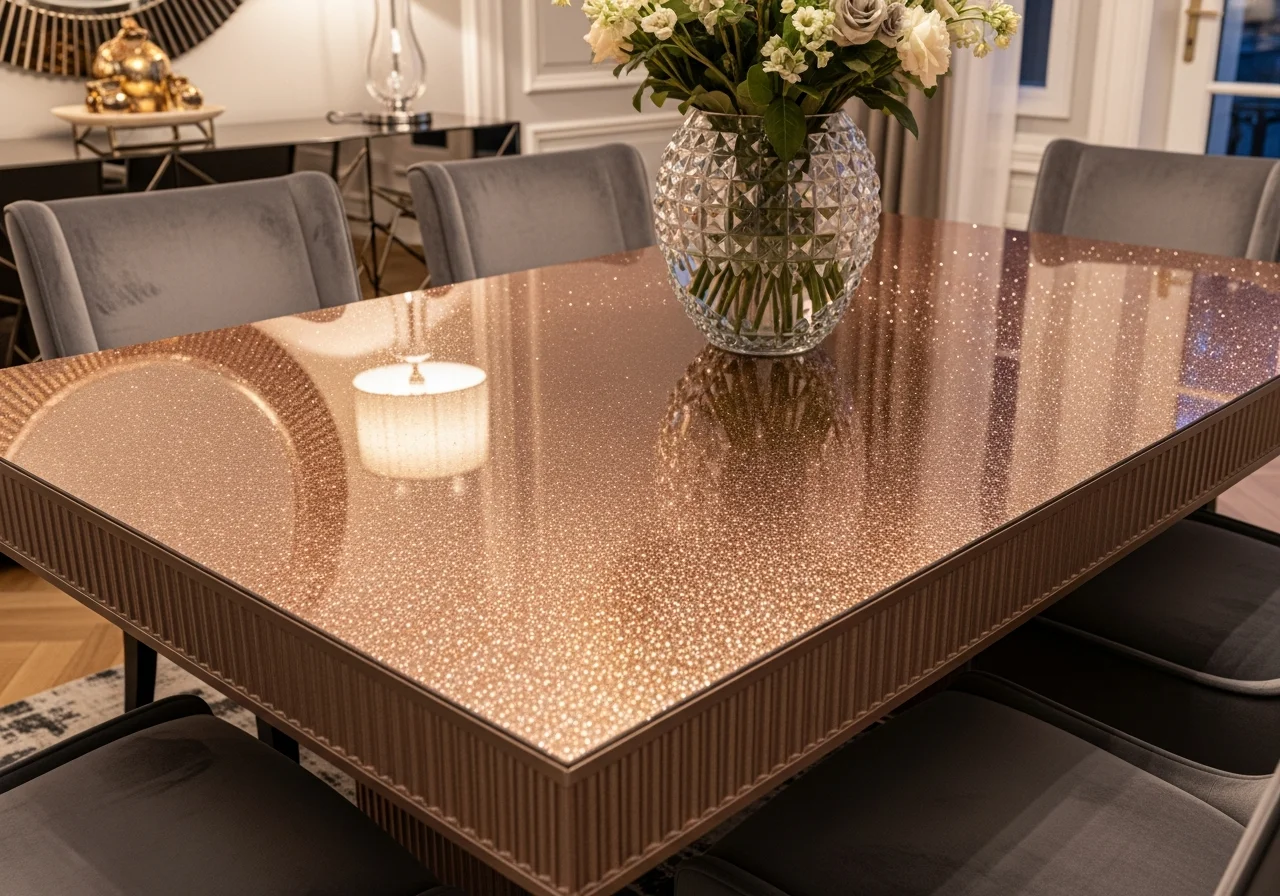
Metallic finishes bring glamour and contemporary style to tired table tops. Modern metallic paints offer various finishes from brushed nickel to rose gold, creating effects ranging from subtle shimmer to high-impact shine. These paints work on wood, laminate, or previously painted surfaces.
Apply a coordinating base coat first for better coverage and depth. Follow with your metallic paint in thin, even coats, maintaining a wet edge to prevent lap marks. Some metallic look best applied with a high-quality brush rather than a roller for smoother coverage. Consider using stencils with metallic to create patterns, or blend multiple metallic tones for an ombre effect. Always seal metallic finishes with a clear topcoat to prevent tarnishing and protect against scratches. May you want to know more
Vinyl Plank Flooring Application
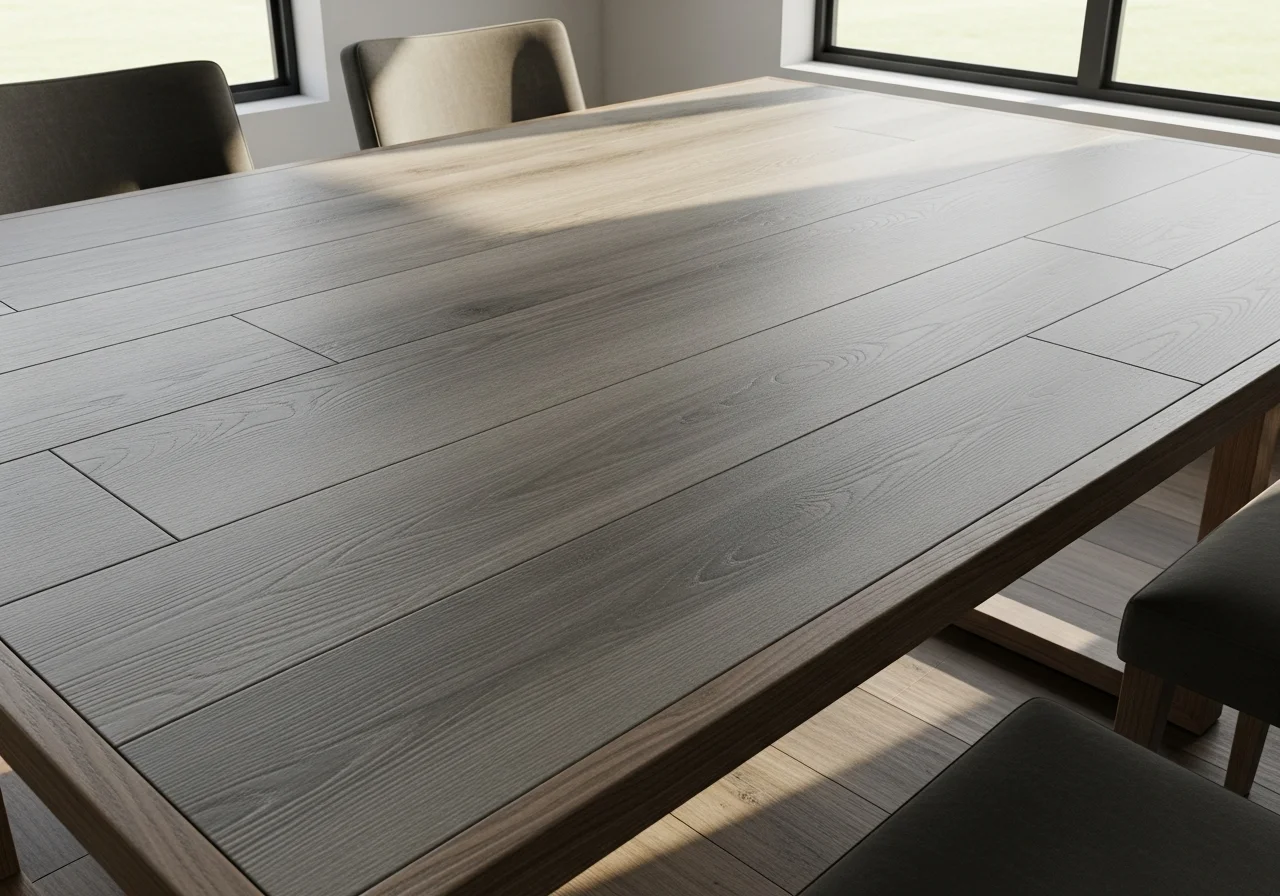
Luxury vinyl plank flooring designed for floors makes an unexpectedly perfect table top material. These products offer incredible durability, water resistance, and realistic wood or stone appearances at affordable prices. Peel-and-stick varieties simplify installation considerably.
Measure your table top carefully and plan your layout to minimize cuts and center your pattern attractively. Cut planks using a utility knife and straightedge, scoring multiple times before snapping. Peel backing and apply firmly, rolling with a J-roller to ensure complete adhesion. The interlocking edges of some vinyl plank systems create seamless appearances. Edge your table with wood trim to hide plank edges and create a finished look. The result is a maintenance-free surface that resists stains, moisture, and daily wear.
Stenciled Design Application

Stenciling allows you to add intricate designs without artistic skills or expensive tools. This technique works beautifully over painted bases or even stained wood, adding Mediterranean tile effects, damask patterns, or custom graphics that reflect your personal style.
Choose or create your stencil, then secure it firmly to your surface using painter’s tape or reposition able spray adhesive. Apply paint using a stencil brush or foam roller with very light, dabbing motions rather than brushing, which can push paint under the stencil. Use minimal paint on your applicator to prevent bleeding. Lift the stencil carefully while paint is still wet, then reposition for repeated patterns. After your design is complete and dry, seal the entire surface with polyurethane for protection.
Penny Table Top Creation
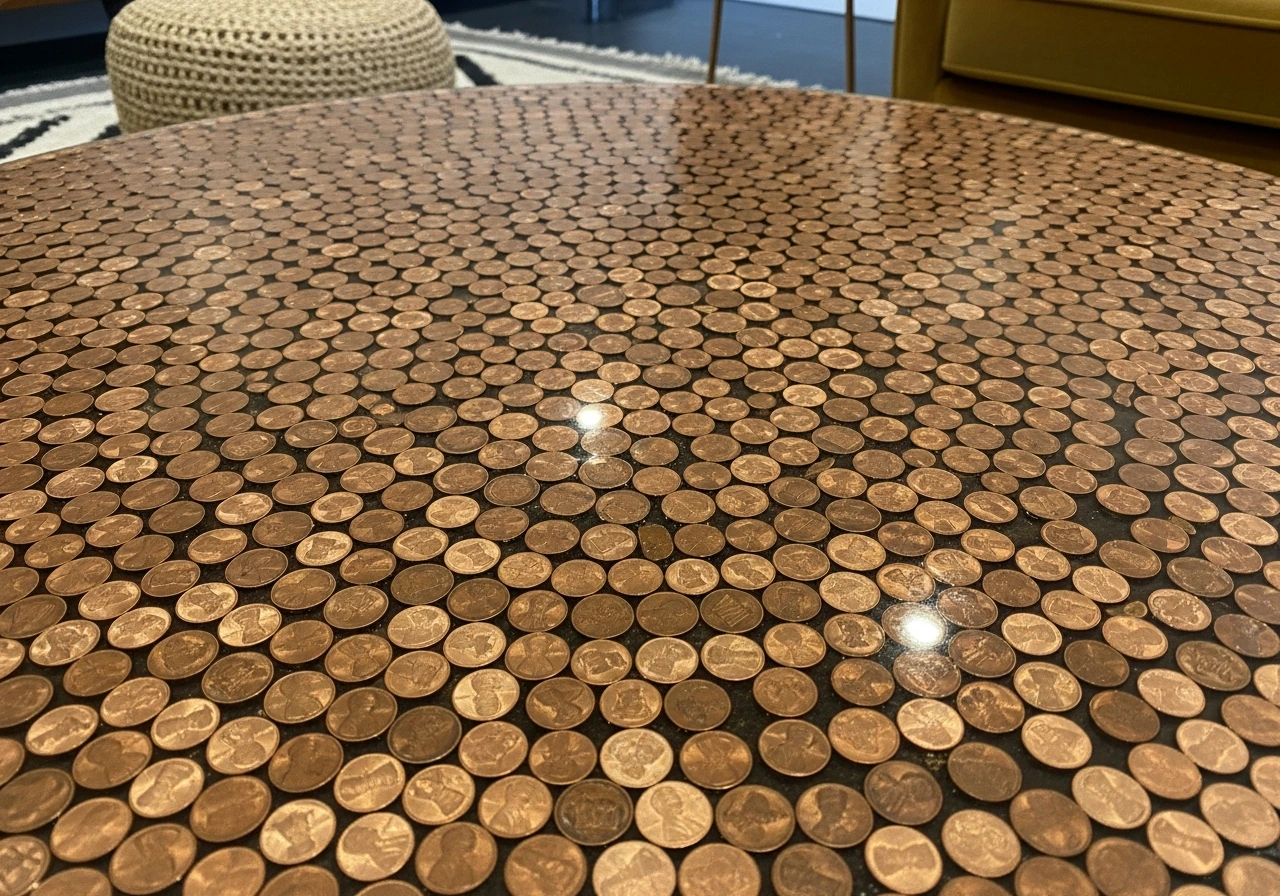
A penny table top is a true conversation piece that’s surprisingly affordable to create despite its luxurious copper appearance. This project requires patience and several thousand pennies, but the result is undeniably unique.
Clean your pennies thoroughly using a vinegar and salt solution if you want a uniform, shiny appearance, or use them as-is for varied patinas. Apply construction adhesive or clear epoxy to sections of your table top, then press pennies into the adhesive in your preferred pattern. Most people find that random placement creates the most pleasing effect. After covering the entire surface and allowing adhesive to cure, pour clear epoxy resin over the entire surface in multiple layers, ensuring pennies are completely encapsulated and the surface is level.
Wallpaper Under Glass Technique
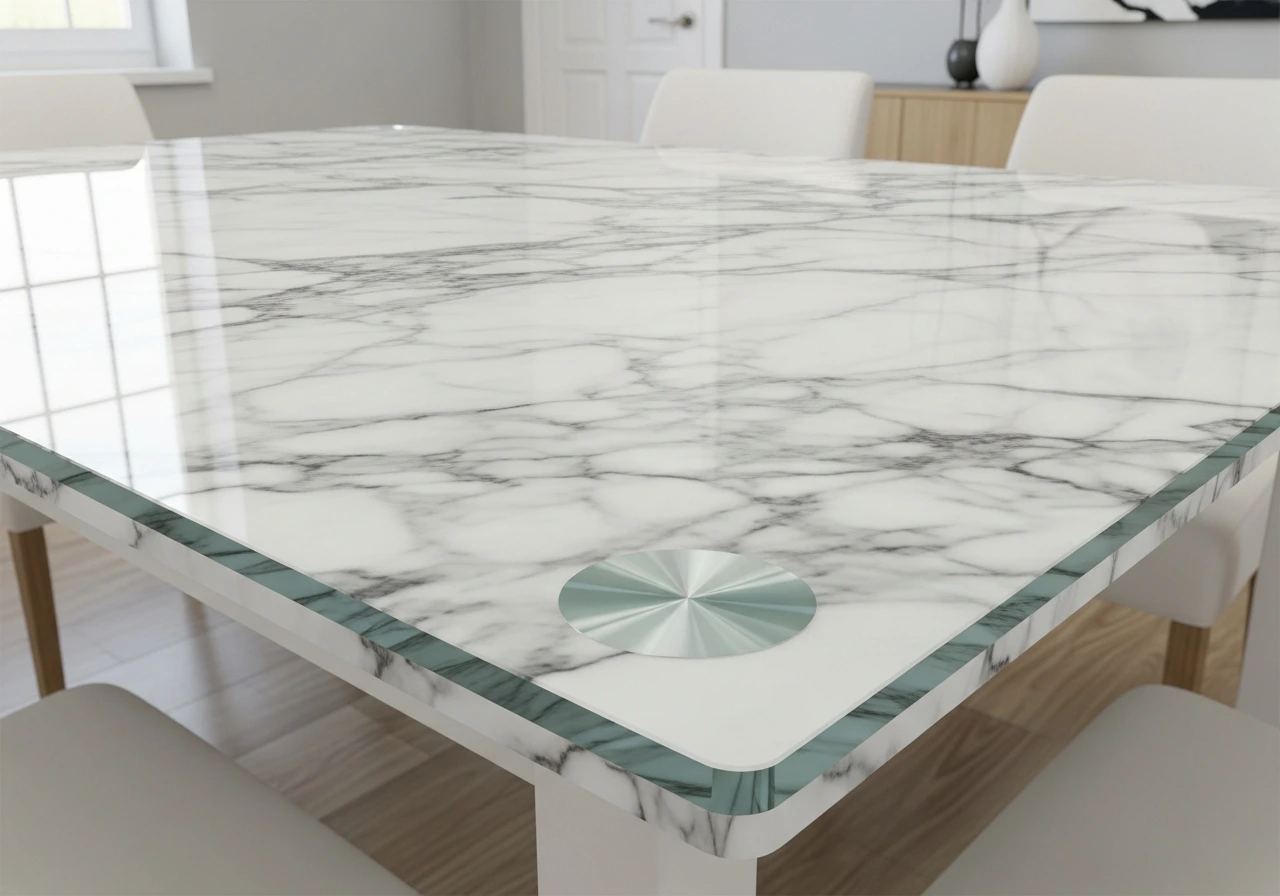
This approach offers the instant gratification of a complete table top transformation with minimal effort. Modern peel-and-stick wallpapers come in thousands of designs, from marble and wood lookalikes to bold geometric patterns and artistic prints.
Measure your table top and cut wallpaper slightly larger than needed. Apply the wallpaper to your clean, smooth surface, working out air bubbles with a smoothing tool as you go. Trim excess along the edges with a sharp blade. Have a piece of tempered glass cut to size with polished edges. Place the glass over the wallpaper, and you have an instantly updated, easily changeable table top that’s protected and simple to clean. This technique is perfect for renters or anyone who enjoys frequently updating their decor. May you read more
Stained Checkerboard Pattern
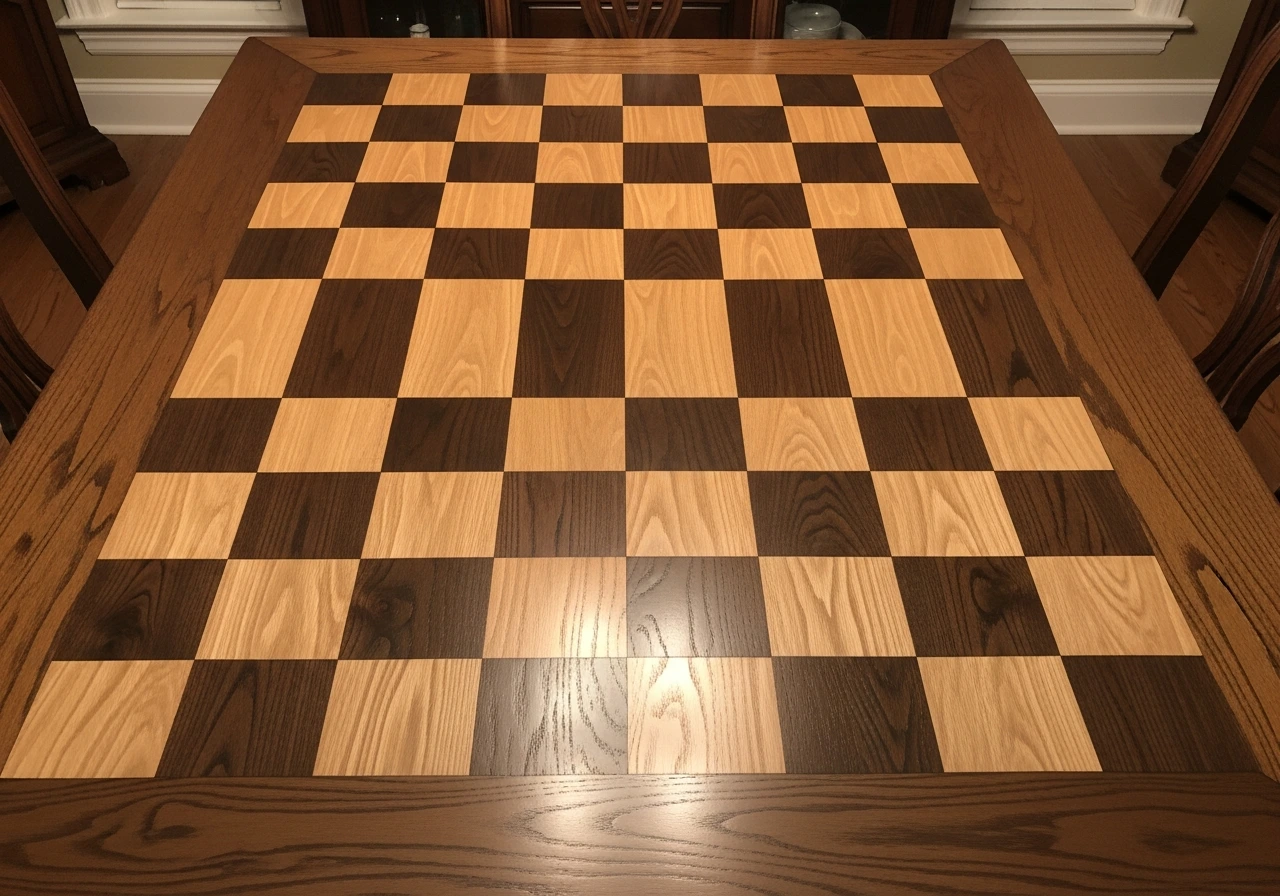
A checkerboard pattern delivers graphic impact that suits both traditional and contemporary spaces. This classic technique requires careful planning and precise tape application but yields professional-looking results.
Sand your wood table top and apply a base stain color to the entire surface. After drying completely, use a ruler and pencil to measure and mark your checkerboard grid with squares of equal size. Apply painter’s tape carefully around alternating squares, pressing edges firmly to prevent stain bleeding. Apply your second stain color to the exposed squares. The contrasting tones create your checkerboard effect. Remove tape while the stain is still slightly damp, then seal the entire surface with polyurethane once fully dried.
Painted Ombre Effect

The ombre technique creates a stunning gradient effect that flows from light to dark across your table top. This artistic approach works with any color palette and suits contemporary and transitional design styles beautifully.
Choose three to five paint colors in graduated tones of the same hue. Apply the lightest color to one end of your table. In sections, blend each subsequent color into the previous one while both are still wet, using long strokes in the direction of the gradient. Work quickly and blend thoroughly where colors meet to eliminate harsh lines. The key is maintaining wet edges and using enough paint to allow proper blending. Seal with several coats of polyurethane, sanding lightly between coats for a smooth, professional finish.
Conclusion
Transforming your table top doesn’t require professional carpentry skills or an unlimited budget. Whether you choose the rustic charm of reclaimed wood, the modern sophistication of an epoxy river, or the budget-friendly impact of a fresh paint technique, each of these DIY approaches offers the opportunity to create furniture that perfectly reflects your style and needs.
The best table top project for you depends on your existing table’s condition, your skill level, available time, and desired aesthetic. Wood refinishing and painting projects suit beginners and provide impressive results with basic tools. Resin pours and tile installations demand more experience but deliver truly unique, durable surfaces worth the learning curve.
Beyond the practical benefits of saving money and extending your furniture’s life, these DIY projects offer something more valuable: the satisfaction of creating something beautiful with your own hands. Your renovated table will carry stories of the process, represent your personal taste, and likely inspire compliments from guests who can’t believe you made it yourself.
Start with proper surface preparation regardless of which technique you choose, invest in quality materials for longer-lasting results, and don’t rush the process. With patience and attention to detail, you’ll create a table top that serves your household beautifully for years to come while showcasing your creativity and craftsmanship. May you get more ideas here
Frequently Asked Questions
What is the easiest DIY table top project for beginners?
Painting your table top with chalk paint is the most beginner-friendly option. Chalk paint requires minimal surface preparation, adheres well to most materials, and provides excellent coverage. A simple painted finish with a protective topcoat can be completed in a weekend with basic supplies and delivers dramatic results even without previous experience.
How much does it typically cost to DIY a table top renovation?
Costs vary widely depending on your chosen technique and table size. Simple paint projects run between 30 to 75 dollars for supplies. Mid-range options like tile or reclaimed wood cost 100 to 250 dollars. More advanced techniques like epoxy resin can reach 200 to 400 dollars. All options remain significantly cheaper than purchasing new furniture.
Do I need to remove the old finish before refinishing a wood table top?
For staining projects, yes, you must remove existing finishes completely so the new stain can penetrate the wood. For painting, you can often skip full stripping by thoroughly sanding to roughen the surface and improve paint adhesion. However, removing old finish always produces the most professional, long-lasting results regardless of your refinishing method.
How long should I wait before using my table after applying a new finish?
Curing times vary by product. Water-based polyurethane typically cures enough for light use within 24 hours but needs several days for full hardness. Oil-based finishes require 48 to 72 hours minimum. Epoxy resin needs at least 72 hours before use. Chalk paint can be used after 24 hours. Always follow manufacturer recommendations for specific products to prevent damage to your new finish.
Can I apply these techniques to laminate or veneer table tops?
Many techniques work beautifully on laminate surfaces. Painting, decoupage, fabric under glass, and vinyl plank application all work well on laminate. However, staining requires real wood. For damaged veneer, consider covering techniques like tile, pennies, or complete resin pours that hide the existing surface. Always sand laminate lightly and use appropriate primers to ensure proper adhesion.