13+ Creative DIY Hot Tub Table Ideas
Soaking in a hot tub offers the perfect escape from daily stress, but the experience becomes even better when you have a convenient place to set your drink, book, or phone. A well-designed hot tub table transforms your spa area into a functional oasis where everything you need remains within arm’s reach. Building your own hot tub table not only saves money but also allows you to customize the design to match your specific needs and outdoor aesthetic.
Whether you prefer a simple floating tray or an elaborate side table with multiple storage compartments, creating a DIY hot tub table is an achievable weekend project. The beauty of building your own lies in the flexibility to choose materials, dimensions, and features that work perfectly for your setup. From rustic cedar constructions to modern minimalist designs, the possibilities are limited only by your imagination and skill level.
This comprehensive guide explores over thirteen creative DIY hot tub table ideas that range from beginner-friendly projects to more advanced builds. Each concept offers unique advantages, whether you’re looking for portability, permanent installation, or specialized features like built-in coolers or towel racks. Let’s dive into these innovative designs that will elevate your hot tub table experience.
Simple Floating Hot Tub Tray

The floating tub tray represents the easiest entry point for anyone new to woodworking projects. This lightweight design sits directly on the water surface, held in place by the tub walls or arms that extend across the width. Typically constructed from pine or cedar boards, this table requires minimal tools and can be completed in just a few hours.
The basic construction involves cutting boards to the appropriate length to span your tub width, then attaching them to two support pieces underneath. Adding waterproof foam strips to the underside creates flotation while protecting your tub’s acrylic surface from scratches. Drill several holes in strategic locations for cup holders, and finish with multiple coats of marine-grade sealant to protect against constant water exposure.
This design works exceptionally well for inflatable hot tubs or situations where permanent installation isn’t practical. The portability means you can remove it entirely when not needed, making maintenance and cleaning straightforward. Consider adding small raised edges on the sides to prevent items from sliding off when the water moves.
Corner-Mounted Cedar Table
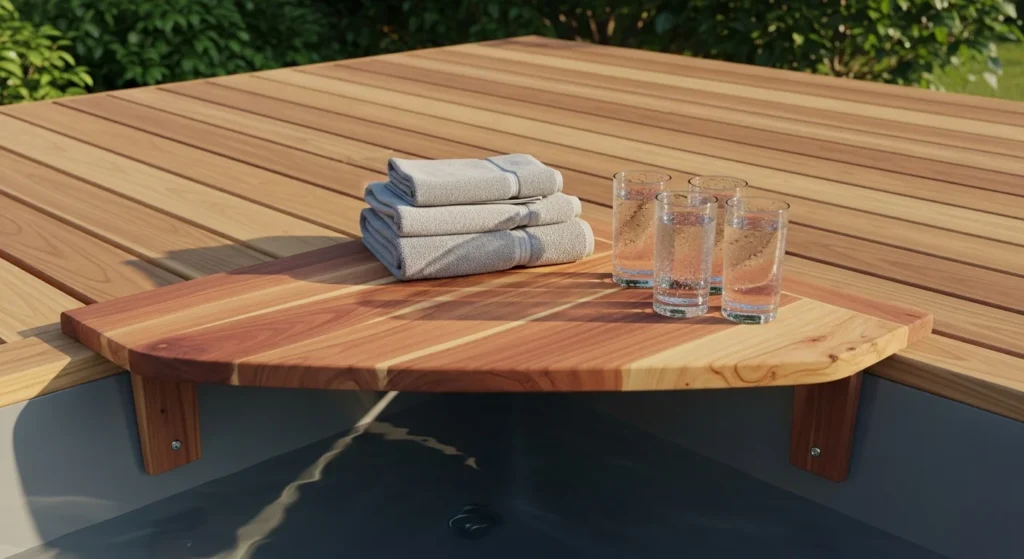
Corner spaces around hot tubs often go unused, making them ideal locations for a permanently mounted table. A corner-mounted design utilizes two walls of your tub for support, creating a stable platform that doesn’t interfere with entry and exit. Cedar remains the preferred wood choice for this project due to its natural resistance to moisture and insects.
Begin by measuring the exact corner dimensions of your hot tub, accounting for any lip or overhang. Cut cedar boards to create a triangular or quarter-circle tabletop, then construct a support frame from two-by-four lumber. Attach the frame securely to your hot tub table ,cabinet or deck using corrosion-resistant screws, ensuring the table sits at a comfortable height relative to the water level.
This permanent installation offers excellent stability for holding heavier items like food platters or tablets. Add a lower shelf between the support legs for storing towels or extra supplies. The corner location keeps the table out of the main traffic flow while remaining easily accessible from multiple seating positions.
Adjustable Height Side Table
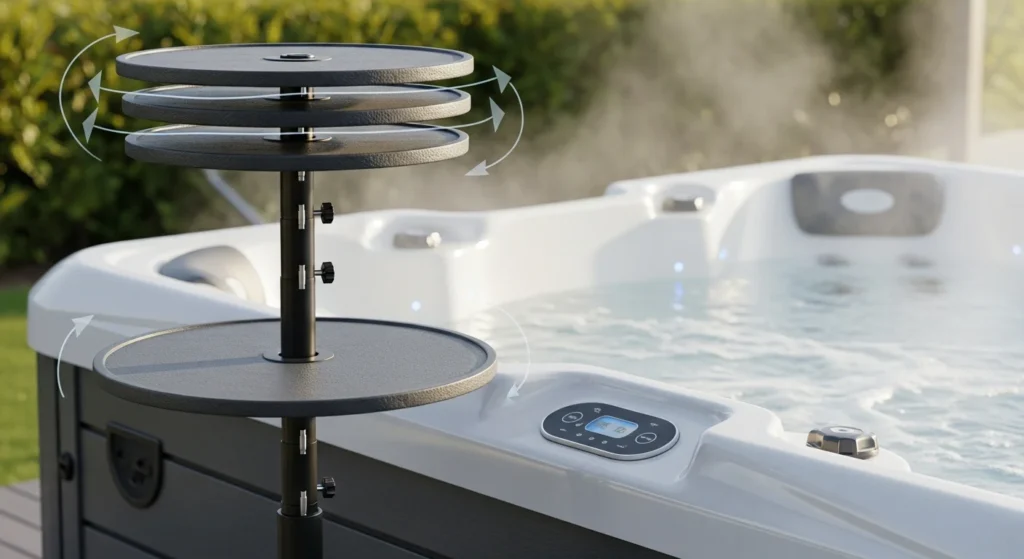
An adjustable height design provides versatility that fixed tables cannot match. This project incorporates a telescoping pole mechanism similar to patio umbrellas, allowing you to raise or lower the tabletop as needed. The adjustment feature proves particularly useful for accommodating different water levels or user preferences.
Construct the tabletop from a small round or square piece of marine plywood, reinforced underneath with cross braces. The central pole can be fashioned from PVC pipe or metal tubing with pre-drilled holes at regular intervals. A simple pin-and-hole locking system secures the desired height. Mount the base to your deck or create a weighted stand that sits beside the tub.
This freestanding design offers complete portability while maintaining stability during use. The height adjustment means the same table works equally well for sitting on the tub edge or reaching from within the water. Apply a weather-resistant finish to all wooden components and use stainless steel hardware to prevent rust.
Fold-Down Deck Table
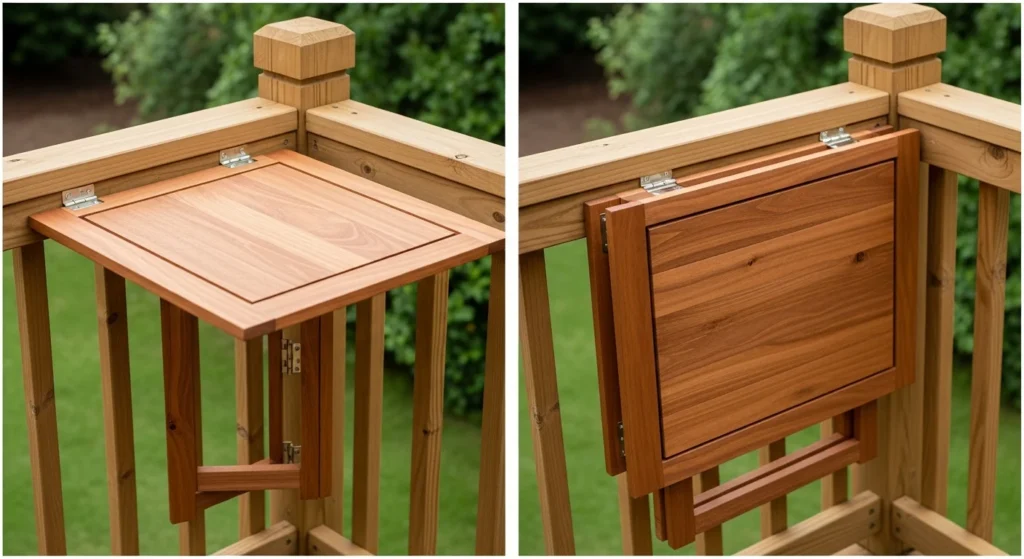
For hot tubs installed on decks or patios, a fold-down table attached to the railing maximizes space efficiency. This clever design mounts with heavy-duty hinges, allowing the table to flip up against the railing when not in use. When needed, it folds down to create a stable work surface that doesn’t consume permanent deck space.
The construction requires a sturdy board for the tabletop, typically measuring eighteen to twenty-four inches wide and thirty to thirty-six inches long. Attach the board to the deck railing using marine-grade hinges rated for outdoor use. Install a folding leg support that locks the table in the horizontal position, preventing collapse during use. When folded up, a simple hook and eye closure keeps it secure against the railing.
This space-saving solution works brilliantly for smaller decks where permanent tables would create obstacles. The fold-down mechanism means you can have a generously sized surface when needed without sacrificing deck space for daily activities. Finish the wood to match your deck for a cohesive appearance.
Pallet Wood Spa Table
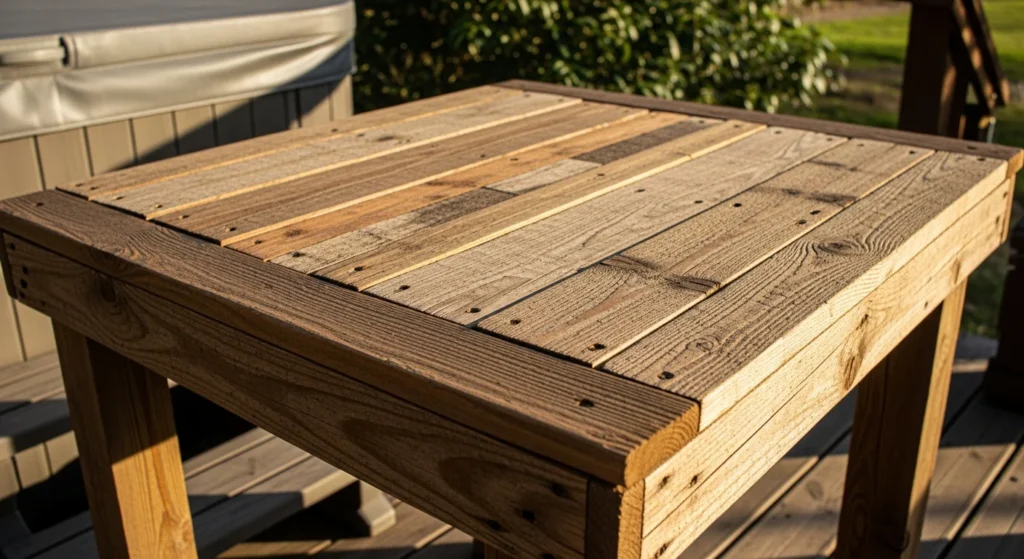
Repurposing wooden pallets offers an economical approach to building a hot tub table while embracing rustic charm. Pallets provide pre-assembled boards that can be disassembled and reconfigured into various table designs. This sustainable option reduces costs significantly while creating a unique, weathered aesthetic.
Start by carefully dismantling a heat-treated pallet, removing all nails and separating the boards. Sand each piece thoroughly to eliminate splinters and rough edges. Arrange the boards into your desired tabletop configuration, whether a simple rectangular design or a more complex pattern. Secure the boards to a frame constructed from the pallet’s heavier support pieces.
The rustic appearance of pallet wood complements outdoor environments beautifully, especially when paired with natural stone or wood hot tub table surrounds. Apply a clear sealant to preserve the weathered look while protecting against moisture damage. Add metal corner brackets for extra stability, and consider leaving some gaps between boards for drainage if designing a permanent outdoor piece.
Multi-Level Storage Table
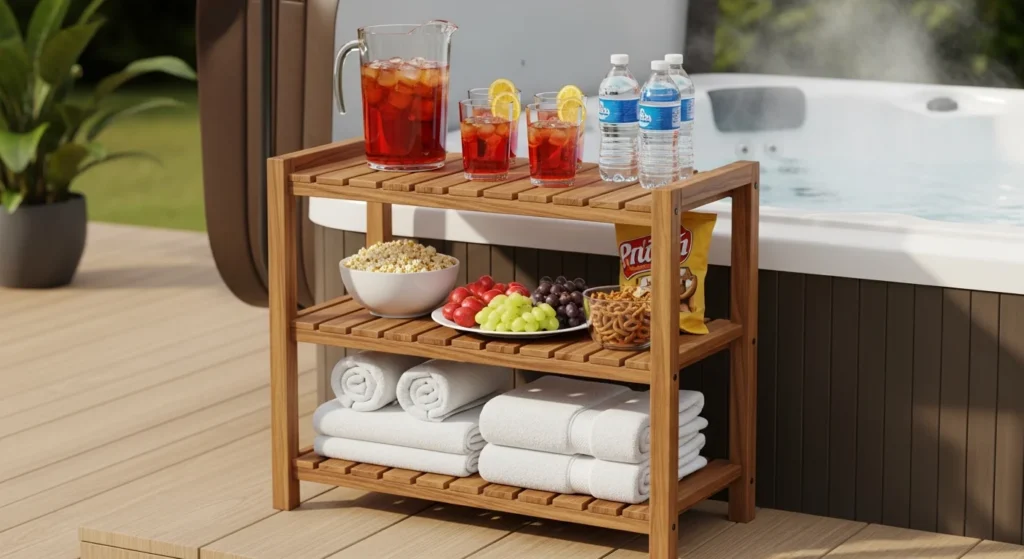
A multi-tiered table design transforms basic surface space into an organizational powerhouse. This more complex build incorporates two or three levels, providing dedicated areas for drinks, snacks, towels, and accessories. The vertical design maximizes storage without requiring excessive footprint space.
Construct the frame using pressure-treated lumber or PVC pipe, creating rectangular openings at different heights. Cut shelving boards to fit each level, securing them with brackets or notched supports. The top level should sit at a comfortable reach from the tub, while lower shelves can hold less frequently accessed items. Consider making one level with raised edges to contain water bottles or glasses securely.
This functional design proves especially valuable for hot tubs located away from the house, where multiple trips for forgotten items become inconvenient. Add waterproof baskets to lower shelves for organizing smaller accessories. The multi-level approach also creates visual interest, transforming a utilitarian table into an attractive outdoor feature.
Floating Caddy with Integrated Cooler

Combining a floating table with a built-in cooler creates the ultimate luxury spa accessory. This advanced project requires more materials and planning but delivers exceptional functionality. The integrated cooler keeps beverages cold for hours while the surrounding surface provides space for glasses and snacks.
Build a rectangular floating frame using cedar one-by-six boards, creating a well in the center sized to hold a small foam cooler. Attach buoyant foam panels underneath the frame for flotation, calculating the amount needed to support the frame, cooler, and contents. The cooler should fit snugly in the opening, sitting slightly recessed below the table surface. Drill drainage holes in the frame to prevent water accumulation.
This luxurious addition elevates any hot tub gathering into a proper party. The cooler section keeps ice frozen longer than open containers, and having cold drinks literally floating beside you eliminates the need to exit the tub. Add cup holder cutouts around the perimeter and a small section for snacks or phone placement.
Bamboo Roll-Up Table

A bamboo roll-up table offers an innovative solution for those seeking maximum portability and storage convenience. This flexible design rolls into a compact cylinder when not in use, making it ideal for small spaces or seasonal hot tub owners. Bamboo’s natural water resistance and sustainability make it an excellent material choice.
Purchase bamboo fencing or create slats from bamboo poles, cutting them to uniform lengths. Drill holes through each end of every slat, then thread marine-grade cord through the holes, spacing the slats about a quarter inch apart. Tie secure knots at the ends to prevent unraveling. When spread flat across your hot tub, the slats create a stable surface. When finished, simply roll it up and store it away.
This lightweight option works particularly well for portable or inflatable hot tubs that are set up seasonally. The gaps between slats allow water to drain quickly, preventing mildew growth during storage. The bamboo’s natural golden color adds a tropical aesthetic to your spa area.
Towel Bar Table Combination
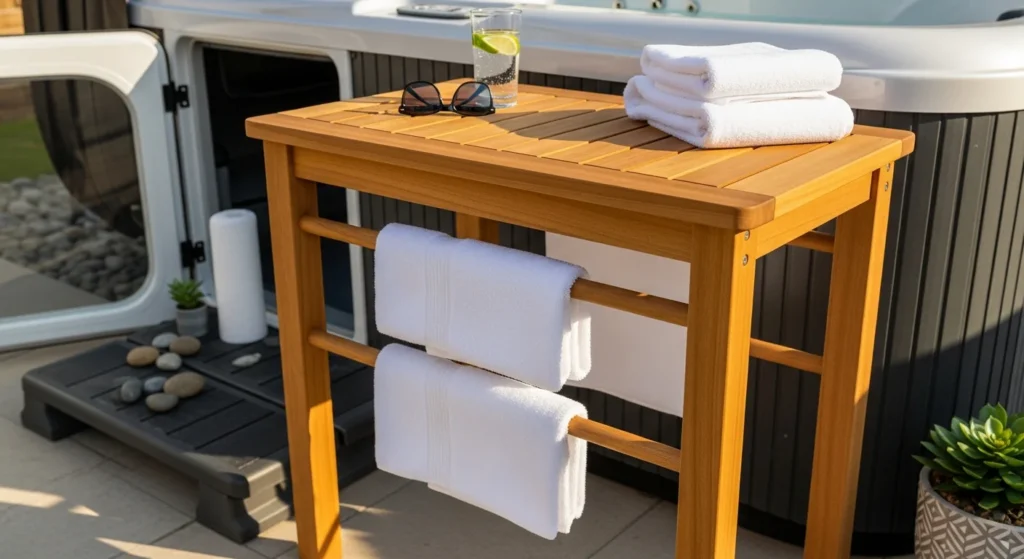
Combining a side table with an integrated towel bar solves two common hot tub challenges with one build. This practical design provides surface space while keeping fresh towels dry and accessible. The dual functionality makes this project especially valuable for hot tubs without nearby storage.
Construct a basic side table frame from pressure-treated two-by-fours, then add a tabletop surface from cedar or composite decking material. Below the tabletop, install one or two horizontal bars positioned to hold draped towels. Use wooden dowels, PVC pipe, or metal rods for the towel bars, securing them with pipe flanges or drilled holes through the table legs.
Position this table near your hot tub entrance where users can easily grab fresh towels when exiting. The elevated storage keeps towels away from wet surfaces while maintaining accessibility. Add hooks to the table legs for hanging robes or swim gear, further enhancing functionality.
Umbrella Stand Table
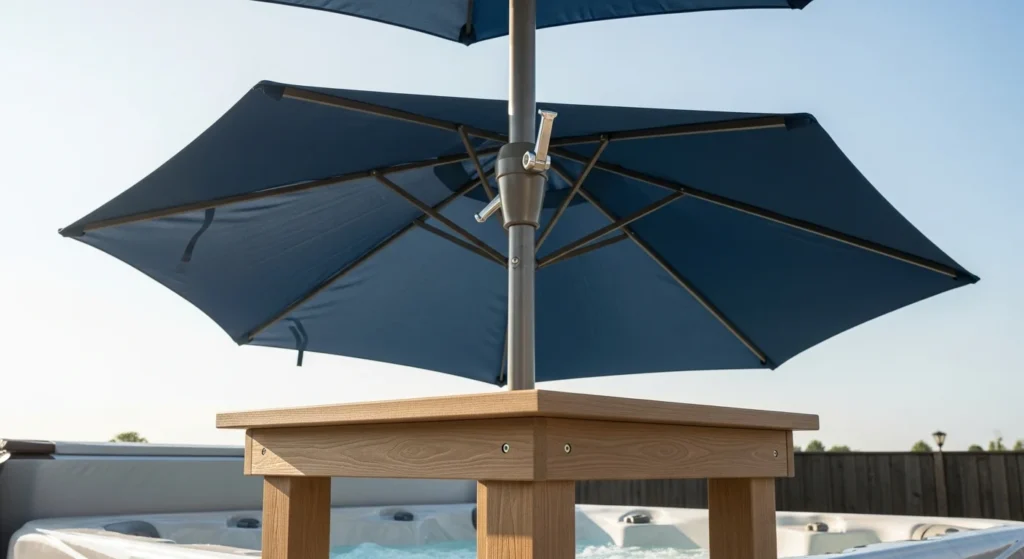
For hot tubs exposed to intense sun, a table that incorporates an umbrella stand provides much-needed shade. This design combines sun protection with surface space, creating a more comfortable daytime soaking experience. The umbrella also offers some privacy from neighbors or overhead views.
Build a sturdy table using the corner-mount or side-table design as your base, but incorporate a vertical pipe sleeve through the center or edge of the tabletop. This sleeve should accommodate a standard patio umbrella pole, extending from the ground or table base through the tabletop. Secure the umbrella pole with a tightening collar or set screw mechanism.
The umbrella provides adjustable shade throughout the day, protecting users from harmful UV rays during extended soaks. This design works best for ground-level hot tub installations where the base can be secured to concrete or deck foundations. Choose an umbrella in a color that complements your outdoor decor while providing adequate shade coverage.
Slide-Out Table System

A slide-out table mounted beneath your hot tub’s lip or cabinet creates a hidden surface that appears when needed. This space-saving design keeps the table completely out of sight during non-use, maintaining clean lines around your spa. The sliding mechanism operates similar to kitchen cabinet drawers.
Install heavy-duty drawer slides rated for outdoor use along the underside of your hot tub cabinet or mounting surface. Construct a tabletop that matches the depth of the slides, typically twelve to eighteen inches. Attach the table to the sliding mechanism, ensuring smooth operation through the full range of motion. Add a stop mechanism to prevent the table from sliding out too far and potentially tipping.
This concealed design particularly suits modern or minimalist outdoor spaces where visible accessories might clash with the aesthetic. The slide-out mechanism protects the table from weather when retracted, potentially extending its lifespan. Consider adding a soft-close feature to prevent slamming and reduce wear on the mechanism.
Lighted Edge Table
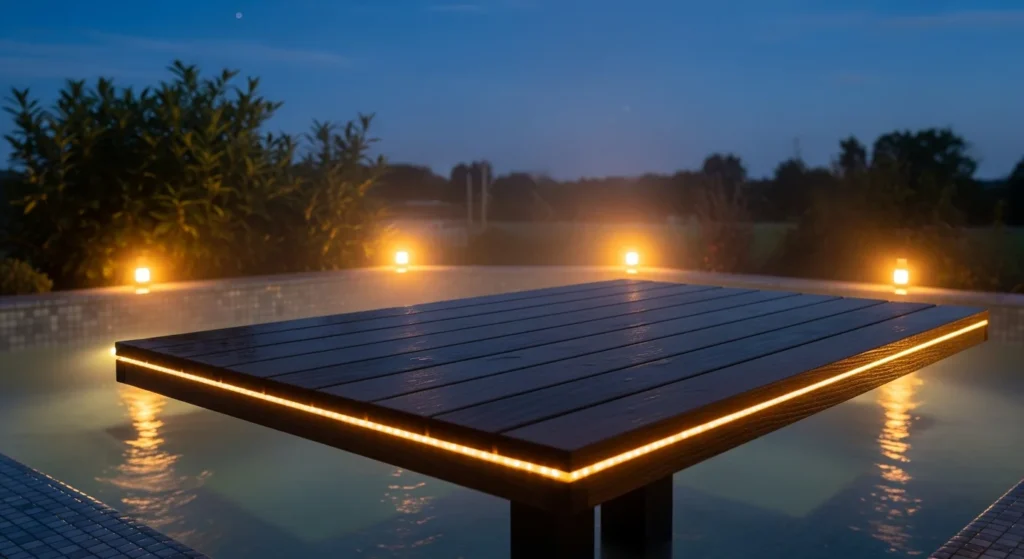
Adding integrated lighting to your hot tub table creates ambiance while improving safety and functionality during evening use. This enhanced project incorporates LED strip lights along the table edges or underside, providing gentle illumination for nighttime soaking sessions. The lighting transforms the table into a striking design element.
Build any basic table design, then route a shallow channel along the edges or underside for LED strip installation. Use marine-grade LED strips designed for outdoor use, securing them with adhesive backing or small clips. Run the wiring to a waterproof power supply, either battery-powered for portability or hard-wired to your deck’s electrical system. Consider adding a dimmer switch for adjustable brightness levels.
The soft glow from LED lighting creates a resort-like atmosphere while allowing you to safely locate drinks or snacks without harsh overhead lights. Choose warm white LEDs for a relaxing ambiance or color-changing strips for entertainment value. The lighting also serves a practical safety function, illuminating the area around your hot tub to prevent trips and falls.
Rotating Lazy Susan Table
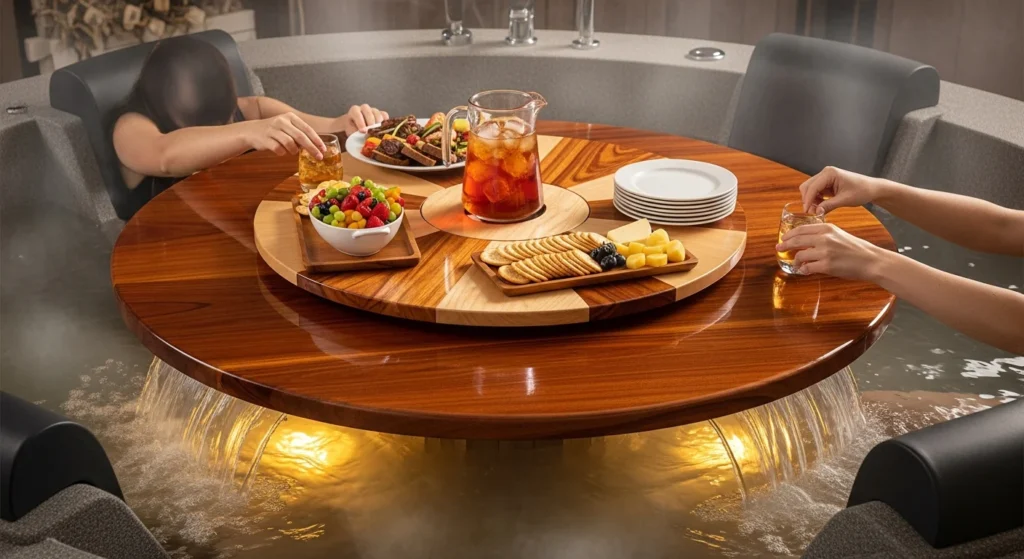
A rotating tabletop brings restaurant-style convenience to your hot tub experience. This clever design features a central pivot point that allows the entire surface to spin, making it easy to share items among multiple users. The rotation mechanism proves especially useful for larger hot tubs where reaching across creates difficulty.
Construct a circular tabletop from marine plywood or tongue-and-groove cedar boards arranged in a round pattern. Install a heavy-duty lazy Susan bearing mechanism at the center, rated to handle the weight of your loaded table. Mount the bearing between the tabletop and a fixed base that either floats or attaches to your tub’s edge. Apply a smooth finish to the underside to ensure frictionless rotation.
This interactive design adds an element of fun to hot tub gatherings while solving the practical problem of item distribution. The rotation eliminates the need for multiple tables around the tub, concentrating everything in one central location. Use marine-grade bearings with sealed components to prevent water damage and ensure smooth operation over time.
Building Materials and Weatherproofing Essentials
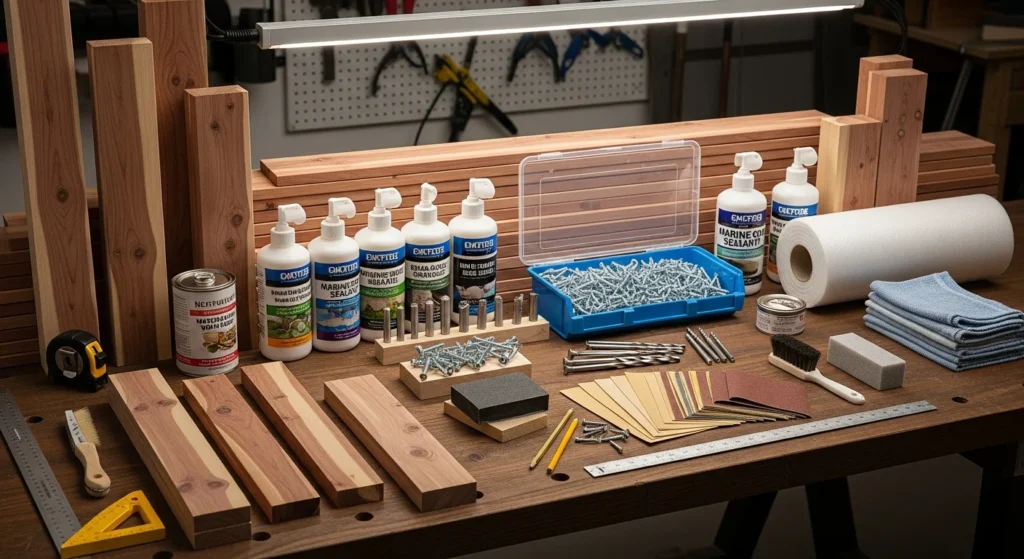
Regardless of which design you choose, selecting appropriate materials and applying proper weatherproofing determines your table’s longevity. Cedar and redwood naturally resist moisture and decay, making them premier choices for hot tub applications. Pressure-treated lumber offers economical durability but requires thorough drying before finishing to ensure sealant adhesion.
Marine-grade sealants and exterior polyurethane provide essential protection against constant moisture exposure and temperature fluctuations. Apply multiple thin coats rather than one thick layer, sanding lightly between applications for optimal adhesion. Pay special attention to end grain, which absorbs moisture most readily. Reapply sealant annually or whenever you notice water absorption.
Hardware selection matters equally, as standard screws and fasteners quickly corrode in wet environments. Use stainless steel or coated screws throughout your build, and choose marine-grade hinges for any moving parts. Plastic or composite materials offer maintenance-free alternatives to wood, though they may lack the natural aesthetic appeal many prefer.
Creating a DIY hot tub table tailored to your specific needs enhances every soaking session while showcasing your craftsmanship. Whether you tackle a simple weekend project or invest time in an elaborate multi-feature design, the result provides years of convenience and enjoyment. The satisfaction of using something you built yourself adds another layer of pleasure to your outdoor relaxation space.
Frequently Asked Questions
What is the best wood for a DIY hot tub table?
Cedar and redwood are excellent choices due to their natural resistance to moisture, decay, and insects. These woods also have natural oils that help repel water. For budget-conscious projects, pressure-treated lumber works well when properly sealed with marine-grade finishes. Avoid untreated pine or softwoods that will quickly deteriorate from constant moisture exposure.
How do I prevent my hot tub table from getting moldy?
Apply multiple coats of marine-grade sealant or exterior polyurethane to all wood surfaces, paying special attention to end grain and joints where moisture penetrates. Ensure proper drainage by drilling small holes where water might collect. Allow the table to dry completely between uses when possible, and store removable tables in a dry location during extended periods of non-use.
Can I build a hot tub table without advanced woodworking skills?
Absolutely. The floating tray and basic corner-mounted designs require only fundamental skills like measuring, cutting straight lines, and driving screws. These beginner-friendly projects need minimal tools including a saw, drill, and screwdriver. Start with simpler designs to build confidence before attempting more complex builds with multiple levels or integrated features.
How much weight can a floating hot tub table safely hold?
The weight capacity depends on the amount of buoyant material incorporated into the design. A typical floating table with adequate foam supports can safely hold fifteen to twenty pounds, sufficient for several drinks, snacks, and small accessories. Calculate the buoyancy needed by testing your foam’s capacity before assembly, and avoid overloading the table which could cause it to sink or become unstable.
Do I need to remove my hot tub table when not in use?
Removable tables should be stored indoors or in a covered area to maximize their lifespan, especially during winter months or extended periods without use. Permanently mounted tables designed specifically for outdoor exposure can remain in place year-round, though covering them during harsh weather extends their life. Inspect all tables regularly for signs of wear, water damage, or loose hardware regardless of installation type.