14+ Creative Homemade Above Ground Pool Cover Ideas
Protecting your above ground pool from debris, conserving heat, and reducing maintenance costs does not always require expensive commercial solutions. With some creativity and basic materials, you can construct effective homemade pool covers that serve multiple purposes while saving money. Whether you need a simple debris barrier or a heat-retaining solar cover, these practical solutions will help you maintain your pool throughout the season and during winter months.
Understanding the benefits of covering your pool makes the effort worthwhile. A proper cover reduces the amount of leaves, insects, and other debris entering the water, which means less vacuuming and reduced strain on your filtration system. Many homemade covers also help retain heat, extending your swimming season and lowering heating costs. While safety should always be a consideration, most homemade solutions focus on debris protection and heat retention rather than supporting weight. The following ideas range from simple to moderately complex, allowing you to choose based on your skill level and available materials.
Heavy Duty Tarp Cover with Bungee Cord System
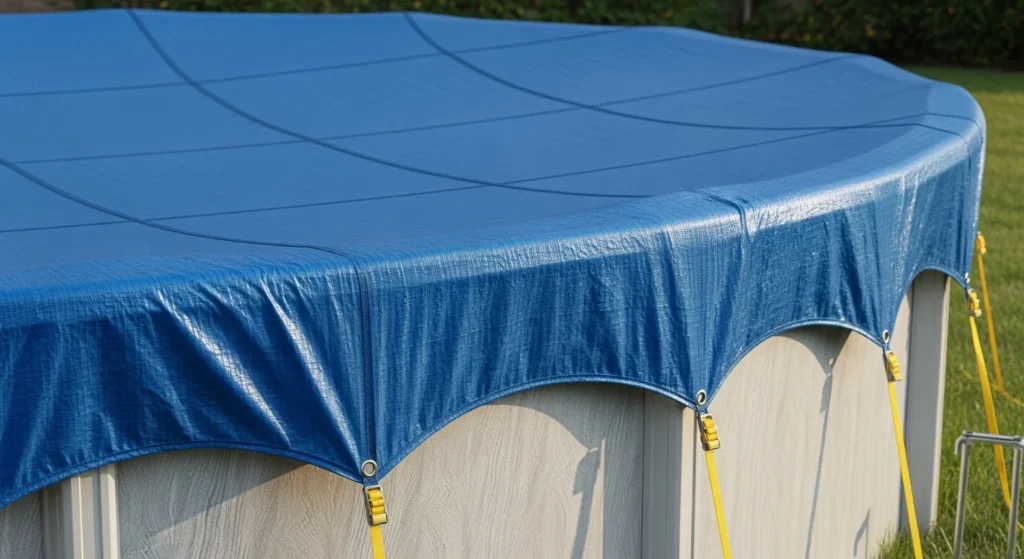
One of the most straightforward and budget-friendly options involves using a heavy duty polyethylene tarp as your pool cover. Hardware stores carry tarps in various sizes made from the same polyethylene material found in commercial pool covers. The key to success lies in proper securing methods since tarps come in rectangular shapes rather than the circular or oval configurations of most above ground pools.
Select a tarp large enough to extend beyond your pool edges by at least two feet on all sides. This overhang provides ample material for securing the cover and prevents wind from catching underneath. Use reinforced metal grommets around the tarp edges to attach bungee cords, which you can then anchor to tent stakes driven into the ground around the pool perimeter. Space your anchor points approximately every three to four feet for optimal tension.
The bungee cord method offers flexibility that accommodates weather changes and allows the tarp to move slightly without tearing. However, water accumulation presents a challenge with flat tarp covers. Consider placing a beach ball or inflatable ring in the center of the pool before covering to create a slight peak that encourages water drainage. Alternatively, build a simple support frame underneath using pool noodles arranged in a cross pattern.
Plywood Panel Cover System
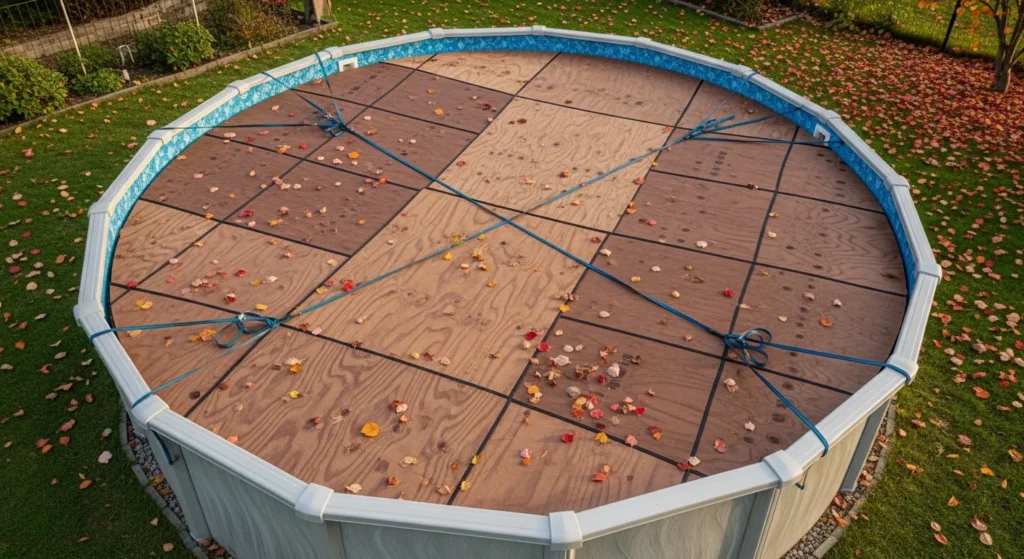
For smaller above ground pools with rigid steel walls, plywood sheets provide an excellent covering solution. This method works particularly well for pools measuring 12 feet or less in diameter. Most lumber centers stock plywood in standard eight-foot lengths, though some carry 12-foot sheets that can span smaller pools in fewer pieces.
Choose exterior grade plywood with a thickness of at least half an inch to prevent warping and ensure durability. Cut the plywood to size, allowing the edges to rest securely on the pool rim. For pools requiring multiple panels, position them carefully to distribute weight evenly across the pool structure. Drill holes at strategic corners and use bungee cords with tent stakes to secure the plywood panels against wind displacement.
This solution offers superior debris protection and creates a solid barrier that prevents accidental entry. The plywood can also help retain some heat, though not as effectively as specialized solar covers. Paint or seal the wood to extend its lifespan and prevent moisture damage. During the swimming season, store the panels in a dry location to maintain their condition. You may also like Stock Tank Pool Cover Ideas
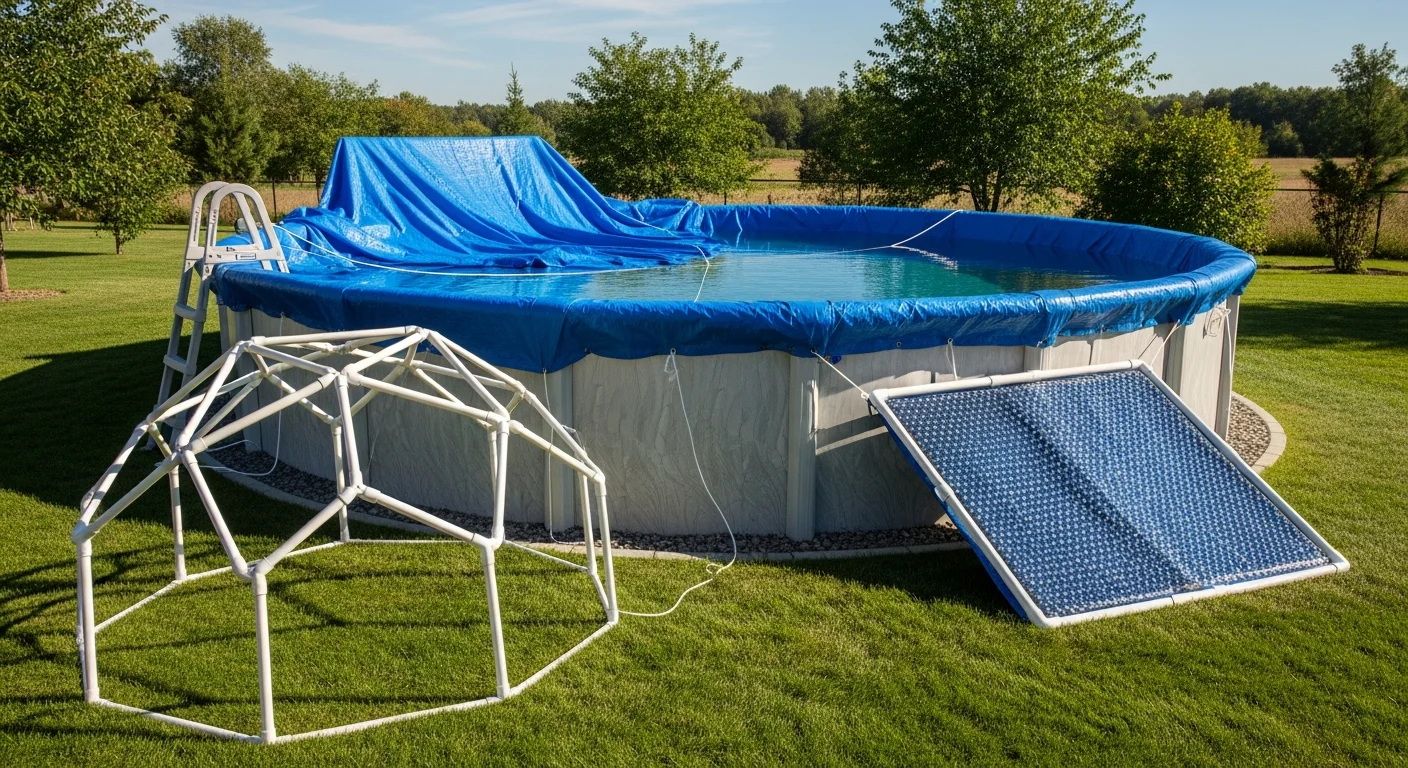
PVC Pipe Frame with Tarp
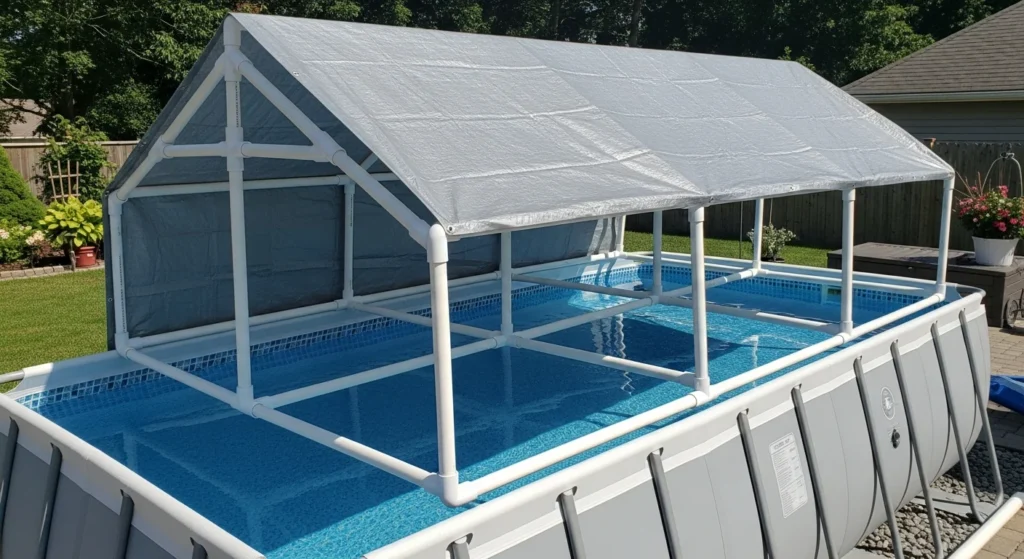
Building a PVC pipe frame provides excellent support for your tarp cover and prevents the sagging and water pooling that plague unsupported covers. This method combines the affordability of tarps with a sturdy framework that elevates the cover slightly above the water surface, allowing rain and debris to slide off naturally.
Construct your frame using one-inch schedule 40 PVC pipe, which offers the ideal balance between strength and weight. Measure your pool width and add six inches to each measurement so the frame rests on the ground surrounding the pool. Cut straight sections for the length and width, using PVC elbows for corners and tees for mid-span connections. Dry fit all pieces first to verify measurements before applying PVC primer and cement.
Lay your tarp over the assembled frame and secure it by threading waterproof string through the tarp grommets and tying it around the PVC pipes. The elevated design prevents water accumulation and makes the cover easier to remove. This system works particularly well for rectangular pools but can be adapted for round pools with some creative pipe bending or additional support points.
Solar Bubble Wrap Cover
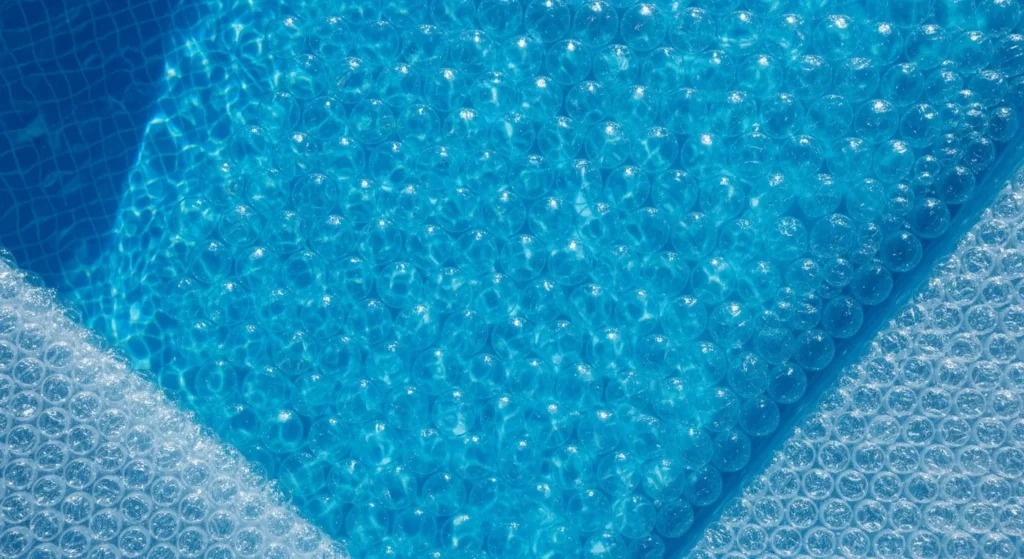
Creating a solar pool cover from bubble wrap material offers an inexpensive way to heat your pool using solar energy. Large bubble wrap sheets, similar to commercial solar covers, trap heat beneath their bubble cells while allowing sunlight to penetrate and warm the water. This solution can raise pool temperatures by several degrees and significantly reduce heat loss overnight.
Purchase thick bubble wrap designed for shipping or packing, preferably with large bubbles for better insulation. Clear material works best for heat absorption, though blue-tinted bubble wrap provides some UV protection. Cut the bubble wrap to match your pool dimensions, allowing some overhang for easier handling. The bubble side should face down toward the water to create insulating air pockets.
Connect multiple sheets by overlapping edges and using waterproof tape if your pool requires more coverage than a single sheet provides. While bubble wrap lacks the durability of commercial solar covers, it costs a fraction of the price and typically lasts one to two seasons before requiring replacement. Pairing this with a PVC roller system makes deployment and removal much more manageable.
Homemade Pool Cover Reel
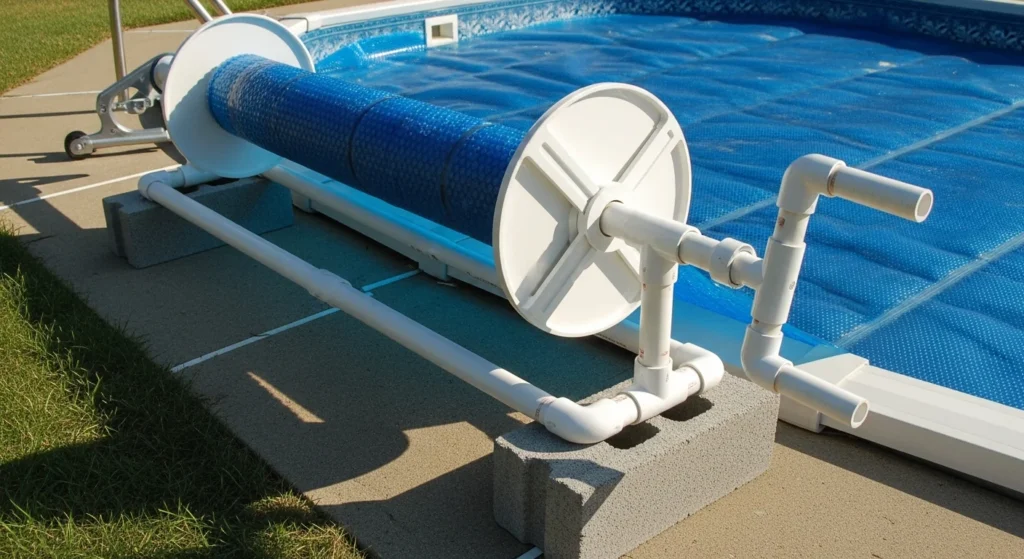
A pool cover reel transforms cover management from a frustrating multi-person task into a simple one-person operation. Building your own reel using PVC pipe costs significantly less than commercial models while providing the same functionality. This solution works with tarps, solar covers, or commercial covers that lack their own storage system.
Use schedule 40 PVC pipe with a one-inch diameter for the main roller, measuring it to match your pool width. Create a hand crank mechanism by attaching a 90-degree elbow on one end, followed by a short vertical section and another elbow to form the handle. Cap the opposite end to prevent water and pest intrusion. Some builders prefer incorporating ball bearings for smoother rotation, though this adds complexity and cost.
Attach your pool cover to the roller by cutting thin sections of PVC pipe lengthwise to create clips. Position the cover edge between these clips and the main roller pipe, securing with self-drilling screws. Place the assembled reel beside your pool and use cinder blocks or bricks as weights to prevent movement during use. Rolling the cover becomes a simple matter of turning the crank handle, dramatically reducing setup and takedown time.
Curtain Ring and Bungee Attachment Method
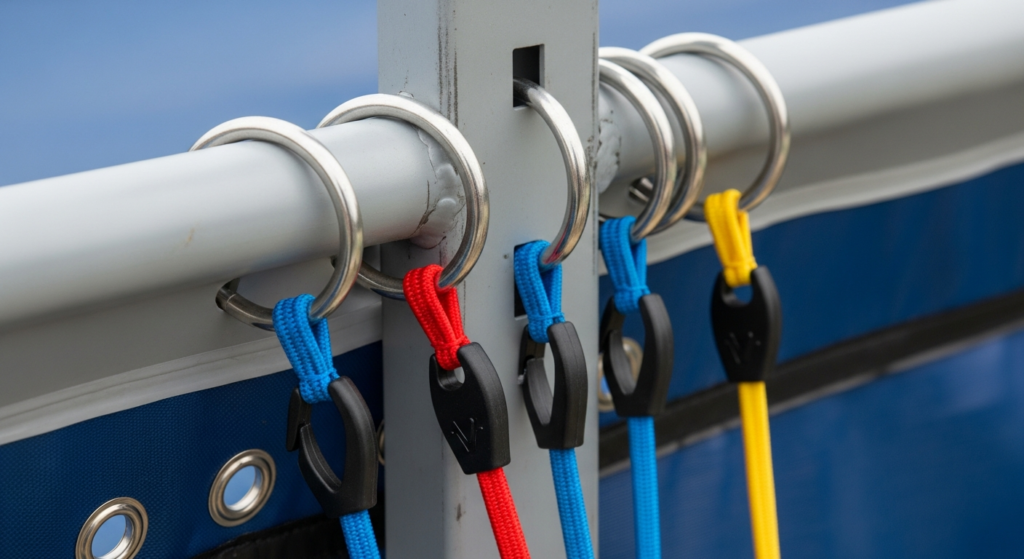
This clever hack solves the common problem of pool covers slipping into the water, particularly for frame pools with vertical support poles. By combining inexpensive curtain rings with bungee cords, you create a secure attachment system that keeps covers in place even during windy conditions.
Purchase large metal curtain rings from any home goods store, ensuring they are large enough to slide over your pool frame poles. Attach these rings at regular intervals around the pool perimeter, positioning them over the reinforced sections of your cover where the drawstring passes through. Connect bungee cords from the rings to the cover grommets or directly to the cover edge.
This method distributes tension evenly and prevents the concentrated stress points that can tear covers. The rings slide easily along the frame during cover adjustment while maintaining constant pressure. This solution works exceptionally well for temporary covers used during the swimming season but proves equally effective for winter covers requiring secure long-term placement.
Black Plastic Heat Absorbing Cover
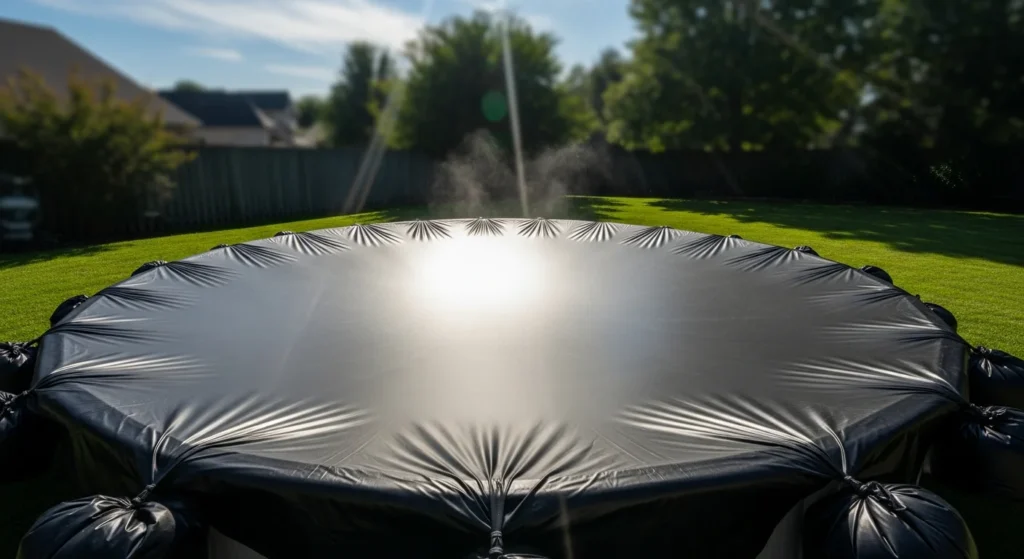
Black plastic materials excel at absorbing solar heat, making them effective for warming pool water naturally. While less durable than purpose-made covers, black plastic sheets or tarps can raise water temperature several degrees when deployed during sunny days.
Select thick black plastic sheeting from your local hardware store, avoiding thin materials that tear easily. Agricultural plastic or pond liner material offers superior durability compared to standard painter’s plastic. Cut the material to size, leaving adequate overlap for your pool dimensions. The black color absorbs infrared radiation, transferring heat directly to the water beneath.
Secure the plastic using the bungee and stake method or weight it down with water bags positioned around the perimeter. This solution works best when combined with other pool warming strategies like positioning your pool in a sunny location and using windbreaks to reduce heat loss. Replace black plastic covers more frequently than other options, as UV exposure causes degradation over time.
Mesh Tarp Combination Cover
Combining mesh tarps with solid tarps creates a versatile covering system that balances water drainage with debris protection. This layered approach allows you to customize coverage based on seasonal needs while maintaining some visibility into your pool.
Start with a mesh tarp as your base layer, which allows rainwater to pass through while catching larger debris like leaves and branches. The mesh prevents water accumulation that stresses pool walls and makes cover removal difficult. Layer a smaller solid tarp over high-traffic debris areas like overhanging trees or frequent wind patterns.
For those comfortable with sewing, stitch multiple mesh tarps together to create a custom-sized cover that precisely fits your pool dimensions. Heavy-duty thread designed for outdoor use ensures longevity. This dual-layer system provides excellent protection while remaining relatively lightweight and easy to handle during deployment and storage.
Winter Pool Cover with Water Bag Anchors
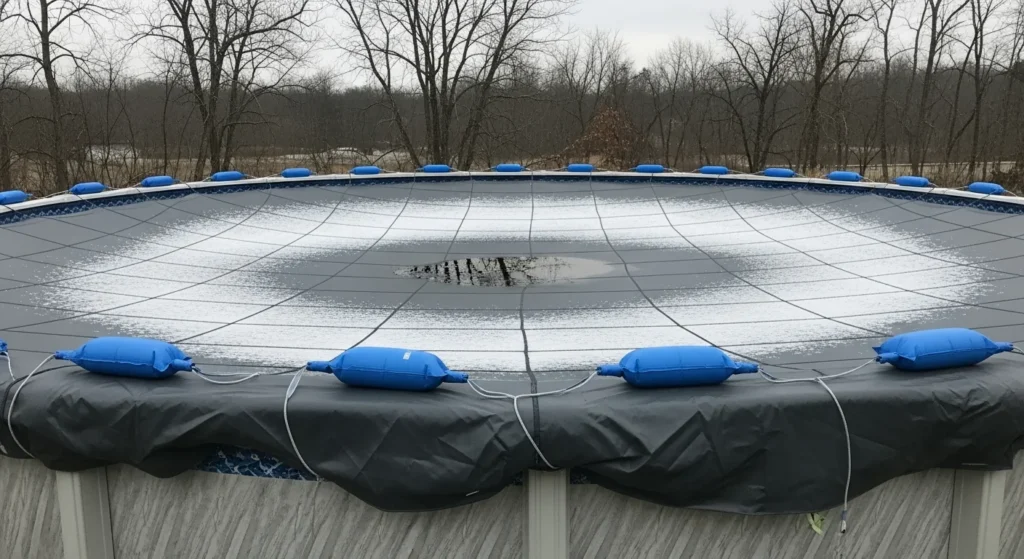
Winter pool closure demands more robust covering solutions that withstand months of exposure to harsh weather. A properly winterized above ground pool cover protects against debris accumulation while preventing ice damage to pool walls and equipment.
Heavy-duty winter covers made from reinforced vinyl or polyethylene provide the best protection, but proper anchoring matters more than cover quality. Water bags offer an effective anchoring method that does not require drilling into decks or permanent installations. Fill specialized pool cover water bags or make your own using heavy-duty plastic bags double-bagged for security.
Position water bags every three to four feet around the pool perimeter, placing them on top of the cover edge rather than hanging from grommets. This distribution method prevents stress tears and keeps the cover taut. Fill bags about two-thirds full to allow for ice expansion while providing sufficient weight. Check bags periodically throughout winter, refilling as needed if evaporation or leaks occur.
Floating Pool Cover Support System
Preventing cover submersion and water accumulation requires thoughtful support strategies. A floating support system keeps your cover above water level while distributing weight evenly across the pool surface.
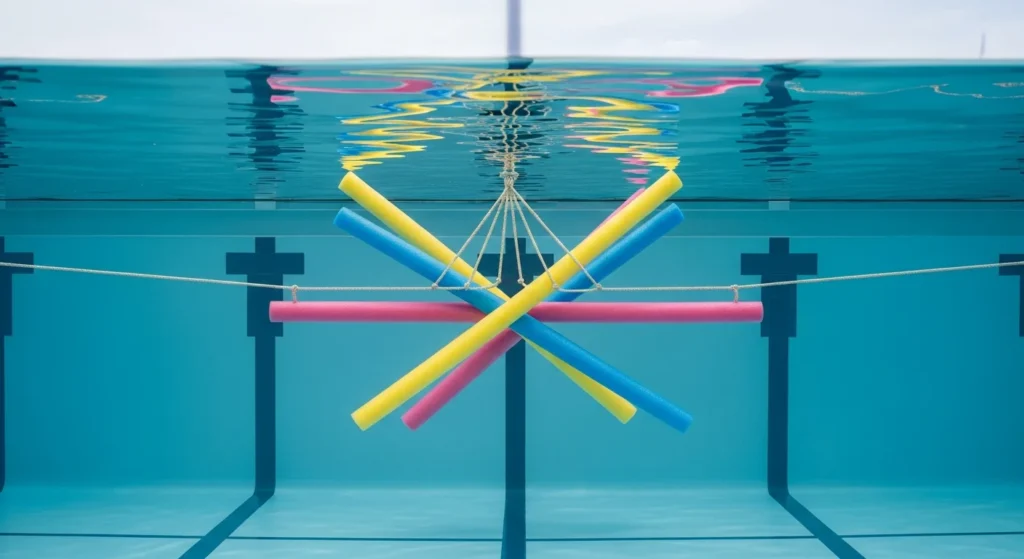
Pool noodles arranged in an X or asterisk pattern under your cover create inexpensive floating supports. Thread rope through the noodles to maintain their formation and prevent drifting. This configuration creates a peaked center that sheds water toward pool edges. Large inflatable balls or rings placed strategically under the cover provide similar support with different aesthetic results.
For a more permanent solution, construct a floating frame from sealed PVC pipe filled with air or foam. Cut pipe sections to span your pool width and connect them at a central point using PVC crosses or custom fittings. This creates a support skeleton that maintains cover shape while remaining lightweight enough for one person to manage.
Hanger Clip Method for Solo Cover Deployment
Installing a pool cover alone challenges even experienced pool owners. The hanger clip method provides a practical solution that eliminates the need for helpers or risky ladder climbing.
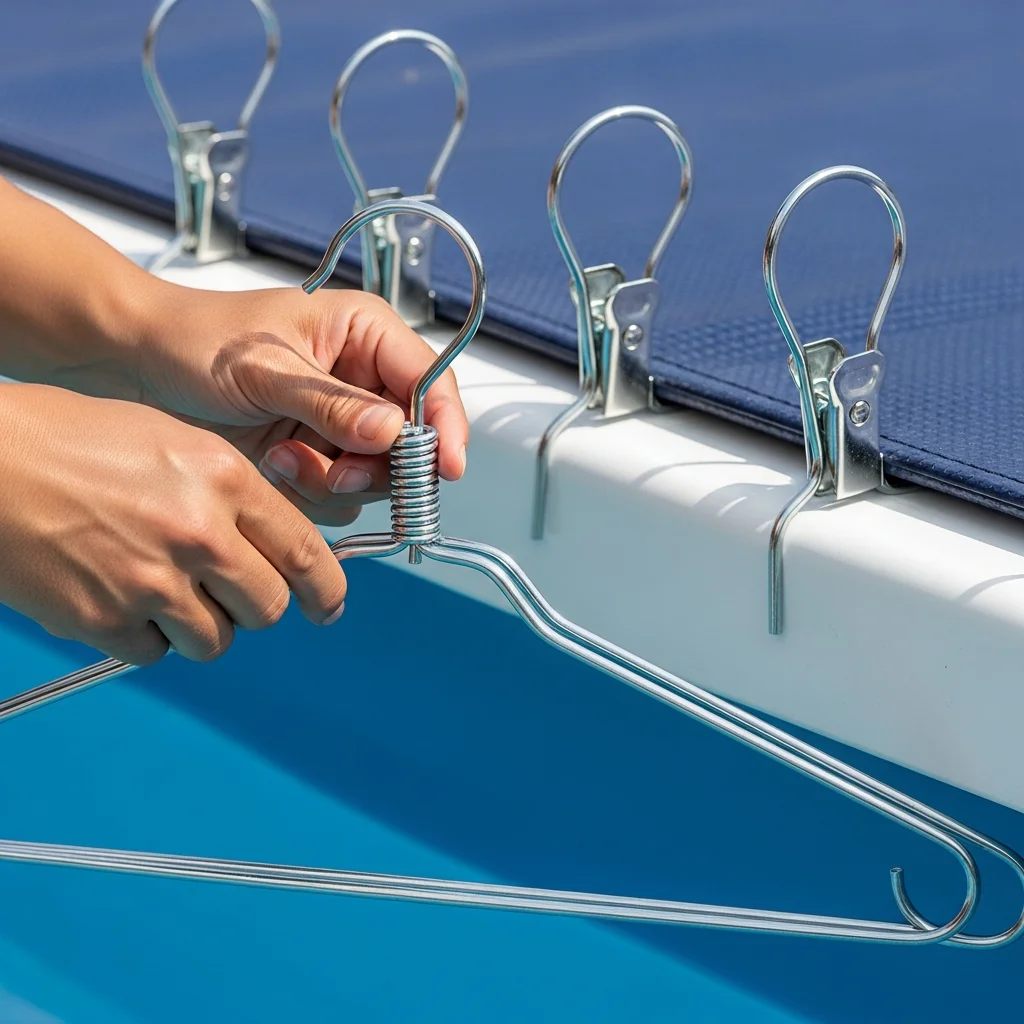
Gather several small clamp-style coat hangers, preferably metal ones with strong spring tension. Begin at one edge of your pool by clamping the cover edge to the pool rim using a hanger. Wrap the hanger behind one of your pool support poles for additional security. Move along the pool edge, placing hangers every few feet while gradually unfurling the cover.
This technique allows you to work methodically around the pool perimeter without fighting the entire cover weight simultaneously. Once the cover rests in position, secure it properly with your chosen anchoring method and remove the temporary hangers. This approach proves particularly valuable for spring opening and fall closing when you might be working alone.
Pole Method for Cover Installation
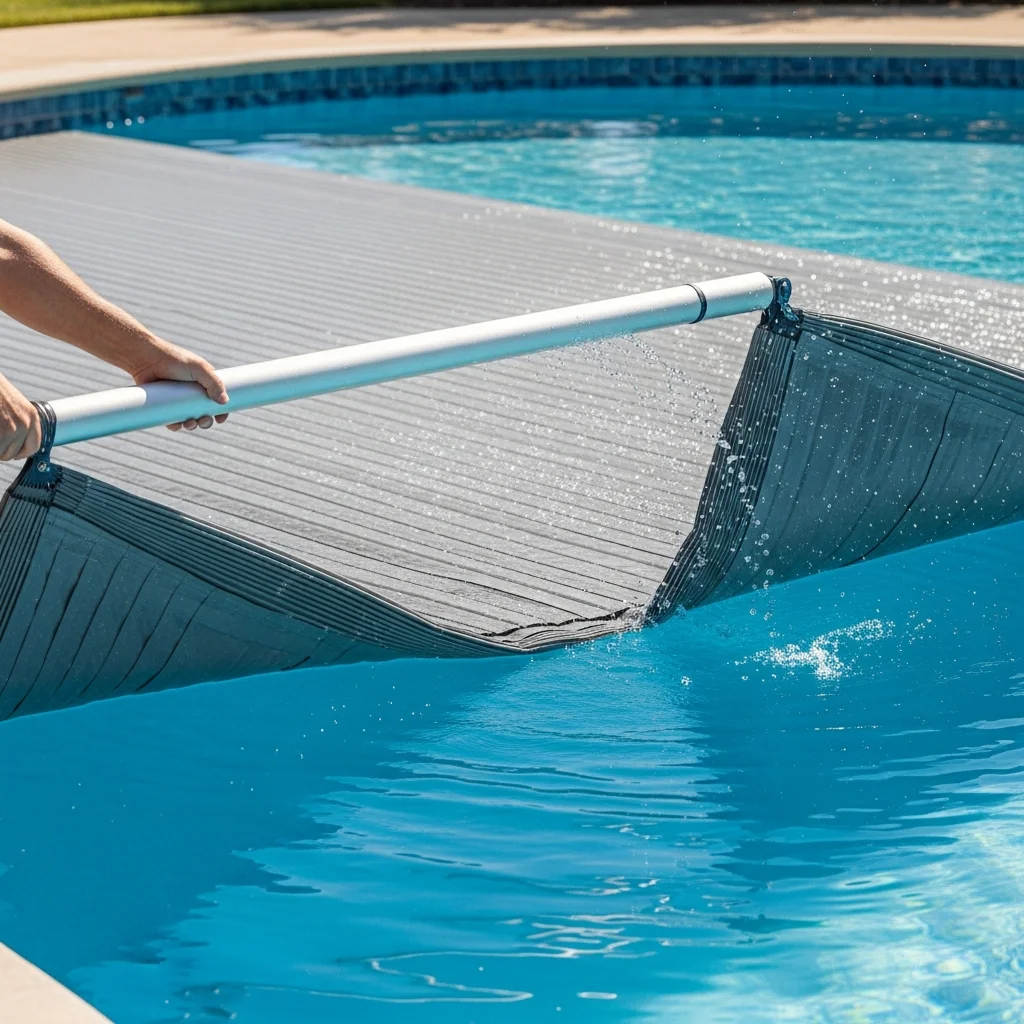
The telescoping pole method offers another solo cover deployment strategy that keeps you safely on the ground. This technique requires a telescoping pole longer than your pool width, typically the same pole used for pool cleaning brushes or skimmers.
Fold your cover accordion-style so it is compact and manageable. Place the folded cover and pole at one edge of your pool. Insert the pole through the folded cover layers and position it across your pool width. Walk around to the opposite side while the pole supports the cover weight. Gently pull the pole toward you, unfurling the cover across the water surface.
This method works best with lightweight covers and smaller pools. Heavier winter covers may exceed pole weight capacity, risking pole breakage or personal injury. Practice this technique several times during the swimming season to build confidence before attempting it with a heavy winter cover.
Custom-Cut Pool Cover with Reinforced Edges
Generic rectangular tarps rarely fit round or oval above ground pools perfectly, leading to excess material and awkward securing attempts. Creating a custom-cut cover from a large tarp provides a tailored solution that is easier to manage and more effective at protection.
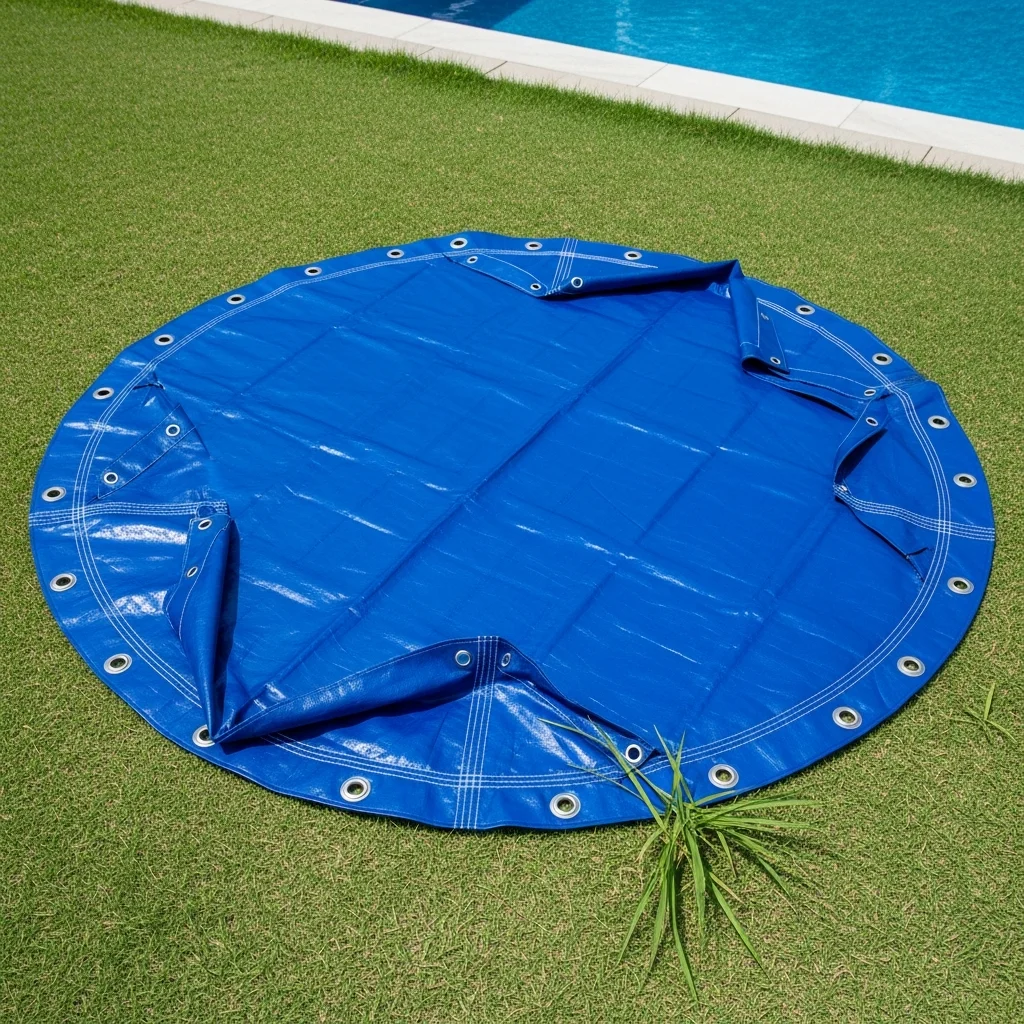
Lay your oversized tarp beside your pool and use chalk or washable markers to trace your pool outline directly onto the tarp. Add six to twelve inches beyond the traced line for overlap and securing purposes. Cut along your marked line using heavy-duty scissors or a utility knife with a sharp blade.
Reinforce the cut edges to prevent fraying and extend cover lifespan. Fold the edge over approximately two inches and sew using heavy-duty outdoor thread, or use fabric adhesive designed for outdoor applications. Install grommets every 18 to 24 inches around the perimeter using a grommet kit from your hardware store. These reinforced attachment points distribute stress and prevent tears when you secure the cover with bungee cords or ropes.
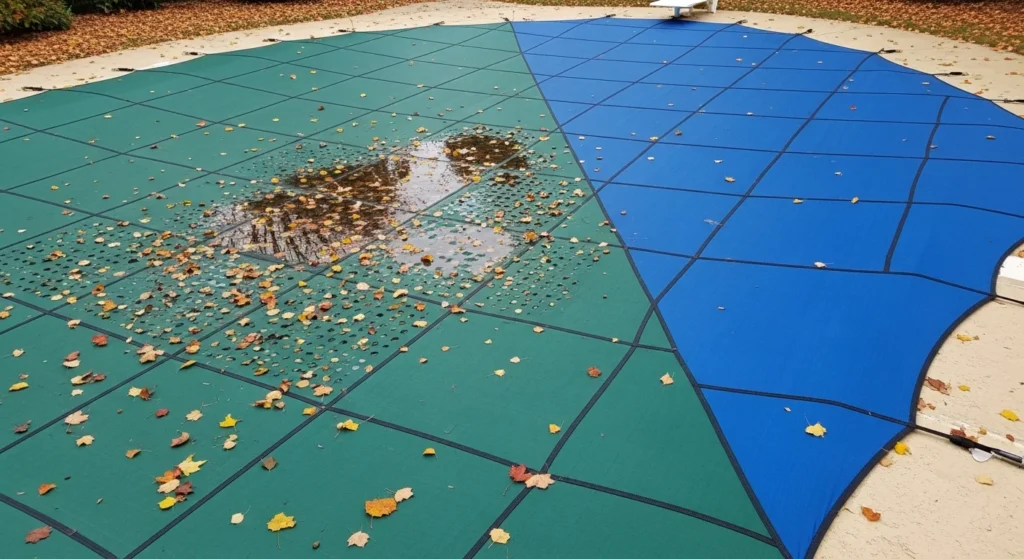
Leaf Net and Solar Cover Combination
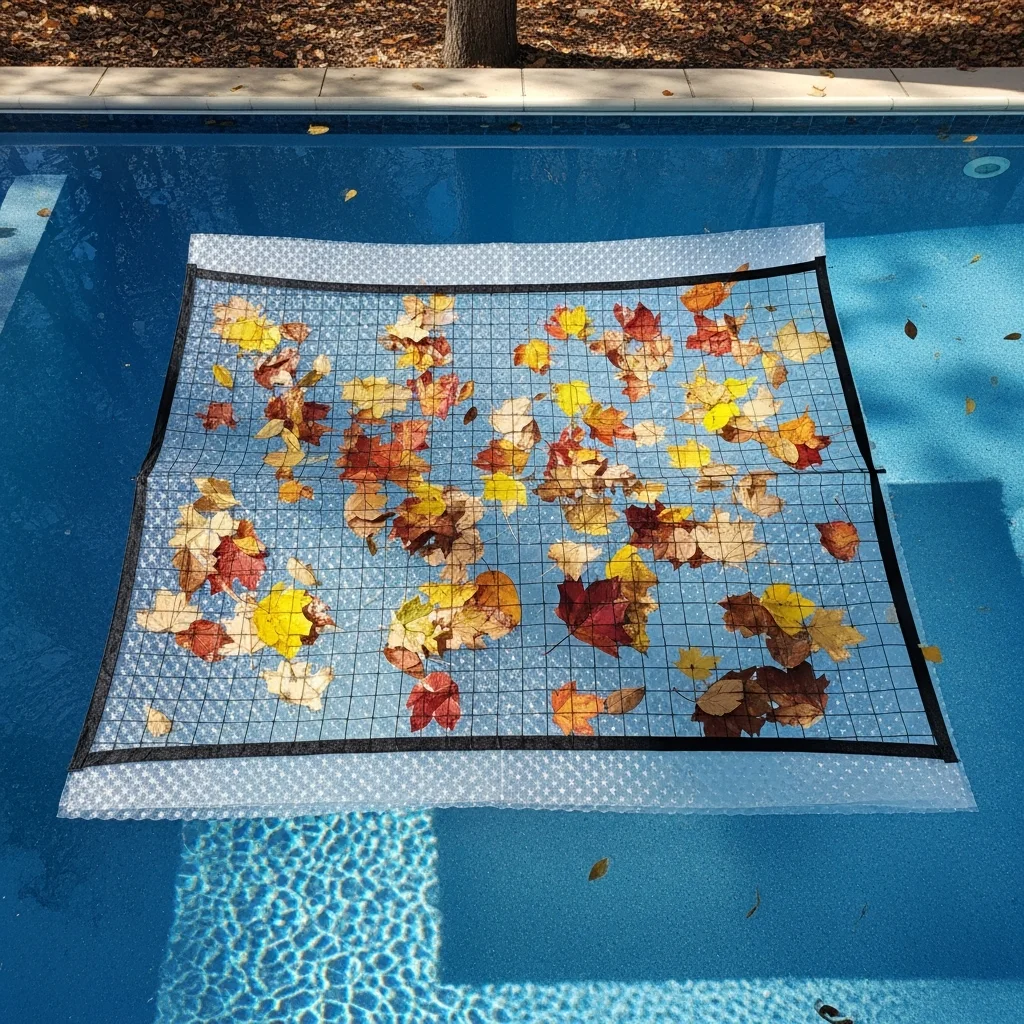
Maximizing pool cover benefits often requires combining different cover types for layered protection. A leaf net placed over a solar cover creates a system that captures debris while maintaining heat retention properties.
Install your solar or bubble wrap cover first, positioning it bubble-side down directly on the water surface. This layer traps heat and creates insulation. Carefully spread your leaf net over the solar cover, ensuring it does not create wrinkles or stress points in the underlying layer. The lightweight mesh catches leaves and larger debris while allowing some sunlight penetration.
This combination proves particularly valuable during autumn when falling leaves create constant pool maintenance challenges. The leaf net takes the abuse from sharp twigs and branches, protecting your more delicate solar cover from punctures. You can remove and clean the leaf net as needed without disturbing the heat-retaining layer beneath.
Conclusion
Building homemade above ground pool covers empowers you to protect your investment while controlling costs. From simple tarp solutions to sophisticated PVC frame systems, the options presented accommodate various skill levels and budget constraints. The most effective approach often combines multiple techniques, such as using a custom-cut tarp with PVC support frames and proper anchoring systems.
Success with homemade pool covers requires attention to proper securing methods, material selection appropriate for your climate, and regular maintenance to address wear and damage. While these DIY solutions may lack some refinements of commercial products, they deliver comparable performance at a fraction of the cost. Start with simpler projects to build confidence and skills before attempting more complex designs. Remember that any cover proves better than no cover when it comes to reducing maintenance, conserving heat, and protecting water quality. With these creative ideas and practical techniques, you can enjoy a cleaner, warmer pool while keeping your budget under control.
Frequently Asked Questions
What is the cheapest material for a homemade pool cover?
A heavy-duty polyethylene tarp from a hardware store provides the most affordable pool cover solution, typically costing between 20 and 60 dollars depending on size. Pair it with inexpensive bungee cords and tent stakes for securing. While not as durable as commercial covers, tarps effectively block debris and can last one to two seasons with proper care.
How do I prevent water from pooling on my pool cover?
Create elevation in the center of your cover using pool noodles arranged in an X pattern, inflatable balls, or a PVC pipe frame underneath. These supports create a peaked surface that allows water to drain toward the edges. Alternatively, use mesh sections in your cover design that permit water drainage while still blocking debris.
Can I make a pool cover that actually heats my pool?
Yes, using black plastic sheeting or clear bubble wrap creates an effective solar heating cover. Black materials absorb heat from sunlight and transfer it to the water, while bubble wrap creates insulating air pockets that trap warmth. These homemade solar covers can raise pool temperatures by 5 to 15 degrees Fahrenheit depending on sun exposure and material thickness.
How do I attach a cover to my above ground pool without drilling holes?
Use bungee cords attached to tent stakes driven into the ground around your pool perimeter, curtain rings that clip onto pool frame supports, or water bags placed on the cover edges for weight. These methods provide secure attachment without permanent modifications to your pool structure or deck.
Is a homemade pool cover safe enough to prevent accidents?
Most homemade pool covers serve as debris barriers and heat retention systems but should not be considered safety covers. They typically cannot support the weight of children or pets and may create entrapment hazards. For true safety coverage, invest in a commercially manufactured safety cover that meets industry standards and install proper fencing around your pool area.