18 DIY Kitchen Ideas to Transform Your Space
Introduction
A kitchen renovation is often listed among the most expensive home improvement projects a homeowner can take on. Professional remodels routinely run well into the tens of thousands of dollars, and for many households, that kind of budget simply is not realistic. The good news is that a complete, high-impact kitchen transformation does not require a contractor, a structural overhaul, or a second mortgage. With careful planning, the right materials, and a willingness to invest a weekend or two of your own time, you can give your kitchen an entirely new look and feel at a fraction of the cost.
DIY kitchen projects have exploded in popularity over the past several years, and for good reason. The results are often just as stunning as professionally remodeled spaces, and the satisfaction of completing the work yourself adds a dimension of pride that no hired renovation can match. Whether your kitchen is outdated, builder-grade, or simply tired-looking, the following 18 DIY kitchen ideas offer a clear roadmap from where your kitchen is today to where you want it to be. Each idea is practical, beginner-accessible, and designed to deliver maximum visual impact with minimum investment.
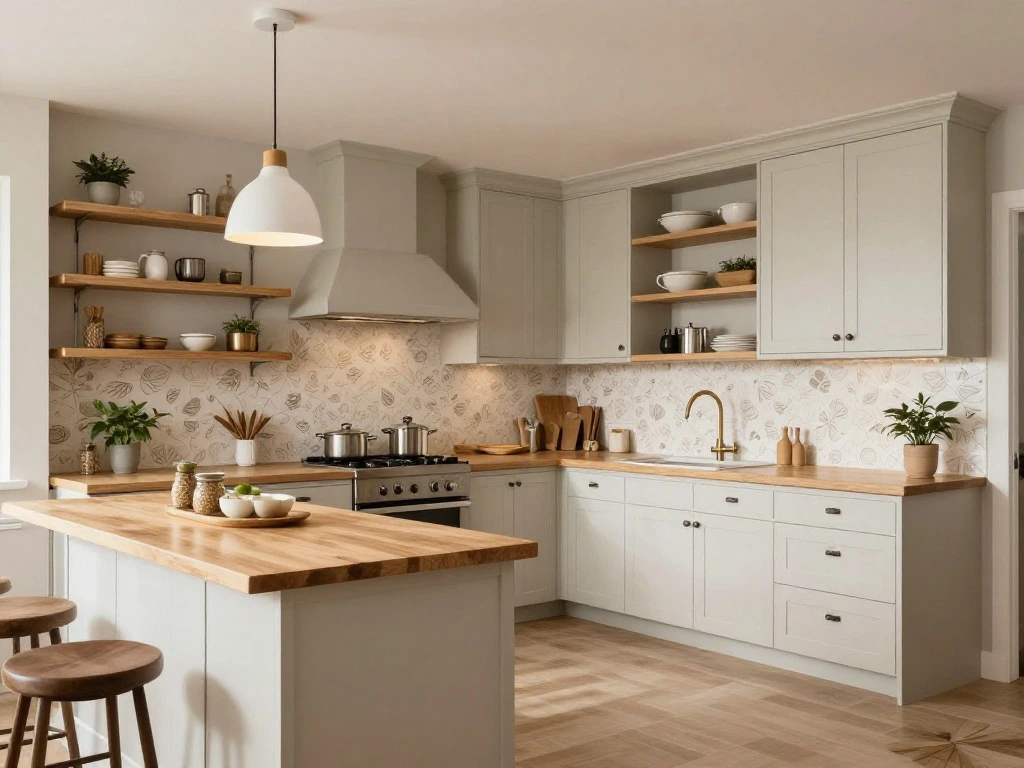
1. Paint Your Kitchen Cabinets
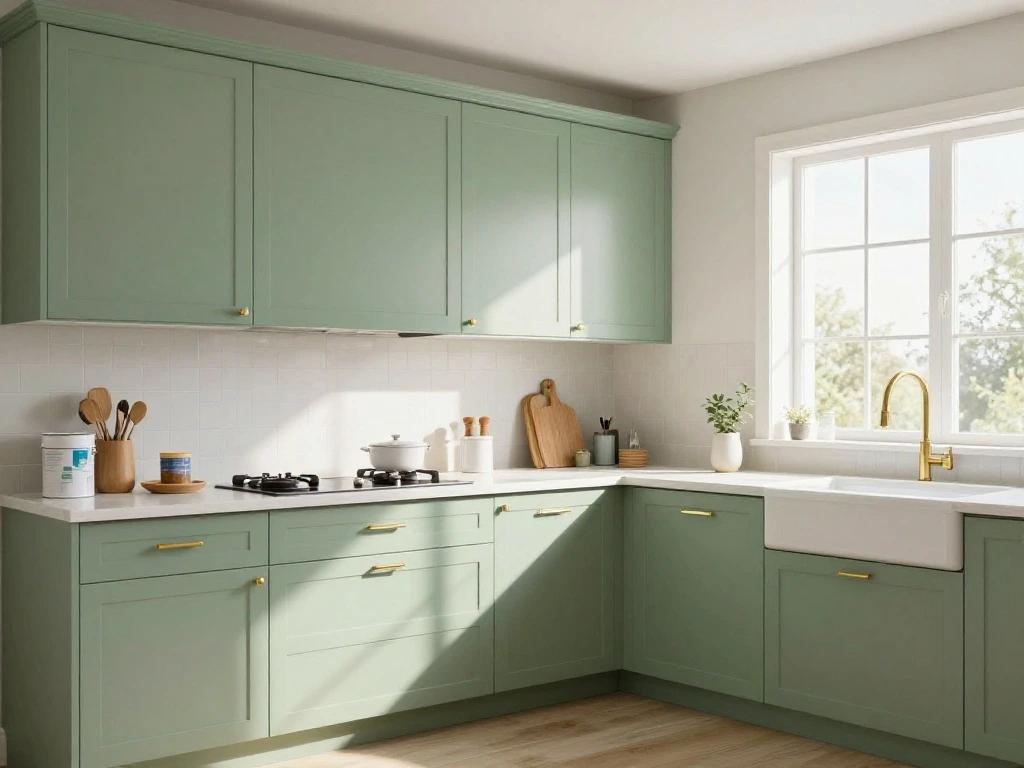
Painting kitchen cabinets is widely regarded as the single most impactful DIY update you can make to a kitchen. Dated oak cabinets, dark cherry finishes, and worn laminate doors can all be completely transformed with a fresh coat of paint. The process requires patience more than skill. Start by removing all cabinet doors, cleaning every surface thoroughly with a degreaser, and applying a bonding primer. Then apply two to three thin coats of a high-quality cabinet paint in a satin or semi-gloss finish. Popular color choices include crisp white, warm greige, soft navy, and sage green. When done carefully, painted cabinets are virtually indistinguishable from brand-new cabinetry.
2. Replace Cabinet Hardware for an Instant Upgrade

If painting feels too involved as a starting point, swapping out your cabinet hardware is the fastest and most affordable update in this entire list. Old brass pulls, painted-over knobs, and mismatched handles date a kitchen more than almost any other element. New hardware in brushed nickel, matte black, champagne bronze, or antique brass can shift the entire style of the kitchen in the space of a single afternoon. The only tools required are a screwdriver and a measuring tape to ensure consistent placement. A full set of handles for an average kitchen typically costs between 30 and 80 dollars, making this one of the highest-return investments per dollar spent in any DIY kitchen project.
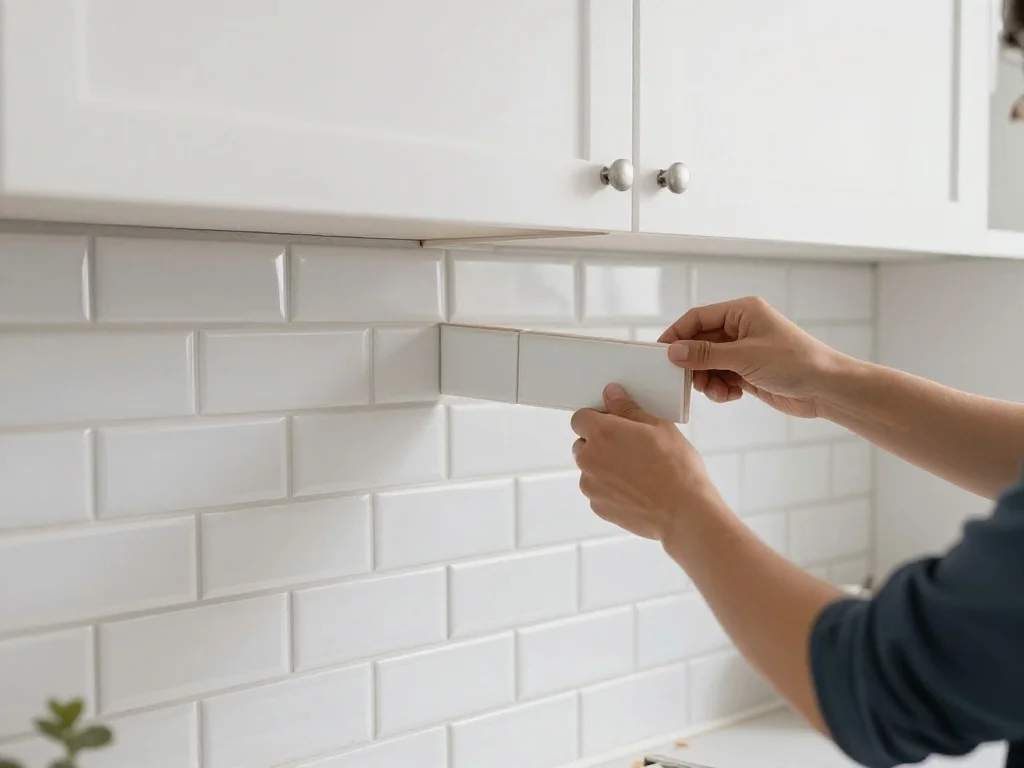
3. Install a Peel-and-Stick Backsplash
A tile backsplash adds enormous visual depth and character to any kitchen, but the traditional process of setting mortar, cutting tiles, and grouting is time-consuming and messy. Peel-and-stick backsplash tiles offer a genuinely impressive alternative. Available in subway tile patterns, Moroccan designs, hexagons, and marble lookalikes, these adhesive panels go up in a matter of hours and require no special tools beyond a utility knife and a straight edge. They adhere firmly to clean, dry surfaces and are both water-resistant and easy to wipe down. For renters especially, peel-and-stick backsplashes are a game-changing option since they remove cleanly without damaging the wall behind them.
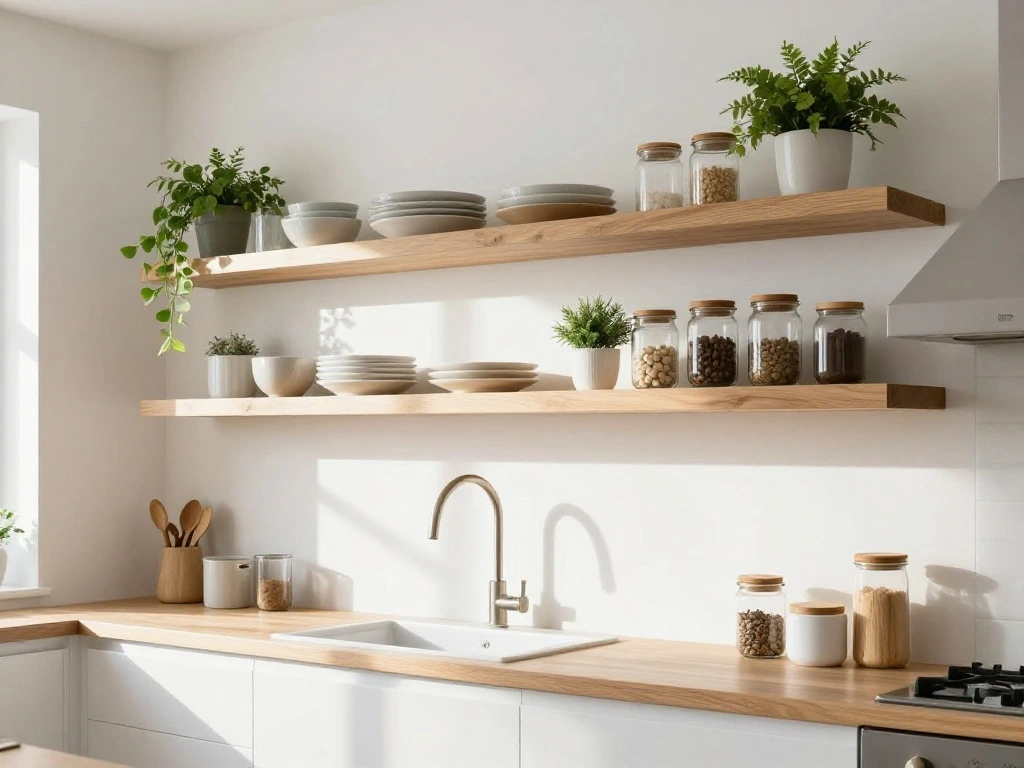
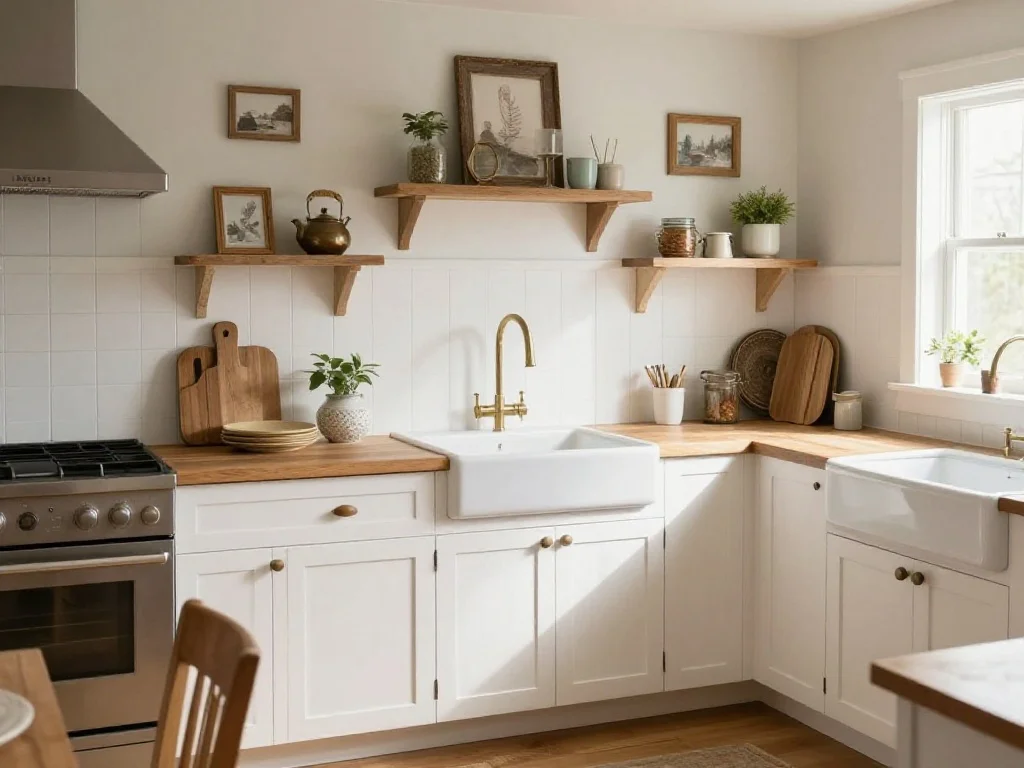
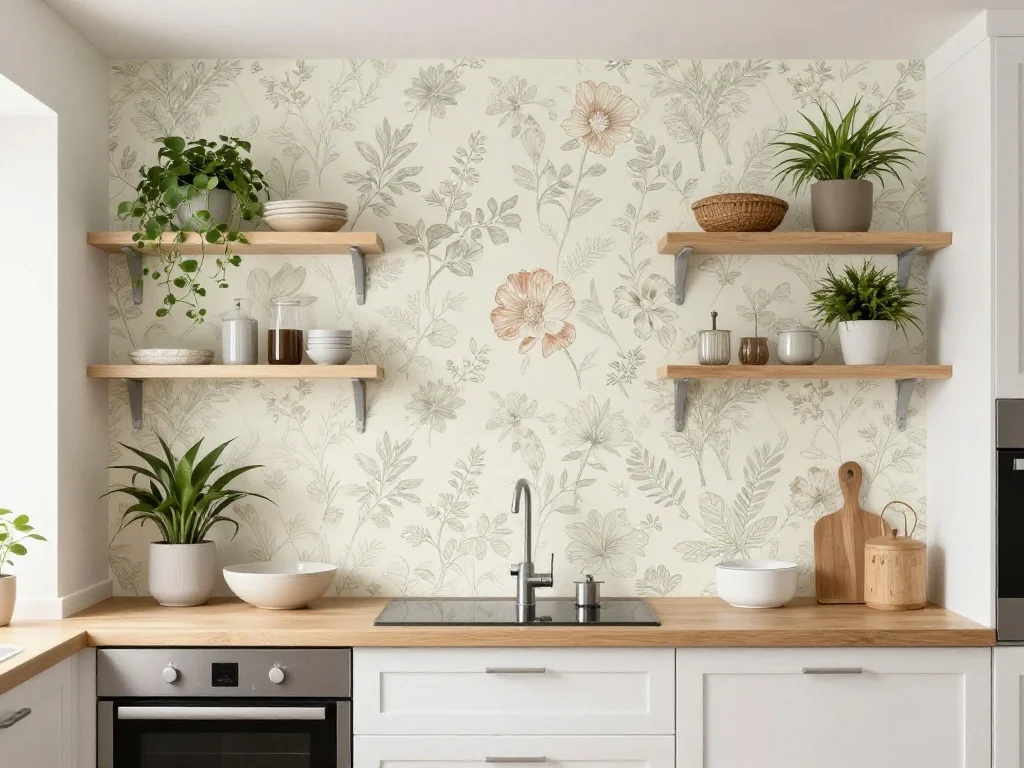
4. Add Open Floating Shelves
Removing a set of upper cabinets and replacing them with open floating shelves is one of the most popular DIY kitchen trends of the past decade. Open shelving creates a sense of airiness and visual openness in kitchens that would otherwise feel enclosed and heavy. It also creates an opportunity to style the shelves with attractive dishware, glass jars of pantry staples, small plants, and kitchen accessories that give the space personality. Floating shelves can be purchased as ready-to-install units or built from scratch using standard lumber. Either way, the installation involves wall anchors, a level, and a drill. The key to making open shelving look polished is editing what goes on display and keeping the styling intentional.
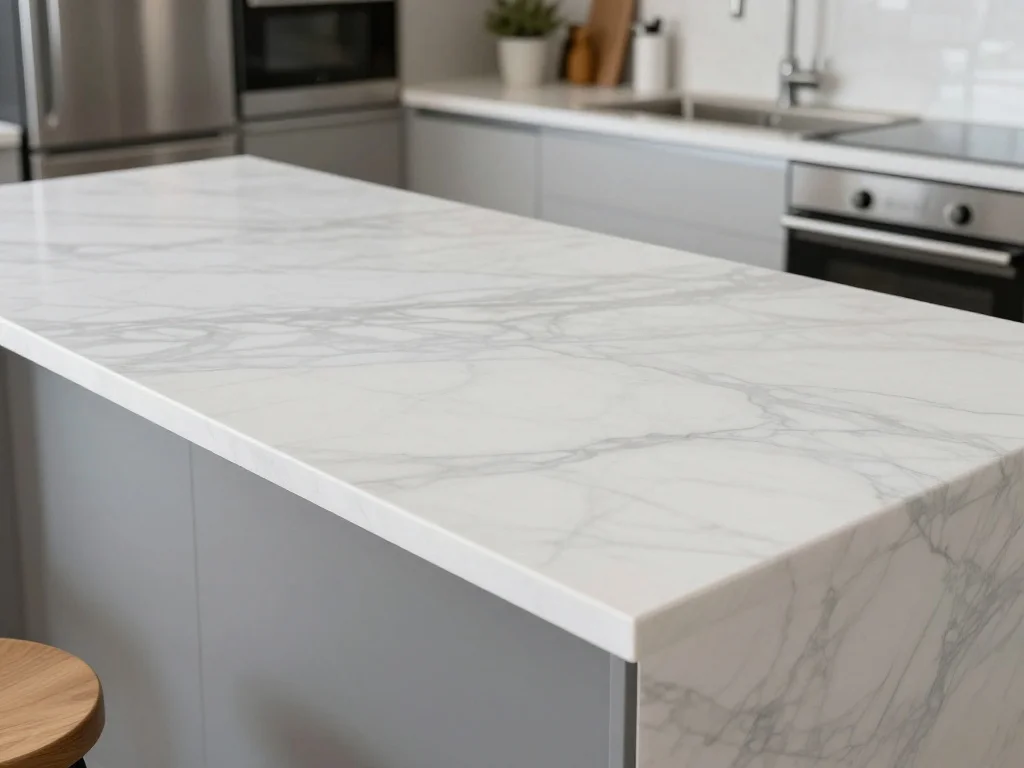
5. Resurface Countertops With Contact Paper or Vinyl
Replacing countertops is one of the most expensive elements of a kitchen renovation. For homeowners and renters who want the look of new counters without the cost, contact paper and adhesive vinyl offer a surprisingly convincing alternative. Modern versions of these products come in realistic marble, granite, concrete, and wood grain patterns that photograph beautifully and hold up well to daily use when applied correctly. The application process requires a clean, dry surface, a credit card or squeegee to remove air bubbles, and careful trimming around edges and cutouts. A full kitchen countertop can be covered for as little as 30 to 50 dollars, making this one of the most cost-effective DIY kitchen ideas available.
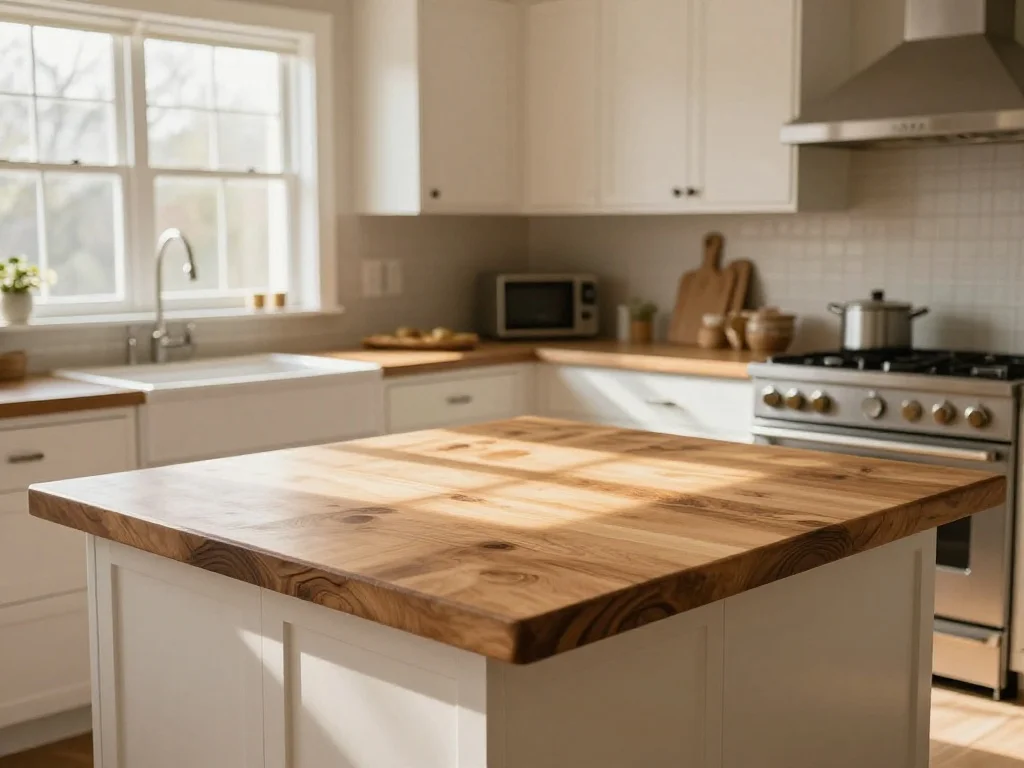
6. Install Butcher Block Countertops
For homeowners who want a genuine countertop replacement without the cost of stone or quartz, butcher block is the most accessible and rewarding DIY option. Unfinished butcher block sections are sold at most major home improvement stores and can be cut to fit your existing countertop dimensions using a circular saw. Installation involves securing the butcher block from below using corner brackets and applying a food-safe oil or varnish finish to protect the surface. The warm, organic look of wood adds immediate character and warmth to almost any kitchen, and butcher block pairs beautifully with both white shaker cabinets and bold colored cabinetry. With proper maintenance including regular oiling, butcher block countertops last for decades.
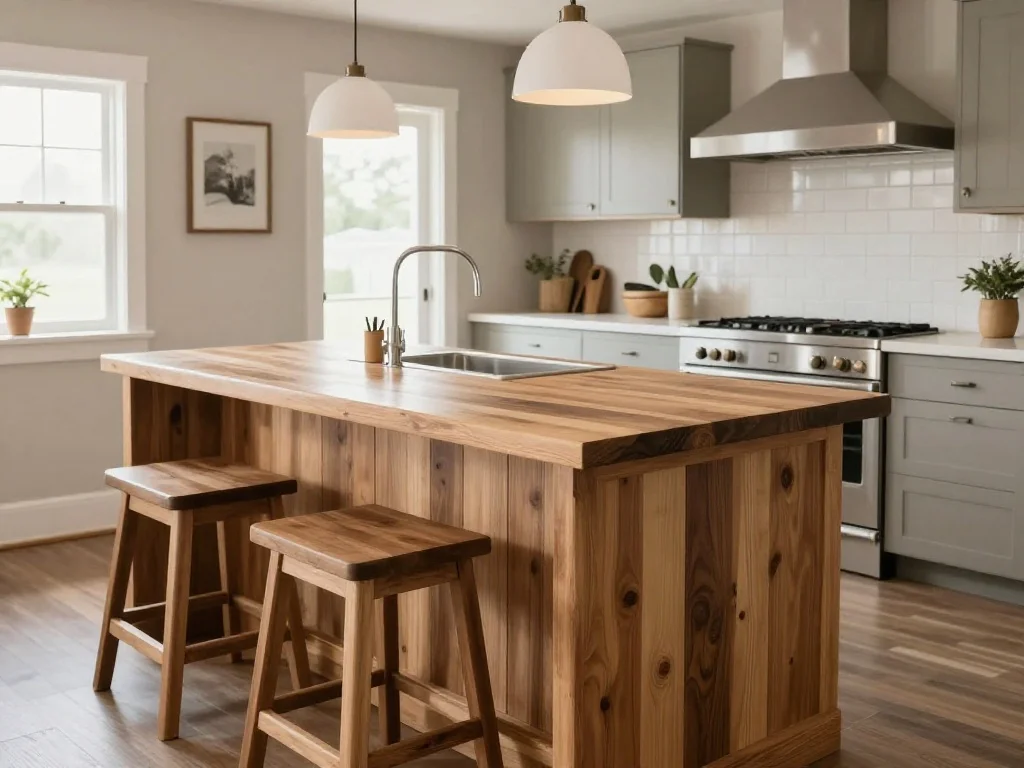
7. Build a DIY Kitchen Island
A kitchen island adds both prep space and storage, but custom-built islands carry significant price tags. A practical and attractive DIY island can be built from a base cabinet unit purchased from a home improvement store, topped with a piece of butcher block or a remnant countertop slab. Simply mount casters to the bottom of the cabinet for a mobile island, or secure it in place if your layout allows for a permanent fixture. You can paint the island a contrasting color to the surrounding cabinetry for a modern two-tone look. Even a small island that measures just 24 by 36 inches adds meaningful workspace and storage in a kitchen that previously had neither.
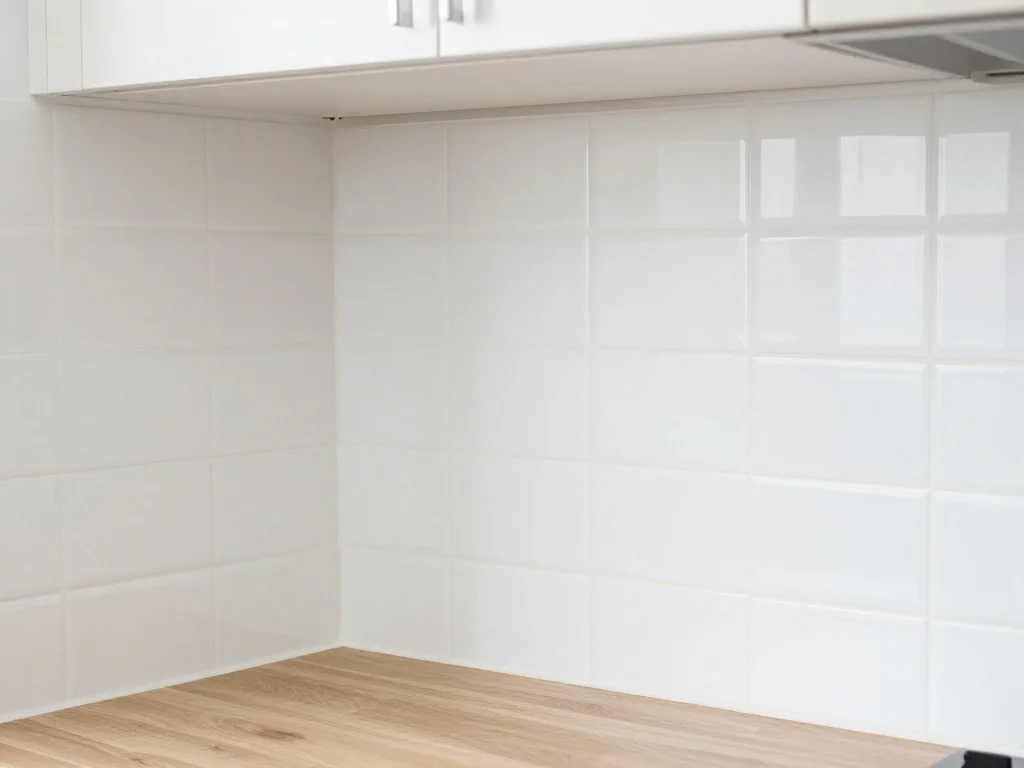
8. Paint or Tile Over an Existing Backsplash
If you have existing tile that is structurally sound but visually tired, you do not necessarily need to remove and replace it. Tile paint is a specialized product designed to adhere to glazed ceramic surfaces and can completely change the color and character of an existing backsplash. Clean the tiles thoroughly, apply a bonding primer, and then paint with a tile-specific formula in any color you choose. Grout pens are a complementary product that refreshes the grout lines from dingy yellowed gray to bright white or a crisp dark charcoal, adding remarkable visual clarity. For tiles that are badly damaged or discolored beyond what paint can address, peel-and-stick tile overlays applied directly on top of the old tiles offer a clean, permanent-looking solution.
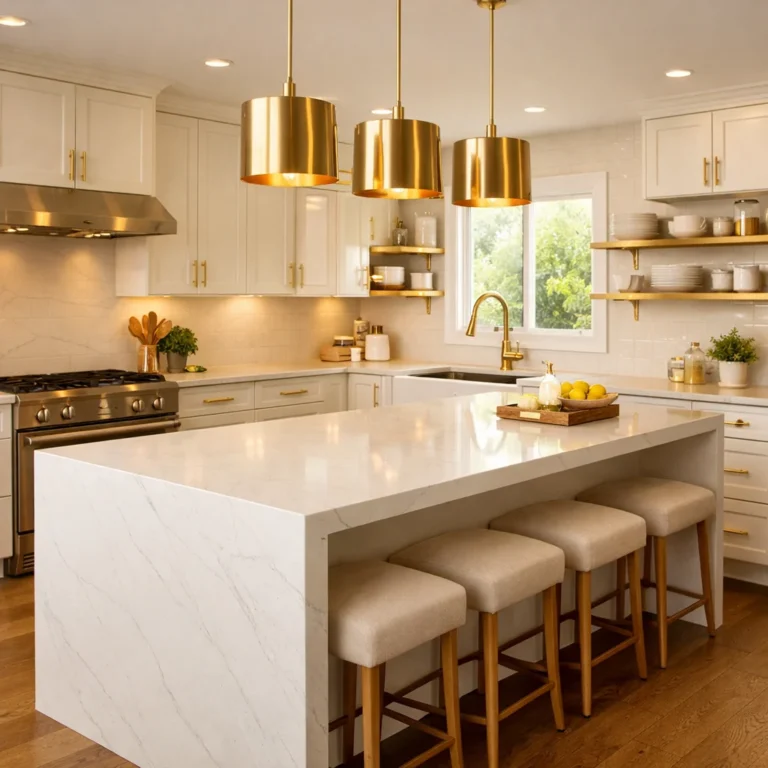
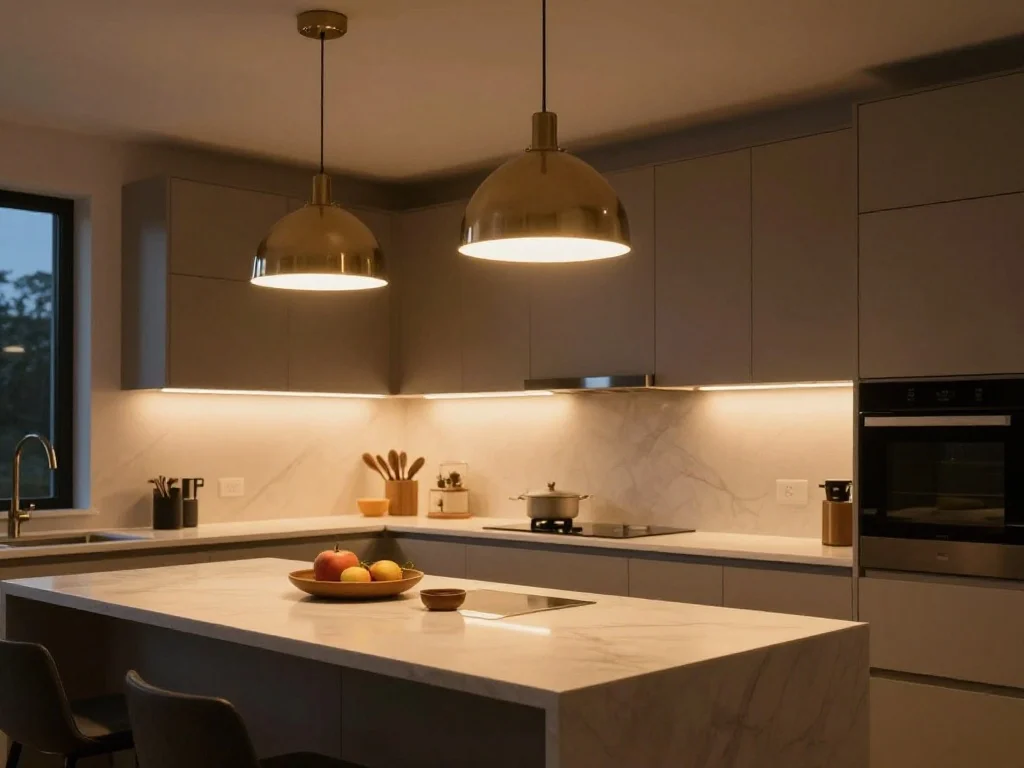
9. Upgrade Your Kitchen Lighting
Lighting is one of the most underestimated elements of a kitchen’s overall atmosphere, and it is also one of the most accessible areas for a DIY upgrade. Replacing a dated flush-mount ceiling fixture with a modern pendant light or a linear LED fixture dramatically changes how the kitchen feels at every hour of the day. Under-cabinet LED strip lights are another high-impact, low-cost addition. These strips install with adhesive backing along the underside of upper cabinets, casting warm task lighting directly onto the countertop below. Motion-sensor activated strips are particularly practical. For kitchen islands and peninsulas, hanging pendant lights on a track or a simple canopy mounting kit can create the kind of layered, professional-grade lighting design normally associated with high-end renovations.
10. Create a DIY Coffee Bar
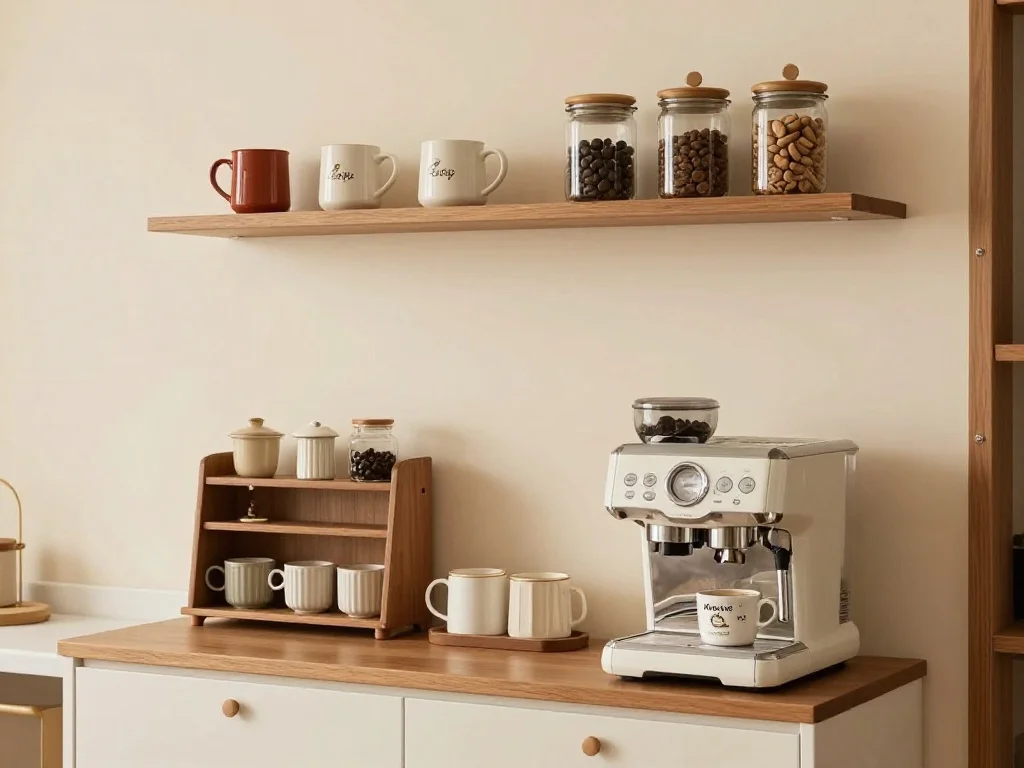
Converting a forgotten corner or a small section of countertop into a dedicated coffee bar is one of the most enjoyable and frequently photographed DIY kitchen projects. The concept is simple: designate a specific area for your coffee maker, gather coordinated mugs on a small open shelf above, add a basket or tray for pods and supplies, and install a small piece of floating shelving to hold everything neatly. The visual result is a purposeful, styled vignette that feels like a considered design decision rather than an afterthought. A coffee bar also frees up the remaining countertop by consolidating appliances and accessories into one defined zone, making the overall kitchen feel more organized and spacious.
11. Add Beadboard Panels as a Backsplash
Beadboard is a classic material that brings warmth, texture, and farmhouse charm to kitchens at a very accessible price point. Beadboard panels can be installed as a backsplash in the space between the countertop and the upper cabinets, painted in any color to match or contrast with the surrounding cabinetry. The panels are sold in large sheets at home improvement stores, cut easily with a jigsaw or circular saw, and attach to the wall using construction adhesive and finishing nails. A coat of kitchen-appropriate paint in a satin or semi-gloss finish protects the surface from moisture and makes it easy to wipe clean. The entire project for an average kitchen typically costs under 50 dollars in materials.
12. Refinish or Paint Kitchen Floors
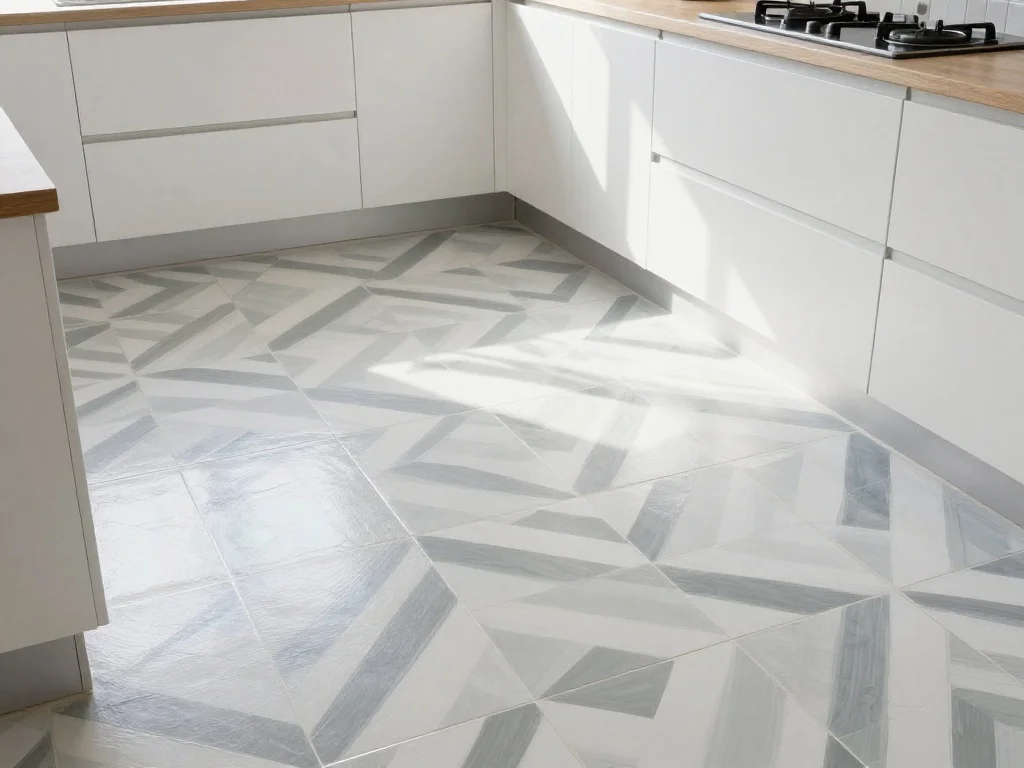
Kitchen floors take an enormous amount of daily abuse and often show age more visibly than any other surface. Replacing them entirely is expensive and disruptive. Refinishing or painting existing floors, however, is an entirely manageable DIY project. Hardwood floors that are scratched and dull can be sanded and refinished over a weekend. Vinyl or linoleum floors in good structural condition can be painted using a floor-specific primer and topcoat. Peel-and-stick vinyl floor tiles are another strong option for covering an old floor surface with a fresh pattern, from classic black-and-white checkerboard to modern wood-look planks. Prepared properly, a painted or covered kitchen floor looks intentional and stylish.
13. Organize and Upgrade Inside Cabinets
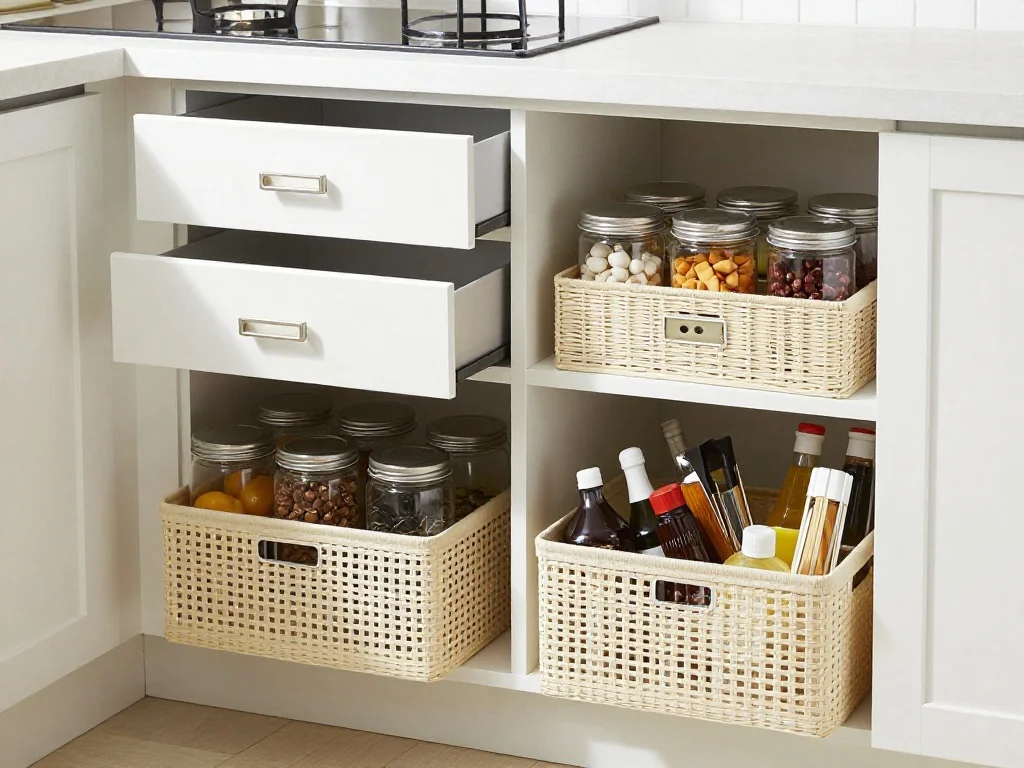
A kitchen transformation is not purely about what you see from the outside. The interior of your cabinets matters enormously to daily function and overall kitchen efficiency. Installing pull-out drawer organizers, stackable shelf risers, and door-mounted racks maximizes every inch of cabinet interior space. Drawer dividers keep utensils sorted and accessible. Turntables inside corner cabinets eliminate the dreaded dead zone where items disappear and never get used. Labeling containers and decanting pantry staples into matching glass jars creates a visually cohesive pantry aesthetic that makes cooking faster and more enjoyable. The cost of interior organization products is minimal, but the functional improvement to daily kitchen use is substantial.
14. Replace Your Kitchen Faucet
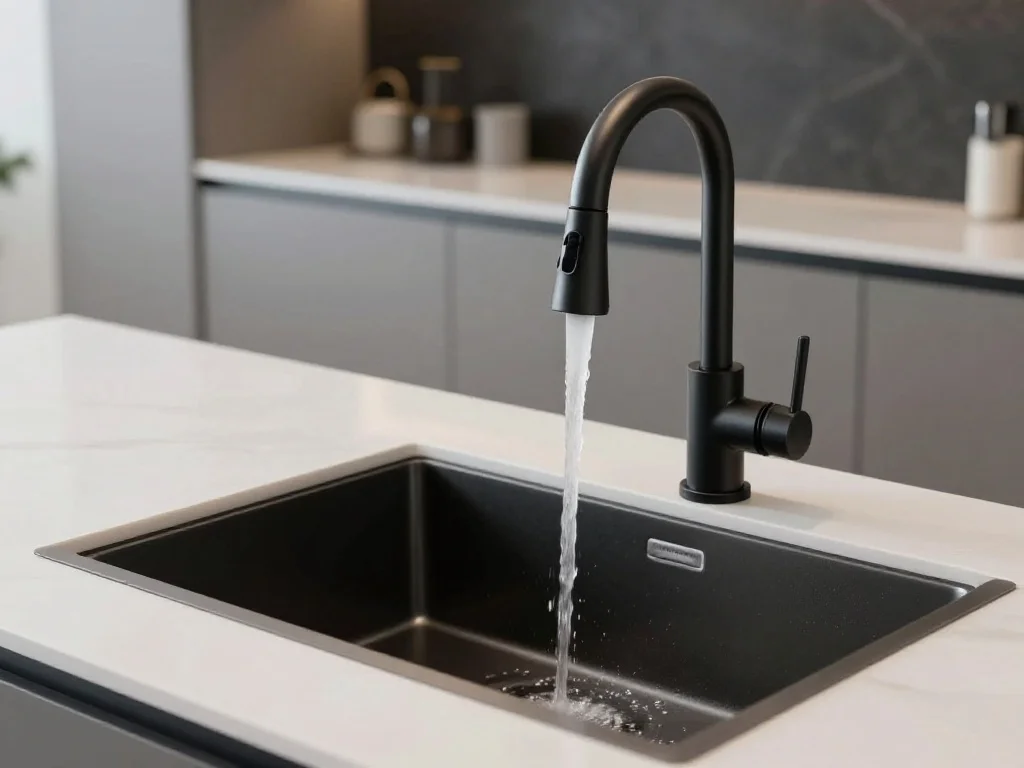
A faucet replacement is one of the most satisfying single-afternoon DIY kitchen projects available to a homeowner. An outdated chrome faucet with stiff handles and low water pressure can be replaced with a sleek, modern pull-down faucet in matte black, brushed gold, or stainless steel in roughly two hours with basic plumbing knowledge. The process involves turning off the water supply under the sink, disconnecting the old faucet lines, and connecting the new ones according to the manufacturer’s instructions. Modern faucets come with clear installation guides and all necessary hardware included. The visual impact on the overall kitchen aesthetic is immediate and outsized relative to the time and cost invested.
15. Apply Removable Wallpaper as an Accent
Removable wallpaper has emerged as one of the most creative and renter-friendly DIY kitchen tools available. A single accent wall covered in a bold botanical print, a classic stripe, or a geometric pattern introduces personality and depth that paint alone cannot achieve. Removable wallpaper peels away cleanly without damaging walls and is repositionable during application, making it forgiving enough for first-time installers. It can be applied to a full kitchen wall, to the interior backs of open cabinets, or even to the ceiling for a dramatic unexpected effect. The range of designs and color palettes available today is extraordinary, and the transformation it creates is often the most photographed element of a finished kitchen refresh.
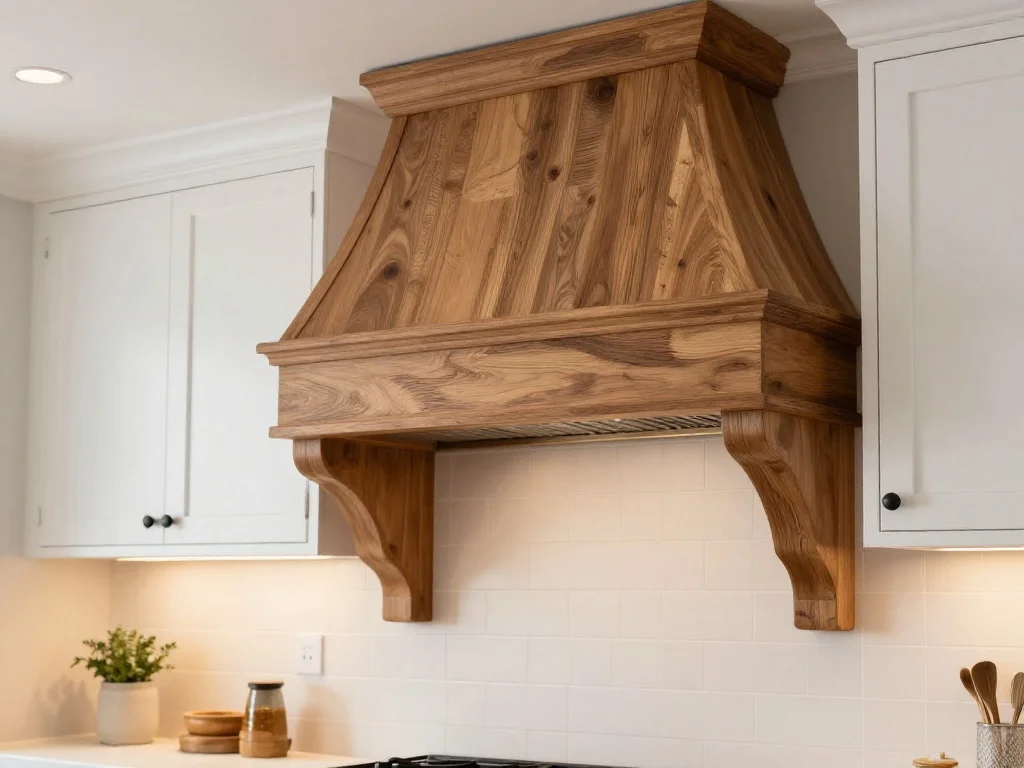
16. Build and Install a Range Hood Surround
A plain stainless steel range hood insert or a basic builder-grade hood is a surprisingly easy element to elevate with a DIY wood surround. Building a simple box frame from MDF or plywood, finishing it with paint or shiplap detailing, and installing it around an existing hood insert creates the appearance of a custom built-in range hood at a fraction of the cost. This is one of the most transformative DIY kitchen projects from a design perspective because a statement range hood immediately draws the eye and establishes the visual focal point of the entire kitchen. Many homeowners who complete this project report that it changes the entire character of the space more dramatically than any other single upgrade.
17. Add Crown Molding to Cabinet Tops
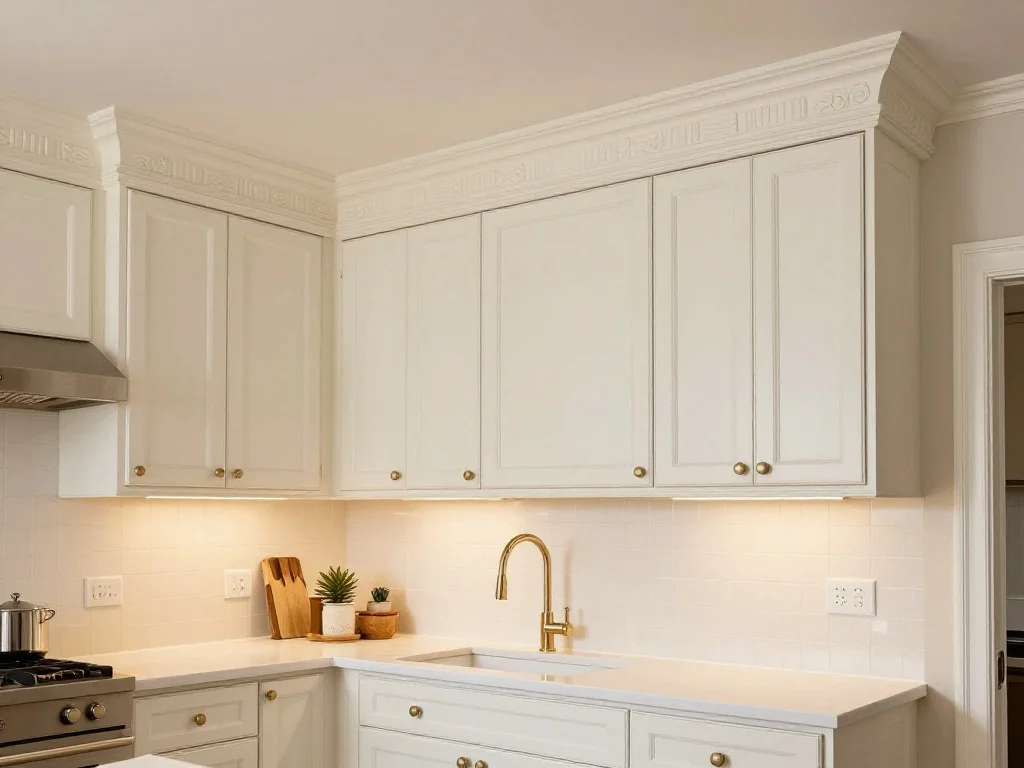
One of the telltale signs of a budget or builder-grade kitchen is the gap between the top of the upper cabinets and the ceiling. Cabinets that end abruptly at their standard height with open space above them look unfinished and impermanent. Installing crown molding to bridge that gap gives the cabinetry a custom, high-end appearance that dramatically elevates the overall kitchen design. Crown molding is sold in standard lengths at any home improvement store, cuts with a miter saw, and adheres to the cabinet face with construction adhesive and small finishing nails. Paint it to match the cabinets for a seamless, built-in look. This is an intermediate-level DIY project but one that delivers a genuinely luxurious result.
18. Style Open Shelves With Intentional Decor
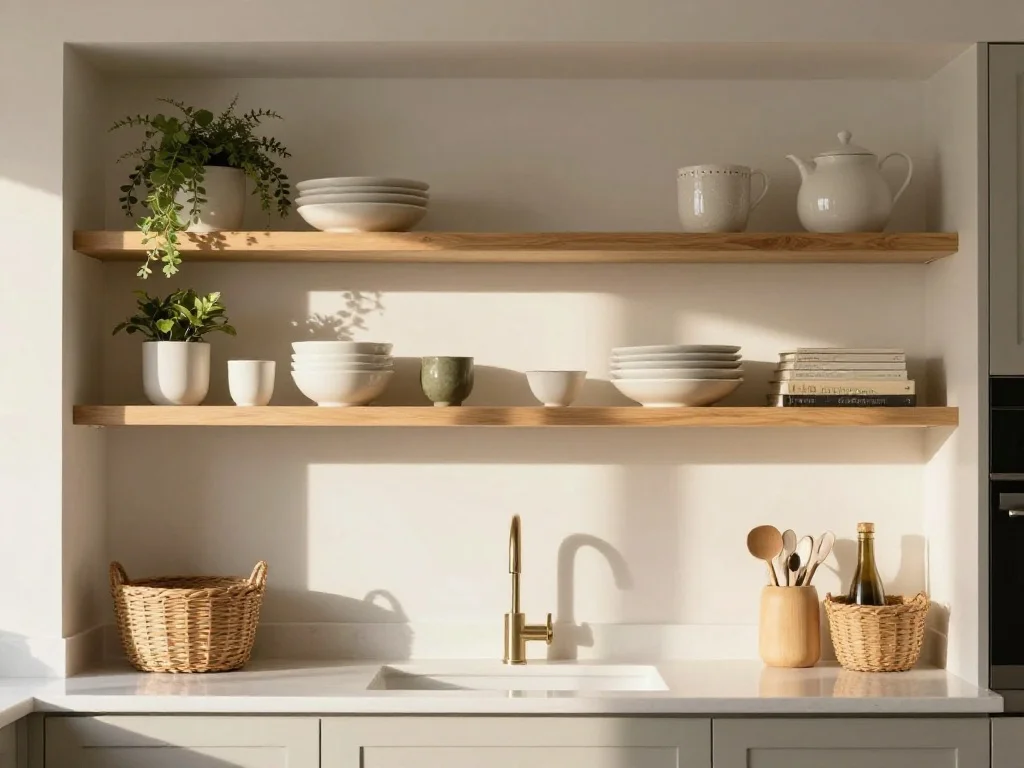
If you already have open shelving in your kitchen or have just installed it as part of this project, the way you style those shelves is just as important as having them at all. Unstyled open shelves filled with random items look cluttered and chaotic. Thoughtfully arranged shelves, on the other hand, look like a design feature. The formula for well-styled kitchen shelves involves alternating between functional items such as stacked bowls and glass jars, decorative items such as small plants and ceramic vessels, and negative space that lets the arrangement breathe. Keeping the color palette cohesive, choosing matching storage containers, and editing down to only what you genuinely use and love creates shelving that looks as if it belongs in an interior design magazine.
Conclusion
Transforming a kitchen does not require a massive budget or professional help. The 18 DIY kitchen ideas covered in this article span a wide range of skill levels, time commitments, and price points, yet every single one of them delivers a visible, meaningful improvement to the space. The most effective approach is to begin with the highest-impact projects for your specific kitchen. If your cabinets are the dominant visual element, paint them first. If the countertops are the source of daily frustration, address those next. Layer in the smaller updates, from new hardware and lighting to a coffee bar and styled shelving, until the kitchen feels entirely transformed. for more ideas visit homeliaa.
The beauty of a DIY kitchen project is that you control the timeline, the budget, and the creative direction entirely. You do not need to do everything at once. Many of the most impressive kitchen makeovers in existence were completed project by project over months or even years, with each small improvement building toward a final result that feels cohesive, personal, and genuinely beautiful. Your kitchen is the most-used room in your home. It deserves to look and function exactly the way you want it to.
Frequently Asked Questions
Q1: What is the most affordable DIY kitchen update with the biggest visual impact?
Painting kitchen cabinets consistently delivers the highest visual return for the lowest cost. A full cabinet paint project can be completed for as little as 100 to 200 dollars in materials and completely transforms the look of the kitchen without touching a single structural element.
Q2: Can I install a peel-and-stick backsplash over existing tile?
Yes. As long as the existing tile is clean, dry, and firmly attached to the wall with no loose or cracked sections, peel-and-stick tiles can be applied directly over the top. Make sure to clean the surface thoroughly with a degreaser before application for the best adhesion.
Q3: How long does it take to paint kitchen cabinets as a DIY project?
Plan for a full weekend at minimum. The process involves cleaning, priming, painting multiple coats, and allowing adequate drying time between each coat. For best results, give the painted surfaces a full week to cure before reattaching hardware and rehinging doors.
Q4: Is butcher block a practical countertop choice for everyday kitchen use?
Yes, when properly finished and maintained. Butcher block countertops should be sealed with a food-safe oil or varnish, wiped dry after contact with water, and re-oiled every few months. With basic care, they are durable, functional, and develop a beautiful patina over time.
Q5: What DIY kitchen projects are safe to do in a rental property?
The most renter-friendly DIY kitchen projects include peel-and-stick backsplashes, removable wallpaper, contact paper countertops, cabinet hardware swaps, under-cabinet LED strips, and interior cabinet organization. All of these can be reversed when moving out without causing damage to the property.